Split Case Rebuild

This site may earn a commission from merchant affiliate
links, including eBay, Amazon, Skimlinks, and others.

I have seen your work, Matt. You do not need my help!!!! But I am in Sydney right now. I could jump on a quick flight!!!:steer:

Beers cold boards free :beer:

All you need to do I say hi if you have the time.

Matt

Cruiser heads are always welcome:hillbilly:
 
Beers cold boards free :beer:

All you need to do I say hi if you have the time.

Matt

Cruiser heads are always welcome:hillbilly:
Just home to Atlanta now so I will get back at this as soon as I can, but thanks for the invite Matt.:cheers:
Cruiserbrett threw me a PM and asked about the H55 part number and price.

Here it is:

H55 Tranny - 33030-60450 $1650 from Toyota of El Cajon

33530-60220 Lever Assy, Shift $120.98

33124-36010 Pipe, Oil Receive $1.42
A freight charge of $100 was applied.
 
OK - Lemme update this and then you will see the set back.

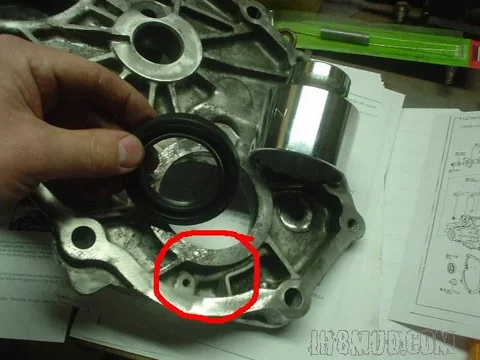
I had been waiting to get my parking brake backing plate back from being powder coated. I did and when I went to install it the rubber flange on the output shaft seal prevented me from doing so. I had spoken to Poser about it weeks ago and he questioned it and I said I though I could just use a razor blade to cut it off if it was in the way and he agreed. Welll - I could have but it would have done me no good. That seal is for the 60 companion shaft and much to large to seal around the parking brake so I will be calling Cdan for another seal.

Then I went to install the companion shaft on the front and that seal was much too small to allow the FJ62 seal from seating :rolleyes: So add that to the shopping list.

I figured I could continue with some small bits until I heard back from CDan but things get much more complicated.

Read on.

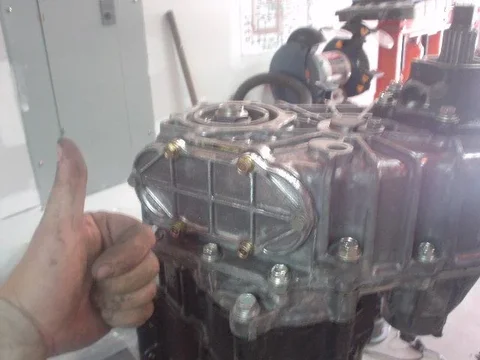
Next I installed the PTO cover.
For some reason the parts catalog lists different part numbers for 2 of the 6 bolts and those two are discontinued. I believe that at some point those bolts had some factory sealant on them. The FSM says ad some sealant to the two front bolts.

Torqued to 12 ft pounds for those two the others torqued to 14.

04-12-08 002.webp

Next was the speedo gear. It slid home easily and I torked the little bolt that holds the locking tab to 9 ft pounds.

04-12-08 004.webp

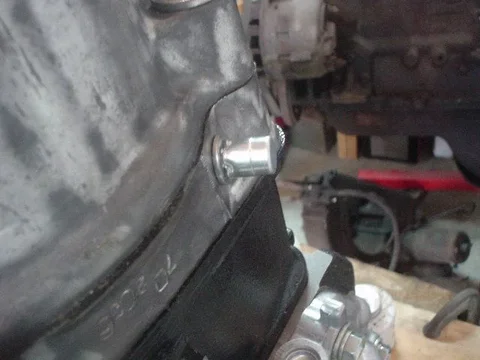
And then was the ident bolt, spring and ball for the 4 wheel drive selector. This was the hole that I tapped early on. The FSM says to ad sealant to this but if you buy one new it already has sealant on it.

04-12-08.webp

Torqued to 33 ft pounds.
04-12-08 002.webp
04-12-08 004.webp
04-12-08.webp
 
Last edited:
Next was the ident for the high low selector. This was also torqued to 33 ft pounds and was the same part as the 4WD selector.

04-12-08 007.webp

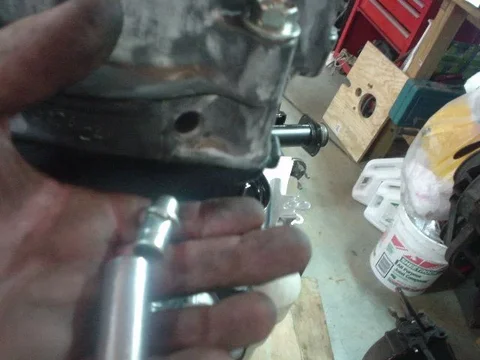
Next I seated a new vent. This was easily accomplished by tapping it home with the help of a 1/2 inch deepwell socket.

04-12-08 008.webp

There you go.

04-12-08 009.webp
04-12-08 007.webp
04-12-08 008.webp
04-12-08 009.webp
 
Last edited:
Then I installed the 4WD selector shaft boot. A note here. When I initially installed the seal under the boot I tried to drive it flush and it would not go. It is because the boot tucks in under the exposed lip.

04-12-08 010.webp

I was able to shove the flange of the boot under the lip easily with a very large flat blade screw driver.

04-12-08 012.webp

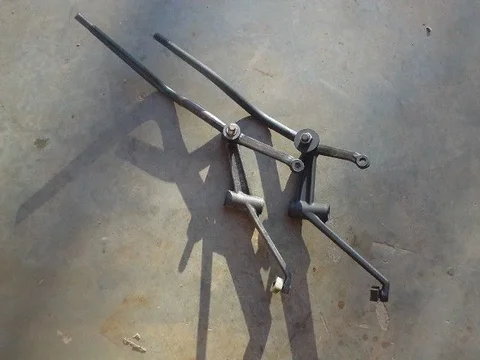
Next was the shifter. I had an early (pre 85) FJ60 shifter that someone gave me and I have a doner rig outback. I was never clear on why the pre '85 shifter would not work but I understand now.

The shifter on the left is the one from the doner 1986 FJ60 and the one on the right is from the earlier. You can see the different angle at the bottom.

04-12-08 013.webp
04-12-08 010.webp
04-12-08 012.webp
04-12-08 013.webp
 
This is where the day goes bad.

I installed the shifter and discovered that on the FJ62 with the electic shift, the hi/lo outer lever is at a different angle then the FJ60 without the electric shift. Well - freakin' A.

This is how tha 62 is.

04-12-08 014.webp

This is how the mechanical shifter needs it.

04-12-08 015.webp

The inner lever has a flat side and a small groove where the bolt rides to preven the outer lever from sliding off under use.

In order to make this work I have two choices. Take the junk back apart and replace the inner lever with the right part or modify the outter lever.

The CORRECT inner and outer levers are blocked in red below.

hi-lo.webp
04-12-08 014.webp
04-12-08 015.webp
hi-lo.webp
 
And then it gets worse.

You recall that this thing was completely taken apart when I got it. I have followed the FSM pretty much to the "t" so I figured I had a good chance of this working for me.

Well, I cleaned up the shop at this point and the box that the transfer case was in when I got it is now about empty and had some of the unused and replaced bits still in it. Before I tossed them I noted something under the lower lip of the box. I yank it out and it was the oil deflector that goes inside the case on the front of the split case.

HOLY Fxxx. I can't freakin' believe it! It never mentioned it in the FSM and I never took note of it on the schematic.

deflector.webp

So there is your answer as to what I am going to do about the shifter. Since my silly ass will be taking this apart to replace the deflector anyway, I guess I will be replacing the inner lever and all will be right with the world.

But the extra practice will not help my ego. Luckily, I only have to replace a couple paper gaskets if I take care with the disassembly.

At this point I went and got drunk.:rolleyes:
deflector.webp
 
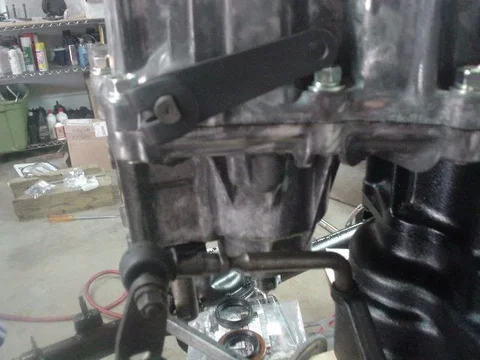
To make things a little more clear: This transfer case shift linkage is bolted on the Transmission.

Toyota changed the length of this shift linkage to accommodate the H55's extra length. Late model USA-spec 4 speeds were given a spacer to make up the different length of the 5spd overdrive. Automatic transmissions had a built-in spacer in their neck.

This way, all late model transmissions used the same length manual shift linkage (and also drive shaft lengths).

- Eric

Then I installed the 4WD selector shaft boot. A note here. When I initially installed the seal under the boot I tried to drive it flush and it would not go. It is because the boot tucks in under the exposed lip.

View attachment 223374

I was able to shove the flange of the boot under the lip easily with a very large flat blade screw driver.

View attachment 223375

Next was the shifter. I had an early (pre 85) FJ60 shifter that someone gave me and I have a doner rig outback. I was never clear on why the pre '85 shifter would not work but I understand now.

The shifter on the left is the one from the doner 1986 FJ60 and the one on the right is from the earlier. You can see the different angle at the bottom.

View attachment 223376
 
To make things a little more clear: This transfer case shift linkage is bolted on the Transmission.

Toyota changed the length of this shift linkage to accommodate the H55's extra length. Late model USA-spec 4 speeds were given a spacer to make up the different length of the 5spd overdrive. Automatic transmissions had a built-in spacer in their neck.

This way, all late model transmissions used the same length manual shift linkage (and also drive shaft lengths).

- Eric
And there is the history of it.

Incidentally, I went through the pics to see if I could ID precisely where things went terribly wrong. And here is the deflector's location:

deflector loc.webp
deflector loc.webp
 
Last edited:
Some consolation

Hugh,
if it makes you feel any better - ALL of us have had to redo our stuff at LEAST once (or twice) while rebuilding complex items.

At least it wasn't already mounted in your truck and full of gear oil.

On my transfer case, I have decided to add a PTO gear. Everything is already installed in the truck. Because of my custom engine/transmission combo, I will have to pull my engine out to split the 'case! There is no room to separate the case because it is too close to my frame crossmember.

Another little sob story: I just spent a week trying to rebuild a 3rd member with new bearings and shims: I put it together no less than TWENTY times trying to get a good gear pattern. I finally gave up and asked for some professional help (this was very hard on my manhood). It turns out that once gears are broken in incorrectly, there is NO WAY to change a bad pattern. I just wasted a week's worth of build time. A lesson I will not soon forget. :bang:

Keep up the great build blog

- Eric
 
:lol: I had to bring a "custom" VW transmission to a guy once. It was in one piece but not exactly right. Bringing in a DIY project for help for sure tuff on the labido! Luckily I discovered the part. Toyota put it in there for a reason so I better et back in there a do it too.
 
Great thread! I'll be re-building my split case in a week or so, and this thread will be so helpful.

Sorry to read about your recent discoveries of the missing part and the incorrect shifter component. Hey, at least you noticed the part was missing - possibly if you had run the transfer without it it may have failed prematurely and then you would have to strip it all down again anyway and replace more parts (and may never have found what the cause was. It's a drag to have to pull it apart again, and practice will make perfect - the blessing was to find the part at the bottom of the box before bolting the transfer back into the truck and running down the road. One of the best ways to learn is to make mistakes while trying something new, that's a fact. Leave the ego at the door.


You've done a tremendous service documenting this build, and learning where you made mistakes is incredibly helpful to all of us.

Frustrating too I'm sure that that FSM omits mention of certain details. What revision/edition of the 1980 manual do you have?
 
Frustrating too I'm sure that that FSM omits mention of certain details. What revision/edition of the 1980 manual do you have?
Mine is the 1994 edition that used to be on Birfield. I downloaded it some time ago. Good quality pdf.
 
Placed my order with CDan on Monday. He told me that he had never sold one of the inner hi/low shift levers and found only one in the inventory in the US. I have no idea the price although they are available from $OR for $15 + $$hipping. I will get back on the horse when the parts come in
 
Well I got back to it. Today I ripped the thing back down. It dis not take long. I just had to do it when I was in the mood.

Here is the deflector that foiled me:
05-03-08 033.webp

I just brushed it a bit and then installed it with some locktite on the bolt. unfortuantely I also had to take the gear stack out to get to it as well. No biggy.

I also took the opportunity to replace the hi/low selector lever. Here are two pics. the one on the left is from the FJ62 adn the one on the right is from CDan and for a manual case.

05-03-08 031.webp

05-03-08 032.webp

Got the thing all back together with a minimal amount of effort...since I had done it recently.:rolleyes:
05-03-08 033.webp
05-03-08 031.webp
05-03-08 032.webp
 
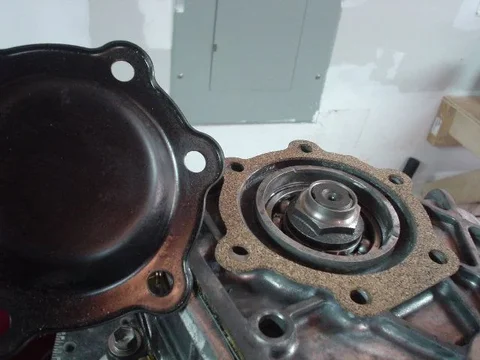
I torqued transmission out put shaft nut to 94 foot pounds, staked it and then I installed the case cover with a cork gasket and torqued the six bolts to 11 ft pounds.

05-03-08 034.webp

I also put the front companion flange in place and torqued that nut to 94 foot pounds. I need to remember to stake it too.

I hooked up the shifter again and tried it through 4WD and 4LO and it shifted seemlessly...well, like a Toyota should anyways.

I cleaned the old indicator switches with with a wire brush on my dremel and then painted them. They will be dry and ready to go on tomorrow.

So I am back in business. Now if I can just get the chassis done to put this in!
05-03-08 034.webp
 
awesome thread.
I am contemplating (is that the right word:rolleyes:) a t-case rebuild and this is going to be very helpful indeed.
Aside from your own made or improvised SST's (and of course a good torque wrench, etc) was there any other special tools you had to have?
Cheers,
and well done,
Hans.
 
Last edited:
awesome thread.
I am contemplating (is that the right word:rolleyes:) a t-case rebuild and this is going to be very helpful indeed.
Aside from your own made or improvised SST's (and of course a good torque wrench, etc) was there any other special tools you had to have?
Cheers,
and well done,
Hans.
Nope. No surprises really. Other then a few mis-steps which I note in the thread it was a 3:banana: job at best. Keep in mind that this thread is rebuilding an FJ62 transfer case for use with an H55 transmission so your application may differ a bit.
 
Gday Hugh,
quick question (and a silly one at that)
attachment.php

oil slinger on the front output shaft- concave bowl side up with the three slingers poking up/out (like it sits in your hand), or convex side up with the slingers facing the bearing?
Is this slinging oil on the seal or on the bearing?
Cheers,
(I'm putting mine together tonight and tomorrow- mine didn't have an oil slinger, but the donor case did)
Hans.
 

Users who are viewing this thread

Back
Top Bottom