
So I want to start this thread on building my 80. My interest in 80's began with turfnsurf 2016. Within a few months I fell into two 96 fzj's. Both in the same week actually. A clean stock white one with a blown head, full lockers and a moonlight grey bone stock no lockers, some slight body damage, perfectly good running stock 80. Both I paid a song for. I immediately tore into the white 80 and titsed out the top end. Then Slowly I looked into suspension meanwhile driving the 80 around and getting some good beta from others on how to build it. Now I was stuck with a decision. Build the nice white one with lockers or the grey one with the body damage?
I found the slinky, or the slinky found me I don't know. But I shoved out 3k and bought a long travel kit With 11mm longer rear control arms and front axle 1" relocating plates along with slee caster plates, slee diy f+r track bar and rear control arm kits. Then scavenged a killer deal off Craigslist on a set of 37's.
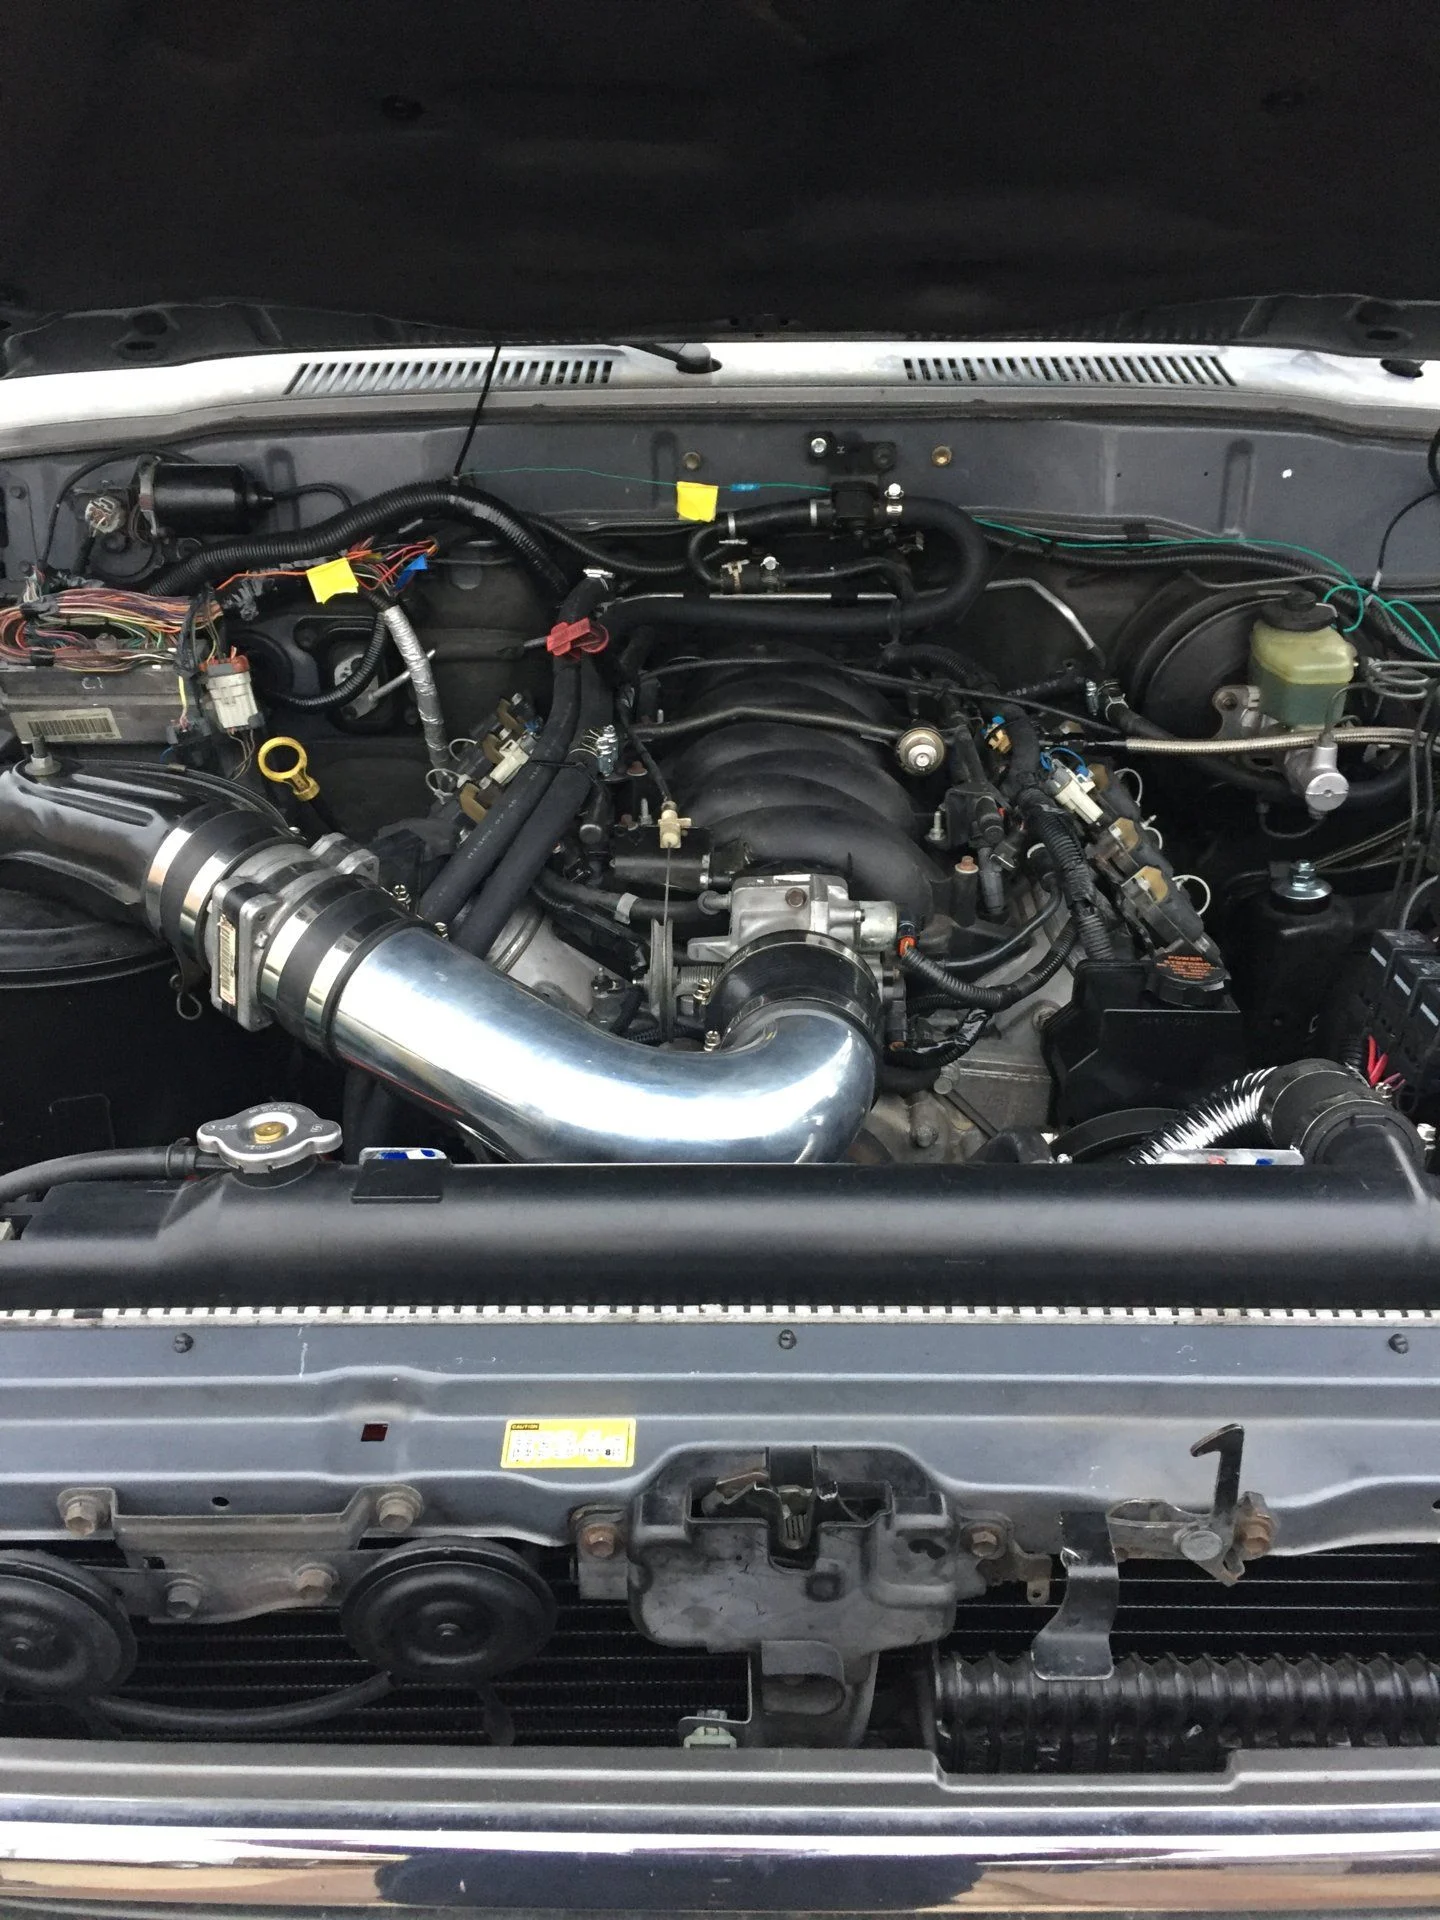
Meanwhile I am sitting on these parts with two 80's trying to decide which one I'm going to thrash on the trails. Low and behold I read a thread on ls swapping the 80 series. Im a tech at a small shop in town here. We have a tow yard and shop. I'm not sure what happened next but being here ten years and never seeing an ls1 come in wrecked, and left for the buzzards to pick off it, there it was...a wrecked 02 ss Camaro ls1 in the yard where I work. and So there it began. Long nights of research and piecing together a plan.
I learned a lot about the ls and various versions of it during the process. Different intakes, oil pans, manifolds, accessories and their locations, be it the water pump or power steering they are different from truck to Camaro so do your research if you're going to purchase a set up. That being said if I were to buy a desired set up it would be a later model probably lq with 6l80 and the tow button so you'd have different tunes but that's not what I wound up with. There is always more than one way to do something and we all know the sky is the limit when it comes to projects. I got a steal on a motor and trans and spent a little extra outfitting it with braided lines, gears and fancy parts in the trans- more on that later. Fancy but not really if you want everlasting reliability.
Be I'm not great with these forums and am still figuring out all the little emoji characters. I may talk to much or to little so bare with me. Here it goes...
Engine: 2002 genIII ls1 w/ cable operated throttle body Camaro cable utilized-used
Trans:GM 4l60e-used
Trans mount: stock Fzj80 modified
Trans shifter: 91 fj80 base modified to to GM cable w/96 shift knob- ih8mud member score
Trans Shifter cable:GM 10340403-local parts house
Engine Harness: stock Camaro
Engine mounts: advance adapter 713088
Exhaust: 2.5" custom by me w/hooker super comp block hugger/ flanges cut and re-angled and replaced with V band style flange. Borla XS
Pro Muff 2.5 center in/out. Wrapped with heat wrap
Vband flanges-eBay
Muff BOR-40364-summit
Hangers-ebay
Heat wrap-eBay
Radiator: stock Toyota with stock antifreeze
Cooling fans: stock camaro dual fans with used AAA signage for fan shroud
Fan relays: painless dual fan relay kit prf-30117-summit racing
Cooling hoses: upper and lower u bend m stainless sum-390025-summit racing: Heater hose Dayco E80406 E87717-off the shelf and connected with brass.
Power steering hose: pressure hose PTFE 6 with appropriate fittings-961955ERL, 925121, 620421-summit racing. Standard return hose off shelf double clamped. Syn atf fluid.
Transfer case: found used 6/87 manual split case then rebuilt by me with Sumo gears 4:1 low 10% underdraive high range.with twin stick shifters-Georg @ valley hybrids
Suspension: Slinky Long Travel 75mm stage 1, 11mm extended rear control arms, slee diy uppers, slee diy panhards, 1" front axle relocate plates, slee 4 degree caster plates, bump stops, sway bar extended links and brackets-Justin @ Redline Landcruisers
Steering: HD 7/8 Heims, 1.5x.25 DOM tie rod,drag link and Front Panhard-Ruffstuff
Tires: set of 5 BFG KO2 5k mile used 37x12.5x17- used off Craigslist $600
Wheels: set of 5 American racing ATX 70 series bronze 17x9x-12mm -4 wheel online
Front hubs: aisin golds- Georg @ Valley Hybrids
Driveshafts: Tom Woods double Cardon front standard two joint rear
Fuel pump: Toyota Supra Denso 950-0155 amazon $160
Fuel pump relay: painless summit racing
Fuel pressure regulator and lines: an fittings AT991966ERL, AT165056ERL(4), SUM-220687B (2), AT165006ERL(4), LS9904filter/regulator kit, Sum-220690B (6), SUM-230610, AT165064ERL, some of these were used for the trans cooler lines and I may have missed a few-summit racing
Transmission cooler & hoses: stock Camaro hardlines to an 6 braid with custom adaption to radiator and from cooler. Stock Toyota from radiator to cooler -summit racing
Battery Cables: 2AWG kit QCR-57-010, SUM-350135-1,with heat protection wrap- summit racing
AC lines: custom by me
Compressor adapter fitting -eBay
Hose kit-eBay
Gears: 4:88 front and rear. All new bearings throughout hub to hub Harrop E Lockers F/R-- Georg @ Valley Hybrids
Front axle: RCV 300M complete shafts, 300M part time hub gears, Hellfire high steer knuckles, Terrain Taimer wheel bearing/birff kits.
Front Brakes: EBC slotted rotors with Yellowstuff pads
Front Bumper: 4X4 Labs DIY
Rear Bumper: 4X4 Labs DIY with dual swings, triple scepter cans and spare tire
Rock Sliders: custom with friend RS Metals- 2x3 with 1.75x.188 DOM Tig Welded to Frame plates
Winch: Warn VR12K Synthetic Line
Roof Rack: Bowfin Cruisers 2018 full rack with Amazon 41” light bar
Second Battery: Odysee 34 with 91 LC battery tray
Last edited:

")