
Navigation
Install the app
How to install the app on iOS
Follow along with the video below to see how to install our site as a web app on your home screen.
Note: This feature may not be available in some browsers.
More options
Style variation
You are using an out of date browser. It may not display this or other websites correctly.
You should upgrade or use an alternative browser.
You should upgrade or use an alternative browser.
shakey sideview mirror FIX
- Thread starter Cruiser Jimmy
- Start date
This site may earn a commission from merchant affiliate
links, including eBay, Amazon, Skimlinks, and others.
Mkreitz, you couldve called me, I have a new mirror on the shelf in the garage.
It wouldve been cheap
But then again, you need something to keep you busy on the weekends
I'll put myself inline for that mirror too.
Did the ZipTie treatment to the PS side, and it worked perfectly. Still full motion of movement, and no more bouncing image in the mirror. Definitely an under five minute and one  repair.

Steve
repair.Steve
Thanks for the write-up, lots of helpful information. Once I got mine out, I found that one of the tabs was broken off and MIA, and the other one was cracked. Instead of messing with the JB weld or zipties, I tried another approach. The piece that was broken off opened the circle/tab that the mirror assembly hangs on to with the hooks from the mirror mount. So, I took a paperclip, and cut it into a "J" shape that completed the broken circle by replacing the missing piece. I held it with a pair of needle nose pliers to the flame of our gas range, and got the ends red-hot. Then, I simply pushed it up against and into the plastic where the tab had broken off--the hot ends of the paperclip went in about an 1/8 of an inch. I let it cool 30 mins or so, then tried to pull it back out with the pliers, no way Jose that baby is in there!
Similar approach to the cracked tab, rather than break it completely and then re-glue it, I just fired up my $6 soldering iron and "welded" it to the surrounding plastic. Took all of 30 seconds and it's super strong!
Similar approach to the cracked tab, rather than break it completely and then re-glue it, I just fired up my $6 soldering iron and "welded" it to the surrounding plastic. Took all of 30 seconds and it's super strong!
^^Good thinking. Report back on how it works over the next months.
Shaky Mirror Fix
I went as far as taking the mirror off the LC before reading the thread about the bottom screw. Turns out just tightening that screw solved the problem. Might want to check that first.
I went as far as taking the mirror off the LC before reading the thread about the bottom screw. Turns out just tightening that screw solved the problem. Might want to check that first.
my variation of repair
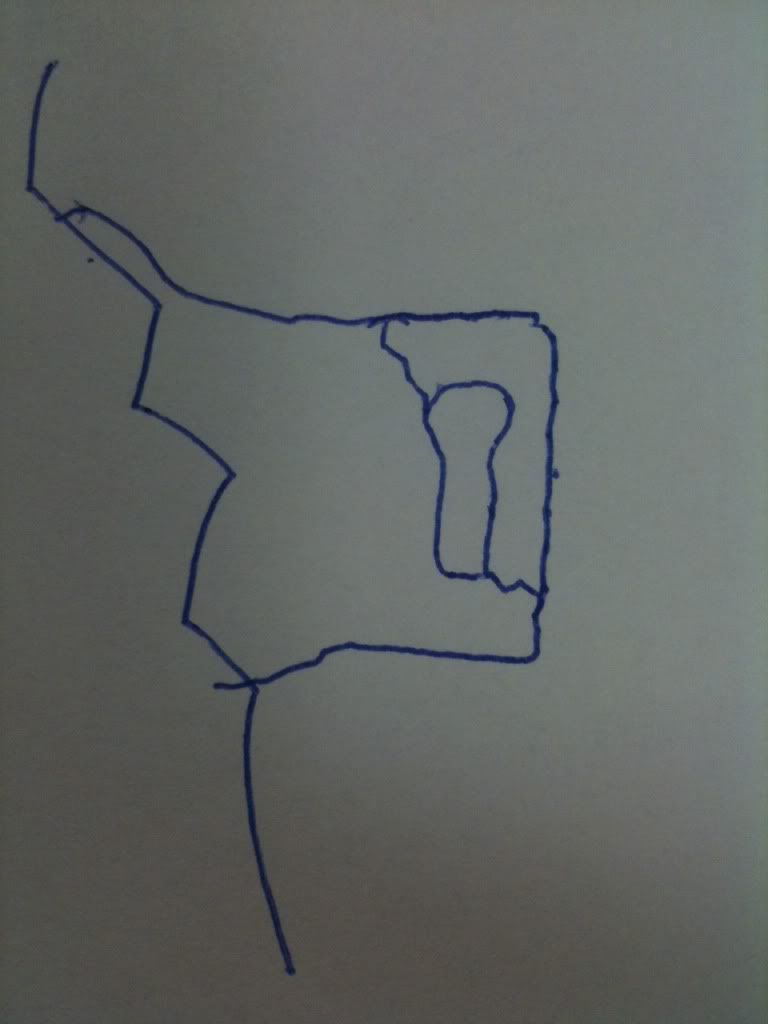
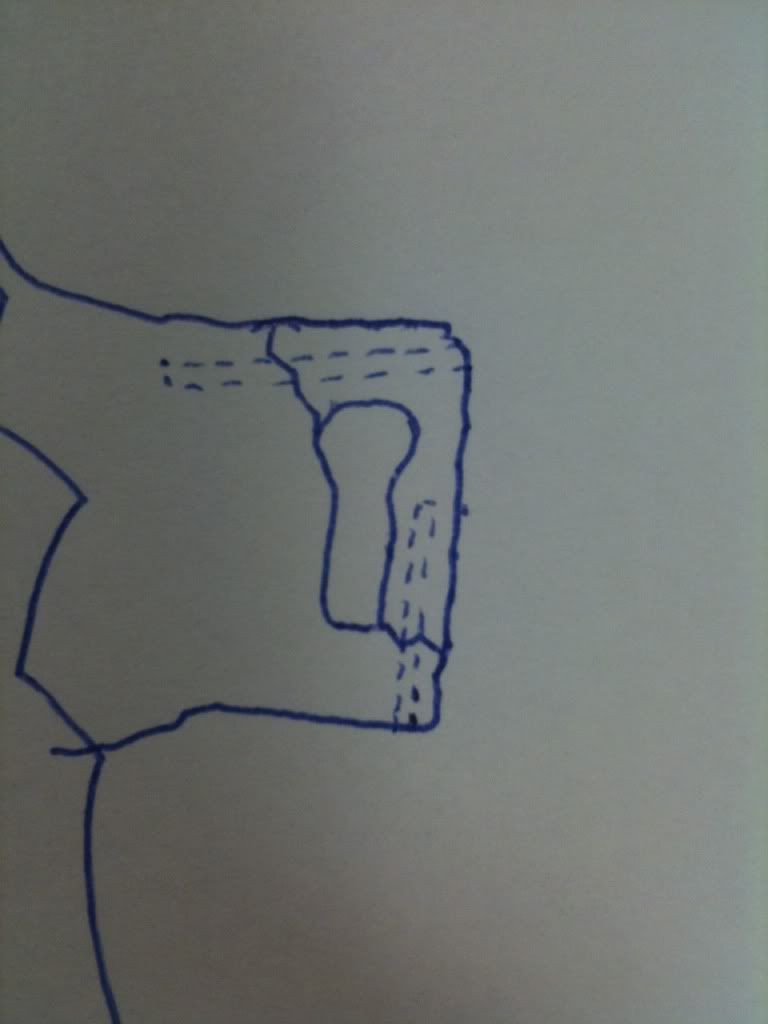
I took my DS mirror off, and by happy coincidence, the portion of the tab that had broken off was still in the housing, as shown in pic 1.
http://s1219.photobucket.com/user/constitutiondefender/media/photo1_zpsd4bda47e.jpg.html
I used cyanoacrylate to glue the tab back together as in pic 2.
http://s1219.photobucket.com/user/constitutiondefender/media/photo2_zpsf44e9ad9.jpg.html
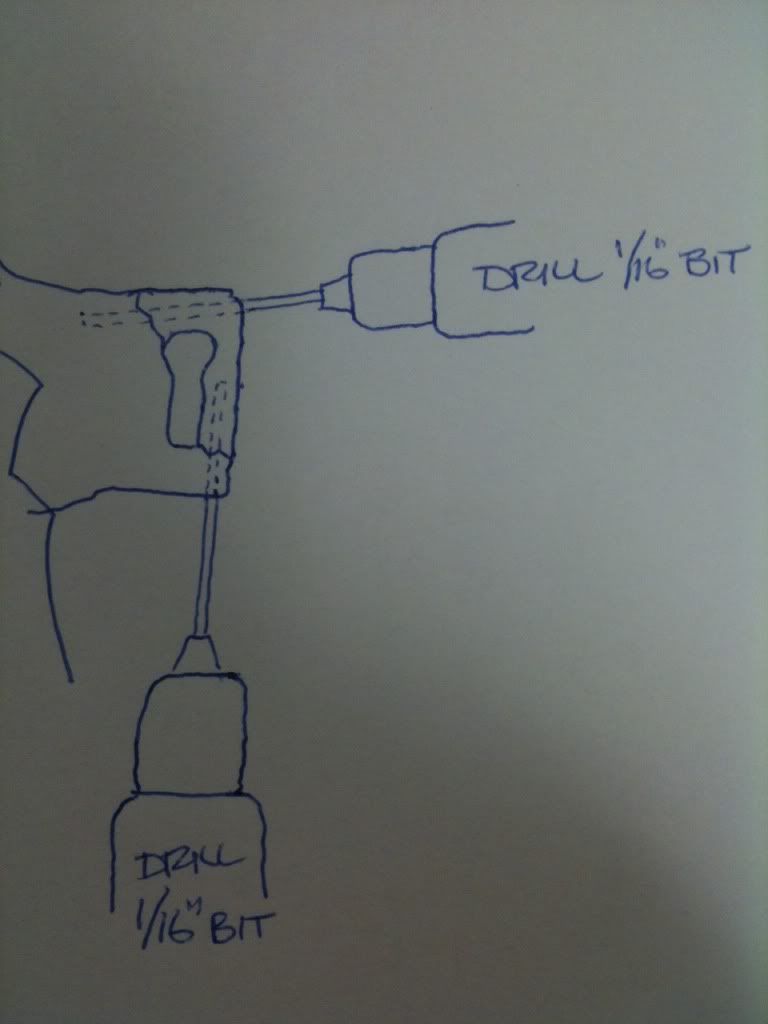
Next I used a 1/16" drill bit to drill two holes, one in each direction, pic 3.
http://s1219.photobucket.com/user/constitutiondefender/media/photo4_zps30aee4ef.jpg.html
Finally I sacrificed the 1/16" drill bit by breaking it in two pieces and gluing each piece in the relative holes to create steel support rods.
http://s1219.photobucket.com/user/constitutiondefender/media/photo3_zpsc1401204.jpg.html
We will see how well it works")
I took my DS mirror off, and by happy coincidence, the portion of the tab that had broken off was still in the housing, as shown in pic 1.
http://s1219.photobucket.com/user/constitutiondefender/media/photo1_zpsd4bda47e.jpg.html

I used cyanoacrylate to glue the tab back together as in pic 2.
http://s1219.photobucket.com/user/constitutiondefender/media/photo2_zpsf44e9ad9.jpg.html
Next I used a 1/16" drill bit to drill two holes, one in each direction, pic 3.
http://s1219.photobucket.com/user/constitutiondefender/media/photo4_zps30aee4ef.jpg.html
Finally I sacrificed the 1/16" drill bit by breaking it in two pieces and gluing each piece in the relative holes to create steel support rods.
http://s1219.photobucket.com/user/constitutiondefender/media/photo3_zpsc1401204.jpg.html
We will see how well it works
All in all, it took about 15 min to get it back in service.
- Joined
- May 26, 2009
- Threads
- 4
- Messages
- 26
I just tried Nonprophet's method last night.
Awesome!
Why didn't I think of that?!?
I used my little propane torch instead of my stove (electric )
And it worked great!
I bought my '93 a year 1/2 ago, and both sides were horrible.
Now both are nice & tight.")
I cut the wire longer so it sticks out the end, and bent it over for added strength.
It took 15-20 min to do both mirrors, including installation.
Thanks for the tip!

Awesome!
Why didn't I think of that?!?
I used my little propane torch instead of my stove (electric )
And it worked great!
I bought my '93 a year 1/2 ago, and both sides were horrible.
Now both are nice & tight.
I cut the wire longer so it sticks out the end, and bent it over for added strength.
It took 15-20 min to do both mirrors, including installation.
Thanks for the tip!
- Joined
- Apr 23, 2014
- Threads
- 1
- Messages
- 6
i just JB welded the 3 contact points along with the bottom phillips screw. its stuck in there forever.
I did the zip tie trick last weekend and can't believe I waited two years to do it. By far it was the easiest, cheapest, and fastest fix to an annoying problem I've done to the 80 yet!
I just tried the paper clip- "Nonprophet" approach. Seems to be working good. Thanks!
Taking mine apart tore the little dust boots, the plastic screwjacks did not pop out of their sockets, instead the adjusters just slipped off their threads and tore the dust /water boots. What to do now?

You can buy one of my mirrors for spare parts. See my sig for parting out.
Another option to the busted mirror post problem.
Yesterday, I went to wash the driver's side mirror when the whole housing spun around freely. I had a busted post.
A bit of research on ih8mud showed the options where bolts were used but I decided that I still wanted the wires to move freely within the post so decided to take a novel approach. I would use a bolt with a hole in the middle along the axis. Easier said than done.
Off to the hardware store and I saw some 1/8" brass nipples that fit perfectly inside the old pivot tower. Off to the nut and bolt section for a two 7/16" NC nyloc nuts and a couple 3/8 fender washers (fit the 1/8" nipple perfectly). I actually got 4.5" and 3.5" nipples in case I needed the longer length. I ended up using only the 3.5" ones.
There are a few threads on dis-assembly of the mirror so I will not get into that portion of the work.
The proposed setup

The final setup ended up being (from top to bottom in the mirror - left to right above) - nyloc nut, 1.5" fender washer, factory washer for the top of the spring and spring.
On the bottom I used a 1-3/8" fender washer (to spread the pressure over a larger area) and another nyloc nut.
Back in the garage, I threaded the ends of the nipple with a 7/16" die and the nuts went on as they should. Test fit into the broken post and the 3.5" is the correct fit. I could not fit the wires into the pipe hole due to the loosely fitting protective sleeve. That cover was readily cut off and a piece of heat shrink was used for its smaller diameter.
A view of the bottom showing the wires coming through the nipple. They rotate freely.

The ball bearings and the rotation area were greased with lithium grease and everything assembled back together.
The end result is full rotation with the wiring still able to rotate freely. The mirror moves very smoothly now between positions. I am also considering doing the passenger mirror before it breaks off.
The only problem noted is that the bottom nut is a bit too long to allow the plastic cover to go back on. But that is readily fixed by using a thinner nut and star lock washer.
Yesterday, I went to wash the driver's side mirror when the whole housing spun around freely. I had a busted post.
A bit of research on ih8mud showed the options where bolts were used but I decided that I still wanted the wires to move freely within the post so decided to take a novel approach. I would use a bolt with a hole in the middle along the axis. Easier said than done.
Off to the hardware store and I saw some 1/8" brass nipples that fit perfectly inside the old pivot tower. Off to the nut and bolt section for a two 7/16" NC nyloc nuts and a couple 3/8 fender washers (fit the 1/8" nipple perfectly). I actually got 4.5" and 3.5" nipples in case I needed the longer length. I ended up using only the 3.5" ones.
There are a few threads on dis-assembly of the mirror so I will not get into that portion of the work.
The proposed setup
The final setup ended up being (from top to bottom in the mirror - left to right above) - nyloc nut, 1.5" fender washer, factory washer for the top of the spring and spring.
On the bottom I used a 1-3/8" fender washer (to spread the pressure over a larger area) and another nyloc nut.
Back in the garage, I threaded the ends of the nipple with a 7/16" die and the nuts went on as they should. Test fit into the broken post and the 3.5" is the correct fit. I could not fit the wires into the pipe hole due to the loosely fitting protective sleeve. That cover was readily cut off and a piece of heat shrink was used for its smaller diameter.
A view of the bottom showing the wires coming through the nipple. They rotate freely.
The ball bearings and the rotation area were greased with lithium grease and everything assembled back together.
The end result is full rotation with the wiring still able to rotate freely. The mirror moves very smoothly now between positions. I am also considering doing the passenger mirror before it breaks off.
The only problem noted is that the bottom nut is a bit too long to allow the plastic cover to go back on. But that is readily fixed by using a thinner nut and star lock washer.
Last edited:
I used wire and UV set epoxy. worked really well

I used a plastic epoxy about 5 years ago. So far so good, still holding strong. Jinx...
It was an epoxy putty like this. 25531 - Hercules 25531 - Plastic Poxy Epoxy - 4 oz.
It was an epoxy putty like this. 25531 - Hercules 25531 - Plastic Poxy Epoxy - 4 oz.
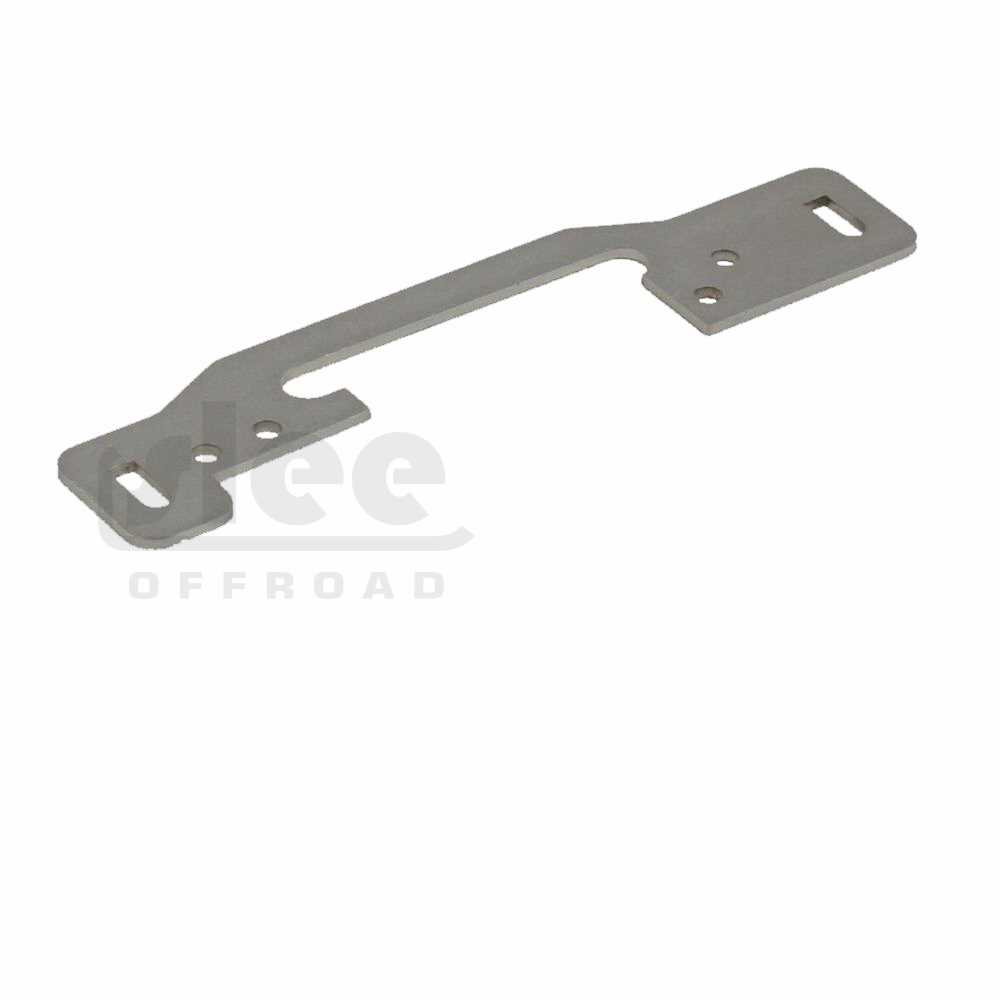
SLEE - Mirror Tab Fix - '91-'97 Land Cruiser / '96-'97 LX 470 - Slee Off Road
Sold as singles Fits all mirrors for '91-'97 Land Cruisers
 sleeoffroad.com
I am in south afria, so unfortunatly have to do the putty way
But I dont give hat fix a long lasting chance, rubbish roads here disintegrate everything
But I dont give hat fix a long lasting chance, rubbish roads here disintegrate everything