Hi folks,
so here it goes. i bought the 40 in 2009, shortly after getting married and havin our first kid. this was going to be my hobby on the side whenever i could fit it and get some wheelin done. the rig has really only done trails, mostly challenging ones (or at least to me) and has had very little DD duties. we had our second kid almost 2 years ago and that started to limit my play time, but it's all good. all the work this year really started with a couple maintenance jobs that the truck was in need for....and because i wasn't carefull with it. 2 years ago she was in a deeeeep silty hole which i fried a recent clutch on. turns out, there was no clutch fork boot and plate which allowed water to quickly get in (including wood chips) the clutch pieces...chunks of wood managed to get wedged in b/w teh clutch plates! work and kids got busy and she sat for a few months till i finally was able to get her out to a friends shop for some much needed wrenching. the clutch as done, front knuckles re/re'd, calipers/pads, steering gone over...and oh, a new/used tranny was put in since the rear output bearing was gonzo from just age(a rebuild was going to cost just as much if not more/plus time than the 76 tcase i found on kijiji, so we dropped that in and did the 2 low mod). then she was all done and ready for some wheelin!
shortly after that, i had a smoking issue...which i tried to address with just doing the basics and keeping my fingers crossed..
https://forum.ih8mud.com/40-55-series-te ... nosis.html
i tried a few things and the smoking seemed to have lessened..and i felt/thought all was great...
so, recon run comes up early spring and i say bring the 40! she seems to be running okay!
meet up with some cruiser buddies... within 15 minutes of getting back on the freeway...i start to hear loose change in the engine and loose power....!! oh no!!! manged to pull off and park near this chapel. we checked the dipstick and no oil! no puddle and i never saw oil on the ground. did i burn it all out?! i must have! anyway, she was done. Wayne, in his generosity, immediately said something in the lines of "well Romey, if you want, we can take this to the shop now, skip the run and start pullin the motor out and start the rebuild.."...i was like, really?! no way!! but, we came to go wheelin, so i said nope, let's keep goin up north. called CAA, they were there in 45 minutes and she was taken to Wayne's garage. i rode with Wayne, we did the run with some other yota folks, and had a blast!
after that, it was just getting our schedule right over the summer combined with gettin the approval from the wifey..and off we went on the rebuild!
Before i start, i would first like to thank landblazer/Brad for getting her back on the road with some much needed major maintenance work! i was happy to have wrenched a little but really wished i could have done more (family and work, well, you know the deal) Also, big thanks to Mudshark/Dave for helpin Brad with a lot of the work too! thanks to you guys, the clutch was tight, steering smooth, i got my 2Low mod done so i don't have to fight the front lockers, and she can stop with confidence!
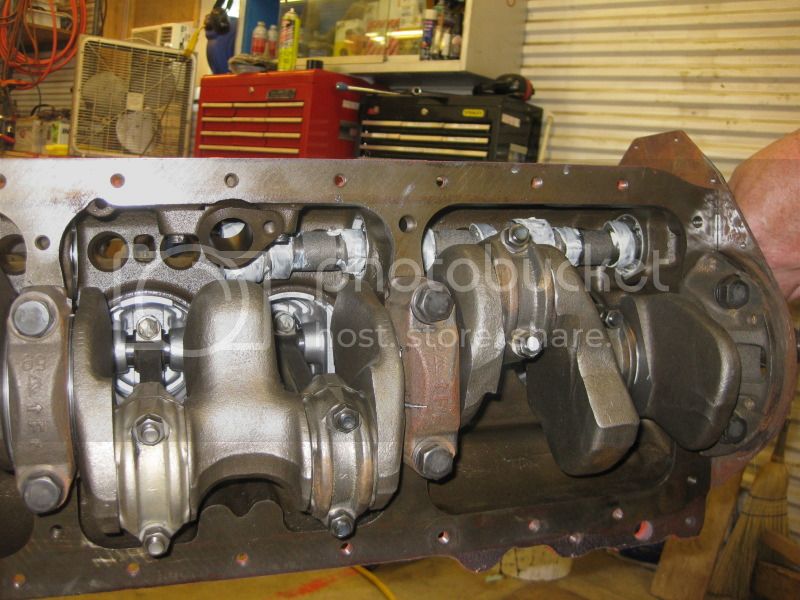
at another friends shop...

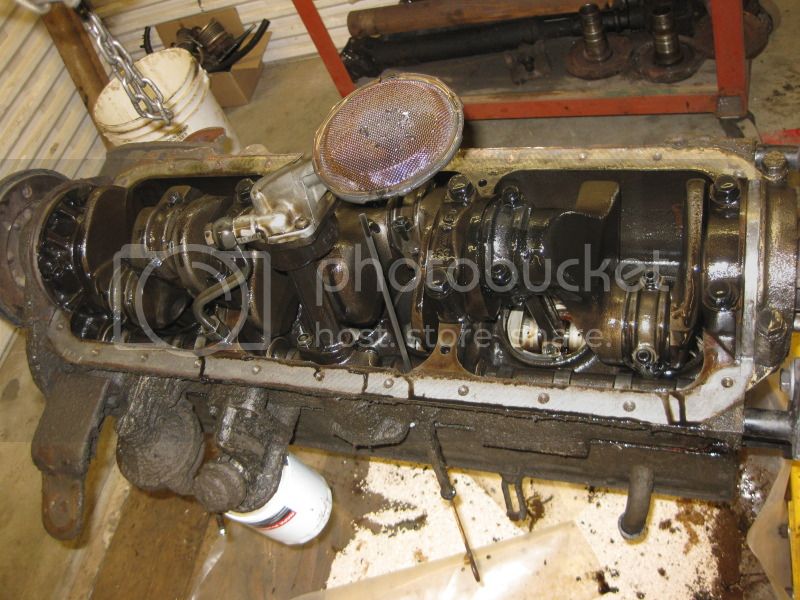
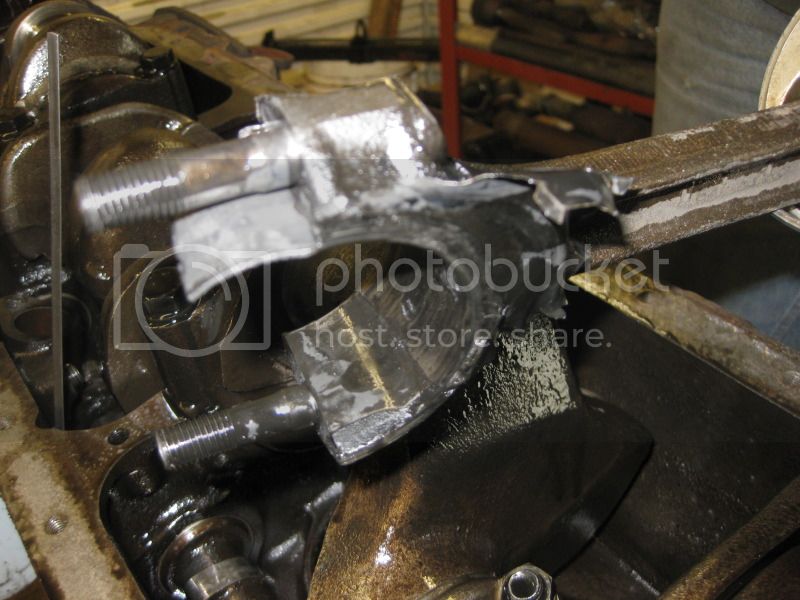
when the motor went...
so here it goes. i bought the 40 in 2009, shortly after getting married and havin our first kid. this was going to be my hobby on the side whenever i could fit it and get some wheelin done. the rig has really only done trails, mostly challenging ones (or at least to me) and has had very little DD duties. we had our second kid almost 2 years ago and that started to limit my play time, but it's all good. all the work this year really started with a couple maintenance jobs that the truck was in need for....and because i wasn't carefull with it. 2 years ago she was in a deeeeep silty hole which i fried a recent clutch on. turns out, there was no clutch fork boot and plate which allowed water to quickly get in (including wood chips) the clutch pieces...chunks of wood managed to get wedged in b/w teh clutch plates! work and kids got busy and she sat for a few months till i finally was able to get her out to a friends shop for some much needed wrenching. the clutch as done, front knuckles re/re'd, calipers/pads, steering gone over...and oh, a new/used tranny was put in since the rear output bearing was gonzo from just age(a rebuild was going to cost just as much if not more/plus time than the 76 tcase i found on kijiji, so we dropped that in and did the 2 low mod). then she was all done and ready for some wheelin!
shortly after that, i had a smoking issue...which i tried to address with just doing the basics and keeping my fingers crossed..
https://forum.ih8mud.com/40-55-series-te ... nosis.html
i tried a few things and the smoking seemed to have lessened..and i felt/thought all was great...
so, recon run comes up early spring and i say bring the 40! she seems to be running okay!
meet up with some cruiser buddies... within 15 minutes of getting back on the freeway...i start to hear loose change in the engine and loose power....!! oh no!!! manged to pull off and park near this chapel. we checked the dipstick and no oil! no puddle and i never saw oil on the ground. did i burn it all out?! i must have! anyway, she was done. Wayne, in his generosity, immediately said something in the lines of "well Romey, if you want, we can take this to the shop now, skip the run and start pullin the motor out and start the rebuild.."...i was like, really?! no way!! but, we came to go wheelin, so i said nope, let's keep goin up north. called CAA, they were there in 45 minutes and she was taken to Wayne's garage. i rode with Wayne, we did the run with some other yota folks, and had a blast!
after that, it was just getting our schedule right over the summer combined with gettin the approval from the wifey..and off we went on the rebuild!
Before i start, i would first like to thank landblazer/Brad for getting her back on the road with some much needed major maintenance work! i was happy to have wrenched a little but really wished i could have done more (family and work, well, you know the deal) Also, big thanks to Mudshark/Dave for helpin Brad with a lot of the work too! thanks to you guys, the clutch was tight, steering smooth, i got my 2Low mod done so i don't have to fight the front lockers, and she can stop with confidence!
at another friends shop...

when the motor went...

Last edited: