I couldn't find anything I could use on the FAQ, so I decided to start a thread.
I had the wheel off to replace my stuck starter, and I noticed that I needed front brakes. The pictures I took were as I assembled, so I posted them in reverse order.
Fitst thing to do to remove the calipers is to remove the retaining wire on the back. a screwdriver works well for this.
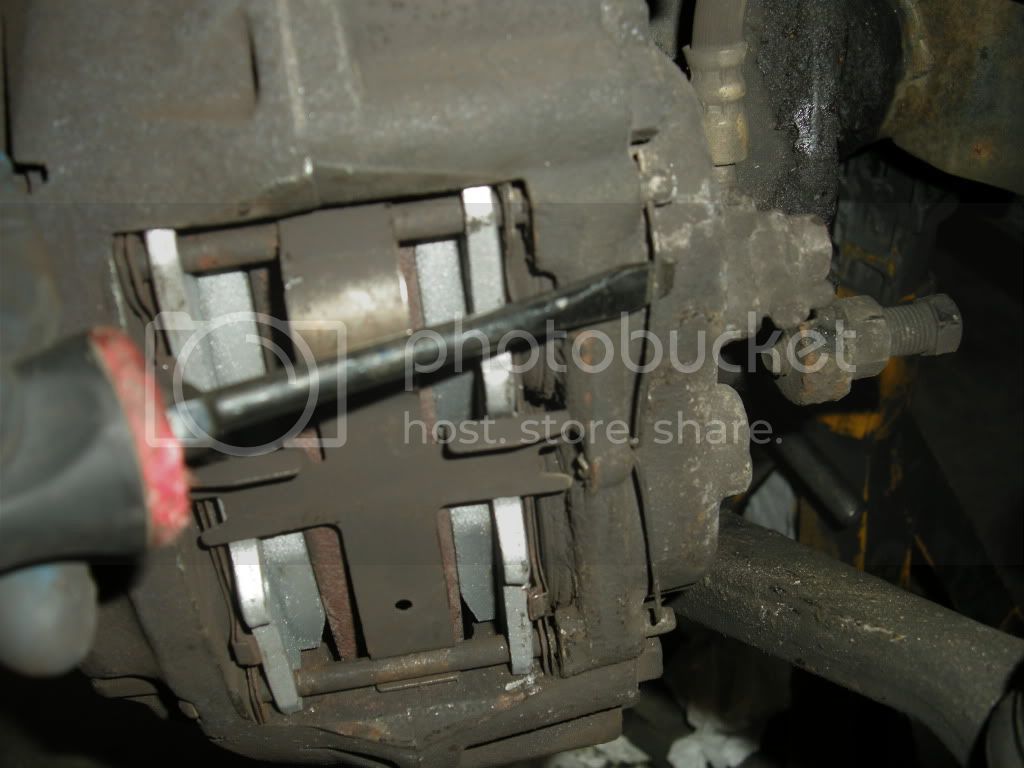
Then just tap the pins out, and the pads should come right out. Make sure you get the shims also, and note their position
Next, remove the caliper mounting bolts and remove the caliper, which is pretty straight forward. Since I had the other wheel on, I pressed the pistons in. You don't want both wheels and calipers off, or you may push the pistons out on the other side, and then you have a huge mess, and tons of more work.
I used 2 C Clamps for one side of the caliper, with an old pad between the clamp and the pistons. I used a large vice grip on the other side. You need to do both at once, or you will keep pushing the pistons out, and you will create a game of whack-a-mole!
Keep tightening the C Clamps and the vice grip until you have pushed all 4 pistons in. Then I left the clamps on so I could take the other side off, and take both rotors in to get turned

Tie the caliper up out of your way so you can take the hub off.
REMINDER NOTE---When you put the caliper back on, make sure the hose is not twisted, like in the pic

The caliper will mount easily with a twisted hose, and when you are driving you will rip the hose off. REMEMBER THIS!
Next tap the dust cover off---I just used a screwdriver

Next, take the retaining clip off of the birf. This will require a snap ring pliers, or great care with whatever tools you have.

Now you can take the 12MM nuts and washers off. There will be cone washers under the locks. To get these out, you should tap the side of the hub with a brass hammer or drift. I didn't have one, so I used a small ball peen hammer, and tapped lightly. It took a while, but they pop out like popcorn eventually. Make sure you catch them. Mine kept hitting me in the chest!

Once the cone washers are out, the cover should slide right off.
First, you need to clean some of the grease out, and tap the locking tab back. Now you have a BIG flat nut, and you probably don't have a socket that big. I didn't so I used a small punch and tapped it loose. It only goes about 1/4 turn before it is loose enough to take off with your fingers. Take note of the position before you remove it, as reassembly will be in the same position

Now take the locking tab out.


ANOTHER BIG NUT! Same thing--take note of the position--tap it and it should loosen right up.
When you put this nut back on, it should be little more than finger tight. spin the rotor often when reassembling to get a good seat on the bearing.
Now there is a locating ring that should slide right out with the bearings.

Put your thumbs into the center hub, and pull the whole thing out. Your thumbs will keep the bearing from falling out.
Now you have this.

Set the whole assembly on your bench, and take the 6 nuts out holding the hub to the rotor.
Slide a flat bar between the rotor and the hub, and pry on opposite sides till it is loose from the hub.

Now is the time to inspect hub seals and bearings, and replace as necessary.
NOTE ON THE ROTOR--The Rotor will need to have to have the directional grooves removed from the face before you install it. Some shops do this, mine didn't

Why is this important? 2 reasons
The lathe cuts from the inside out, following a path, and leaving a directional groove much like a n old Album. If not removed, that tiny groove will sheer fine amounts off of the surface of the pad until the groove wears down. You lost a lot of brake life.
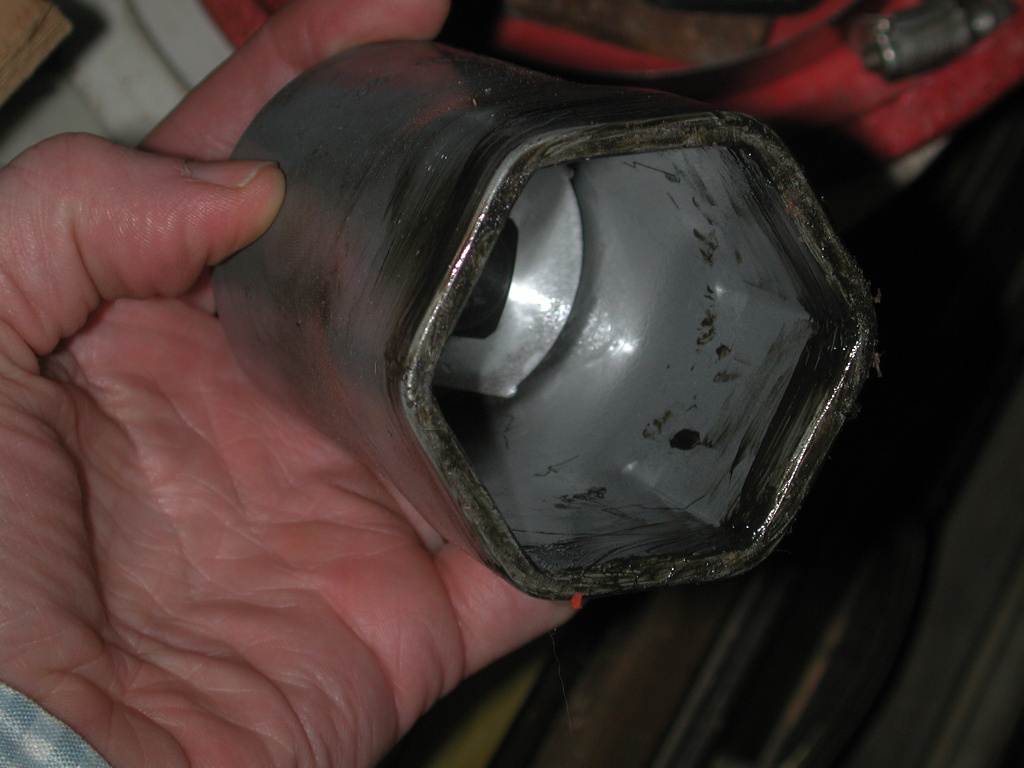
The other reason is that if the shop used a fast cut, the grooves will actually lift the pad up, and it drops back down, creating a high speed clicking sound. Again, it will wear off in time, but you put up with noise and shorter brake life. Do yourself a favor and remove the groove. I just use a 3M sanding disc. Looks like this when done

So that's it! Assembly should be the reverse of the above.Make sure you remember to bend the locking tabs down on BOTH BIG NUTS when you put it back together.
Hope this helps someone tackle the job
I had the wheel off to replace my stuck starter, and I noticed that I needed front brakes. The pictures I took were as I assembled, so I posted them in reverse order.
Fitst thing to do to remove the calipers is to remove the retaining wire on the back. a screwdriver works well for this.
Then just tap the pins out, and the pads should come right out. Make sure you get the shims also, and note their position
Next, remove the caliper mounting bolts and remove the caliper, which is pretty straight forward. Since I had the other wheel on, I pressed the pistons in. You don't want both wheels and calipers off, or you may push the pistons out on the other side, and then you have a huge mess, and tons of more work.
I used 2 C Clamps for one side of the caliper, with an old pad between the clamp and the pistons. I used a large vice grip on the other side. You need to do both at once, or you will keep pushing the pistons out, and you will create a game of whack-a-mole!
Keep tightening the C Clamps and the vice grip until you have pushed all 4 pistons in. Then I left the clamps on so I could take the other side off, and take both rotors in to get turned
Tie the caliper up out of your way so you can take the hub off.
REMINDER NOTE---When you put the caliper back on, make sure the hose is not twisted, like in the pic
The caliper will mount easily with a twisted hose, and when you are driving you will rip the hose off. REMEMBER THIS!
Next tap the dust cover off---I just used a screwdriver
Next, take the retaining clip off of the birf. This will require a snap ring pliers, or great care with whatever tools you have.
Now you can take the 12MM nuts and washers off. There will be cone washers under the locks. To get these out, you should tap the side of the hub with a brass hammer or drift. I didn't have one, so I used a small ball peen hammer, and tapped lightly. It took a while, but they pop out like popcorn eventually. Make sure you catch them. Mine kept hitting me in the chest!
Once the cone washers are out, the cover should slide right off.
First, you need to clean some of the grease out, and tap the locking tab back. Now you have a BIG flat nut, and you probably don't have a socket that big. I didn't so I used a small punch and tapped it loose. It only goes about 1/4 turn before it is loose enough to take off with your fingers. Take note of the position before you remove it, as reassembly will be in the same position
Now take the locking tab out.
ANOTHER BIG NUT! Same thing--take note of the position--tap it and it should loosen right up.
When you put this nut back on, it should be little more than finger tight. spin the rotor often when reassembling to get a good seat on the bearing.
Now there is a locating ring that should slide right out with the bearings.
Put your thumbs into the center hub, and pull the whole thing out. Your thumbs will keep the bearing from falling out.
Now you have this.
Set the whole assembly on your bench, and take the 6 nuts out holding the hub to the rotor.
Slide a flat bar between the rotor and the hub, and pry on opposite sides till it is loose from the hub.
Now is the time to inspect hub seals and bearings, and replace as necessary.
NOTE ON THE ROTOR--The Rotor will need to have to have the directional grooves removed from the face before you install it. Some shops do this, mine didn't
Why is this important? 2 reasons
The lathe cuts from the inside out, following a path, and leaving a directional groove much like a n old Album. If not removed, that tiny groove will sheer fine amounts off of the surface of the pad until the groove wears down. You lost a lot of brake life.
The other reason is that if the shop used a fast cut, the grooves will actually lift the pad up, and it drops back down, creating a high speed clicking sound. Again, it will wear off in time, but you put up with noise and shorter brake life. Do yourself a favor and remove the groove. I just use a 3M sanding disc. Looks like this when done
So that's it! Assembly should be the reverse of the above.Make sure you remember to bend the locking tabs down on BOTH BIG NUTS when you put it back together.
Hope this helps someone tackle the job
Last edited:

")
 I don't have a back up. I heard somewhere that it is not a good idea to mix different types of grease. I am assuming that its the stock stuff thats in there.