Rear License Plate Bracket Resto & Questions

This site may earn a commission from merchant affiliate
links, including eBay, Amazon, Skimlinks, and others.

Joined
Apr 1, 2013
Threads
23
Messages
551
Location
Dhahran, K.S.A.
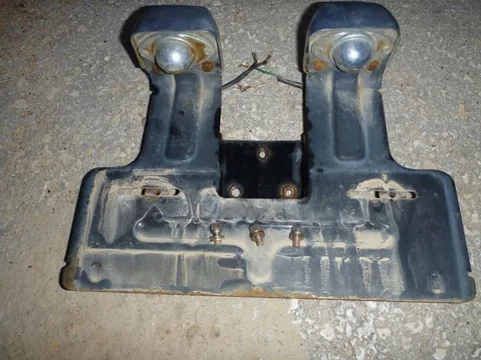
I'm slowly working on restoring a late model rear license plate bracket.

Here's a before shot:
P1020331sm.webp

After removing the large covers, it looked like this underneath:
P1020338sm.webp

And here are all the parts "exploded":
P1020340sm.webp

My goal is to get it looking good and get the wiring closer to what it originally had.

First up was the small lamp covers. I used the old aluminum foil and ketchup trick and these were the results:
P1020345sm.webp

P1020346sm.webp

There was some pitting remaining that I could not remove. For that I used a small brush to locally apply naval jelly to "kill" the rust and then neutralized the jelly with a baking soda wash. Short of re-plating the covers, are there any other recommendations for the remaining pitting?

*more to slowly follow as I muddle through*
P1020331sm.webp
P1020338sm.webp
P1020340sm.webp
P1020345sm.webp
P1020346sm.webp
 
Mine were way worse than yours, so I ended up just painting them w/Rustoleum Chrome. Not what you prob. want though.
I wonder if it would be possible to use one of the electrolysis units that folks use to derust stuff--could you use, say copper plate and reverse the polarity or something?--maybe some old (pre-1964) silver nickels?
My mind wanders sometimes-------
 
Sorry have to ask what is the foil, ketchup trick. Never heard of it
 
For the aluminum foil and ketchup, you take a dab of ketchup and put it on the part you want to shine and then use the aluminum foil as a polishing cloth. With a bit of elbow grease you can get it to shine right up. I got this from a gearhead I work with and he's not sure why it works, but it does.

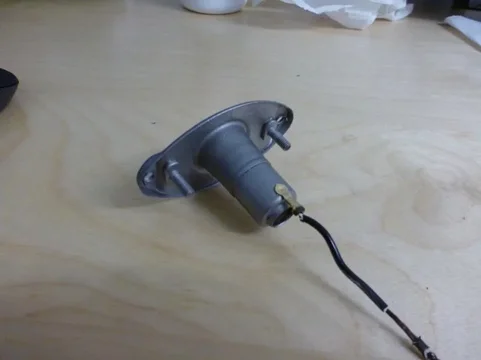
I blasted the lamp housing and I think it turned out nice. Does anyone know what gauge the wire is for the rear license plate lights? I've searched and can't find an answer. I'm leaning towards 16ga, but I am not sure.
P1020355sm.webp

P1020356sm.webp
P1020355sm.webp
P1020356sm.webp
 
Those look like the universal replacement type lights. If they still sell them at parts stores could you compare the cover or just use the whole light. If those had been on IL roads there would be nothing left to replace. These on my 79 .
LIcense light.webp
 
Even if the wires were originally 18ga, I would go with 16, or even 14...over kill is never a bad thing with wiring. My covers look just a little better than Howard705's above pic...I'm gonna have to tackle this problem soon. You're doing a great job, looks good! Keep plugging away...:cheers:

Skip
 
Thanks for the encouragement! 16ga it is then. Will be attempting to recreate the wiring for each lamp and the wiring harness that is under the cover attached to the inside of the rear door as this was the situation I found:

P1020322sm.webp

I know it won't be quite factory, but I am going to try and put back together the bullet connectors and outer protective sheath over the wires.

I know this is a shot in the dark, but does anyone know where the license plate light wiring harness mates to the main truck wiring harness? Does the main harness connection point come past the hole in the rear door frame or does the license plate wiring harness go through the hole in the door frame? I'm trying to figure out how long to make the harness and so far this is the best diagram I can find:

Wiring harness diagram.webp
P1020322sm.webp
Wiring harness diagram.webp
 
The first pic is as the wire just comes thru the grommet in the door.
The second pic is a short harness that goes from the door thru the hole in the door jamb.
And the third pic is where it connects to the main harness coming from the frame rail underneath. Hope this helps.

Skip
Tag Light Wire 1.webp
Tag Light Wire 2.webp
Tag Light Wire 3.webp
 
Awesome! Thanks! I will try and trace the wiring and see whether I have a connection in that area of if the hacked wires continue.
 
Slow work on the small stuff. Seems like I keep getting sidetracked with other projects... Decided to try and arrest the rusting on the inside of the large plated cover.

I taped the edges of the cover to try and prevent delaminating of the plating and then hit the underside with the blaster. Could not get the nozzle up fully under the tabs holding the captive nuts, but hit everything I could. Got some pretty quick flash rusting so I did two cycles of naval jelly on the entire inside and a bath of baking soda/water to neutralize the acid.

Turned out pretty good IMO and after several days, no rust has appeared yet. As the underside of this part is not seen I may go ahead and do a coat of brushable epoxy primer through the inside (including up and under the tabs).

P1020352sm.webp

It actually looks better than the picture shows. That yellowish tint is not seen with the naked eye.
P1020352sm.webp
 
Here's the before and after on my bracket. I blasted all the parts after disassembly. Powder coated all the metal including the bug eye covers. I didn't want any chrome other than the door handles on this truck. Bought the lights from Cruiser Corps (I think... or ebay) and The screws were re plated along with about 1000 other screws and bolts and misc hardware. The plating only cost a total of $50 for all of it and the black coating was very reasonable since I blasted all the smaller stuff myself.

P.S. I still have a pair of brand new chrome light covers...
License bracket.webp
 

Users who are viewing this thread

Back
Top Bottom