Rear Differential Work and 3rd Member Rebuild (1 Viewer)

This site may earn a commission from merchant affiliate
links, including eBay, Amazon, Skimlinks, and others.

No, the ring gear looks fine. I'm asking about the differential side gears ( Where the axles come through). The top edge of those teeth should be straight and not worn to a "knife" edge.

Big Thanks to Dick and Stump for all your assistance so far!:beer:

Dick, I'll take some more pics of the side gears tomorrow.
 
Here are some more pics of the side gears, do they look worn at all?

Right side
full


Left side
full


Top
full


Bottom
full
 
Actually they look like they are in pretty good shape. It's down to checking stuff - clearances, the thrust washers, the condition of the differential shaft (goes through the spacer) and the backlash. Something is worn and out of spec. Adjusting the backlash is a bench top job. If the backlash is in spec you can do everything else with the third member in the housing.
 
Thinking about it, it may be wear on the differential shaft causing the problem.
 
Thanks Dick I appreciate your feedback. Unfortunately, I honestly do not know where to start checking clearances and backlash as I have zero experience with diffs and their associated issues and solutions. Where in the diff do I check clearances?

I'm being summoned to help the wife, be back soon.
 
Try to pick up a Factory Service Manual (FSM) that covers your year FJ40, or a Haynes manual. It will make it a lot easier to work through these issues.
 
PM Sent
 
FSM will give you the clearances you need to check. I still think if you pull the differential shaft you'll likely find excess wear that is allowing the gears to slap around. You can do this without pulling the third member.
 
9 times out of 10, these can be refreshed with new thrust washers on both the axle gears and spider gears. If your pinion shaft shows any wear, replace it. Not uncommon for an outer axle bearing to go south (these usually destroy the seal and leak oil all over your backing plate).
Might even consider installing a locker while it is all apart.:idea:
 
Last edited:
I'd like to officially thank Dick @reddingcruiser for helping me today over the phone, I could not have completed this task without his vast knowledge of diffs and his willingness to assist me. :beer:


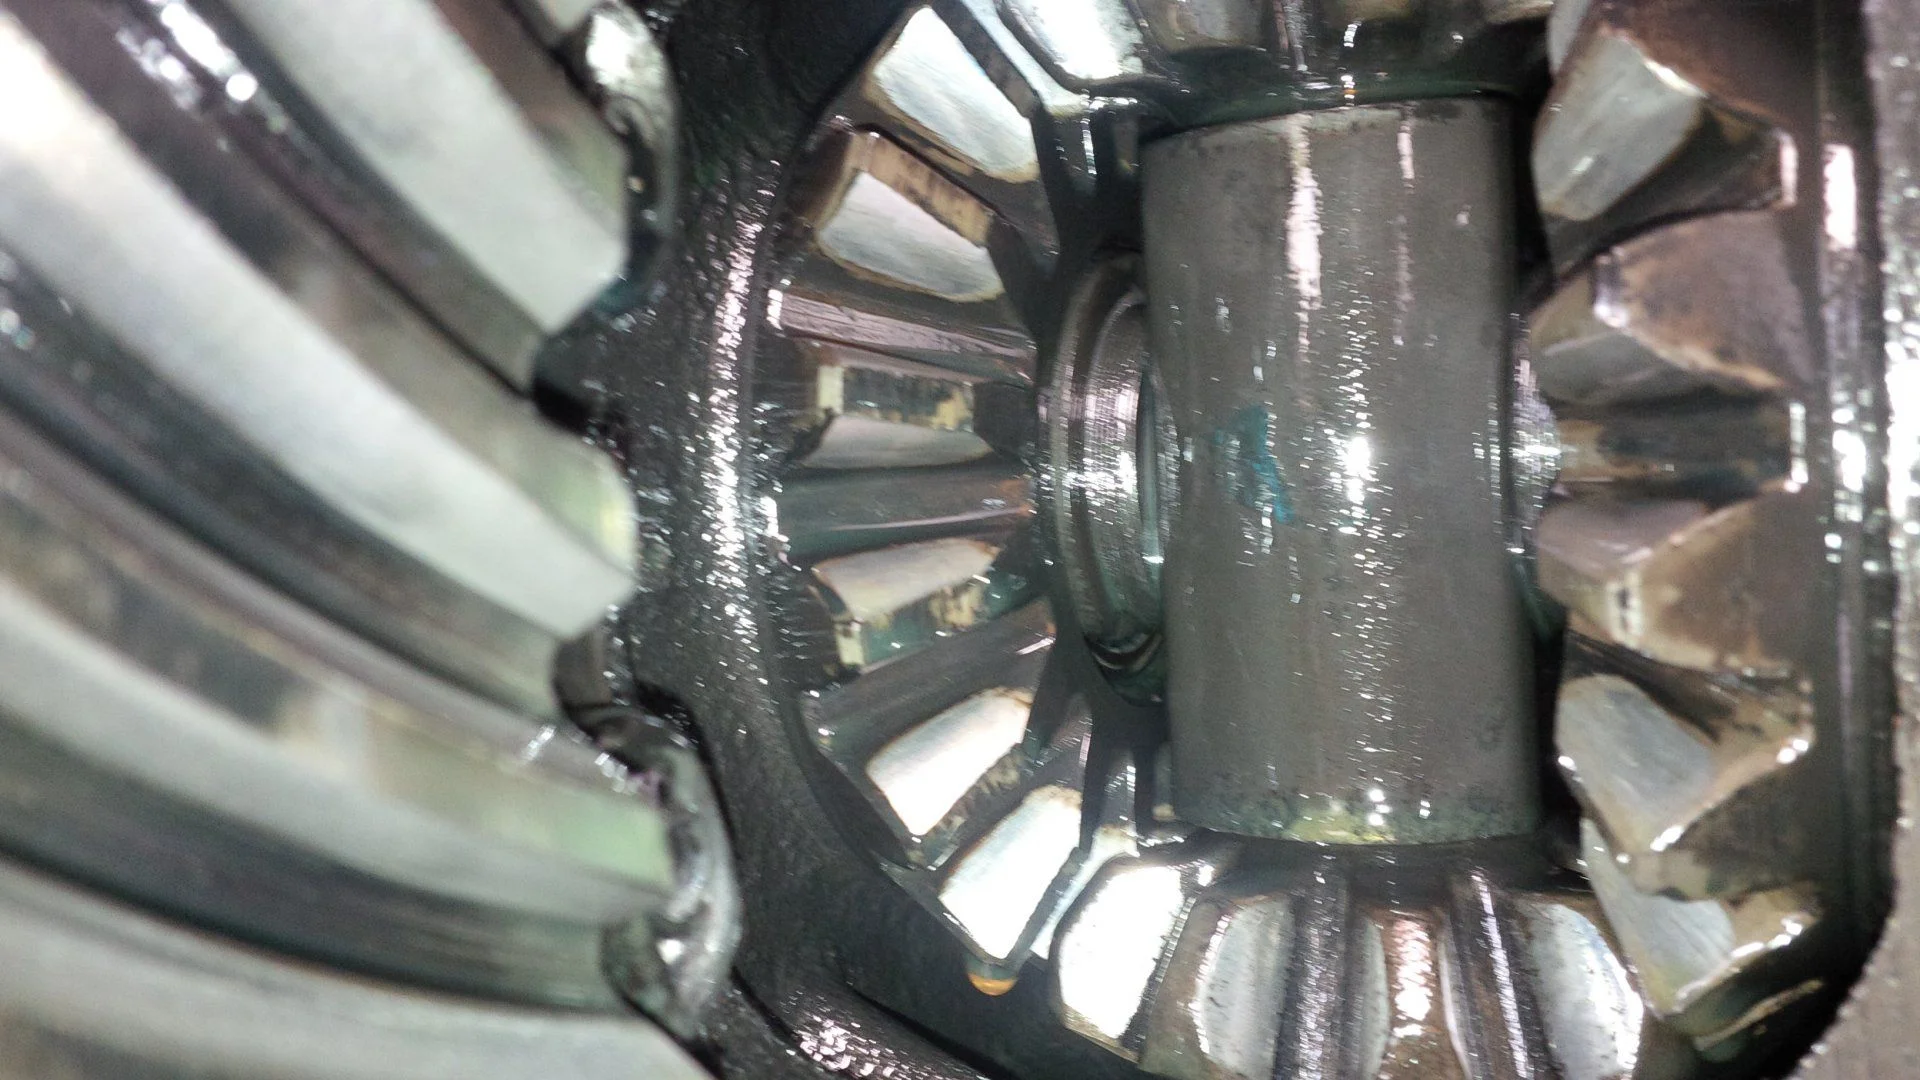
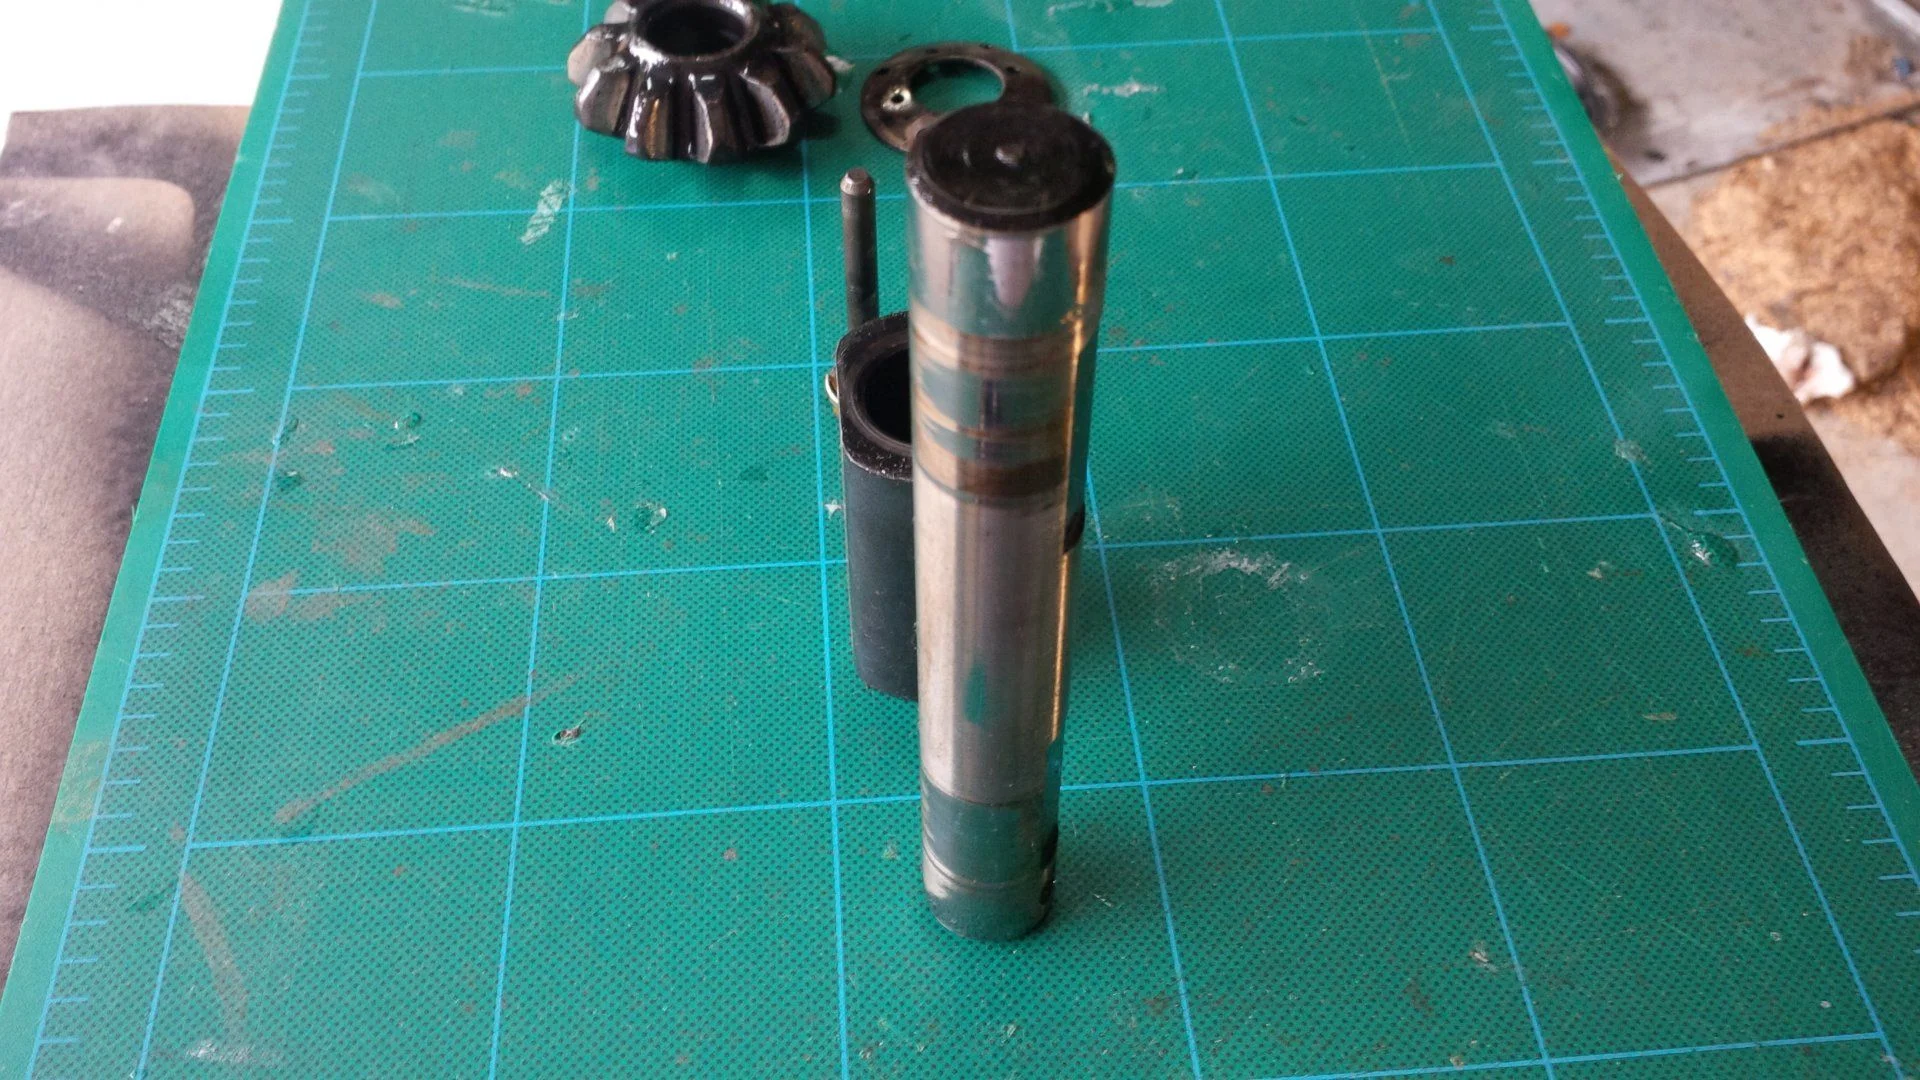
Removed the pinion shaft and spacer

full


The pinion shaft spacer appears to be worn since there was a big enough gap between it and the thrust washer for a flat head screw driver to be inserted.
full


full


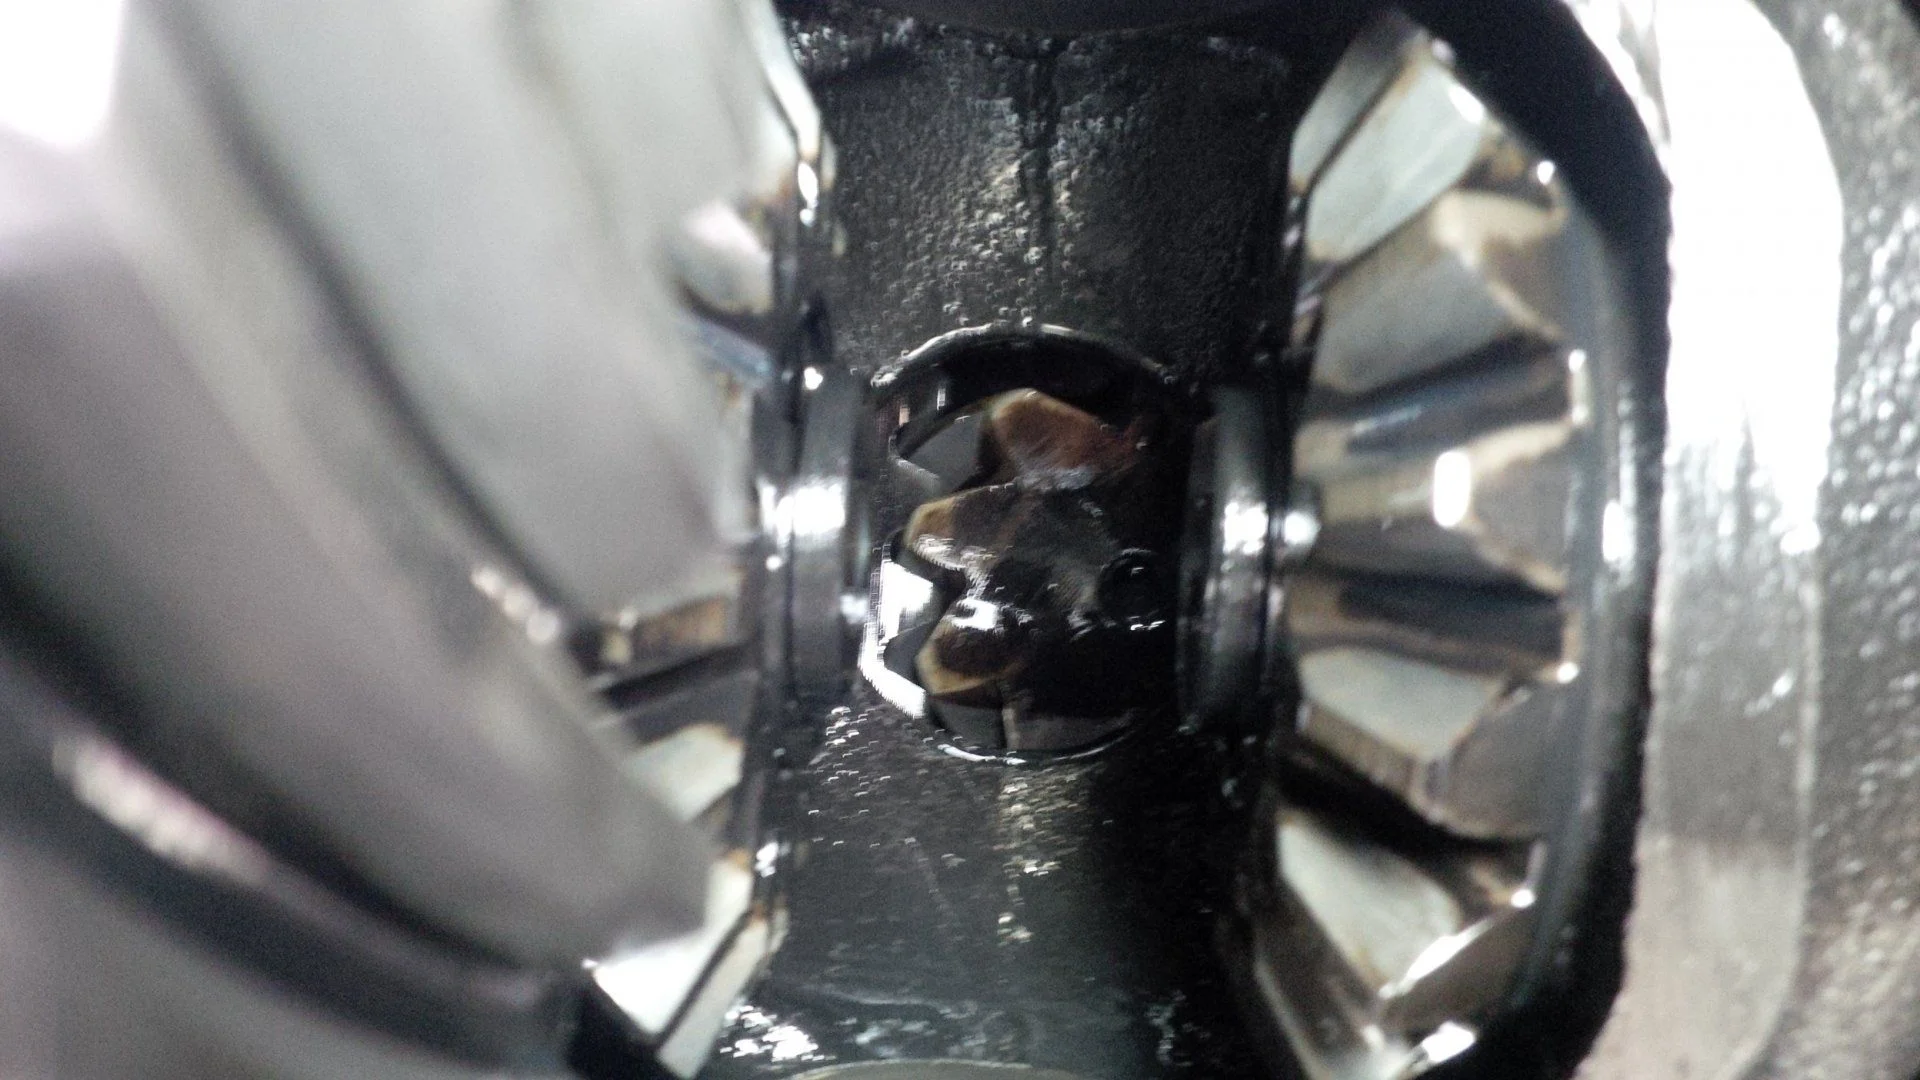
then removed top gear and thrust washer
full


removed bottom gear and thrust washer. The thrust washer look pretty worn out and need replacing.The spider gears all appear to be in good condition.
full


removed top gear and thrust washer

full


removed 'C' clip and left side gear
full


removed 'C' clip and right side gear
full


The ring gear has a lot of rotational play, where as the pinion gear is solid with no lateral, vertical or longitudinal play, so I think we're good there. From the looks of things the PO had the diff serviced at some point in time, however, the tolerances were not set properly in accordance with the FSM specifications.
full


propped up the third member
full

I removed all bolts and washers, unfortunately I was not able to free the 3rd member from the axle, used some force with a mallet, screw driver, pry bar to no avail.

Do you guys have suggestions on how to separate these two units?
full
 
Put the truck down on the ground, put one upper nut on loosely (a couple of threads), put a bottle jack under the forward end of the 3rd, jack it up enough to put some decent pressure on the front end of the 3rd, and check it in the morning. Gravity performs some sort of magic overnight.

Do you guys have suggestions on how to separate these two units?
 
Put the truck down on the ground, put one upper nut on loosely (a couple of threads), put a bottle jack under the forward end of the 3rd, jack it up enough to put some decent pressure on the front end of the 3rd, and check it in the morning. Gravity performs some sort of magic overnight.

Thanks Geezer! I'll try it.:beer:
 
By the way, you still seem to have one nut installed in that last photo. Just in case you missed that one. :D
 
Yes, upward force with the jack on the flange yoke area. It doesn't need much, just enough to put some upward force on the end. You can also give the 3rd a couple whacks with a 5lb hammer to help jar it loose. I just pulled one yesterday from a CRUSTY FJ62 housing it was less than a minute with pressure to get it to crack loose at the bottom. If it needs more, I use an old 1" wide wood chisel to get in between the 3rd and the axle housing at the bottom with the jack pushing up and that frees it too.
 
Yes, upward force with the jack on the flange yoke area. It doesn't need much, just enough to put some upward force on the end. You can also give the 3rd a couple whacks with a 5lb hammer to help jar it loose. I just pulled one yesterday from a CRUSTY FJ62 housing it was less than a minute with pressure to get it to crack loose at the bottom. If it needs more, I use an old 1" wide wood chisel to get in between the 3rd and the axle housing at the bottom with the jack pushing up and that frees it too.

Stump - Thanks for the recommendation it worked like a charm!

By the way, you still seem to have one nut installed in that last photo. Just in case you missed that one. :D

Geezer - Thanks for the recommendation it worked like a charm!
 
I removed the third member today without a glitch with recommendations from @spotcruiser and @Stumpalama .
Moved the third member to bench and attached to the vice and got it ready for some adjustments to tighten the ring and pinion gears in order to minimize the excessive gear noise.

full


full


I marked the carrier bearing adjuster rings prior to making any adjustments...
full


...next I loosened the carrier bearing bolts to free-up the adjusting ring for easier movement while adjusting the Carrier Bearing Pre-Load. Also removed the lock-tab bolt on both sides. I adjusted both side two notches each time until I reached 6 notches on each side and it made hardly any difference. When I rotate the pinion and it makes contact with the ring gear there's a loud clunk. I'm wondering whether or not the pinion is properly adjusted.
full
I


Here's a vid in which you can hear the clunk while rotating the pinion gear, this was after adjusting the Carrier Bearing Pre-Load.

 
Follow the manual. It explains exactly how to set the diff. A lot of pinion backlash only means that you need to move the ring gear closer to the pinion or the pinion needs to move towards the ring gear. Checking gear mesh is what will tell you what you need to change.
 
Last edited:

Users who are viewing this thread

Back
Top Bottom