This is what the fsm has to say about it

Navigation
Install the app
How to install the app on iOS
Follow along with the video below to see how to install our site as a web app on your home screen.
Note: This feature may not be available in some browsers.
More options
Style variation
You are using an out of date browser. It may not display this or other websites correctly.
You should upgrade or use an alternative browser.
You should upgrade or use an alternative browser.
Builds My 78' Barn find FJ45
- Thread starter Michael B
- Start date
This site may earn a commission from merchant affiliate
links, including eBay, Amazon, Skimlinks, and others.
More options
Who Replied?Haha that's awesome! Have you had any progress with the vsv yet?
Michael B
SILVER Star
- Thread starter
- #186
I have the 12HT installed and running but I ran into a little snag. After the installation I could not get the clutch disk to disengage from the fly wheel. When I finally had exhausted every option to resolve this issue, without removing the transmission and t-case, I gave up and pulled them last weekend.
The motor came with a newly installed clutch and throw out bearing. During the install I noticed that the throw out bearing was different from the original one on the 2H. So I used the new one. (It is always a good idea to keep the clutch, pressure plate and throw out bearing together when working with used parts). I also noticed the clutch slave cylinder was different. So I used it. When I examined the clutch fork I could see no difference, but it was in better condition than mine. So I used it. All of this was used with my original 2H bell housing.
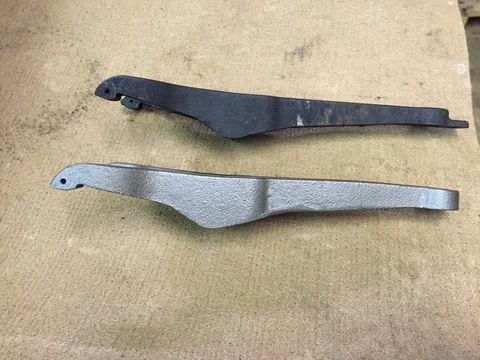
I should have known better! It turns out the clutch fork is slightly different from my original. (Another good rule of thumb is to always use the clutch fork that came with the bell housing being used). When examined side by side it is difficult to see the difference between the two. But the depth of the pivot ball socket is deeper on one than the other. And there in lies my ultimate problem with my set up. Apparently there was enough difference in the depth to keep the throw out bearing from applying sufficient pressure to the pressure plate to disengage the clutch disk. There was also a difference between the slave cylinders. My original one has a longer cylinder than the new one did. The original one is going back on with the clutch fork.
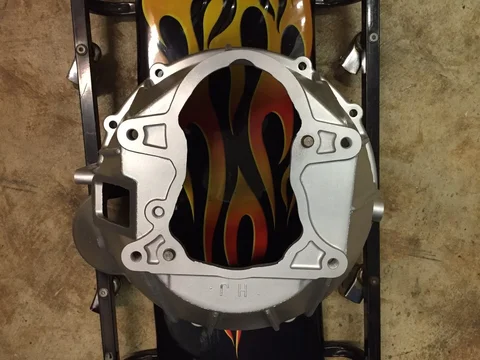
Tomorrow I will install the transmission and t-case. While I had everything apart I decided to clean up a few annoying problems. My fuel cell had developed a small leak, so it will be going out to the radiator shop for repair. My original t-case had a very troubling leak. It was leaking from the split case joint. Instead of rebuilding the t-case at this time I'm opting to install the transmission, after swapping out the top plates, and t-case that came with the motor. I also blasted and painted the bell housing and clutch fork before installation. (In the pictures below the shiny new looking clutch for is my original after painting).
Hopefully by the end of next week I will have the truck back on the road again. I just hate it when I shoot myself in the foot!!!


That sucks! It's not the easiest engine/tranny to pull. I feel your pain... Hopefully you can get it sorted asap and enjoy it!
Looking at the pictures, i wish i have a blasting cabinet or cheap and easy access to one. It all cleans up so nice.
Have you got the VSV sorted yet?
Mark
Looking at the pictures, i wish i have a blasting cabinet or cheap and easy access to one. It all cleans up so nice.
Have you got the VSV sorted yet?
Mark
Michael B
SILVER Star
- Thread starter
- #188
It was not fun pulling it (3 HRS), but it was really no fun installing it (8 HRS). There are a few more items to take care of and this job will be complete. I need to install both drive shafts, re-connect the starter wire, battery cable and install the fuel tank (which is out for repair) then the seats.
I am enjoying my blasting cabinet though! It's nice to just plug in the air hit the power switch for the light and vacuum and go. Since I'm using glass bead it works very nicely on aluminum.
I have another VSV number from Beno that I have ordered. I don't know how it operates yet. Beno had no information and neither did the Toyota parts guy. All I know is it is 12v. It should be here tomorrow, so we will find out!
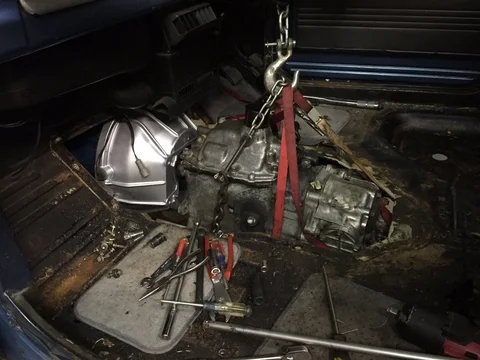
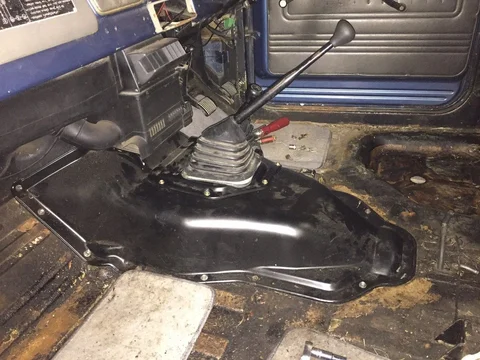
Below are more pictures from the transmission install. I'm getting too old for this crap!!!!!


Michael B
SILVER Star
- Thread starter
- #190
Michael B
SILVER Star
- Thread starter
- #191
I was able to get everything assembled this afternoon. But it took longer than expected. While trying to install the driveshafts I discovered that the flanges on my new t-case had already been changed over to the smaller FJ40 style flange. The problem for me is that I had already swapped my driveshaft flanges to the larger FJ60 flanges. Since I will be installing FJ70 axles later and they use the larger flange I swapped the t-case flanges. Eventually my drive shaft will have the same size flanges on both ends. All of this work put my completion time after dark. So the test drive will have to wait for tomorrow.
- Joined
- Sep 25, 2011
- Threads
- 89
- Messages
- 3,678
- Location
- Harbour City, the New Southern Wales
- Website
- www.freewayoneentertainment.com
Keen to hear how that 12H-T runs mate!
Michael B
SILVER Star
- Thread starter
- #193
Thanks Cult! Me too!! It seems like one delay after another keeping me from driving it. There was water left in the fuel tank I could not pour out before installing the tank. So now I'm working on removing the water. I also want to install and test my new VSV. It shouldn't be much longer. I have an appointment on Friday to have the exhaust installed. I usually work better with a deadline!


- Joined
- Sep 25, 2011
- Threads
- 89
- Messages
- 3,678
- Location
- Harbour City, the New Southern Wales
- Website
- www.freewayoneentertainment.com
When I cleaned my tank [with electrolysis], after hosing it out I set it in the sun for a full day. Was bone dry by the end. Give that a shot.
Michael B
SILVER Star
- Thread starter
- #195
That's a great idea Cult except that it is winter here and not enough sunshine/heat to cause evaporation. I think I have it handled. I put fuel in the tank, about 4 gallons, and let the water settle to the bottom. Then I added 16 oz of isopropyl alcohol to absorb the water. Then I drained the tank. I'll put more fuel in the tank along with more alcohol and it should be a done deal.
- Joined
- Sep 25, 2011
- Threads
- 89
- Messages
- 3,678
- Location
- Harbour City, the New Southern Wales
- Website
- www.freewayoneentertainment.com
Sweet as. Or set the fuel on fire and get it warm that way 
Michael B
SILVER Star
- Thread starter
- #198
I installed the new 12v VSV from a part number Beno supplied to me. It looks just like the 24v unit that came on the motor and works like I need it to. It is normally open until 12v is applied with a key hot wire (the old 12v wire that ran to the carb on the original 2F motor). Then it shuts the valve until power drops (when the key is turned off) porting vacuum to shut down the motor.


Nice! That should do the trick!
Can't be to long now....
Can't be to long now....
Similar threads
Users who are viewing this thread
Total: 1 (members: 0, guests: 1)


