Johnson Furnace # 6-8384 is mine!!!

This site may earn a commission from merchant affiliate
links, including eBay, Amazon, Skimlinks, and others.

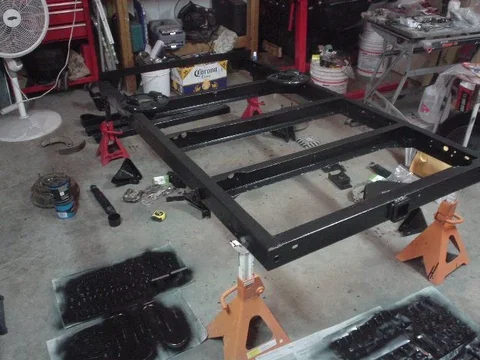
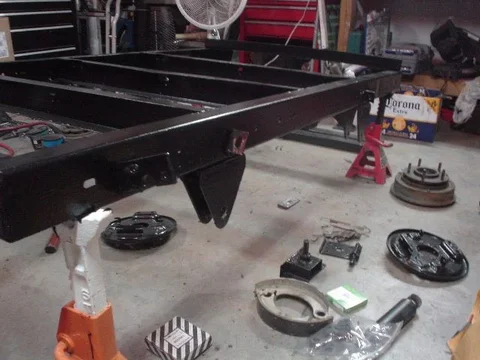
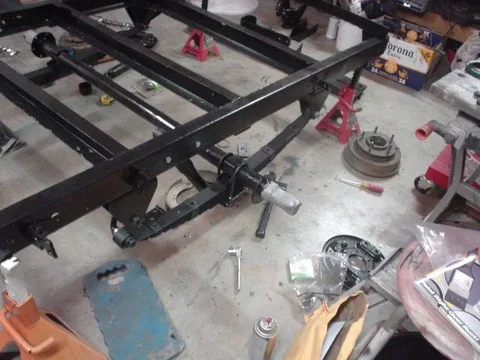
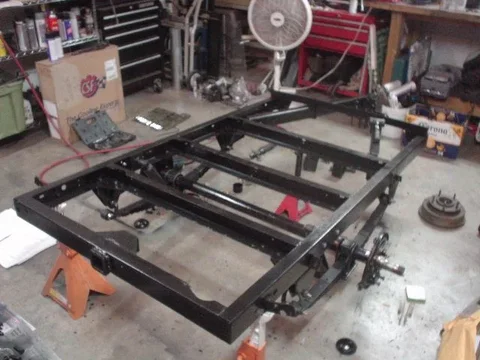
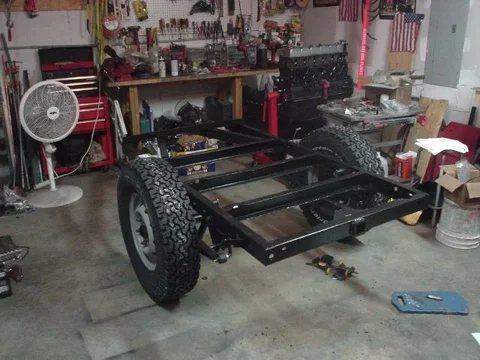
Got a coat of chassis black on just about everything.

BTW - listen to your wives. When they say they are bad painters it is not because they do not want to do it (well maybe) but they are probably bad painters. Let's just say some of the POR15 from last night had to be scarped off. It will not work properly if it is put down a 1/4 inch thick. :rolleyes:

I think my goal of having a rolling chassis by Sunday is a bit too optimistic :doh:
 
Chassis black is done.
Tomorrow after work I have to wire brush some of the hardware and the spring packs (I am not going to take them apart) and spray them with a various selection of rattle can. I hope that will bring to assembly Saturday/Sunday.
 
Chassis black is done.
... and spray them with a various selection of rattle can. I hope that will bring to assembly Saturday/Sunday.

It was my understanding that 'rattle can' would not adhere to POR finish after the POR cured for more than an hour or two. So what is your method to get the paint to stick?
 
It was my understanding that 'rattle can' would not adhere to POR finish after the POR cured for more than an hour or two. So what is your method to get the paint to stick?

He didn't POR those parts.

Perzactly. Just the spring packs, bolts and few little items is all.
 
I am freakin' beat.

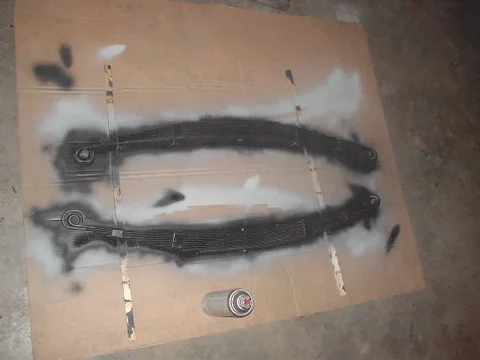
Cleaned the spring packs the best I could with a wire brush on the grinder and primed and painted them.

09-18-09 003.webp

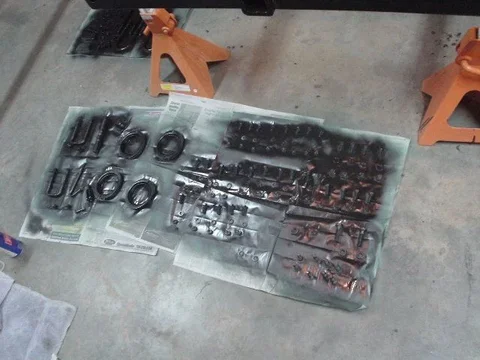
I also got all the hardware blasted, cleaned, primed with self etching primer and then coated with Zero-rust.

09-18-09 001.webp

09-18-09 002.webp

I still have to flip everything for the final coats of paint but I made some real head way tonight.
09-18-09 003.webp
09-18-09 001.webp
09-18-09 002.webp
 
I also laid everything out kinda where it belongs so I will be ready for assembly withing the next 48 hours.

09-18-09 004.webp

I went through the manual and I think I have all the hardware I need to get it a roller again. That will lack ice.

In between watching paint dry tomorrow, I plan on dropping off the recycling at the dump, going to get the BFG tires at Sams Club and have them mounted and try to fix the oil leak on the 40.

Should be a full rich day if I can crawl out of bed in time.
09-18-09 004.webp
 
Well I am fxxxing tired!

When I got home from running the recycling and going to Sams to find out that mine does not stock the BFGs I wanted for the trailer and would not order them, I found this waiting for me on the front steps:

09-19-09 001.webp

Thanks Kilo!

It was a bit different from mine but will work fine. Any idea what year it came off of? I think mine may have been replaced with a newer one at some time during the life of the trailer.

I hung the spring mounts and discovered I was missing some bolts.

09-19-09 002.webp

I thought I did a decent inventory but I guess I missed some and I ran to Ace and when I got back at it I discovered there were not holes in some places the newer manual said there were supposed to be holes. I ended up adding a few items to my stock. :meh:

Eventually, I got the spring packs on and the axle back in place. No spring over for me.

09-19-09 005.webp
09-19-09 001.webp
09-19-09 002.webp
09-19-09 005.webp
 
A helpful hint:

While putting the rear U shackle (or U-bolt) in place I noticed that, although it was tight the shackle was not tight against the mount:

09-19-09 003.webp

I loosened the bearing and discovered I needed to hold the shackle hard against the mount when I started to thread the bearing on. TahDah, no more gap:

09-19-09 004.webp

I started feeling a little loopy and realized that the brakes I have were not detailed in the newer M416 manual. I did not print the old one and could not get my head around the functionality so I went ahead and put the drawbars together. This went easy and then I realized I was missing something...the fxxxing "drawbar couple bracket" aka the landing leg mount! I was befuddled, worried, aghast!:confused: Had it been lost at the sand blaster?:hhmm: Surely not, it was small enough I would have blasted it myself..WTF:confused::hhmm::confused:

Then I thought I did not remember blasting it...:idea:

I found it in my parts washer:doh:

09-19-09 007.webp

Apparently it has been in there a couple months along with an FJ40 drag link part that I had a couple of so it wasn't missed :lol:
09-19-09 003.webp
09-19-09 004.webp
09-19-09 007.webp
 
As I mentioned i was having trouble getting my head around the brakes since the newer trailers are a little different. Check out the older manual if you have any trouble. A good blow up in there of the assembly.

brakes.webp
brakes.webp
 
Brakes are on. that was a bit cR0nfusing. But it is done. I screwed off most of the day so I did not get as far as I hoped but that is the way it goes :cheers:
 
Man Hugh, you work fast! Nice job.
Funny you would say that...most guys thing I am like molasses in January! Thanks
 
I found this waiting for me on the front steps:

View attachment 356619

Thanks Kilo!

It was a bit different from mine but will work fine. Any idea what year it came off of? I think mine may have been replaced with a newer one at some time during the life of the trailer.

No problem!;) Did it work or will it work for you? I'm not sure what year mine is? It only had one small data plate with no info stamped on it? Hope it works for you!! Keep it up!
 
No problem!;) Did it work or will it work for you? I'm not sure what year mine is? It only had one small data plate with no info stamped on it? Hope it works for you!! Keep it up!
The engineering is similar enough it should. I have it soaking in PB blaster now to try to free up the adjustment knob.
 
Well, like I mentioned at the end of the OP, I am going to try and do some of the stuff boctor did >here<.

I am going to start by tearing it apart and getting it blasted and plan on POR15ing the whole thing after. The interior will get Rhino Lined. When I put ir back together it will be SOA since that is EZ PZ.
For sure the frame for the RTT like boctor. I like the idea of the kitchenette too. The :princess: and I were discussing adding a shower pump and a large water tank, a propane tank and lights. For sure LED running and brake lights in those bad ass military buckets. Not sure how long it will take

You might want to do this yourself to save the $$$. If you do make sure you leave room for the tailgate to close. I saw a Rhino lined one where the body shop that did it did such a beautiful job that there was not enough room left for the tailgate to close. :doh:
 
You might want to do this yourself to save the $$$. If you do make sure you leave room for the tailgate to close. I saw a Rhino lined one where the body shop that did it did such a beautiful job that there was not enough room left for the tailgate to close. :doh:
That is actually a good point. My tailgate is pretty tight.
 
Made some additional progress this weekend. The brake cable is in place and all the cotter pins are where they should be and everything is tight. For the cable I just WD-40ed the s*** out of it and then ran the cable sleeve back and forth on them until everything moved freely. Then I lubed it all with the PB Blaster lube/anti-corrosion spray. I need to adjust the brakes and do something with a brake handle. Sadly, the one I got from kilo disintegrated while I was trying to free it. There must have been a design flaw in those. The adjuster seems to hold water and rust out.

I ordered one of the $5 ones and I am going to see if I can use the $5 handle and parts from the other two to come up with a solution.

Finally, the last of the blasting and painting will have to wait a while. Going on vacation to VA via the Outer Banks for 10 days, then a wedding the weekend after that. I will maybe try to get the last four parts to the blaster after that. In the mean time I can hear the rust eating through the tub!

And my wife just brought me a dirty martini.
 

Users who are viewing this thread

Back
Top Bottom