I'm still finalizing the last few pieces of this upgrade but wanted to share the details with folks. I've seen a few other brake upgrades that involve different rotors and a bit of machining but in my opinion this is the easiest way to get bigger brakes without the extra work. I've seen a few guys running this hub/rotor/caliper setup now for quite some time and haven't seen any reported issues. I've yet to see a detailed write-up using this configuration so that's where I come in!
Let's start by buying some stuff. You'll want to make sure you get the calipers from the earlier 5th gens (2010-2013) with 14WA stamped into the caliper. The later year models switched to a 14mm mounting bolt vs our 12mm mounting bolt. These will have 14WB stamped into the caliper. Caliper specs:
5TH GEN FRONT CALIPER (14WA stamping, For 338mm rotor (All Trims)
Toyota Part #: 47750-60300 - LH, 47730-60300 - RH
Mounting Bolt: 12mm
Piston Size: 48mm
Bleeder Size: M7 x 1.0
Inlet Size: M10 x 1.0
And here are the specs on the rotor:
5TH GEN FRONT ROTOR (For 14WA front caliper (All Trims))
Toyota Part #: 43512-60191
Outer Diameter: 338mm
Thickness: 31.8mm
Hub hole: 108mm
Bolt hole: 14.4mm
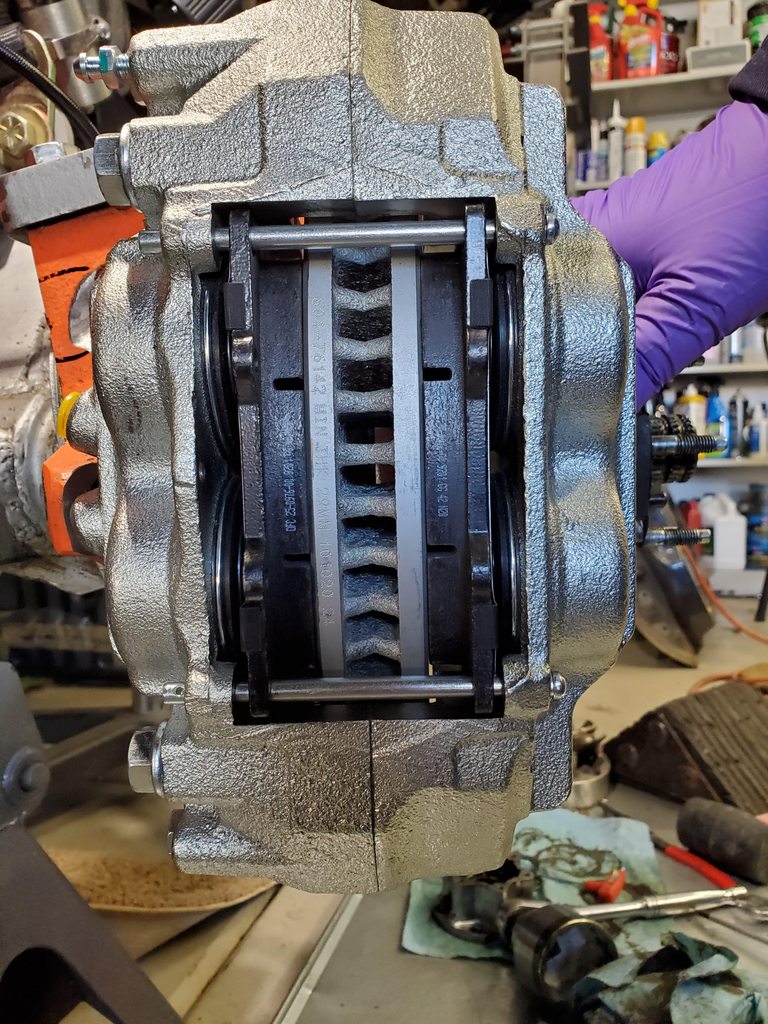
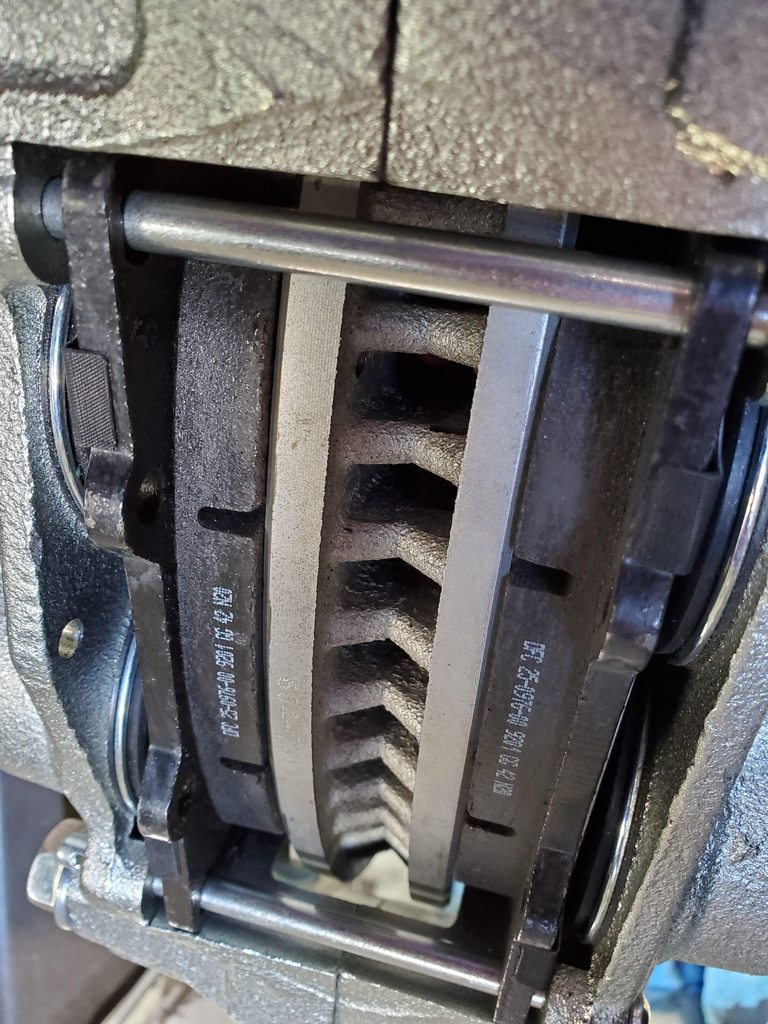
I've read of issues with sticking calipers whether new OEM and reman so I just decided to go with aftermarket to take advantage of the long warranties. For the calipers I went with new aftermarket (not reman) Raybestos units. Part numbers are FRC12551N and FRC12552N.
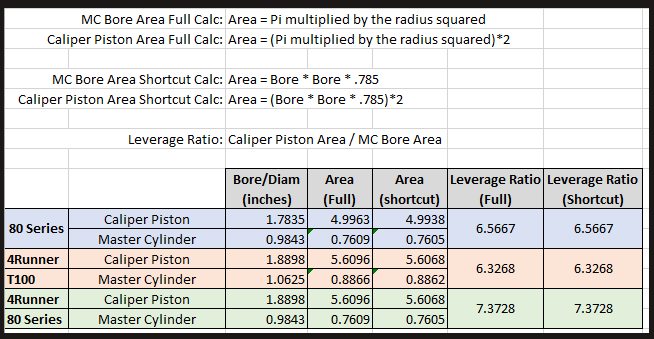
Here's a comparison of the stock 80 calipers and the 4Runner calipers. The 80 Series Caliper Piston OD is 45.3mm or 1.7835". The 4Runner Caliper Piston OD is 48mm or 1.8898". Credit to @Dirty Koala for providing the math and specs on these things.
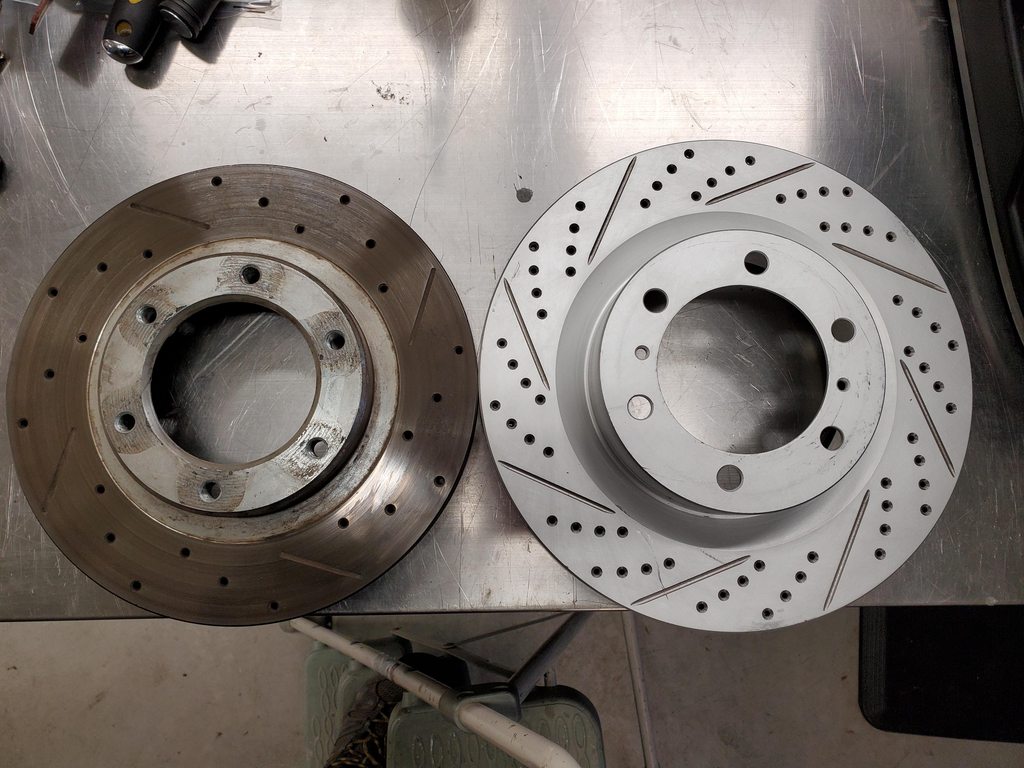
For rotors I also went with aftermarket from R1. I went with their Carbon GeoMet cross drilled and slotted version because I hate money and like flashy parts. 311mm/12.2" vs 338mm/13.3", a whole inch bigger.
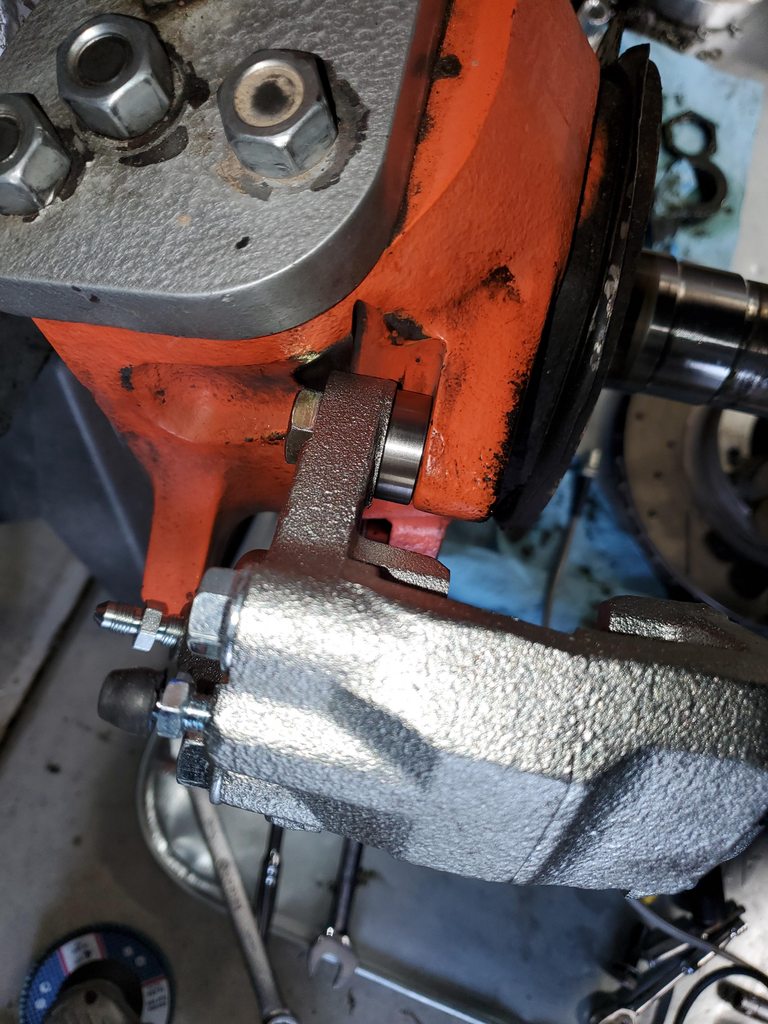
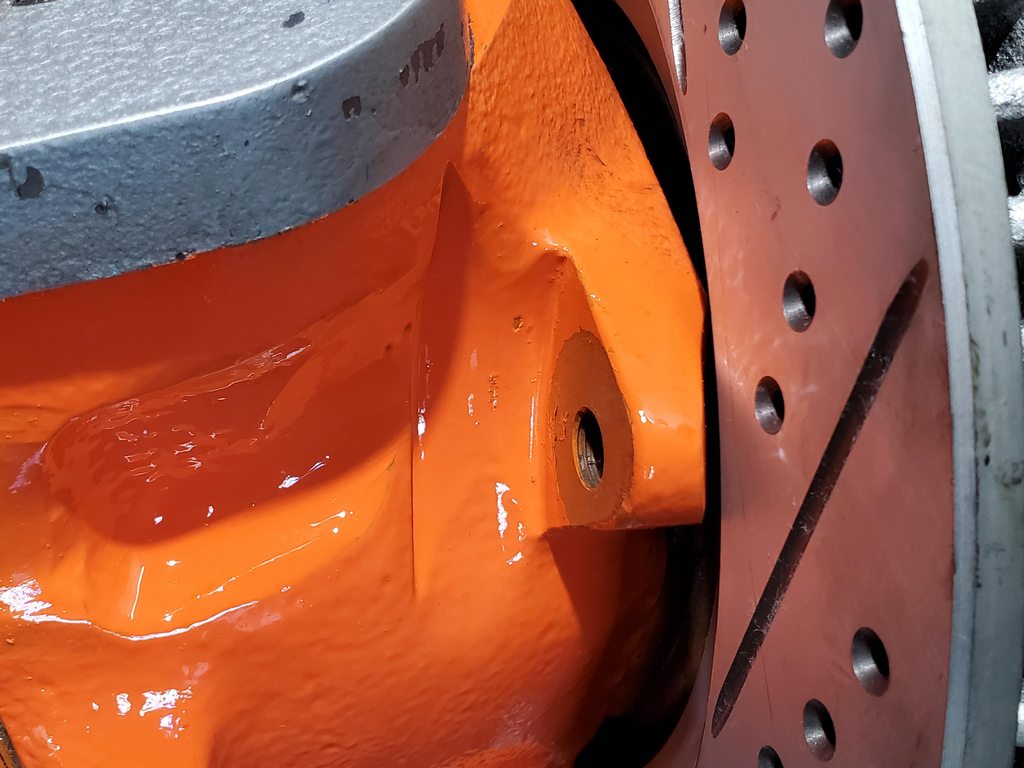
First step is figuring out the caliper mounting. Now, the 4Runner caliper will bolt up directly to the 80 knuckles no problem. But because the rotor has a deeper hat and we're not doing any machining of the hub, the rotor will sit DEEPER over the knuckle compared to the 80 rotor. This then means the caliper needs to be spaced BACK. Based on what I heard from other that have done this, the caliper needs to be spaced back about 10mm.
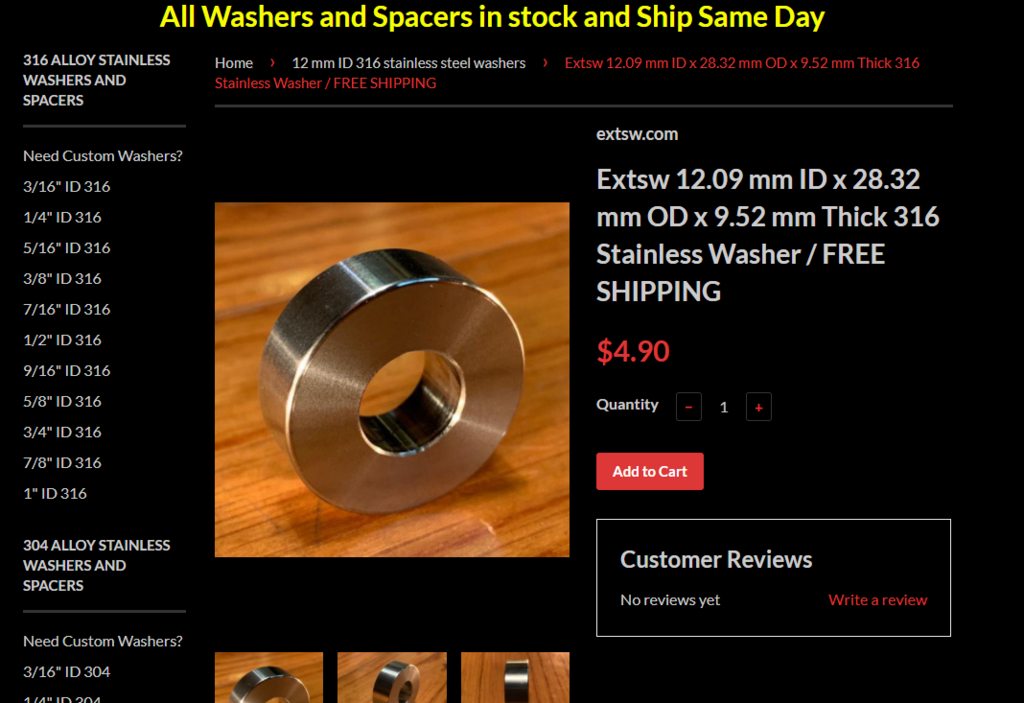
On the FB 80 page someone found these machined spacers that looked to do the trick. They have an ID of 12.09mm (perfect for the mounting bolt) and are 9.52mm thick.
Here's the link: 12 mm ID 316 stainless washers spacers - https://www.extsw.com/collections/12mm-id-316 Be sure to order a few extras as you will always need these to mount your caliper.
You will also need longer bolts. I used M12-1.25 x 45mm 10.9 bolts. Here is the caliper bolted up to the knuckle with the machined spacers and longer bolts.
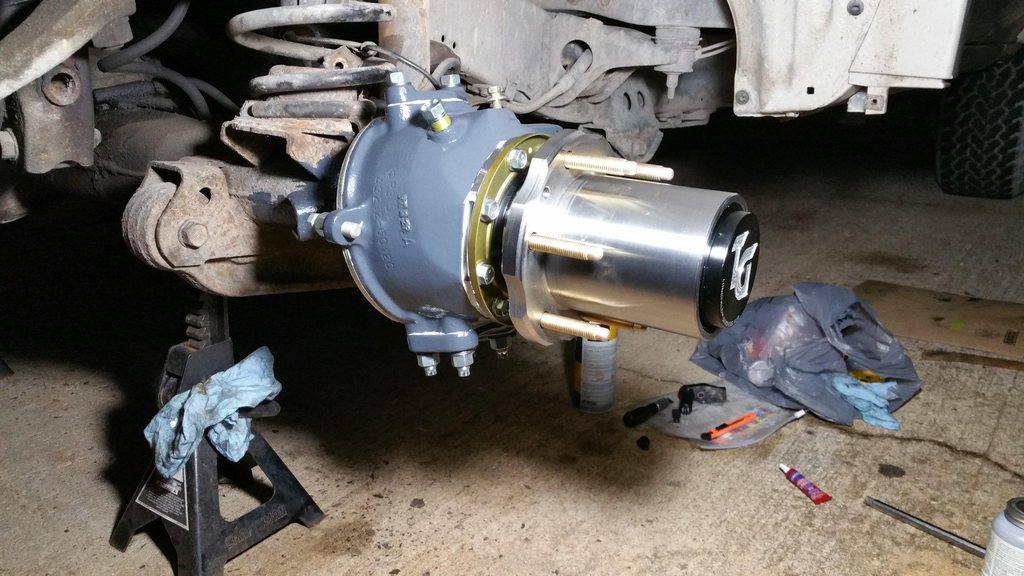
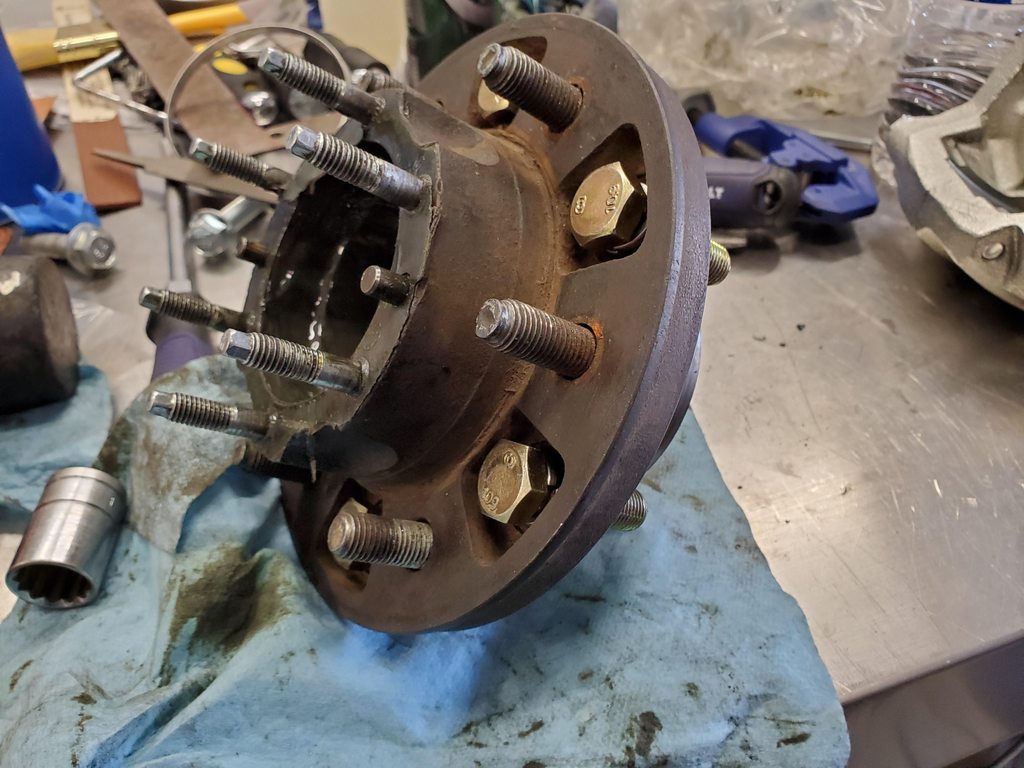
The next step is figuring out how to mount the rotor to the hub. The stock 80 rotor has threaded holes and bolts up behind the hub. The 5th gen 4Runner rotors are slip-fit in stock configuration. Our hubs will not work for slip-fit unless you do a lot of machine work to the hubs, something I didn't want to do. So we're gonna bolt them up in a lugcentric configuration.
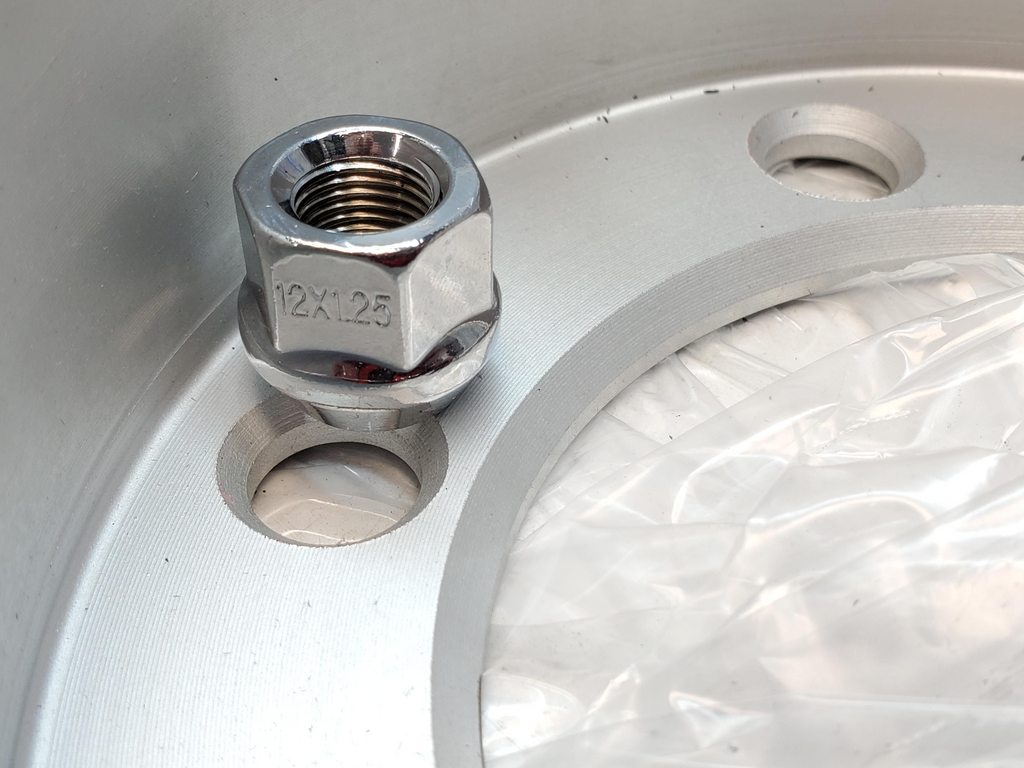
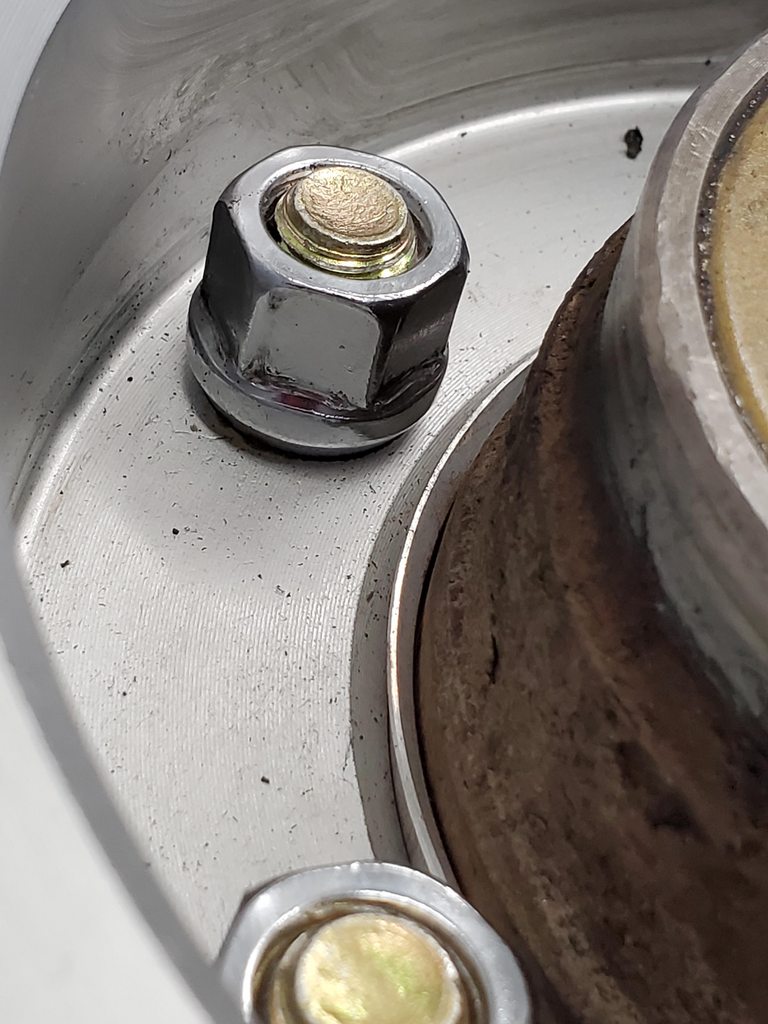
For this I used longer M12-1.25 x 40mm bolts and M12-1.25 open-ended acorn bulge lug nuts. Here's the hub taken apart with longer bolts.
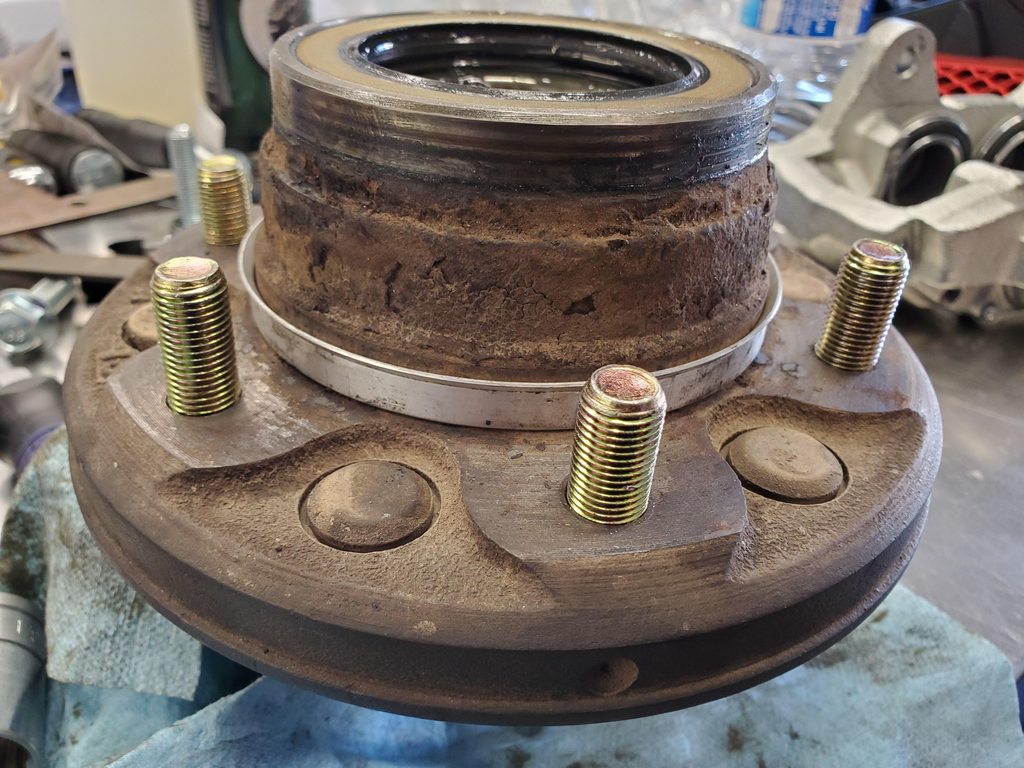
Back side of the hub. You'll notice I had a hub centering ring here. Based on what I read from others, they recommended 108mm to 106mm rings to help center the hub over the rotor. However I feel this isn't needed because of the lug centric nuts we're using.
The back side of the rotor showing the beveled hole which matches nicely with the acorn bulge lugnuts.
I used orange Loctite and cranked them down to about 14 3/4 Ugga Duggas. Here you can see the hub centering ring still installed.
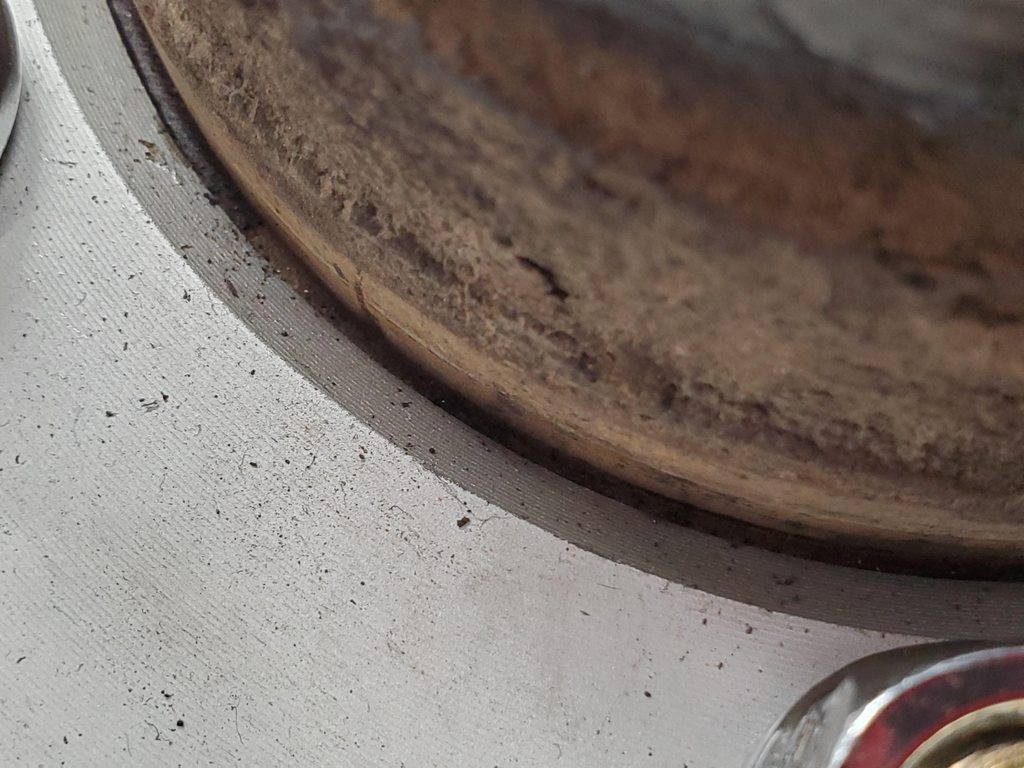
Here's the approx 2mm difference between the hub and the rotor with the ring removed after you tighten everything down. As I mentioned, several people have been running these for a few years now with no issue. It's really no different than when you install aftermarket wheels in a lugcentric setup vs OEM wheels that are hubcentric.
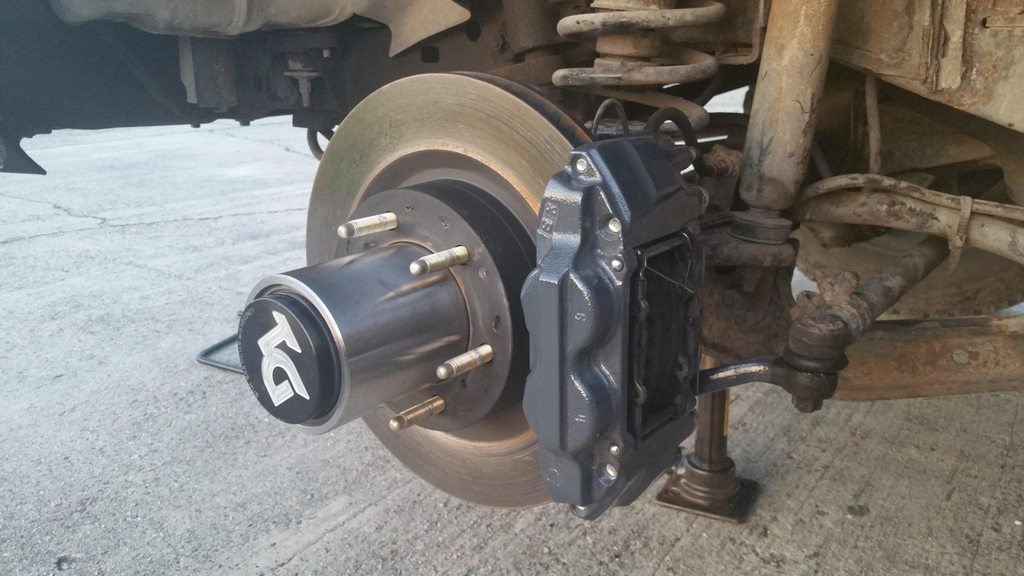
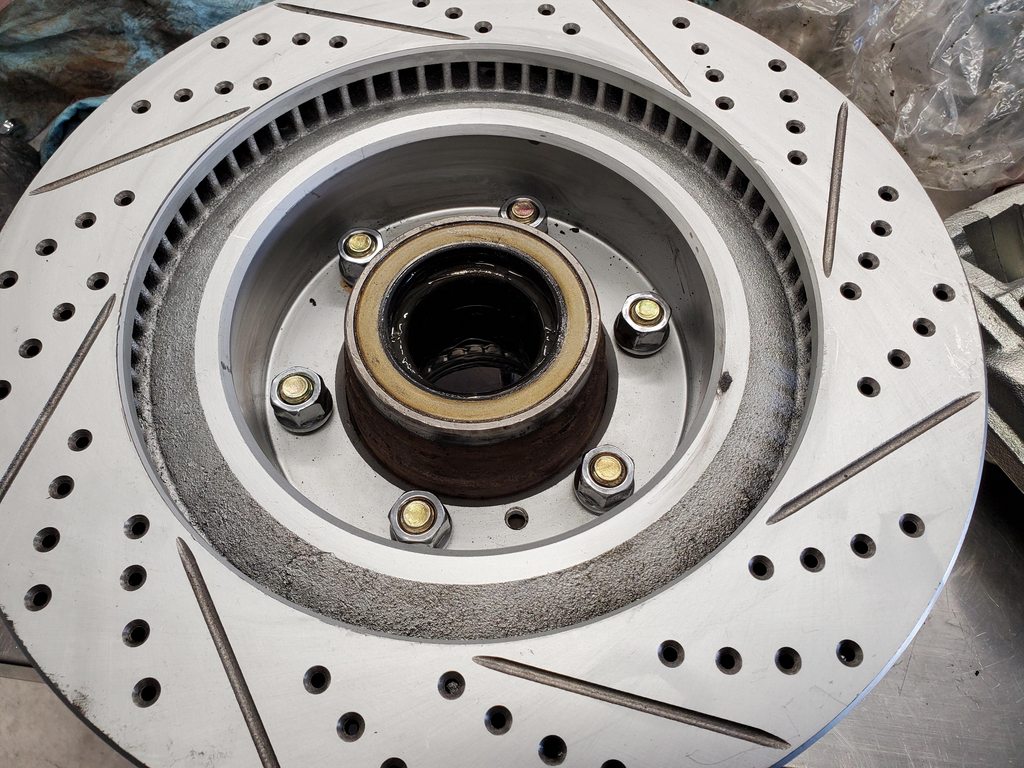
And the final assembly
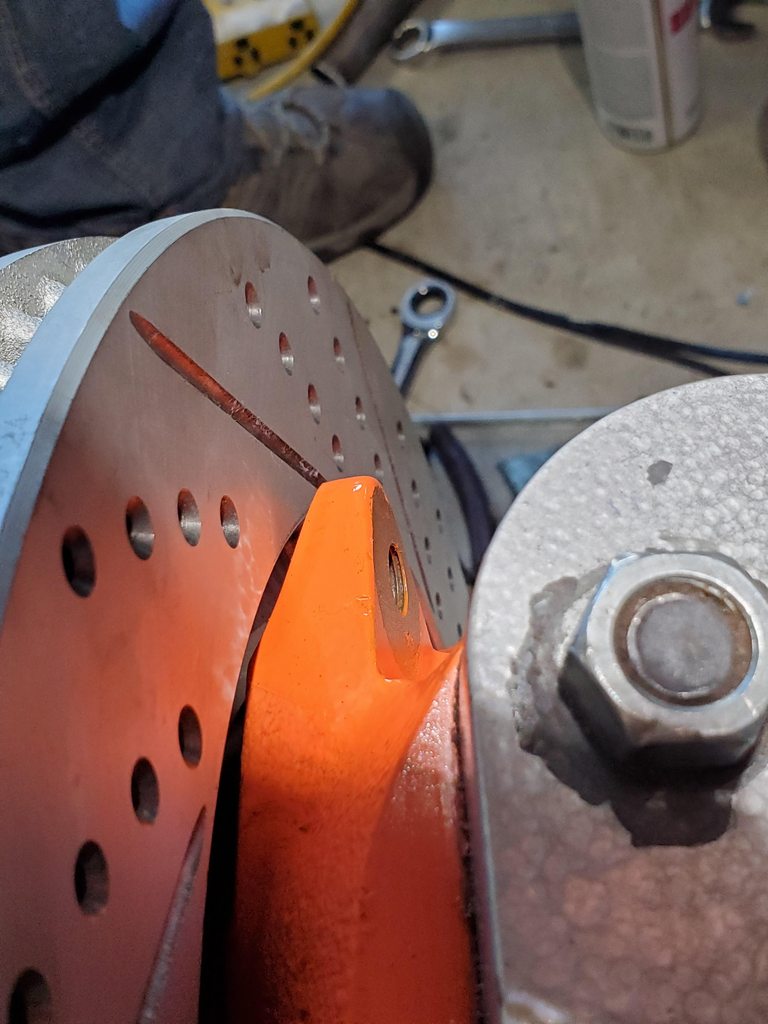
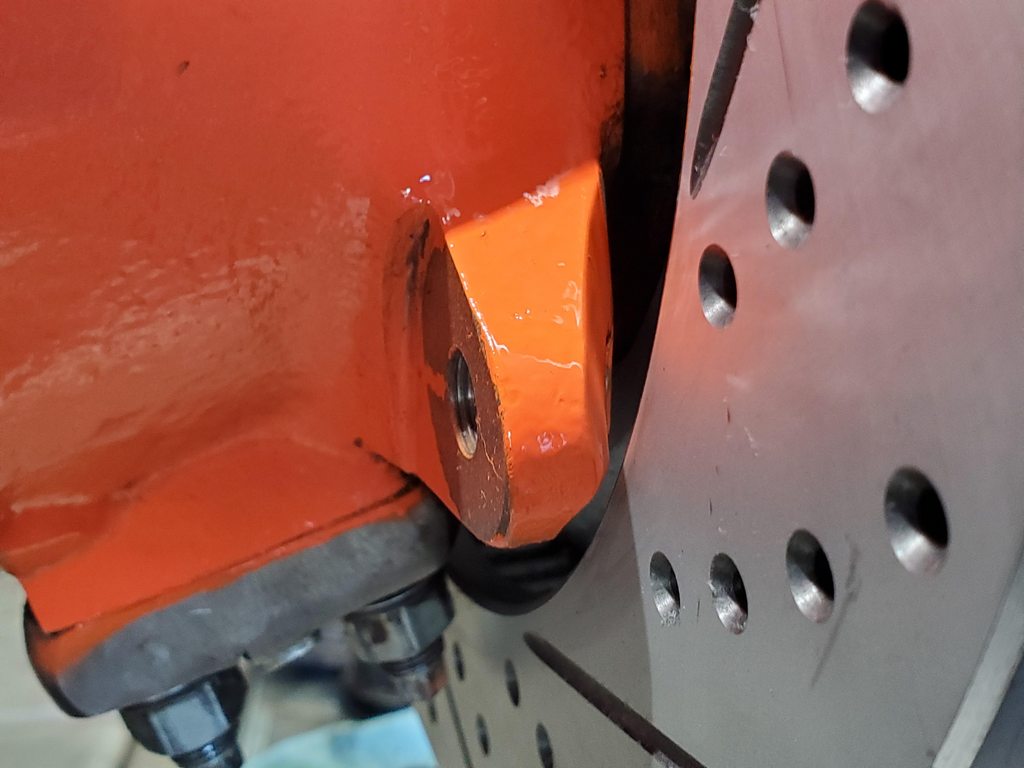
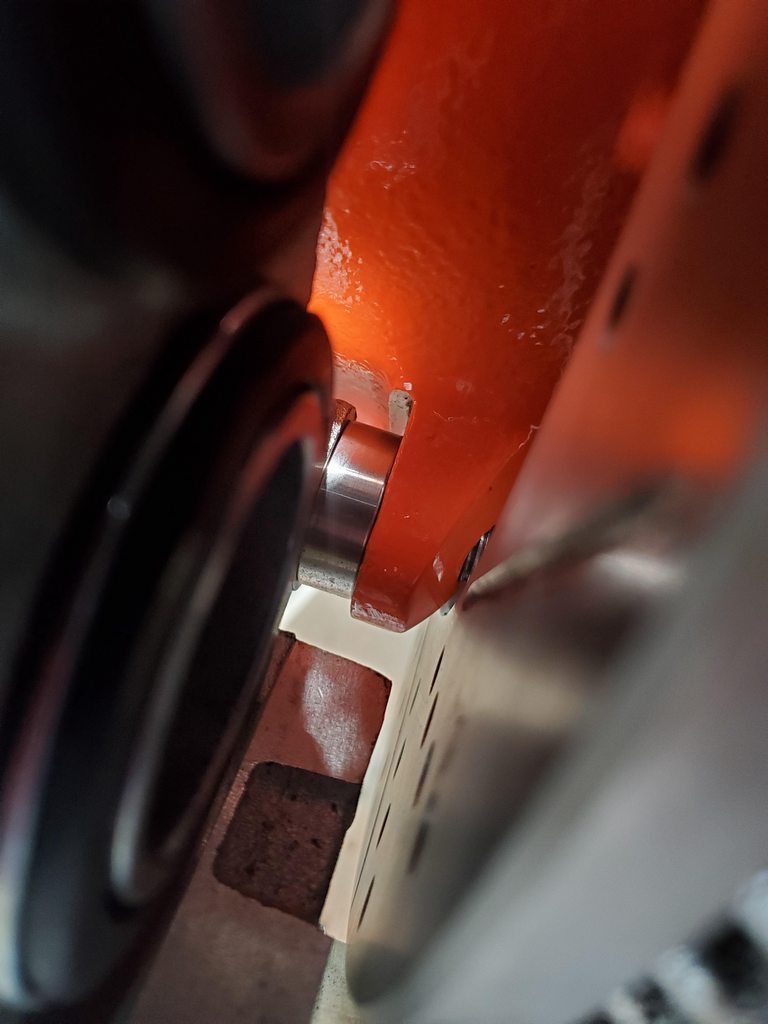
As mentioned above, the 4Runner has a deeper rotor hat and since we simply bolted it to the back of the 80 hub, it will sit deeper over the knuckles. This means you need to do a little bit of grinding to clear the rotor. Here you will see the spots that required grinding on my knuckle. The grinding on the back steering stop is to clear the caliper. Because I'm running Hellfire knuckles with more material up top, I had to do a bit more grinding to clear the nut and a socket due to the caliper being spaced back by about 10mm. All in all this is quickly taken care of with a flap wheel.
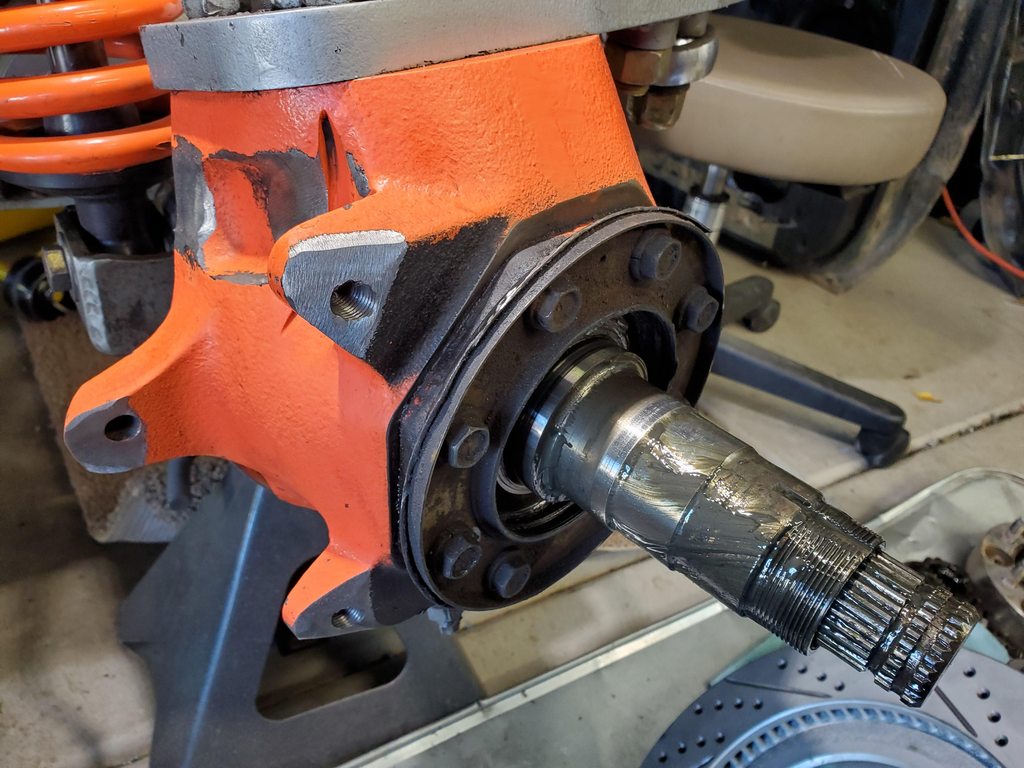
NOTE: since I'm running high-steer and don't have lower steering arms, I had nothing to grind here. But your lower steering arms will also require a bit of grinding to clear the rotor.
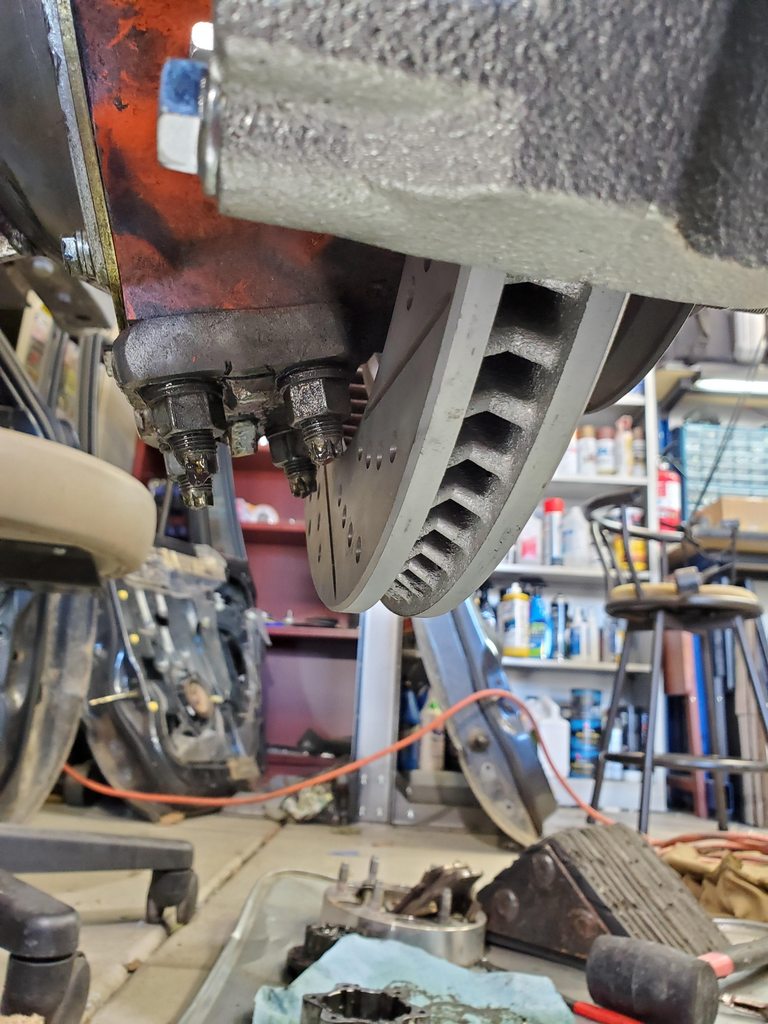
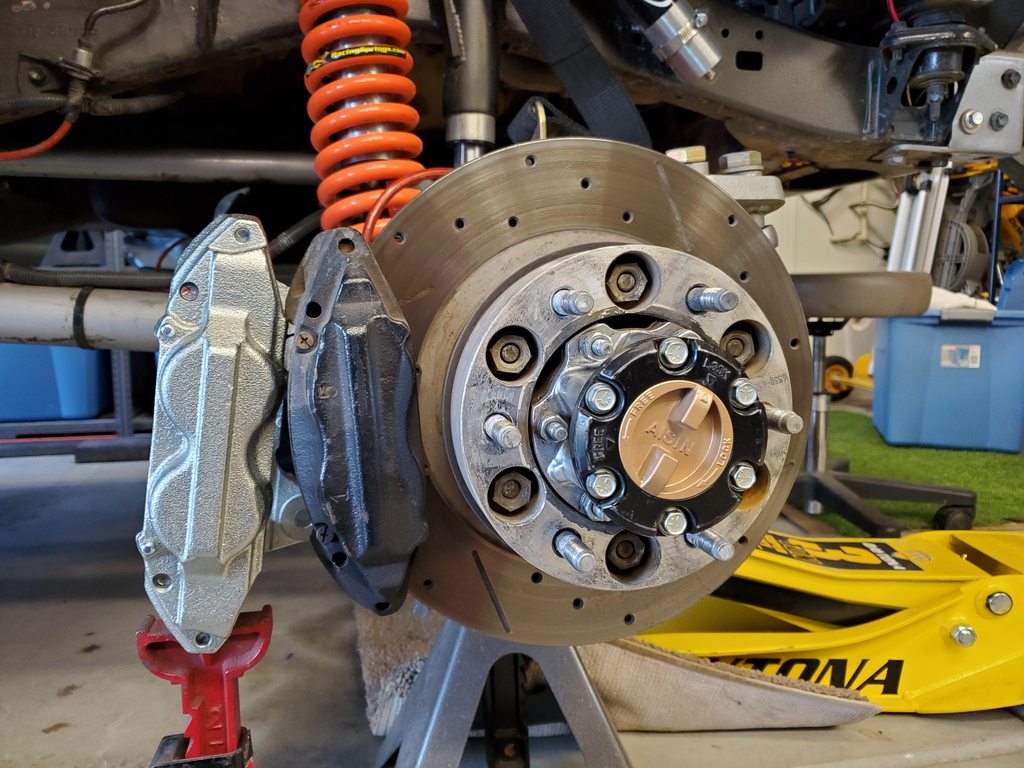
With that out of the way we can mount the rotor/hub assembly back on the spindle. Here's the final clearance after grinding.
Lower caliper mount.
And we can finally put the caliper over the rotor!
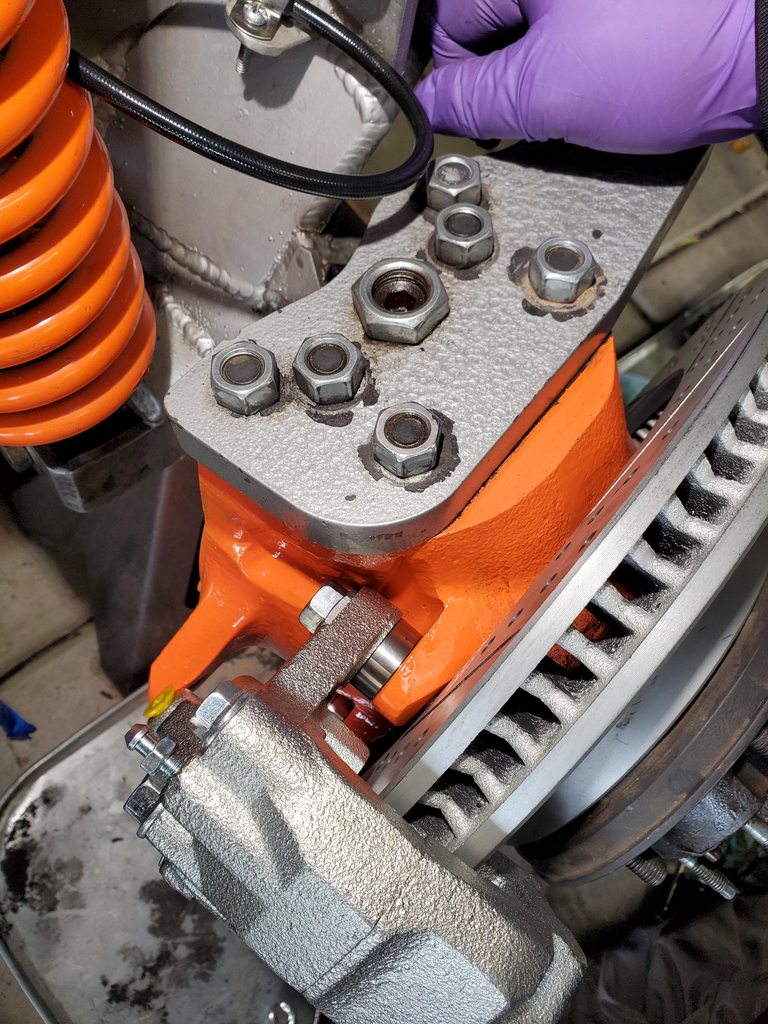
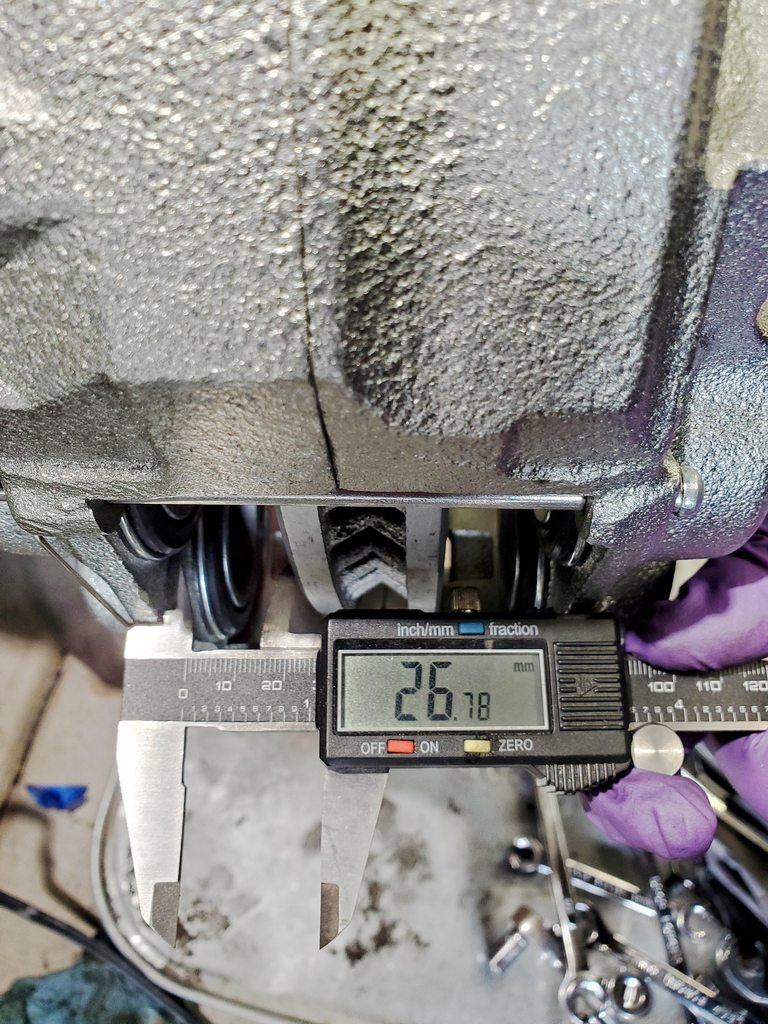
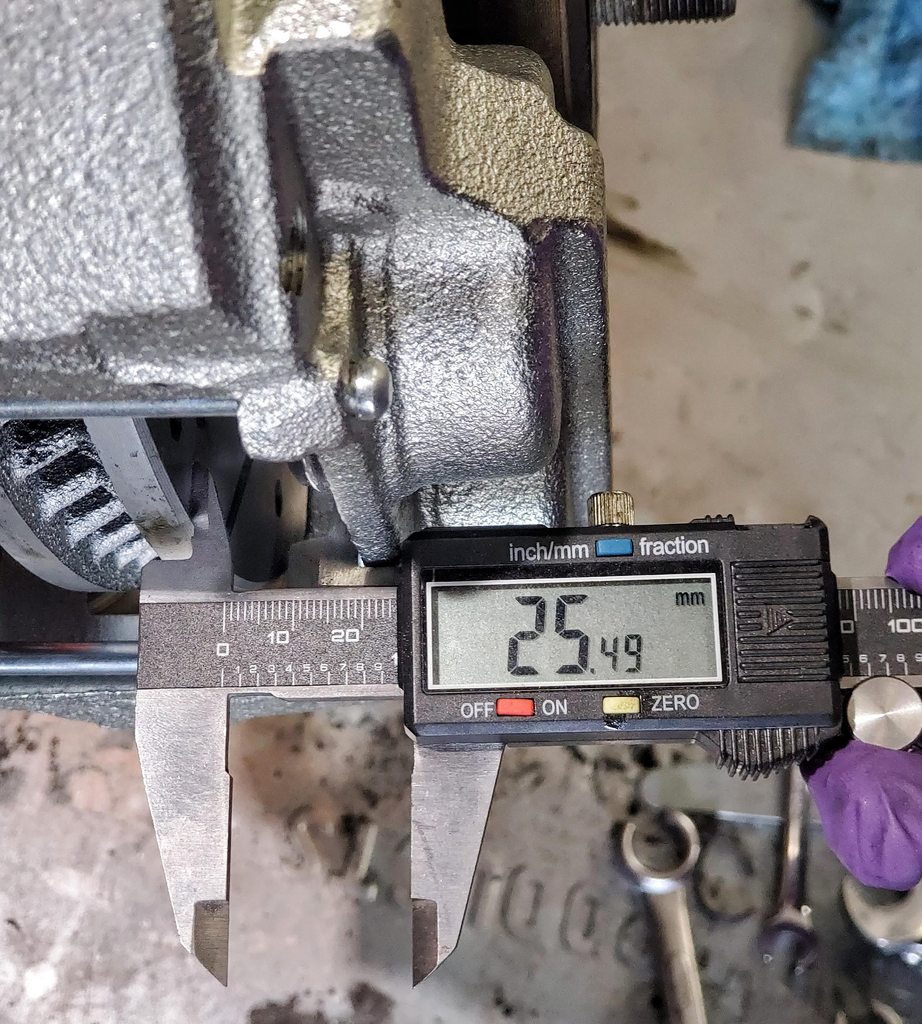
The 9.52mm machined spacers are just about perfect. With everything mounted up, I measured the distance between the surface of the rotor and the inside of the caliper housing. Not sure if this is the best place to measure but it's where I could get a consistent flat surface. With this setup I'm at about a 1.3mm difference between each side which is 0.05", basically nothing. I really don't see this causing an issue but if you really needed it to be perfect, it seems like an 8mm wide spacer would be just right.
Let's start by buying some stuff. You'll want to make sure you get the calipers from the earlier 5th gens (2010-2013) with 14WA stamped into the caliper. The later year models switched to a 14mm mounting bolt vs our 12mm mounting bolt. These will have 14WB stamped into the caliper. Caliper specs:
5TH GEN FRONT CALIPER (14WA stamping, For 338mm rotor (All Trims)
Toyota Part #: 47750-60300 - LH, 47730-60300 - RH
Mounting Bolt: 12mm
Piston Size: 48mm
Bleeder Size: M7 x 1.0
Inlet Size: M10 x 1.0
And here are the specs on the rotor:
5TH GEN FRONT ROTOR (For 14WA front caliper (All Trims))
Toyota Part #: 43512-60191
Outer Diameter: 338mm
Thickness: 31.8mm
Hub hole: 108mm
Bolt hole: 14.4mm
I've read of issues with sticking calipers whether new OEM and reman so I just decided to go with aftermarket to take advantage of the long warranties. For the calipers I went with new aftermarket (not reman) Raybestos units. Part numbers are FRC12551N and FRC12552N.
Here's a comparison of the stock 80 calipers and the 4Runner calipers. The 80 Series Caliper Piston OD is 45.3mm or 1.7835". The 4Runner Caliper Piston OD is 48mm or 1.8898". Credit to @Dirty Koala for providing the math and specs on these things.
For rotors I also went with aftermarket from R1. I went with their Carbon GeoMet cross drilled and slotted version because I hate money and like flashy parts. 311mm/12.2" vs 338mm/13.3", a whole inch bigger.
First step is figuring out the caliper mounting. Now, the 4Runner caliper will bolt up directly to the 80 knuckles no problem. But because the rotor has a deeper hat and we're not doing any machining of the hub, the rotor will sit DEEPER over the knuckle compared to the 80 rotor. This then means the caliper needs to be spaced BACK. Based on what I heard from other that have done this, the caliper needs to be spaced back about 10mm.
On the FB 80 page someone found these machined spacers that looked to do the trick. They have an ID of 12.09mm (perfect for the mounting bolt) and are 9.52mm thick.
Here's the link: 12 mm ID 316 stainless washers spacers - https://www.extsw.com/collections/12mm-id-316 Be sure to order a few extras as you will always need these to mount your caliper.
You will also need longer bolts. I used M12-1.25 x 45mm 10.9 bolts. Here is the caliper bolted up to the knuckle with the machined spacers and longer bolts.
The next step is figuring out how to mount the rotor to the hub. The stock 80 rotor has threaded holes and bolts up behind the hub. The 5th gen 4Runner rotors are slip-fit in stock configuration. Our hubs will not work for slip-fit unless you do a lot of machine work to the hubs, something I didn't want to do. So we're gonna bolt them up in a lugcentric configuration.
For this I used longer M12-1.25 x 40mm bolts and M12-1.25 open-ended acorn bulge lug nuts. Here's the hub taken apart with longer bolts.
Back side of the hub. You'll notice I had a hub centering ring here. Based on what I read from others, they recommended 108mm to 106mm rings to help center the hub over the rotor. However I feel this isn't needed because of the lug centric nuts we're using.
The back side of the rotor showing the beveled hole which matches nicely with the acorn bulge lugnuts.
I used orange Loctite and cranked them down to about 14 3/4 Ugga Duggas. Here you can see the hub centering ring still installed.
Here's the approx 2mm difference between the hub and the rotor with the ring removed after you tighten everything down. As I mentioned, several people have been running these for a few years now with no issue. It's really no different than when you install aftermarket wheels in a lugcentric setup vs OEM wheels that are hubcentric.
And the final assembly
As mentioned above, the 4Runner has a deeper rotor hat and since we simply bolted it to the back of the 80 hub, it will sit deeper over the knuckles. This means you need to do a little bit of grinding to clear the rotor. Here you will see the spots that required grinding on my knuckle. The grinding on the back steering stop is to clear the caliper. Because I'm running Hellfire knuckles with more material up top, I had to do a bit more grinding to clear the nut and a socket due to the caliper being spaced back by about 10mm. All in all this is quickly taken care of with a flap wheel.
NOTE: since I'm running high-steer and don't have lower steering arms, I had nothing to grind here. But your lower steering arms will also require a bit of grinding to clear the rotor.
With that out of the way we can mount the rotor/hub assembly back on the spindle. Here's the final clearance after grinding.
Lower caliper mount.
And we can finally put the caliper over the rotor!
The 9.52mm machined spacers are just about perfect. With everything mounted up, I measured the distance between the surface of the rotor and the inside of the caliper housing. Not sure if this is the best place to measure but it's where I could get a consistent flat surface. With this setup I'm at about a 1.3mm difference between each side which is 0.05", basically nothing. I really don't see this causing an issue but if you really needed it to be perfect, it seems like an 8mm wide spacer would be just right.