This is one of my favorite 4runners!
Navigation
Install the app
How to install the app on iOS
Follow along with the video below to see how to install our site as a web app on your home screen.
Note: This feature may not be available in some browsers.
More options
Style variation
You are using an out of date browser. It may not display this or other websites correctly.
You should upgrade or use an alternative browser.
You should upgrade or use an alternative browser.
Help with 3-link on '99 4-Runner
- Thread starter JLHEEPETR
- Start date
This site may earn a commission from merchant affiliate
links, including eBay, Amazon, Skimlinks, and others.
More options
Who Replied?RLMS
Supporting Vendor
- Joined
- Sep 19, 2007
- Threads
- 144
- Messages
- 1,530
- Location
- Colo Spgs Colorado
- Website
- www.redlinelandcruisers.com
Joe, I love it even more now! Chop that puppy up!!!
Justin
Justin
- Thread starter
- #323
- Thread starter
- #324
Body mounts were good so they got burned in.
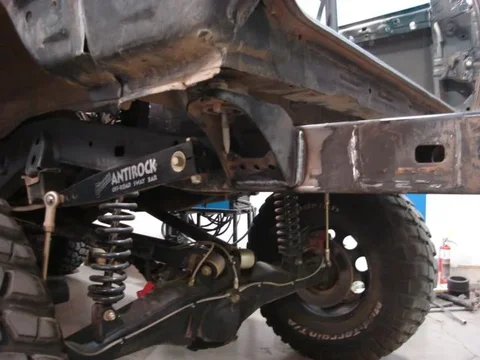
Then is was time to start stitching the body back together. I didn't realize just how much the rear tapers off until after it was cut. It's over 1/2" narrower then it was 8" ago. Oh well...nothing a little squeezing won't fix. I wish I had a friend who could do this part for me. It's not pretty but I plan on covering up the inperfections with bed liner. No bondo and clear coat here!

I ran out of time but couldn't resist a little mock-up.
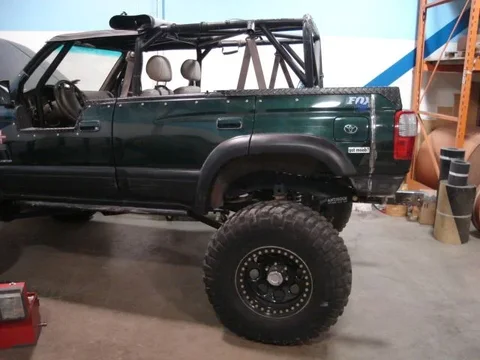


Then is was time to start stitching the body back together. I didn't realize just how much the rear tapers off until after it was cut. It's over 1/2" narrower then it was 8" ago. Oh well...nothing a little squeezing won't fix. I wish I had a friend who could do this part for me. It's not pretty but I plan on covering up the inperfections with bed liner. No bondo and clear coat here!

I ran out of time but couldn't resist a little mock-up.

looking goooood!
are ya going to bed line the entire truck or just the back portion?
are ya going to bed line the entire truck or just the back portion?
Badass man, I love it.
Bedline the whole thing!!
Bedline the whole thing!!
On that last pic with the tail lights in. Did it already have that gap at the top? I'm assuming that's where the tailgate used to close and fill in. Did you have something there before you chopped it? Are you going to put something there?
- Thread starter
- #328
Thanks guys. I'm undecided on how to go about covering the scar with bed liner. For sure only the back but I'd love some suggestions on where and how to tape it off so it looks good when it's done. I was playing with the idea of some kind of swoosh or angle, maybe leaving the fuel door green (no it's not fuctional) and ideas please?
Sam, the brake lights get boxed in a bit by the rear bumper - see post 317 but yes they kind of hang out there. You are correct, the void is from the missing rear hatch.

Sam, the brake lights get boxed in a bit by the rear bumper - see post 317 but yes they kind of hang out there. You are correct, the void is from the missing rear hatch.
- Thread starter
- #329
- Thread starter
- #330
I spent a few hours last night pondering how to make this work. I wanted to keep the power slide adjustment to accomodate different leg lenghts in case someone else wanted to drive. Finally it came to me. I cut free everything I didn't need. Here are the slider rails free of the tilt and seat back brackets.

I cleaned and re-wired the power slide assembly and bolted them back together.

Then I made up some 2x2 angle brackets to which I could bolt up the seat. Here it is set in place.
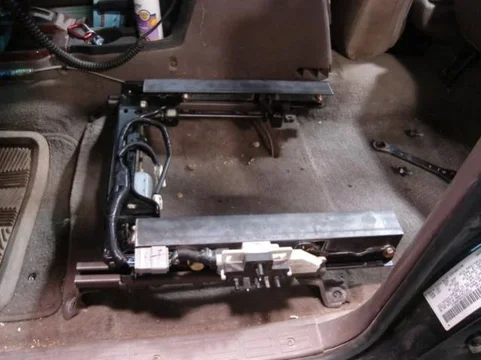


I cleaned and re-wired the power slide assembly and bolted them back together.

Then I made up some 2x2 angle brackets to which I could bolt up the seat. Here it is set in place.

- Thread starter
- #331
- Thread starter
- #332
I'm going to have to lose the slide adjustment all together and build a plate low on the floor to bolt the seat to. I was so excited for this to work but it's back to the drawing board.
I spent a few hours last night pondering how to make this work. I wanted to keep the power slide adjustment to accomodate different leg lenghts in case someone else wanted to drive. Finally it came to me. I cut free everything I didn't need. Here are the slider rails free of the tilt and seat back brackets.
View attachment 701997
I cleaned and re-wired the power slide assembly and bolted them back together.
I'm going to have to lose the slide adjustment all together and build a plate low on the floor to bolt the seat to. I was so excited for this to work but it's back to the drawing board.
If you make the legs on these mounts lower (take as much height out of the leg as possible) you can still use the power slides. But the right slide might not have enough room to do that without changing the mounts in the floor.
- Thread starter
- #334
A little more work done this last weekend. Scott, you're right about not being able to use the slide without major modifications to the floor mount. The problem is mostly on the inside along the tranny tunnel. Here the seat really needed to be set right on the floor to fit correctly.
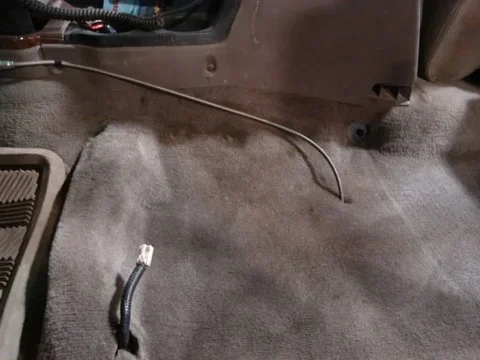
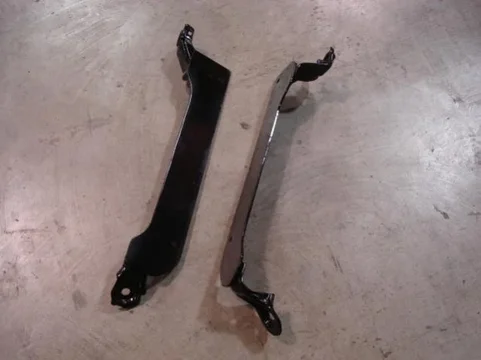
I had no desire to completely redo the floor in the truck (including modify the tranny tunnel to accomodate the extra width) so I decided the seats would have to be fixed instead. Using the footings from the factory seat I worked up some brackets.
Checked final fit on the floor.


I had no desire to completely redo the floor in the truck (including modify the tranny tunnel to accomodate the extra width) so I decided the seats would have to be fixed instead. Using the footings from the factory seat I worked up some brackets.

Checked final fit on the floor.

- Thread starter
- #335
- Thread starter
- #336
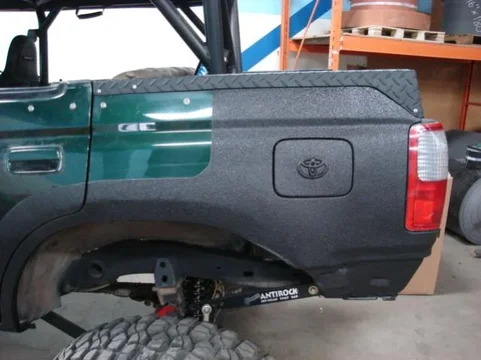
I finally got back to work on the Runner. The bob is close to being done... body is all welded back together. A little bondo (I told myself I wouldn't) and some sanding and it was ready for Linex. I tore off all of the factory plastic and prepped it as best I could. Tonight with the help of J&K Customs here in Missoula the Linex was applied. I've got to give Jeremy and his crew due credit, they did an awesome job! The diamond plate body covers/bed caps got re-worked and re-painted. I plan to mount them up tomorrow and take some updated pics.
- Thread starter
- #337
- Thread starter
- #338
Here's a better shot of the finished product. We left the toyota badge on the fuel door to get the raised effect in the linex. I still need to paint over the rivets.
And finally everything re-installed in the bed. Also replaced the fuel cell and went to a different style filler cap. Now it's on to rebuilding the rear bumper!
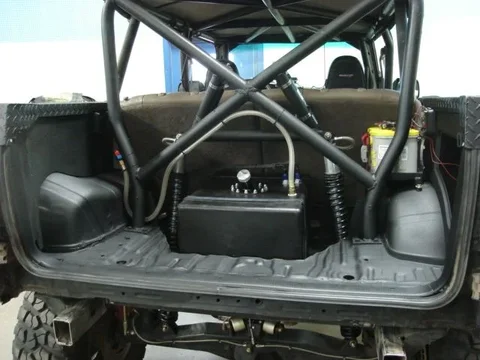


And finally everything re-installed in the bed. Also replaced the fuel cell and went to a different style filler cap. Now it's on to rebuilding the rear bumper!

You sir are a sick man, awesome work 

That looks really good man, good work 

Similar threads
- Replies
- 0
- Views
- 551
- Replies
- 82
- Views
- 13K
Users who are viewing this thread
Total: 1 (members: 0, guests: 1)


