Builds Greenbriar's '96 Build

This site may earn a commission from merchant affiliate
links, including eBay, Amazon, Skimlinks, and others.

Joined
Jan 15, 2019
Threads
5
Messages
59
Location
Somerville AL
See intro thread for plan: Hello Mud!

Day 1
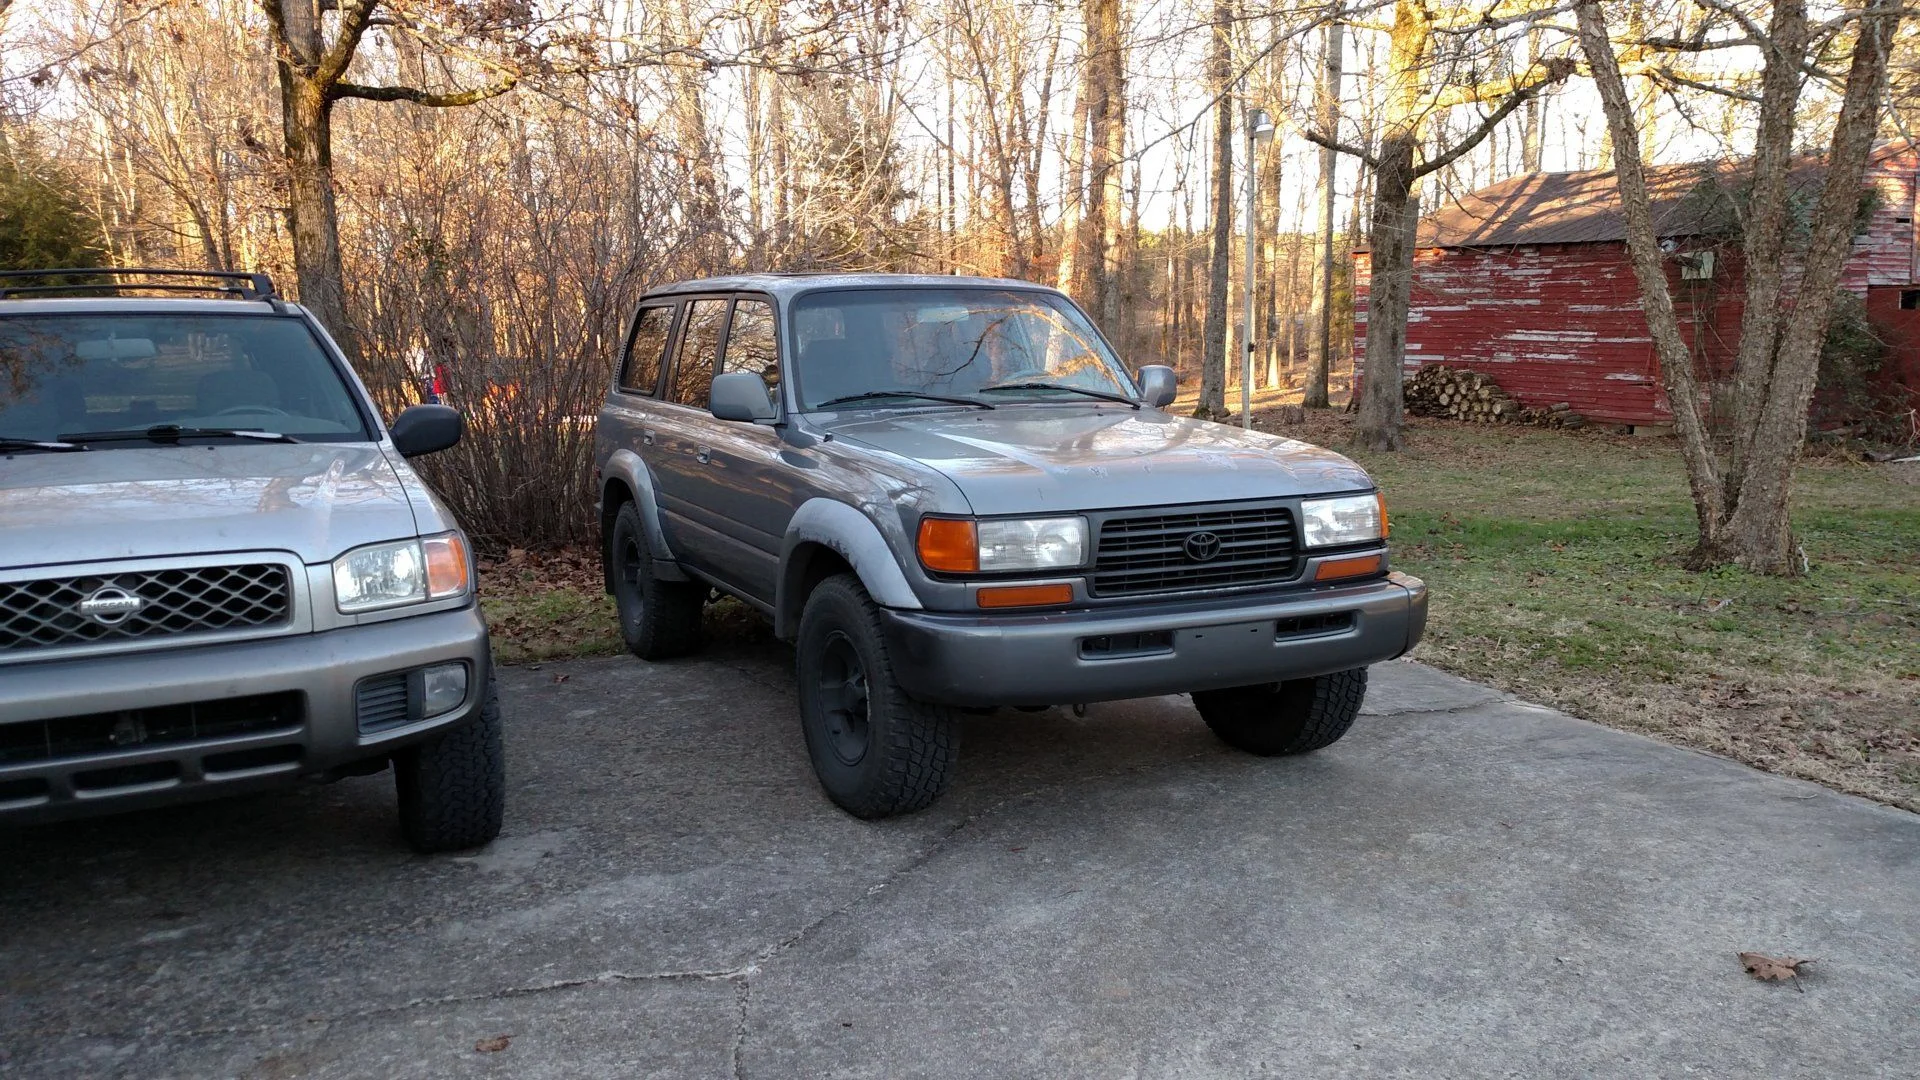
Beginning (from intro thread)

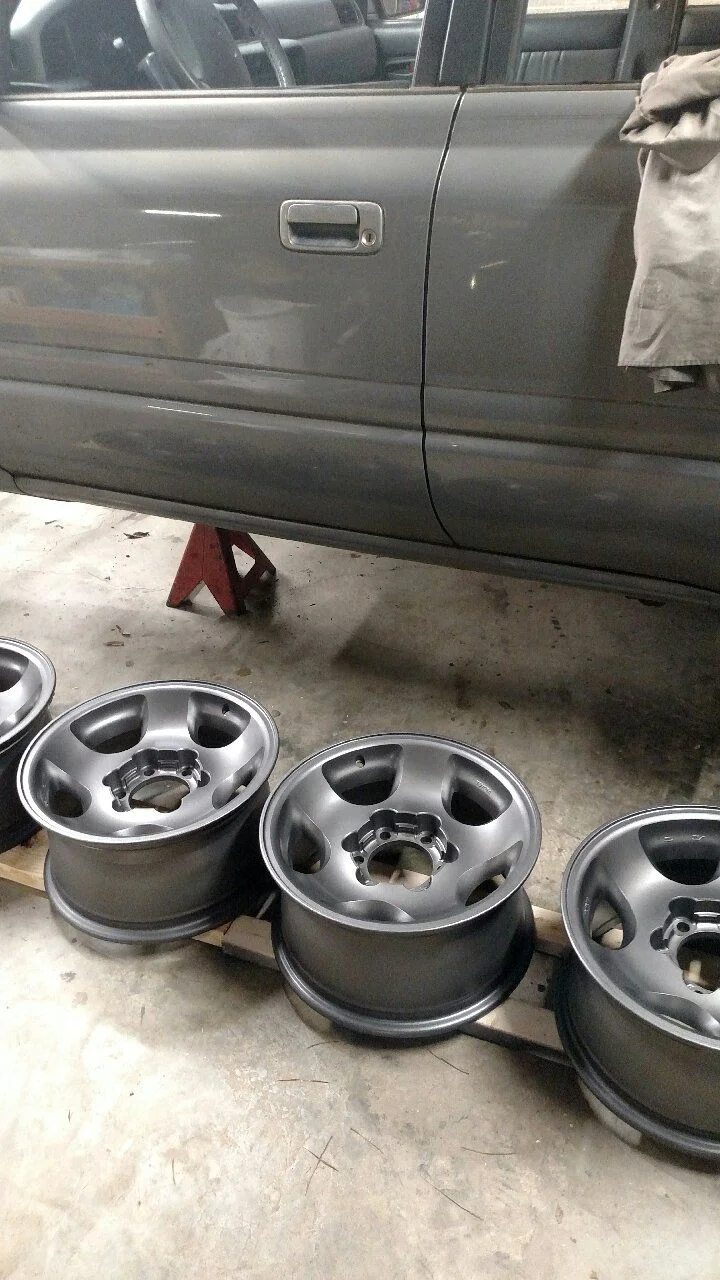
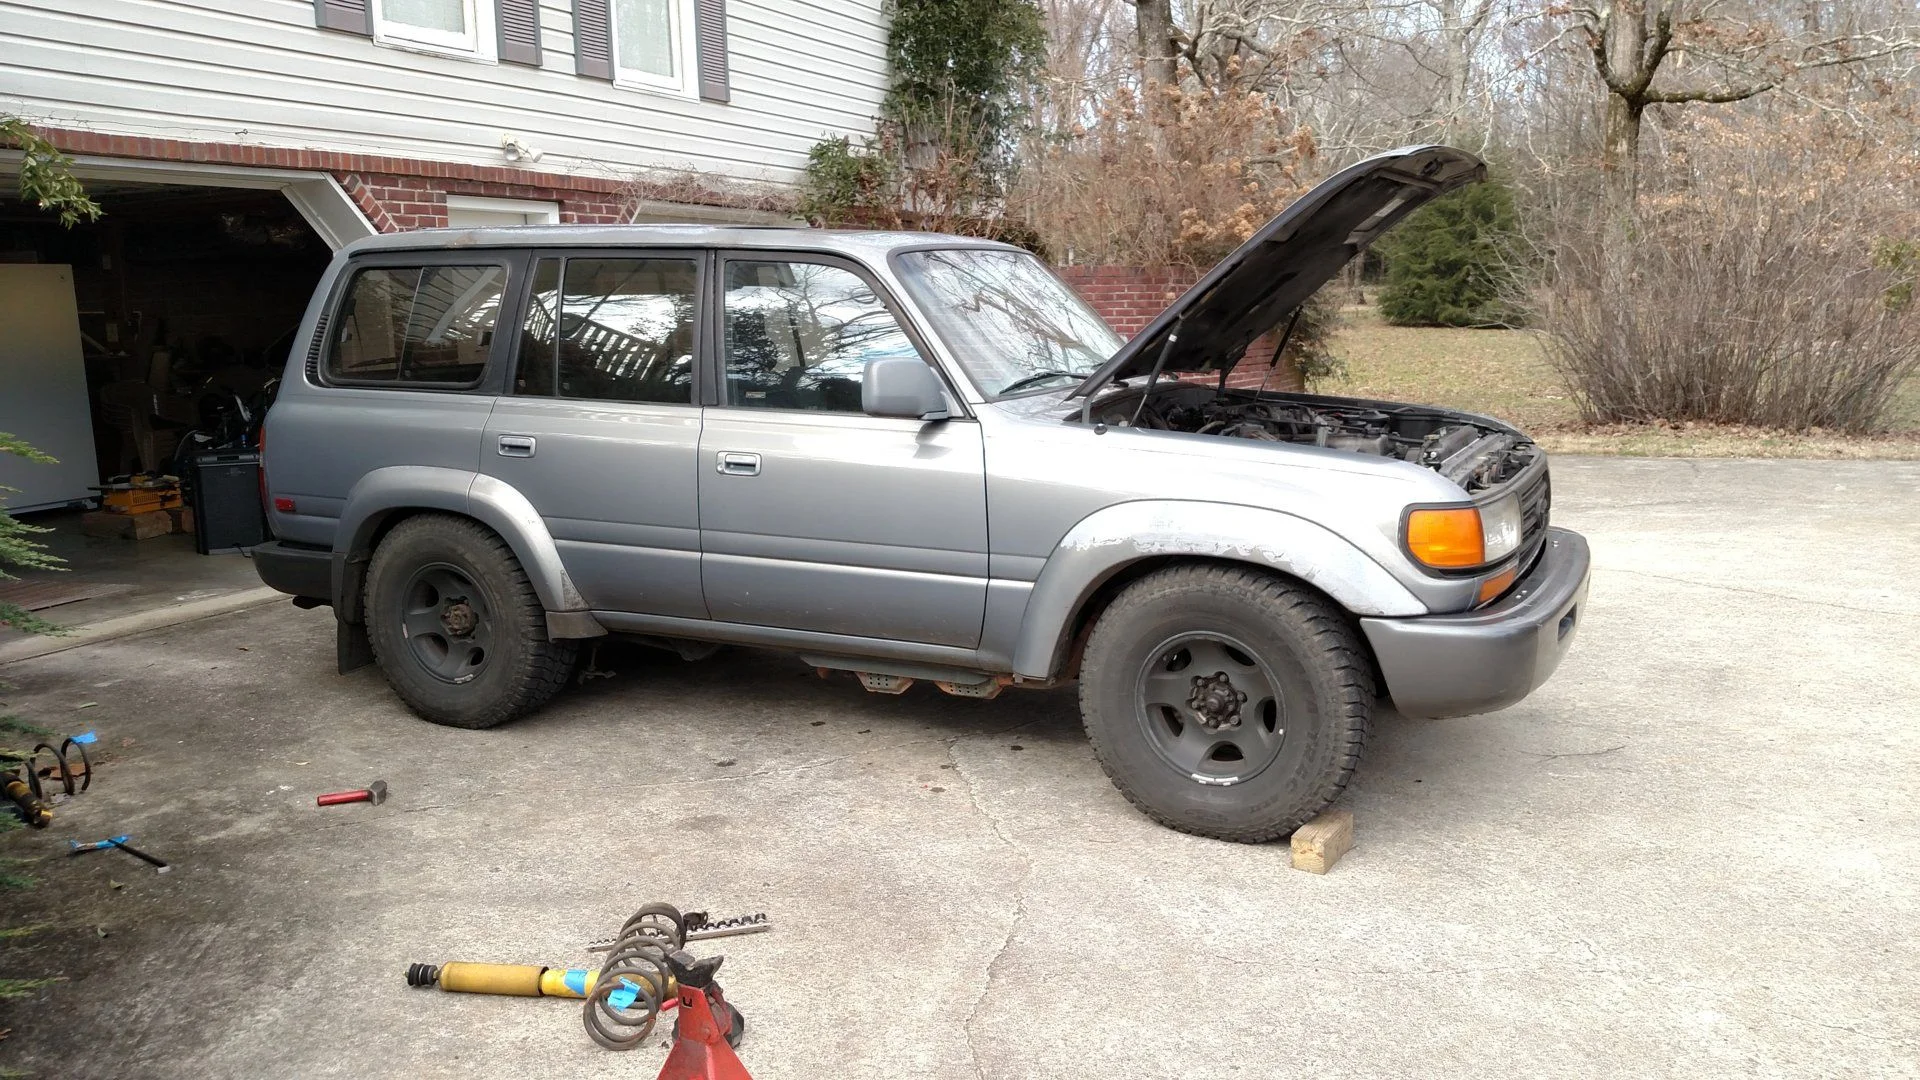
Pulled shocks and springs so it would clear AC duct in garage. Sitting on the bumpstops...


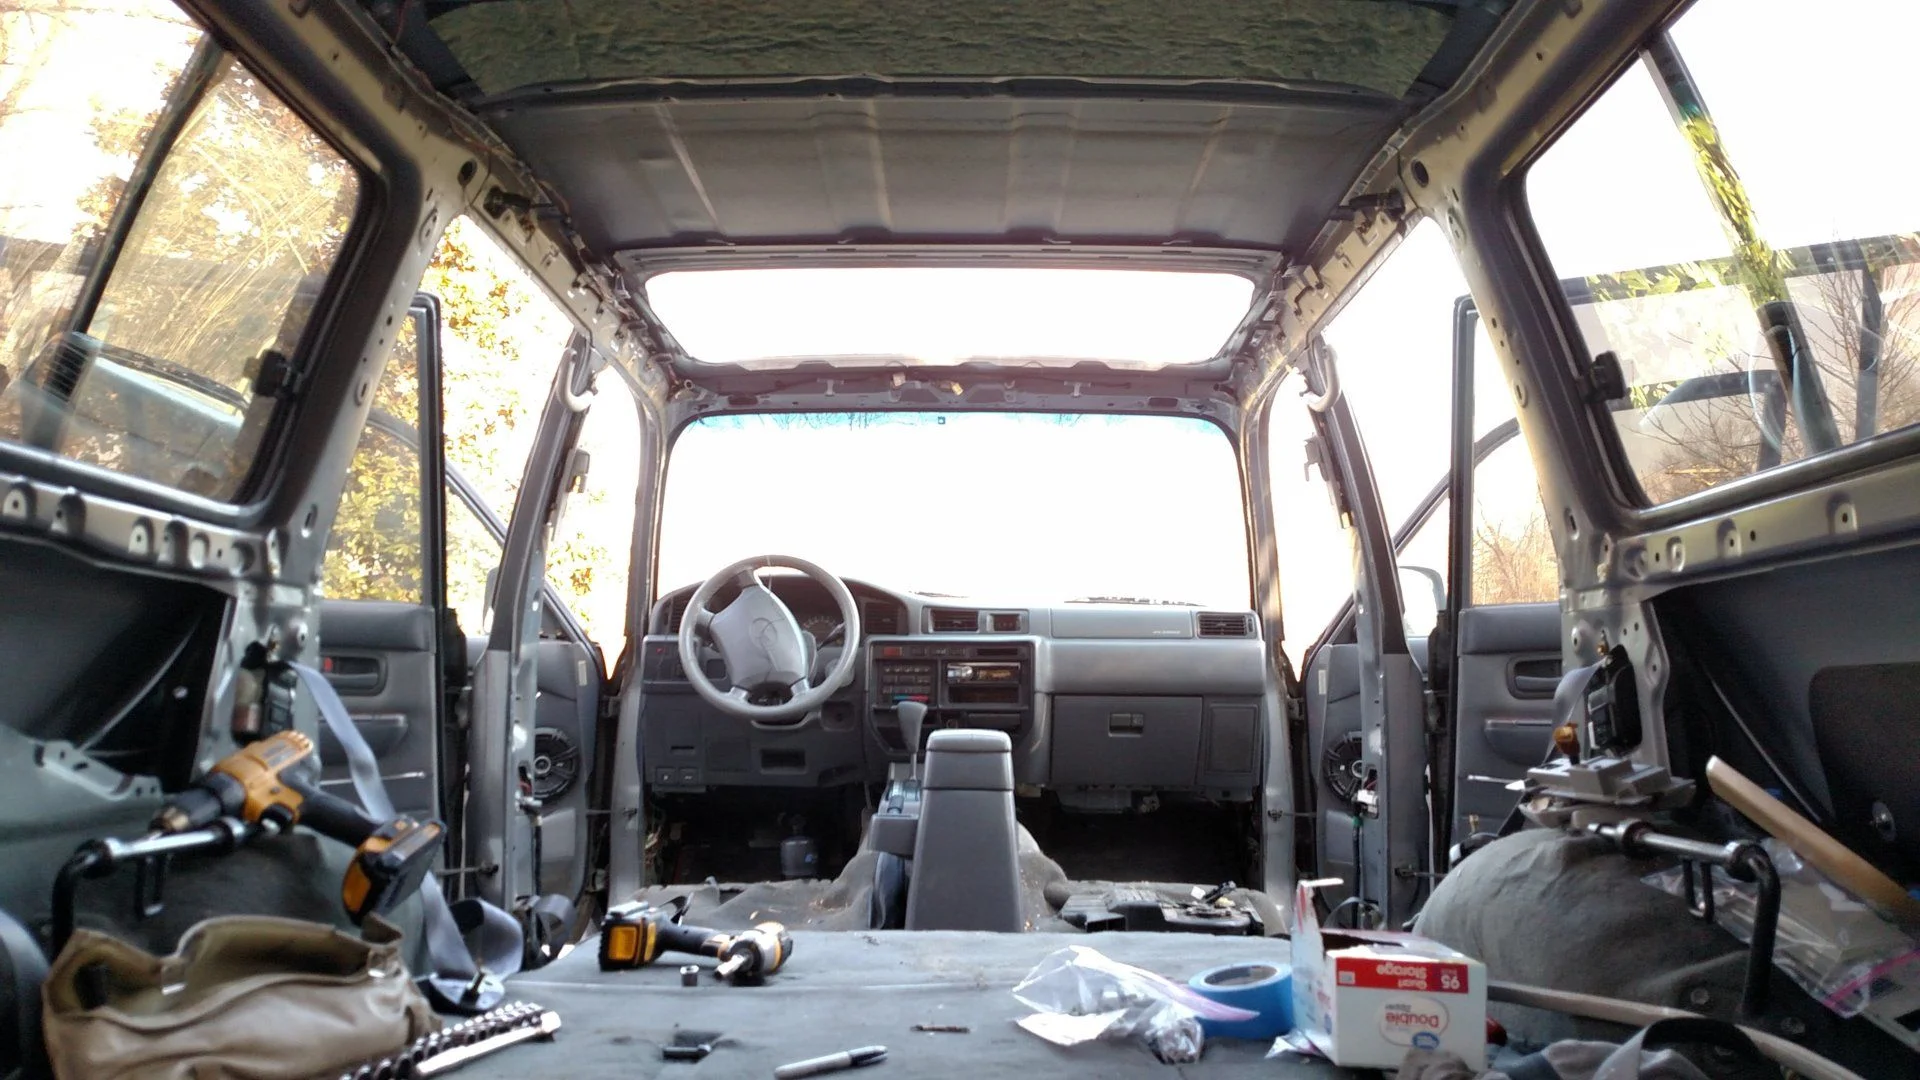
Pulled most of the interior to access the stuck down sunroof. Had to pull the headliner now, as I can't get it out in the limited space in the garage.


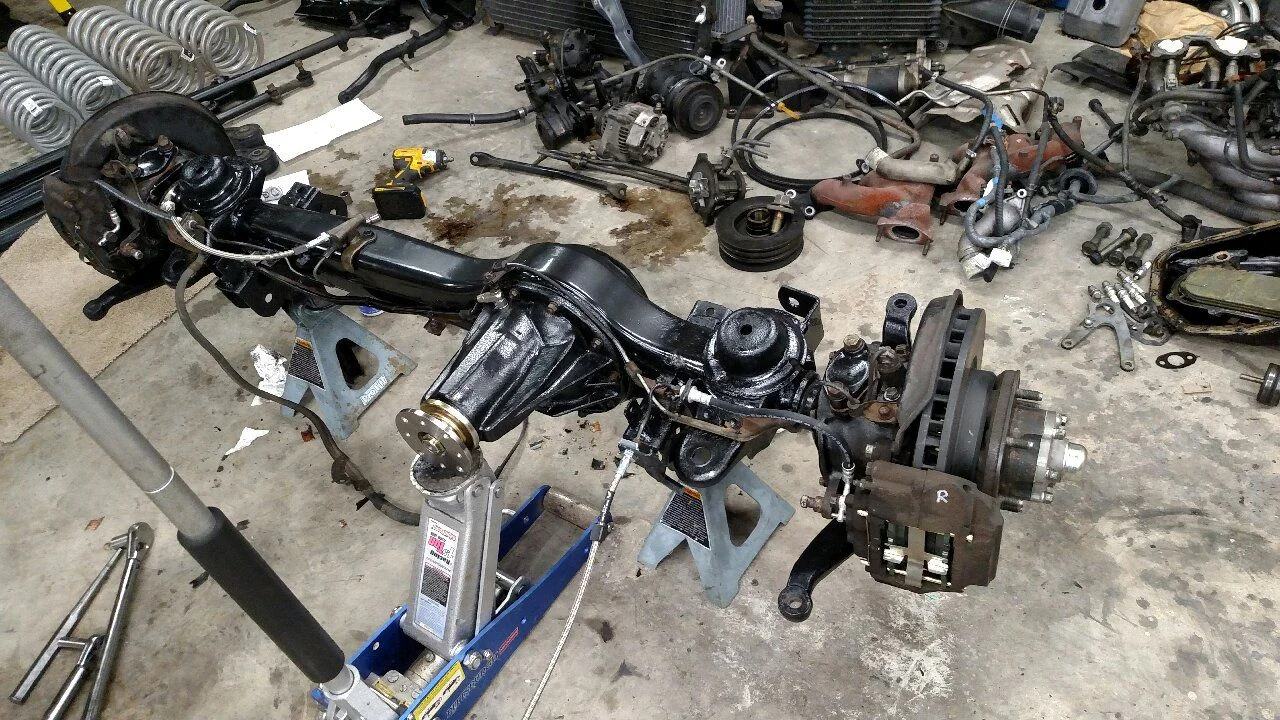
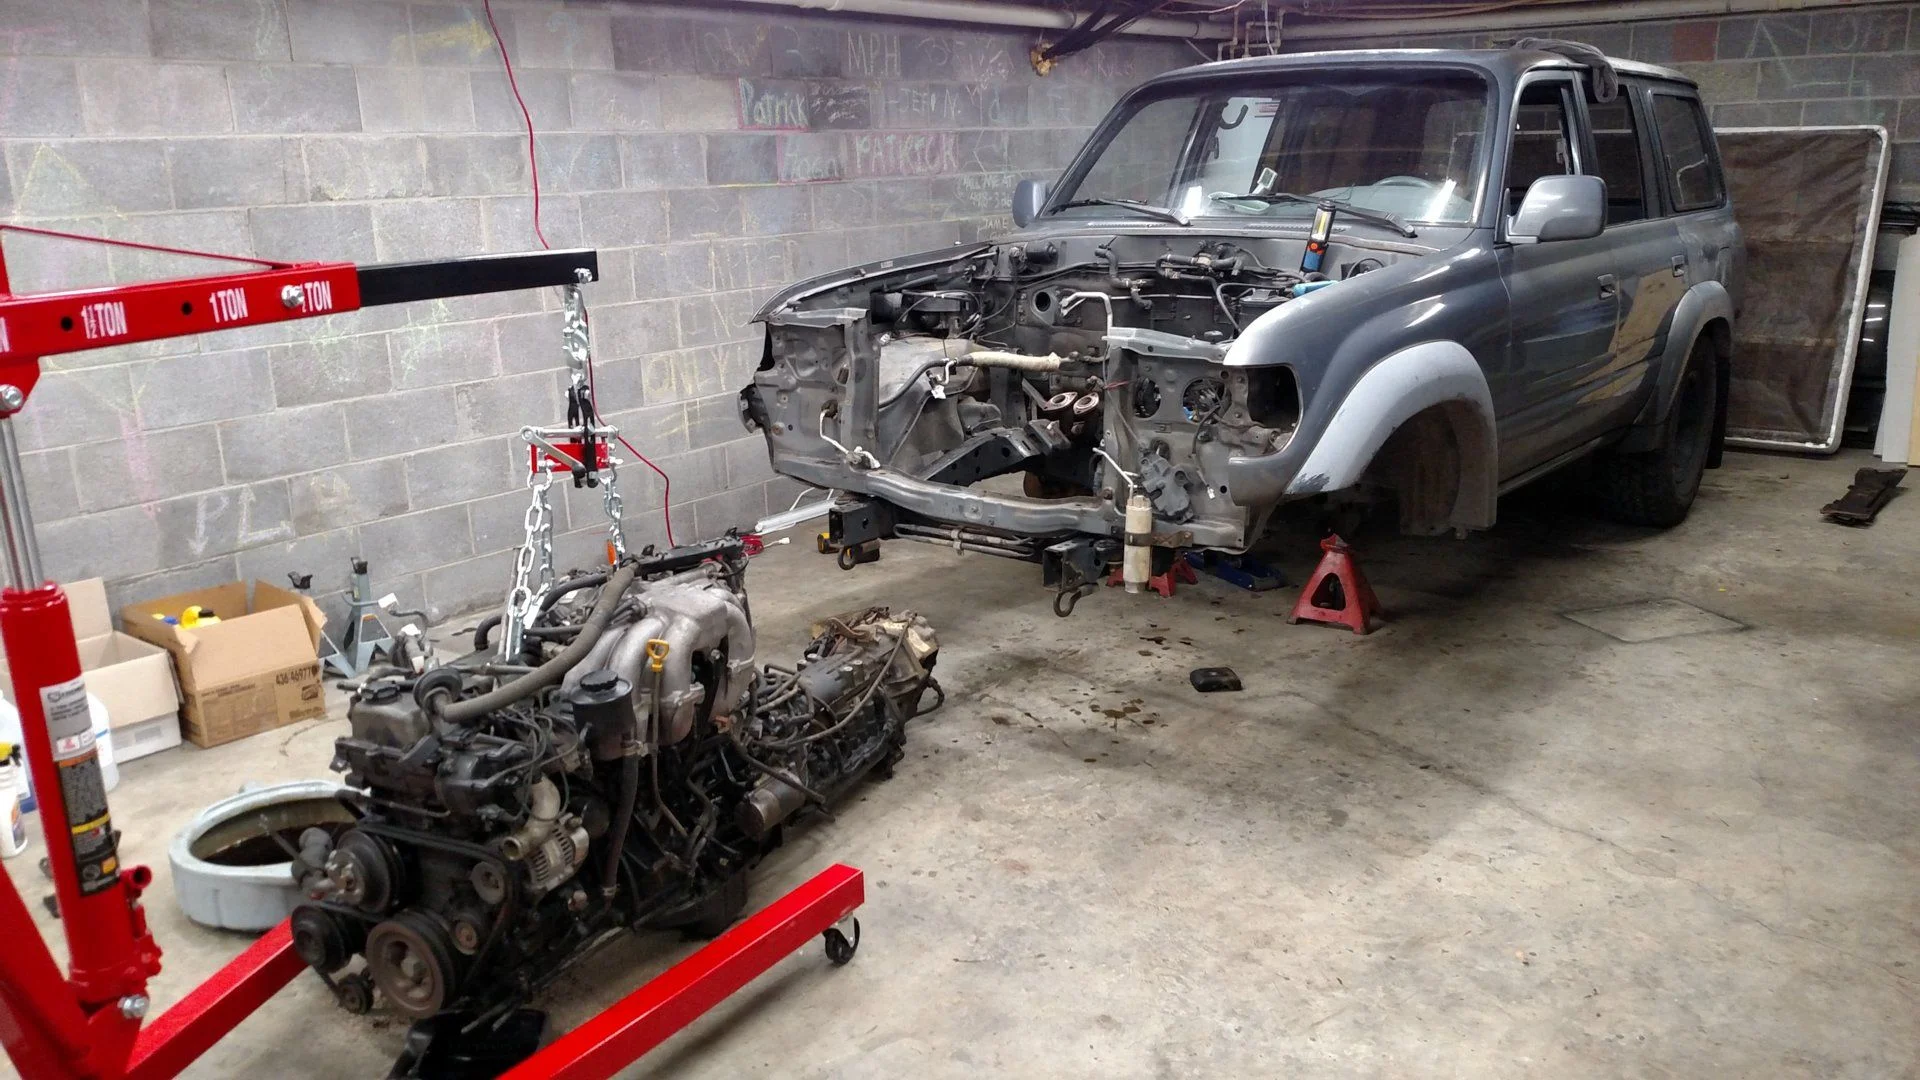
Used wheel dollies and a little brute force to squeeze it into the back of the garage where there is more side to side room to work. Got the bumper etc pulled, hope to get the front axle, radiator etc tomorrow and get it down and ready to pull the motor. Thrilled with my pile of $20 Lowes LED shop lights. That's all I had in me for today...

 
Bound and determined I see. :popcorn:
 
All in a day's work! Looking forward to more!
 
Looking forward to your build
 
That's a lot of work for one day! Do you know if the 80 and 100 have similar sun roofs? If they do I know someone local that may have some used parts .
 
Day 2:
Unfortunately, this was all the coolant that was in this thing. The block was full, which is a good thing I guess. I shouldn't have driven it to work without checking... (PO said they had been driving it daily) It did register temp while I was driving it, and I had heat, so maybe it'll be ok... Every top end coolant hose was leaking.

Got the front axle pulled, and the driveline on the ground. I'm beat. Time for bed... I'll check on the sunroof compatibility tomorrow; I only played with it for a minute this morning. It looks like it may just be gummed up and stuck, but we'll see...

 
Tore into the sunroof this evening. Both tracks/cables are broken. I couldn't find any definitive answer as to whether or not a 100 sunroof actuation system was the same as an 80. Looks like I'll be needing both tracks and cables to get it working again though. Also broke the trim on both sides that cover the glass bolts. It was amazingly brittle. I guess getting baked for 20 years in the roof will do that...
 
Didn't get too much time on Sat, but got to spend most of the day today working on pulling the motor down. When I went to separate the motor and trans, I noticed the torque converter moved around a little once I got it loose from the flexplate. Got them separated and found this...
No clue what the point of the spot welds on the bolt were for, they had to be put on after it was tightened, as they were clean and there was no way to get a socket or anything on it. That's the nose of the torque converter in the end of the crank there, hence the movement once it was loosened up. This was all really fresh, and once I spent a while with the dremel and a cutoff wheel re-shaping the bolt, I found out why the rear main was leaking. The re-worked bolt:
The freshly installed main was pushed in too far, and the solution was GOBS of silicone... (and still leaking like crazy) I'm glad I decided to go through this thing instead of running it. It looked like there were going to be things like this, judging by the quality of some of the "fixes" I could see on the top side of the engine. I'm pretty sure the PO tried to take good care of this thing, but his mechanic I'm not so sure about...
The valve seals were completely shot, and most of the soft gaskets/o-rings looked to have been pretty hot at one point, so I'm guessing with the new radiator that this thing was overheated at some point. It'll be interesting to see if the head checks out flat. All the cam bearing surfaces looked good though, so I'm optimistic. Typical exhaust valve seal:
The bottom end looks awesome, as I expected listening to everyone here. The bearings look great, and there's still plenty of cross-hatch in the cylinders. I'll probably not send the block off, and just spin in new bearings after breaking the glaze in the cylinders with a ball hone, and slide on some new rings. I almost hate to bore it for no reason, and mess up the factory balance with new pistons (or have to re-balance it). Here is the pile of parts at the end of the day...
 
You waste no time! Always fun to find the sloppy attempts at repairs from the PO...
 
Haven't had a chance to work on it lately, but had a few boxes on the porch when I got home.
Visions of things to come, courtesy of @dockbox :
1899851
 
Today was about trying to get everything quantified so I can get some of the engine stuff ordered. I finished stripping the block and head down and recorded all the clearances and bearing numbers. Putting the cams back in the head with it off the block showed that it was probably warped a little, as the cams were not the smoothest to turn; they weren't locked up though, so maybe it won't be too bad. I spent the time I had left just visually going over the rest of the truck, trying to make sure I haven't left anything off the list of things to do. I found some interesting stuff I had missed before. I knew it had an alarm of some sort at one time, but didn't dig into it until today, and I found this:

1901160


Ugh. I'm not sure I'd have done it any differently but... I've done these before, and they're a bear at best, but man, seeing this kind of stuff makes me nervous...
I found it while checking the steering shaft for play. Is the below image normal? I went to check the engine bay steering u-joint for play, and when I did, the whole interior section moved, a lot more than I thought it might. There's nothing between the u-joint and the rubber flex disk on the inside. Is there suppose to be a carrier bearing in there? The grommet is obviously gone, but I can't imagine it would provide much support to the shaft even when new. Or was it a grommet/bearing combo that is now missing the bearing?

1901163


After this, I checked the fuel sender. The gauge didn't work, and I was hoping there might be an obvious problem. I got lucky!

1901165


Don't know if this was a mouse or what, but the piece of wire was sitting right there...
While I had that door open, I found something else that I'm sure made for a scary story. This is in the jamb, and when I saw it I thought "surely not"...

1901166
 
Last edited:
Looks like lots of fun! You are doing great, keep it up👏
 
Flying! This will be a fun one to watch. Sub'd.
 
Haven't wanted to hog the active post board every time I do something, so I've piled up a lot for one post.
I found a 72k trans and whole sunroof assembly locally. I needed a torque converter anyway, and by the time I built this older trans and bought a converter I'd have had what I have in the 72k one. Now I've got a spare...
I got the sunroof pulled apart and greased up, and shimmed it into place. The seal on the glass is way better than the old one, so maybe I'll have a little less wind noise...
I carried to head and block off to Memphis Motor Werks last week. Turns out the head is flat, which is awesome, but the end (1+6) cylinders are a little elliptical, so I'm trying to source half over pistons now. The 1mm over pistons seem to be easier to find... I was hoping to avoid an overbore, but I think this will be the best bet to last another 300k.
Today started here:

Did my best to clean up a little. Got some of the front knuckle parts cleaned up and painted, and started to clean out the axle housing.


Every bearing in both sides of the front end was shot... The trunnions were amazingly bad for it to drive as well as it did. Found out after cleaning the spindles up that the wheel bearings had been spinning on both of them pretty badly, which is unfortunate because Toyota is real proud of them...


One was bad enough that it got into the drive flange:


Rigged up a way to torque the ring gear bolts onto the new ARB carrier:


Ended up having to stop here, because the shim stack I chose for the pinion was too thick, and I didn't have a good way to get the bearing back off. You really need a press to do one of these... (as has been pointed out over and over...)


Also carried my wheels to a guy in town that has a shot blasting machine. I was going to strip them chemically, and then re-paint, as they had a rough rattle can job on them when I got it. Luke at Wheel Fix It cut me a heck of a deal on the shot blasting instead, and it couldn't have turned out any better. Now I just need to get some primer on them:


Until next time.....
 
I was informed by my Dad that it has been over a month since my last update post, so I figured I had better get caught up... :)
Got the wheels painted, and I think they turned out really well...


Here they are with tires sitting next to the lifted Pathfinder with 32s. Makes it look tiny...


Also got the front axle done, short of installing the caster plates.


Got all the small bits, and transfer case swapped over to the new(er) transmission. I didn't go through the transfer case yet because I wanted to see how I liked the 4.88 gears with the 35s. I figure it should be fine for a while anyway, and if I decide I want to push the gear ratio up or down 10%, then I can put the aftermarket gears in while I rebuild it, and only break into it once...


Today I went to Memphis Motor Werks to pick up the block and the head. Barry did an awesome job... They have a single point CNC valve seat cutter, and it's hard to see in the pictures, but there's a multi-angle valve job, cleaned up the bowls, and de-shrouded both the intakes and exhaust valves. They also put in bronze guides and multi-angled the valves themselves. I couldn't be more pleased with how it turned out, and I expect it'll provide a healthy bump in low lift flow. I can't wait to see how it drives. They've got the program saved if anybody in driving distance needs a head done, these guys know their stuff.


I'm now officially past my hopeful completion date, and we have a trip to Wyoming at the end of May that I'd love to take this thing on, so we'll see if I can get it together in time to shake it down and be confident in it. The motor shouldn't take long to put back together, and I'm pretty sure I've finally got all the parts here. Engine, and the rear axle left to go; maybe I'll make it!
 

Users who are viewing this thread

Back
Top Bottom