Dr Slug's 1983 BJ42 Build Thread - Yes I need a name for my truck

This site may earn a commission from merchant affiliate
links, including eBay, Amazon, Skimlinks, and others.

Well spent the weekend painting the interior with sound deadening paint-

100_0667.jpg


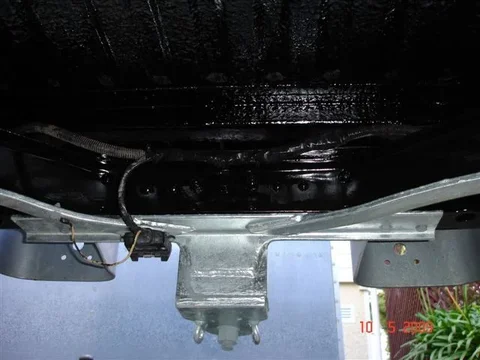
Then painted the rear bar and installed new tail lights- gotta love having a disabled car park opposite my garage! :)

100_0665.jpg


Wanted to protect the sills a bit with this truck, my last 40 copped few scratches the day after I painted the same spot. So I bought some pinch-weld from the local rubber store. As I'm planning on running this as a softy to start, I decided to put it on the edge around the top.

100_0658.jpg


100_0659.jpg
 
New bolts and washers in the windscreen hinges-

100_0675.jpg


Definitely worth the effort with these, no more rattles at all with the hinge. Gotta buy more of these kits now to do the rest of the hinges.

Well the spraying in the garage has definitely worked, here's the set up. I had the roller door half down, and the fan worked a treat sucking out the fumes.

100_0662.jpg


Well hope to go to the bolt shop tomorrow afternoon to replace all the bolts I took off. Will be good to free up some space in the garage once I start bolting things back on the truck.


:cheers:
 
Drslug your work looks great! How did you like the por15? was it easy to use? I am thinking about buying some but I just can't pull the trigger yet .
 
Drslug your work looks great! How did you like the por15? was it easy to use? I am thinking about buying some but I just can't pull the trigger yet .

Hi Chugging Along, yeah the POR-15 was great. Followed the instructions pretty close, and although the process is a bit lengthy, it was definitely worth it.

One tip though - when they say wear gloves, don't skimp on this area. Each time I got some on my hands/arms, it took days to wear off. The normal Solvol soap bars that I used did nothing except wear my skin off. :doh:
 
I have yet to take off the body panels off my FJ. Are they fairly easy to work with? Is reattachment easy? And if ya don't mind about how much did that POR 15 cost ya in your AUD?
 
Well got the front panels back on yesterday. Stinking hot in the sun, but steered clear of the :beer: .Was a bit difficult to measure where they were meant to bolt and tighten because I haven't got the bonnet ( hood for you Yanks ) hinges done yet. So I had to sit the bonnet on and go from there. I haven't done the little side panels yet either, this was because I have to cut the LHS for the snorkel fit-out.

100_0685.jpg


Once they were on and bolted I played with a new snorkel I bought a few weeks back-

100_0684.jpg


100_0687.jpg


With the snorkel attached I decided to bolt my newly acquired bull bar to the truck. Gee this was heavy, ended up sitting it on an esky (cooler box for you Yanks, chilly bin for the Kiwis) with a couple of phone books to adjust to the required height. Then it was a case of using the hi-lift jack for the finer adjusting.

100_0689.jpg


100_0690.jpg


Now that I have the bar on it should be a lot easier to paint, I'm going to do a hammered black finish. Have to weld on a few other tabs first though for my UHF radio, and some extra spot lights.

:cheers:
 
Last edited:
That bar should piss off the wankers at the stupid pedestrian safety council! Not sure how you get on up there in Brisvegas but I know a lot of guys in Adelaide are starting to get defects for bars like that.

Truck is looking good!
 
Well headlights installed -
100_0707.jpg


Then whacked in rubber matting on the floor-

100_0709.jpg

100_0705.jpg


Put the seats in, these came from my last cruiser -

100_0712.jpg


Kick panels installed, took ages getting the pins in for these, must of got a bit of paint stuck in the holes-

100_0711.jpg


Then it was bonnet time. New hinge pins and stainless bolts used, also made some gaskets with some neoprene rubber.

100_0714.jpg

100_0715.jpg


Also painted up the rear bumper pieces today, but ran out of time to install.

100_0720.jpg


:cheers:
 
Last edited:
....the bonnet ( hood for you Yanks )....an esky (cooler box for you Yanks, chilly bin for the Kiwis) ...

Great multilingual skills there Nick :D

...Also painted up the rear bumper pieces today, but ran out of time to install. ....

Why have you modified your bumperettes Nick?
100_0720.jpg


:cheers:[/QUOTE]:beer:

BTW - She's looking good!
 
.,...Modified the bumperettes??? Painted them the same colour as they were before, well these are off my old truck anyway.

Well they've been shortened Nick.

For OEM, they should look like this (without the 4 extra holes around each big-hole ... which is something I did for mounting a temporary roof-rack ..to be used for carrying one or two lengths of pipe or similar ...that I'm yet to design/make):

TowhooksRear2.webp

Towbar.webp

:beer:
TowhooksRear2.webp
Towbar.webp
 
Well they've been shortened Nick.

For OEM, they should look like this (without the 4 extra holes around each big-hole ... which is something I did for mounting a temporary roof-rack ..to be used for carrying one or two lengths of pipe or similar ...that I'm yet to design/make):

Hi Tom,

I think the photo I have is a bit of an optical illusion, they do look the same size as yours, and these ones are the same size as the black painted ones that were on this truck when I got it.

Ill post up some pics of them installed tonight if I can get it done :cheers:
 
...I think the photo I have is a bit of an optical illusion.....

Ah ha .... Damn cameras! They do lie quite often!

(What I'm seeing as a weld is really just a reflection.)
 
Well not much happened on the weekend. Pulled her out of the garage and applied the polish to the new paintwork.

Since I've had the truck a few times it hasn't cut out by itself, and I've had to manually pull the EDIC arm to stop. Well I initially sprayed it with WD-40 thinking it was just a bit stiff after sitting for so long, and it did start working again. But on Saturday it has failed to stop again, and it's starting to piss me off :crybaby:

So I sat on Saturday night trying to look at the wiring and realised this was a mess - previous owner had installed a Wilson Switch for the glowplug system, and it appears they have just used any old wire they could find, all the colours are the same.

But under the dash I finally got to the Fuel Control Relay and unbolted it. I took it apart and it looked as new, no sign of anything wrong there, so I put it back together. I seem to have misplaced my multimeter in the garage as well :doh: , so couldn't check for continuity as described in a few threads I found about it. I did jump the M plug on the EDIC motor and it ran, so it looks like this works. I just hope the problem is a dodgy loose wire somewhere else in the line

So it will have to wait till tomorrow arvo, once I have bought a new multimeter and made up some crocodile clip test leads.

Sorry no pics this week, Ill post up some tomorrow arvo hopefully with a normal running truck :)
 
Well I have a new Fuel Control Relay on its way, a mate has sourced one for me. Strange (and mostly annoying) thing is though after I took the old one off, then spent Wednesday evening checking all my wiring on the truck, I plugged it back onto the truck last night and it worked. Well it was working sometimes and then not others before, and I'm certain its the relay sticking, so now Ill have a spare in case it gives up again.

On other matters, I installed the bumpers last weekend, but there was a problem -

100_0724.jpg


100_0725.jpg


Looks like the right hand side one got twisted when it was fixed to the old cruiser, cause it doesn't sit properly now. I fixed it a bit by packing out the right hand side of it with a steel piece - this made it a bit better, but not perfect. So I'll pull it off and paint the ones that came with this truck, I know they are defiantly straight. Not going to waste my time trying to bend this one back into shape, ill end up having to repaint it anyway after doing that :(

Cut the hole out for the snorkel - primed these two side pieces up and will over weekend-

100_0721.jpg


Also got the bonnet latches on as well-

100_0723.jpg


Followed Toms advice on his hood restore thread - drilled out a hole at the bottom and shot some grease in there, hopefully this stops the rust problems I got on my last truck after a few months. They obviously don't make them the same as they did back in the 70's-80's, the original latches were a lot heavier as well.

Ordered some Old Man Emu shocks and a steering stabilizer yesterday, should have them to play with next weekend. Once their on and I finish the doors this weekend it will be roll bar time.

Well not sure if much is going to happen this weekend. The :princess: has got me going to some bridal expo tomorrow :doh: I keep telling her that working on my car is part of the wedding planning -I'm planning (and now have permission :p) to have 40 series cruisers as the bridal parties vehicles.

:cheers:
 
Looking good mate. I replaced my hood latches with shiny aftermarket ones too, and they are going rusty as we speak. I should drill a hole in them too or something, as the water just pools in there and hey presto, rust! :doh:

Enjoying all the pics. :beer:
 
Looks great!! Who's snorkel is that? Safari?
 
Looks great!! Who's snorkel is that? Safari?

I got in on eBay from a place in Adelaide that are making them - Direct 4x4 Accessories. Direct4x4accessories items - Get great deals on 4x4 snorkel, winch items on eBay Stores!

They are identical to the Safari, without having Safari written on the side of it. Really decent kit as well, comes with everything needed to hook up, at half the price of the Safari. Also I liked the 36 months warranty given as well on the plastics used, I think the Safari only offered 12 months?
 

Users who are viewing this thread

Back
Top Bottom