Navigation
Install the app
How to install the app on iOS
Follow along with the video below to see how to install our site as a web app on your home screen.
Note: This feature may not be available in some browsers.
More options
Style variation
You are using an out of date browser. It may not display this or other websites correctly.
You should upgrade or use an alternative browser.
You should upgrade or use an alternative browser.
Dave's 1978 FJ40 long restoration project
- Thread starter DSB345
- Start date
This site may earn a commission from merchant affiliate
links, including eBay, Amazon, Skimlinks, and others.
- Joined
- Apr 14, 2004
- Threads
- 1,475
- Messages
- 36,911
- Location
- 818-953-9230
- Website
- www.marksoffroad.net
Goodness, talk about Cruiser Porn.....that's a keeper!
Do you know what knuckle kit was used on the rebuild?
Ummm, that would be a Mark's Off Road knuckle kit!

The axle looks great!
Looking incredible, that axle is definately 40 porn.................
- Joined
- Apr 14, 2004
- Threads
- 1,475
- Messages
- 36,911
- Location
- 818-953-9230
- Website
- www.marksoffroad.net
Dave
I dismantled the transfer case this afternoon. Dave had warned me before he brought the case in that the drain plug was frozen, and that he'd rounded off the plug and gouged the case trying in vain to get it out. Sure enough, Even laying the case on the ground and whacking the drain plug with a chisel wouldn't do it. So I resorted to a trick suggested by Pinhead: I welded a nut right over top of the plug. Worked like a charm.

I will get it hot tanked tomorrow and evaluate whether it's gonna be cheaper to weld up the aluminum you ground off or just replace the case.
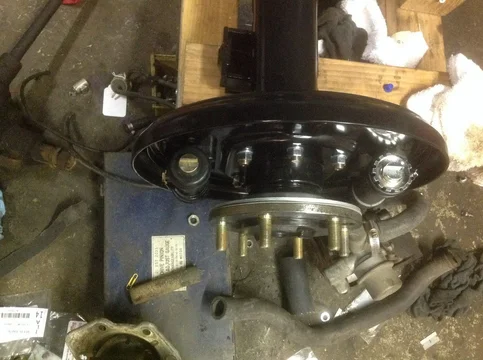
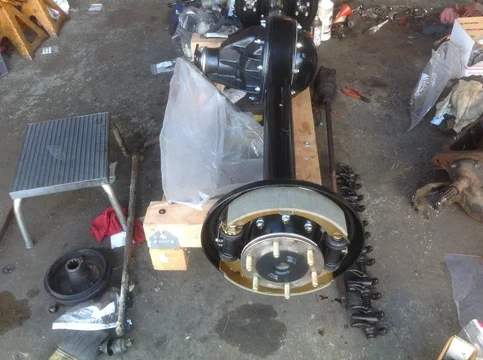
Should have a progress pic on the rear end too.
I dismantled the transfer case this afternoon. Dave had warned me before he brought the case in that the drain plug was frozen, and that he'd rounded off the plug and gouged the case trying in vain to get it out. Sure enough, Even laying the case on the ground and whacking the drain plug with a chisel wouldn't do it. So I resorted to a trick suggested by Pinhead: I welded a nut right over top of the plug. Worked like a charm.

I will get it hot tanked tomorrow and evaluate whether it's gonna be cheaper to weld up the aluminum you ground off or just replace the case.
Should have a progress pic on the rear end too.
Last edited:
DSB345
SILVER Star
- Thread starter
- #88
OK 

Dave
I dismantled the transfer case this afternoon. Even laying the case on the ground and whacking the drain plug with a chisel wouldn't do it. So I resorted to a trick suggested by Pinhead: I welded a nut right over top of the plug. Worked like a charm. I will get it hot tanked tomorrow and evaluate whether it's gonna be cheaper to weld up the aluminum you ground off or just replace the case.
Should have a progress pic on the rear end too.
- Joined
- Apr 14, 2004
- Threads
- 1,475
- Messages
- 36,911
- Location
- 818-953-9230
- Website
- www.marksoffroad.net
- Joined
- Apr 14, 2004
- Threads
- 1,475
- Messages
- 36,911
- Location
- 818-953-9230
- Website
- www.marksoffroad.net
Forgot to show this to you when you were here:

GA Architect
SILVER Star
Forgot to show this to you when you were here:
If only I were on the West Coast......*sigh*
Nice work!
- Joined
- Apr 14, 2004
- Threads
- 1,475
- Messages
- 36,911
- Location
- 818-953-9230
- Website
- www.marksoffroad.net
If only I were on the West Coast......*sigh*
Nice work!
No credit here, except for being a hoarder: it's a NOS cluster.
- Joined
- Apr 14, 2004
- Threads
- 1,475
- Messages
- 36,911
- Location
- 818-953-9230
- Website
- www.marksoffroad.net
DSB345
SILVER Star
- Thread starter
- #94
I think the new case is more cost effective, Mark. I'm very glad I'm having you do this right so I don't have to fix my mistakes later and I know I have a sound drive train that will be dependable for many years to come. Your doing a fantastic job for me. Very professional top notch skill and expertise. I'm learning a lot and having fun too 
Dave
Dave
Got the case back from hot tank. I don't think the gouges you made are structural. I can certainly weld it back up and smooth it down. It's just time. Plus time to clean it up. I have an empty case that will probably end up being more cost-effective.
View attachment 1196020
Last edited:
DSB345
SILVER Star
- Thread starter
- #95
What mark is trying to say is when I originally tried to remove the plug to drain the transfer case, I tried the correct socket with a rachet but it wouldn't budge. Then, I resorted to a wrench and hammer and that didn't work. I was thinking, I will just get our my IR gun with 780 ft. pounds and that should work for sure. It stripped all the corners of the nut instantly. So I thought hummm, now what. I have that really nice Makita grinder what if I grind down the nut into two flat spots and use the good ole' vise grips and hammer trick. Surely that would work. As I was grinding down the nutwith ambers flying into my face and on my clothes, I pulled the Makita back to take a look at my progress and saw that I had accidently ground right into the case a little. I dropped the Makita and just laid there awhile looking at my stupid mistake and said to myself, That's going to cost me big. I got out from under the rig and gave up for the day. 

Last edited:
Man i took my transfer plug out for the first time the other day and it was really stubborn and stripped from PO, what I used was pipe wrench . Those things will bite into whatever u got , just go easy and let it get a good bite and have at it . Worked for meWhat mark is trying to say is when I originally tried to remove the plug to drain the transfer case, I tried the correct socket with a rachet but it wouldn't budge. Then, I resorted to a wrench and hammer and that didn't work. I was thinking, I will just get our my IR gun with 780 ft. pounds and that should work for sure. It stripped all the corners of the nut instantly. So I thought hummm, now what. I have that really nice Makita grinder what if I grind down the nut into two flat spots and use the good ole' vise grips and hammer trick. Surely that would work. As I was grinding down the nutwith ambers flying into my face and on my clothes, I pulled the Makita back to take a look at my progress and saw that I had accidently ground right into the case a little. I dropped the Makita and just laid there awhile looking at my stupid mistake and said to myself, That's going to cost me big. I got out from under the rig and gave up for the day.
- Joined
- Apr 14, 2004
- Threads
- 1,475
- Messages
- 36,911
- Location
- 818-953-9230
- Website
- www.marksoffroad.net
Dave
You asked me to keep you posted on the timing cover. Today is engine day at the house. I am working on the 45, stripping the F.5 I just got from South Dakota, and yours is right here too. I've decided to powderpaint my timing cover. It's just addictive, seeing that paint.
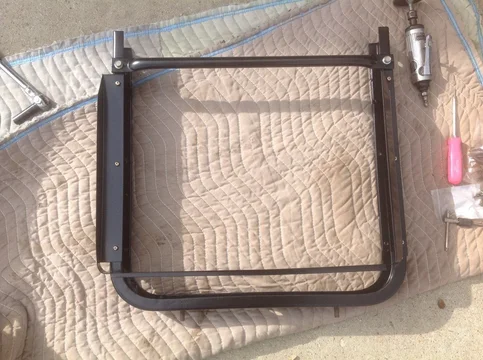
Just reassembled my radiator core support.

Bling!
So you want me to get yours done too. The timing cover on that motor already has a fresh seal and gasket on it I will have to redo if I pull it. LMK
You asked me to keep you posted on the timing cover. Today is engine day at the house. I am working on the 45, stripping the F.5 I just got from South Dakota, and yours is right here too. I've decided to powderpaint my timing cover. It's just addictive, seeing that paint.
Just reassembled my radiator core support.

Bling!
So you want me to get yours done too. The timing cover on that motor already has a fresh seal and gasket on it I will have to redo if I pull it. LMK
DSB345
SILVER Star
- Thread starter
- #99
Yes please
Dave
You asked me to keep you posted on the timing cover. Today is engine day at the house. I am working on the 45, stripping the F.5 I just got from South Dakota, and yours is right here too. I've decided to powderpaint my timing cover. It's just addictive, seeing that paint.
Just reassembled my radiator core support.
View attachment 1196412
Bling!
So you want me to get yours done too. The timing cover on that motor already has a fresh seal and gasket on it I will have to redo if I pull it. LMK
- Joined
- Apr 14, 2004
- Threads
- 1,475
- Messages
- 36,911
- Location
- 818-953-9230
- Website
- www.marksoffroad.net
Similar threads
- Replies
- 6
- Views
- 737
Users who are viewing this thread
Total: 1 (members: 0, guests: 1)


