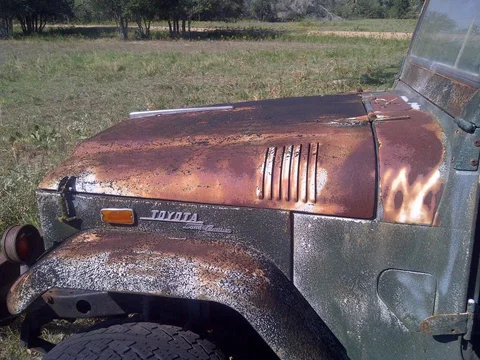
Barn Rebuild: The family heirloom

This site may earn a commission from merchant affiliate
links, including eBay, Amazon, Skimlinks, and others.

I used the durabak on the inside of my tub and was as meticulous as I could be about surface prep and prime following every direction possible. Clean with POR and their etching primer. Wearing pretty well but peeling in a few high wear spots like floorboards..
 
I used the durabak on the inside of my tub and was as meticulous as I could be about surface prep and prime following every direction possible. Clean with POR and their etching primer. Wearing pretty well but peeling in a few high wear spots like floorboards..
Did you use a roller to apply or did you spray it on?

I emailed the company and asked about applying during the recoat window after priming or scuffing the primer after it cures. They said scuffing completely dry primer should get best adhesion for me.

I might spray the Durabak if I have the right tip. I have a 2.3mm tip and I have a cheap texturing gun with a 1/4" tip. I am emailing Durabak to ask what they recommend. I'll roll it on if I don't already own the right tools to spray it.
 
I sprayed it on with a shutz gun that someone gave me from their raptor kit. I was really happy with the results.

104_3071.webp


104_3087.webp


104_3096.webp
 
I wouldn't recommend durabak for anywhere that will be in the sun. PO coated my 74 inside and out about 15 years ago in PNW. It was cooked off the hood etc. by the Texas sun but has held up ok on the inside/bottom. I'm going to redo it with monstaliner.
 
I wonder if the Durabak from 15 years ago has the same UV additives that the current stuff has.

Regardless, I'm only doing undercoat and floors. The rest of the body panels/dash will be painted with PPG Deltron single stage in factory colors.
 
I went to the barn today to collect parts. If I'm applying Durabak to the tub, I should probably apply it to the transmission tunnel. I dug that out and a few other parts.

Started cleaning the transmission tunnel with the wire wheel on the 4.5" Porter Cable. After mostly cleaning it, I sprayed the tunnel with H3PO4 and rinsed it. The plan is to sand it and prime it tonight so I can Durabak the whole under carriage and the tunnel tomorrow. Durabak literature states good adhesion and fast cure when it is hot and humid. DFW has a heat advisory tomorrow.

While I was working, FedEx arrived:
20150805_152638.webp
 
Round 2: prime the rest of the tub.

No rotisserie, but 4 saw horses, some cold beer, and a few friends can do nearly the same thing.

This is before the epoxy primer. I had previously applied rattle can etch primer in some areas to prevent my sweat from returning rust.

20150810_095907.webp
 
Looking good!
 
I know I don't update often. I work on the Land Cruiser between many other projects.

Over the course of the past few weeks, I've been working on the body. Slight hammering and light filler work were done to cover the worst spots. I didn't want to hide all the spot welds, so I have those and a few other imperfections showing through. I figure I can probably live with it this way.

I bought PPG Deltron single stage paint in Spring Green. I hung plastic and wetted the floor to control the dust. A sealer coat of primer, then a coat of paint.

I'm waiting for the first coat to dry enough to touch up a couple runs with 100 grit, then I'll spray a second coat. I hope it turns out well.


Sent from my LGLS990
 
Today, I finished the paint for the tub. Specifically, I applied gray Durabak to the interior. My first attempt at painting a vehicle was so poorly done (and so long ago) that this doesn't quite qualify as a second attempt. I'm no master of painting, but I can live with the results.
uploadfromtaptalk1446413579052.webp
uploadfromtaptalk1446413586186.webp
uploadfromtaptalk1446413599636.webp


Sent from my LGLS990
 
It's a truck, it doesn't need to be perfect.

But it looks great!
 
At first I thought I'd ruined the paint where the masking tape was. The tech sheet from PPG said I could mask and over coat after 8-10 hours, before 24 hours. I waited 12-15 hours, taped everything off, and applied the Durabak. Peeling the tape off, I thought I'd ruined everything, because the paint appeared sticky and textured wherever the Durabak got on the tape.

After stressing out for a bit, I noticed that the solvents in the Durabak had soaked into the tape adhesive, and caused the adhesive to be left on the paint after removing the tape. I'll wait for everything to cure, then wipe off the adhesive with some acetone. Hopefully, everything works out as I intend.

Sent from my LGLS990
 
I guess I will wait a few more days so the solvents all evaporate before I use anything to clean up the adhesive residue. I'll research the contents of my paint Reducer and steer clear of anything on that list.


Sent from my LGLS990
 
I've been picking through the wire harness for the cowl this weekend.

uploadfromtaptalk1447632916082.webp


The good news is it is mostly complete. Only a few ends are missing. There are some missing connectors and one or two inappropriate splices, but in good shape considering the age and history of this vehicle.

The fuse panel is in good shape, but the cover is mediocre. I know racer65 has a repro panel with an extra fused circuit, but I'm thinking I'll stick with the factory one for the time being.

uploadfromtaptalk1447633103992.webp


Sent from my LGLS990
 

Users who are viewing this thread

Back
Top Bottom