Builds ?????????80 tm Build Input Requested (26 Viewers)

This site may earn a commission from merchant affiliate
links, including eBay, Amazon, Skimlinks, and others.

Done....well half assed done.


image-4042014198.jpg

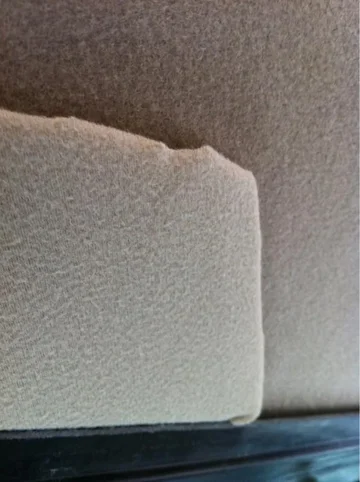
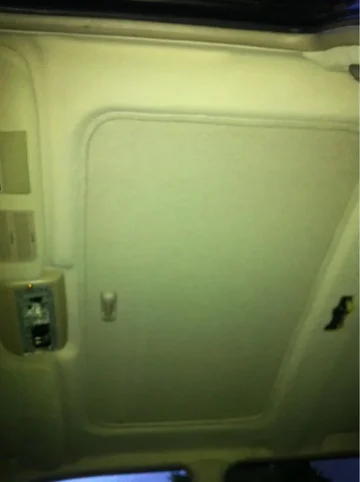
Can't get to the nutsert in the sunroof tray without dropping the assembly, and out of patience. (have one rattling around in rear door I haven't found for three days, either. Going to drive me nuts).

I may lose my entry in the fair over this, too. Headliner and all other tan is recovered in the swatch color. Sun visors and sunroof shade may remain OE.


image-3981044223.jpg

Have I lost my mind in thinking I'll regret not doing it right, or am I splitting hairs over a non-issue, anyway?

Do I pull the assembly to replace the glass, anyway? Fix then?
image-4042014198.jpg
image-3981044223.jpg
 
You do not have to pull the tray to remove the glass... The plastic trim has to be remove to exposed the bolts for the glass.... Be careful when removing the trim...years of sun exposer has made the plastic brittle...I cracked one piece trying to get it off.
My advise would be to drop the tray, grab the nutsert ..... If you don't want to purchase more liner and you can live with a slightly different color shade bolt the tray back up, because it's not like the sunshade is sitting on top and you can just slide it out.. You have to disassemble a portion of the tray which.. Trust me it was a puzzle to figure out how to get that shade out.....trying to get the shade out and back in was a bigger PITA then calibrating the motor..... Grab the Nutsert and call it a day...

Lou

Sent from my iPad using IH8MUD
 
In brief thread perusals, I've read about the plastic breaking and that it isn't available in tan, which is what I have.....already broken, compliments of PO.

Good news on the glass and many thanks for the OCD check, too.

Going to try the monkey snack trick and try to fish the nutsert out with a magnet, like ants on a stick. The tray is plastic, so it may work. If not will pull it.

Can't believe the work to remove, to get it out, but has to be done. Will deaden area above if it's pulled.

Thanks, Lou.
 
Maybe someone else has said this before, maybe not.

Keep positive on this truck. With the amount of care it's getting now (despite all of the previous neglect) you will be very happy with the outcome.

The magnet idea sounds like a pretty good one. If not eventually the nut might find a home and stop rattling around haha.
 
I just now officially deleted the expense tracking for this project, so as long as no one asks what it cost, I'll remain positive.

It would've been cheaper to put D60s under the FJC. Hahaha, but enjoying it, nonetheless.

A friend of my wife's was picking up my daughter last night, as I'm sweating on the freshly cleaned carpets lining tray and reassembling interior, and asked if I was restoring. It caught me off guard, because it has all the appearances of a restoration, yet my purpose is a crawler.

Got me thinking.

Doesn't make much sense, but I question the intent coupled with expense, and decided, like any addiction, it's better to roll with it, and destroy anything that detracts from the enjoyment of, so I'm officially not keeping track of expenditures, anymore. (How's that feel, Spenser, or can you turn work off? Hahaha.)

Hopefully leathers show today, and can complete the interior portion, sans tire and rear inner fender storage, start suspension.
 
installing headliner

Monkey snack's...great job..

One more warning.... when you re-install your headliner...I used an awl to line up the holes and ended up dislodging a nutsert that rattles around ....driving me nuts.. I'm thinking about shooting expandable foam to keep it in place... Just letting you know;)

Lou
 
Thanks for the warning. Had forgotten to pull the tan covers by the front seat belts, so dropped earlier. Waiting on the call to pick up all.

I'd thought of expansion foam in rear hatch, because I can't find the friggin nutsert that's rolling around, or anywhere it could be, unless between the skins, inaccessible.

Have an admission of guilt.

After all was said and done, I partially dropped the tray to deaden above (unbolted, but propped up 4" from roof with collapsing lawn chairs).

Wound up one sheet shy of total coverage, but placed strategically.

For the record, more than anything.
 
What I'm doing is similar to your project, don't add it up, it will just anger you
 
I just now officially deleted the expense tracking for this project, so as long as no one asks what it cost, I'll remain positive.

It would've been cheaper to put D60s under the FJC. Hahaha, but enjoying it, nonetheless.

A friend of my wife's was picking up my daughter last night, as I'm sweating on the freshly cleaned carpets lining tray and reassembling interior, and asked if I was restoring. It caught me off guard, because it has all the appearances of a restoration, yet my purpose is a crawler.

Got me thinking.

Doesn't make much sense, but I question the intent coupled with expense, and decided, like any addiction, it's better to roll with it, and destroy anything that detracts from the enjoyment of, so I'm officially not keeping track of expenditures, anymore. (How's that feel, Spenser, or can you turn work off? Hahaha.)

Hopefully leathers show today, and can complete the interior portion, sans tire and rear inner fender storage, start suspension.

That works for me Chris. I come home and dream about fixing issues at work. I've decided to just embrace the madness and go for it. I'm starting to pick up some parts for a major (to me) overhaul. Front axle rebuild, new rubber under the hood, new bushings, etc. Having a great time with it and if I find some bad PO items so be it.
 
Slowerthanu said:
What I'm doing is similar to your project, don't add it up, it will just anger you

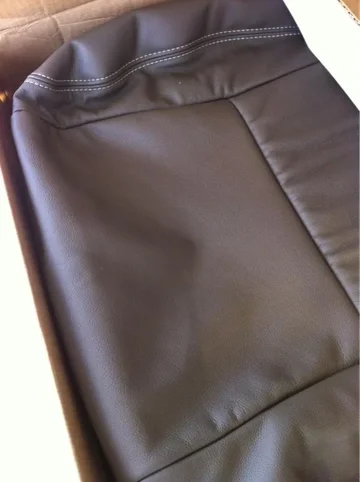
About the time I start to angry about, UPS drops off a package like this


image-1542905243.jpg


And all's good in the world again.

Awesome looking. Wish I had done the headliner in leather, to match. Hahaha.

Picking up headliner now, and this is in for interior work.


image-2223166673.jpg


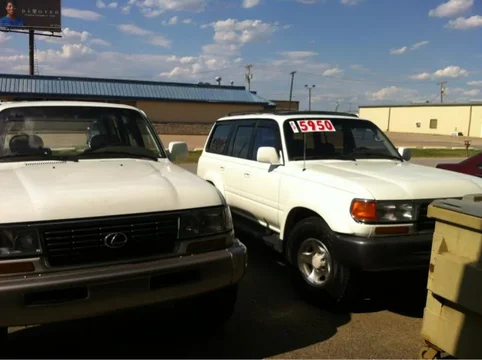
Locked, 200k. Getting details from lot, and will post up in the FS by others.
image-1542905243.jpg
image-2223166673.jpg
 
I dropped off the seats and armrests today at the upholstery shop. Guy called me this afternoon to tell me all was going great and that Shanes kit fits awesome. I'm excited for the new, not stinky seats.

On the carpet, what did you use to clean them? I have a little Bissell and I was using that, combined with hose water to clean it but I was considering renting an industrial one to really get it fresh.
 
fjrohrs said:
That works for me Chris. I come home and dream about fixing issues at work. I've decided to just embrace the madness and go for it. I'm starting to pick up some parts for a major (to me) overhaul. Front axle rebuild, new rubber under the hood, new bushings, etc. Having a great time with it and if I find some bad PO items so be it.

Was involved in a local's front rebuild. Super nice guys, learned a lot in just the tear down portion, and bet both would be willing to assist.
 
I'm not sure what you decided on for your spare but I just finished the major work on my 4x4 labs rear bumper and it was a joy to build (I've built MANY bumpers and this was the most "fun").

I don't like the ladder that comes with the kit so I am going to bend up my own and adapt the hi-lift mount and bike rack to that.
 
Slowerthanu said:
I dropped off the seats and armrests today at the upholstery shop. Guy called me this afternoon to tell me all was going great and that Shanes kit fits awesome. I'm excited for the new, not stinky seats.

On the carpet, what did you use to clean them? I have a little Bissell and I was using that, combined with hose water to clean it but I was considering renting an industrial one to really get it fresh.

Good news, but I expected them to from thread perusals and talking to Shane.

Was rushing to get headliner before 5 and didn't open Shane's box until I arrived there. Interior guy said they looked nice. He's swapping front and second, console and both armrest for $200, with me delivering seats to him, uninstalled.

Can't wait to actually dig into box.

I asked the same guy about carpet cleaning, and he said he pulls them, scrubs them down with diluted Simple Green (per package directions) and an interior scrub brush (softer bristled).

I was hesitant, but talked to a detail tech I know and he said the same thing. Claimed the high dollar cleaners are all a biodegradable product very similar to Simple Green, yet scented different.

That's what I did. Scrubbed, rinsed, scrubbed, rinsed thoroughly, then hung out to dry (which took about an hour in 109 degree temps).

They look a thousand times better, but it didn't remove rust stains under the rear door sill (not visible with sill installed) nor a funky stain be the DS front seat bracket. I used a razor and shaved it off.

I'm about as good a judge of scent, as I am color, due to allergies, but after pulling the tire out, and baking in the sun all day today, when I went to get headliner it actually smelled good, a vast improvement from the mustiness prior to cleaning.
 
Last order from Beno.

All suspension related OE bolts. (Rear links, radius arms, pan hards.)

image-1924311805.jpg

Learned on the FJC to have them handy, in the event a sawzall, torch, or grinder becomes involved with removal. Figured I'd swap, per FSM of course, for good measure, and in case they aren't in a good mood when removing.

Also, when deadening, the inner door vapor barriers were accidentally discarded, and by the time I realized and went dumpster diving, it was too late to recover. (part number, for others).


image-1924311805.jpg

Bought the last two fronts in the US, no known rears, nor ETAs on. Have thousands of square feet of thick mil visqueen, but not sure where the pockets on the rear are, so searching for pic.

Anyone know if Vulkem would suffice to adhere to door?

I know it'll inevitably cure, bill stink for the entire duration, which will be prolonged in the heat. Other suggestions?
image-1924311805.jpg
 
Slowerthanu said:
I'm not sure what you decided on for your spare but I just finished the major work on my 4x4 labs rear bumper and it was a joy to build (I've built MANY bumpers and this was the most "fun").

I don't like the ladder that comes with the kit so I am going to bend up my own and adapt the hi-lift mount and bike rack to that.


Haven't, yet.

I have the first Alpha (?? ) that timkorn and stainlessdoc produced, sans swing out (old pics)


image-1127840348.jpg


image-1470507064.jpg

And it's built to the hilt, very tough, but may take a different approach and cut the rear crossmember, taper it at the bottom up towards the body mount, then mimic the lines of the OE wings (I know, very lofty and ambitious) and tuck the rear closer to the body, for a minimalistic appearance and clearance. (weld recovery points into the ends of the frame rails).

Due to all that, was reason for cargo mount for spare. If I could minimize stench of molten rubber, would almost deal with the loss of space.

For the front, I haven't even began to think about, but same minimalism with a concealed winch mount.

Last build started as an expeditionary purpose with roof rack, ladder, more lights than Wrigley Field, but all went unused and sold. Approached this with the intent of a light weight, very capable, weekender/day tripper.

We'll see how it turns out, though.
image-1470507064.jpg
image-1127840348.jpg
 
Delancy said:
Last order from Beno.

All suspension related OE bolts. (Rear links, radius arms, pan hards.)

Learned on the FJC to have them handy, in the event a sawzall, torch, or grinder becomes involved with removal. Figured I'd swap, per FSM of course, for good measure, and in case they aren't in a good mood when removing.

Also, when deadening, the inner door vapor barriers were accidentally discarded, and by the time I realized and went dumpster diving, it was too late to recover. (part number, for others).

Bought the last two fronts in the US, no known rears, nor ETAs on. Have thousands of square feet of thick mil visqueen, but not sure where the pockets on the rear are, so searching for pic.

Anyone know if Vulkem would suffice to adhere to door?

I know it'll inevitably cure, bill stink for the entire duration, which will be prolonged in the heat. Other suggestions?

I didn't know you could order the barrier..so I just cut my own and used 3m Strip-Calk... recommend by my a body shop guy and works great... It's really hard to work with in hot weather ...it gets really sticky ....so I had small cooler that I kept tossing it back in during the install

Lou

Sent from my iPad using IH8MUD
image-1519693083.jpg
image-4017020913.jpg
image-1168688195.jpg
 
Thanks for the pic and product advice, Lou. Makes good sense on the strip caulking, now that I think of it.

Still no speakers, so a little preliminary. Was hoping to wrap up tonight, but a lot of work, no doubt.

If I were to do another strip and install tomorrow, would take a 1/10 of the time, but by the time the opportunity presents again, sure I'll have forgotten the process. Haven't opened the book on this one.

I'll be losing sleep over this, tonight.


image-1547960349.jpg


Almost done. Fumbling through handles and errors has taken its toll.

Yes, I now know the handle should installed before the pillar cover. Hahaha.


image-842390630.jpg
image-1547960349.jpg
image-842390630.jpg
 
Chris, this looks great ... I have to laugh about your comment about not keeping track of cost.. When I bought my FJ55... the only thing I planned on doing was swapping out the 3 speed trans for a 4speed ..replace a few bulbs and fix the leaky A/C...
I sold it for $35k and let's just say I still lost more the $10k.... Your working at warp speed ..looking good

Lou

Sent from my iPad using IH8MUD
 

Users who are viewing this thread

Back
Top Bottom