4x4lbs rear bumper install.....questions... (1 Viewer)

This site may earn a commission from merchant affiliate
links, including eBay, Amazon, Skimlinks, and others.

Well, I decided at 4am, screw it...its almost daylight....time for a bumper install!

14 and a half hernias later....I'm done!

(at least til I have to take it all apart for powdercoating....)

I had a feeling the spare would take up almost the entire rear end...its just silliness.

IMG_0733.jpg


Because of the lack of space I decided to mount the hi-lift on the outside of the ladder instead of the inside. I kept it at the ladder angle to keep it inside the body lines so I'm not pulling trees down with it.

The first tire fitment showed that the original angle for the spare was completely vertical meaning it stuck out far and just looked weird to me. I decided to do away with the 2 bolts that "pinch" the tire clover tube and weld it all up at the angle I wanted.

This allowed me to bring the tire closer to the body and the angle looks better IMO.

IMG_0734.jpg


IMG_0735.jpg


I haven't installed the little magic gas struts for the arms yet. Since the rounded head strut mounts are threaded like screws...am I going to have to drill holes and them tap them so the mounts can screw in?

This is as far as the tire swingout can go out because of the stops placement....the ladder swingout can go farther (I think it was like 135 degrees?).

IMG_0736.jpg
 
Nice. That spare tire is retarded huge. It's all looking good though. I hope the swingout is all beefy enough to support that tire over bumpy roads. Does it wiggle much?

As for the gas strut, I just finally installed mine last week. I used a 80 series hood strut. And yes you'll have to drill and tap, at least that's what I did. Worked out well.
 
The kit comes with 2 gas struts so I have em...just gotta get around to installing them.

It vibrates a bit when driving over bumps, but nothing crazy. If I walk back there and give it a quick push towards the truck, it will wiggle a bit, but its quite solid. Since I didn't plan on drilling more holes and ever removing the ladder or tire carrier from the swingouts, I just welded every inch of contacting metal I could - so I'm sure that adds to the solidness.
 
Looking good Cody!:cool: That's what is great about the kit, if you don't like how the design works on your rig, cut and weld until it does!:hillbilly:

The strap that I welded to the front edge of the wings.
filler_1.jpg
filler_2.jpg
 
The pic in post 41 makes your ladder look like it's completely vertical, what gives there? Mine follows the angle of the upper hatch.
 
dude, that spare is fawking huge! hahaha, i bet you can't see a thing out the back?

Also, your truck looks great, BUT, put some real liner on it! that herculiner looks like crap in that picture. Just go ahead and do it right like you have the rest of your rig.
 
yeah...thats what I get for getting it muddy and then powerwashing it a lot. The next go around with liner I'll lay it on a lot thicker, maybe even spray some black primer under it first.

There is a curve to the ladder you can see in the swingouts open picture, so its somewhat of an optical illusion with my camera and the completely straight hi-lift in front of it.

I could have added more of an angle for looks, but I noticed when test fitting it turned the ladder ONLY into looks, since I'd have to kick out the rear window to be able to step on that rung at all.

Visibility....who needs it?


IMG_0737.jpg
 
(at least til I have to take it all apart for powdercoating....)

With as much as I have had powdercoated, I'd recommend knocking down all of the sharp metal corners prior to powdercoat. The rust has alot easier time getting started in sharp edges where the powdercoat will be the thinnest.


The first tire fitment showed that the original angle for the spare was completely vertical meaning it stuck out far and just looked weird to me. I decided to do away with the 2 bolts that "pinch" the tire clover tube and weld it all up at the angle I wanted.

This allowed me to bring the tire closer to the body and the angle looks better IMO.

The square tube for the tire should have already been cut to the angle of the back window, no?


I haven't installed the little magic gas struts for the arms yet. Since the rounded head strut mounts are threaded like screws...am I going to have to drill holes and them tap them so the mounts can screw in?

Yes you will have to tap them and I would also nut them from the bottom side for more support. Obviously, you don't have the luxury of doing so on the swingouts though.

The kit comes with 2 gas struts so I have em...just gotta get around to installing them.

You should also prepare for the possibility of having to swap out the balls for stainless pretty soon. Mine are starting to rust and I live in sunny San Diego:frown: Also, I drilled mine exactly according to the centerpunch marks. This caused the right strut to max out just prior to the swingout fully opening (not pretty) I was able to adjust the strut by loosening each end about 1/2-1 turn.
 
This is what the tire clover setup looked like when done...it was just about a 90 degree angle making the tire stand vertically on the back if not a little negative meaning the top of the tire was sticking out further than the bottom when installed.

pic21.jpg


This is what I did:

IMG_0741.jpg
 
Here's what I mean- check out your ladder vs mine.

DSC01319.jpg
 
This is what the tire clover setup looked like when done

Ah yes, that reminds me, I would tack the backside of each of those PEM studs as well. They can strip very easily if you rely on the splines alone.

My square tube came precut to place the "clover" at that angle.
 
I wouldn't powdercoat anything that is likely to come into rock contact, because touch-up is not easy. Prime and spray paint, scratches on the underside become a two minute touch-up.
 
I wouldn't powdercoat anything that is likely to come into rock contact, because touch-up is not easy. Prime and spray paint, scratches on the underside become a two minute touch-up.

I went with a 'hammered' textured powder coat. I did that to cover up the less than pretty welding. Krylon hammerite rattle can is a perfect enough match that I can't see the touch ups.
 
I wouldn't powdercoat anything that is likely to come into rock contact, because touch-up is not easy. Prime and spray paint, scratches on the underside become a two minute touch-up.

Ah, touch-up........smuch-up. I powdercoat everything. Scratches on the underside or anyside become character:D. When something starts looking too shabby, I'll re-powdercoat it;)
 
Yay....welding is fun.

But welding with gas with wind around makes me want to punch babies!

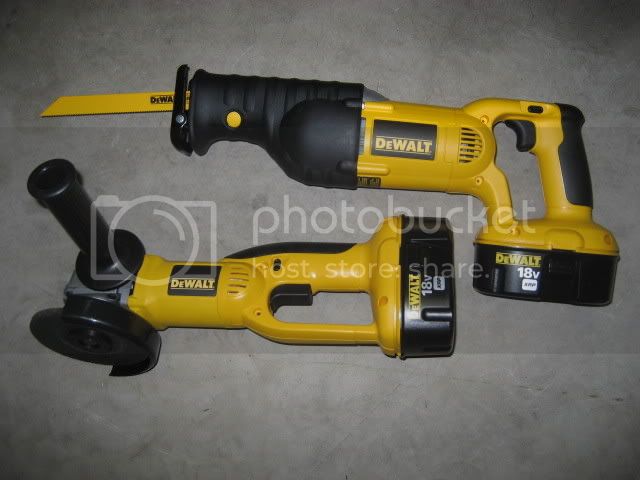
I tried my 4.5" grinder for those inner welds....that was the most awkward can't really reach anything experience....

The long blade on the sawzall killed those welds pretty easily...barely anything left to grind off on those.

This is as much as I could accomplish by myself before it started getting dark.

IMG_0721.jpg
Ready to start the sawing and grinding on mine today, I have a set of 6 inch sawzall blades for the rear main X-member cuts..How long a blade do you suggest for the inner weld cuts (top, bottom and vertical)?
Thanks in advance.
 
Ready to start the sawing and grinding on mine today, I have a set of 6 inch sawzall blades for the rear main X-member cuts..How long a blade do you suggest for the inner weld cuts (top, bottom and vertical)?
Thanks in advance.

I used a few different tools to perform this task but you will want a smaller (3" or so metal blade as well) I ended up using one 6" blade that was toast afterwards and one 3" blade that was still usable afterwards.
 
I had one blade that was about 8-10" long or so. The reason I used that one was because if the little blades pulled into the sawzall enough to come out of the cut area....they would turn and smash into whatever I was cutting and bend the blade all up.

The long blade I used gave me plenty of room to get in there and keep the blade cutting instead of popping out.

Edit, this is a pic of the long blade I used inside the sawzall:

IMG_0710.jpg
 
Last edited:

Users who are viewing this thread

Back
Top Bottom