Builds 1994 1hz 80 series ZOMBIE

This site may earn a commission from merchant affiliate
links, including eBay, Amazon, Skimlinks, and others.

behooooooold all ye whom follow.....the sun roof is WORKING....but

i cant figure out how to properly align the motor, rails and the open/close tilt up n down.....this is what is happening....

1- the close and open work for a few seconds and then stop....motor hot ....hence i know the circuit breaker thing is working.
2- no tilt up n down key function what so ever UNTIL.....its all the way open....

therefore...what i hope i understand and hence need help on is....my alignment is waaaaaaaaaay off....

1- in what EXACT position is the sunroof supposed to be in BEFORE i start anything.
2- how are the motor switches supposed to be aligned with the motor gears.

and as i am still young at heart.....would love to see pictures.....even raggedy paint brush illustrations will help

i have nothing in the FSMs EWD ( i have the RM184E)
 
ok....my fault...found it on the Body section...will tackle it in the morning....working with a mining lamp isn't healthy.....and i could get shot if anyone thinks im a thief looking for something...
 
I would love to help guide you but have never been into the sunroof operating mechanism myself! Sorry!!

motivation is the greatest help....dont worry bro....im struggling...but enjoying every second.

Thanx
 
sunroof alignment...

after reading through this wonderful post...

https://forum.ih8mud.com/80-series-tech/260221-how-sun-roof-repair.html

i add a few tips.....based on my modest experience....and believe me....its very modest.

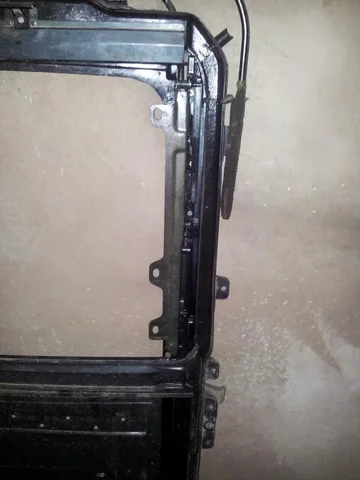
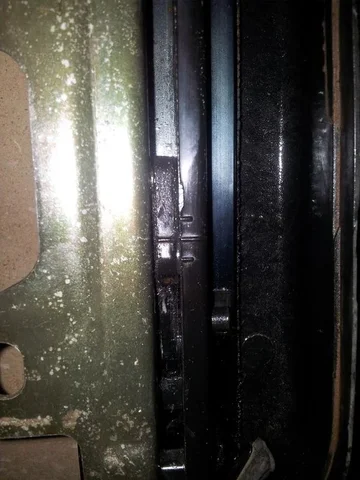
once u clean, lube and begin to install your sunroof....make sure that the alignment marks between the triangular moving part and the glass mounts are aligned....as the post said.....its VERY important.
s1.jpg
s2.jpg

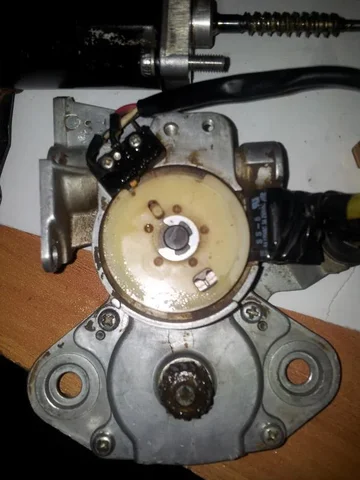
then...open the small motor cover before installing it....and align as shown
s3.jpg

when u close it up again.....im pretty sure u will manage to move it, as i did....therefore...make sure u do ANOTHER mark outside...this saves u having to go back and remove that cover again to re-align.
s4.jpg

s1.jpg


s2.jpg


s3.jpg


s4.jpg
 
next up...door switches

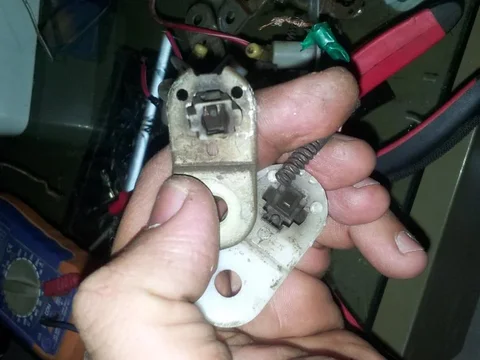
testing the door switches.....as anticipated....they work 5% of the time.

d1.jpg

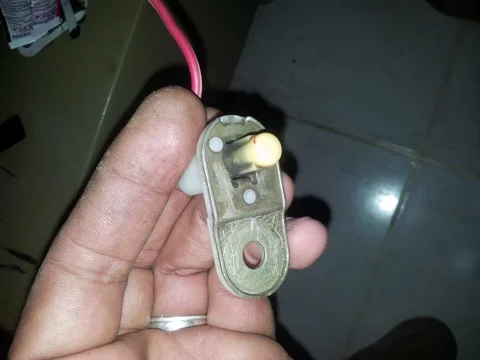
...so....knowing me and my caffeine addiction.....why not dismantle them, and see whats happening....

d2.jpg

the contact that does the earthing is either to far bend....or just rusty/clogged...thats why its not working most of the time....will clean up and post pics......this time i will show off my Made in China multimeter...:D:grinpimp:

d1.jpg


d2.jpg
 
a question.....we dont have silicon lube here.....what would the best alternative for the sunroof rails before i install it back in?? engine oil....hydraulic oil.....brake fluid...or just good old bearing grease???
 
Choices in order of availability:
1) Silicone lubricant
2) White Lithium grease
3) Light bearing grease
4) Goose grease
5) Engine oil
 
Choices in order of availability:
1) Silicone lubricant
2) White Lithium grease
3) Light bearing grease
4) Goose grease
5) Engine oil

thank you....will see whats available from 2 down....i searched high and low for silicone..no luck
 
door switch fix

during my previous junkyard visits, i didnt even bother to look for door switches...i thought....what could go wrong with them....hmmmmmm

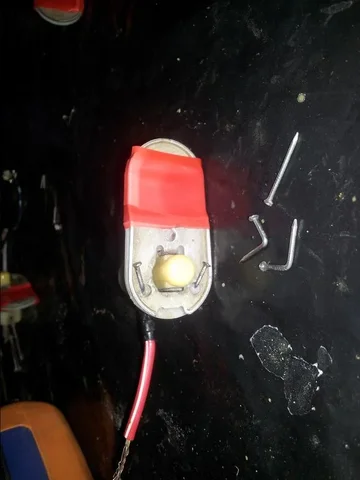
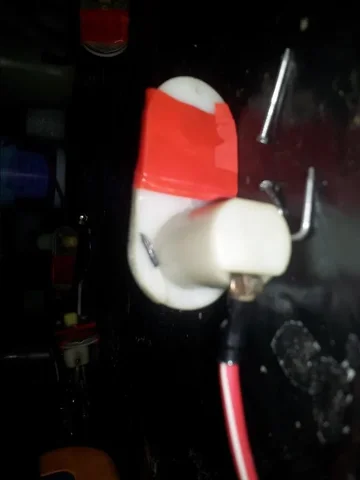
so...basically i took them apart using narrow pliers to squeeze the plastic holding the metal base down....cleaned and polished them....tested they worked 100% of the time..
sw1.jpg

now, to keep them down...i decided to use small wood nails..because melting the original plastic might not be enough for the force from the springs inside the switch.. i bent the nails in right angles (90 degrees)...using the wife's cooker.....heated the nails up, holding the nail in one pliers and the base squeezed into position with another....and drove the nails down.... then completed the 'locking' process by just slightly squeezing the nails down under the plastic base....
sw2.jpg
sw3.jpg

sw1.jpg


sw2.jpg


sw3.jpg
 
hope some of the people viewing and participating would contribute to Woody by becoming silver members....show our appreciation to this wonderful site...especially now that its getting an upgrade..
 
I just can't figure out why they decided to make those door switches in a way so it is almost impossible to repair them.
But nice to see you made it :-)
 
I just can't figure out why they decided to make those door switches in a way so it is almost impossible to repair them.
But nice to see you made it :-)

thank you....and as previous mudders have said....necessity is the mother of invention.:D
 
bad news im afraid....

wont be able to run the cruiser tomorrow....the guy was supposed to get me the interior insulation yesterday said the shop was closed....so will get it tomorrow afternoon...

after installing that, i will lay the wires "to rest'....may they rest in ONE piece... :D

as usual...need some advice....

i want to run the wool type interior insulation all the way up under the dashboard....currently i have this floppy inner tube plastic like thing.....my concern is....how do i get it to hold in position.....not a big glue fan on vertical or inclined surfaces....is it possible to screw some short metal/aluminum screws in and use a strap kind of thing (maybe a small metal sheet)??? especially the upper part...the mid way can be held by the pedals on the driver side, and the AC fan/heater/blower on the front passenger side.

much appreciated if i can get a pic or two....due to lack of sleep ....my eyes are literally 0.5 mm in diameter....but any help appreciated.

Thanx
 
advice...is it possible to completely cancel my heater....we NEVER use it here...
do i just plug the two outlets from the engine or do i need a by pass? keep in mind i want neither the rear or front heaters.

want to do the heater removal before installing the floor insulator so i can plug any openings.
 
IMO, Best case to me would be to connect the inlet and outlet to each other with a rubber hose. Brighter minds might say differently.
 
IMO, Best case to me would be to connect the inlet and outlet to each other with a rubber hose. Brighter minds might say differently.

thats great...but im trying to eliminate as many "future" problems as possible...

i was thinking about it....and i think just plugging the holes where the main hoses come out would be fine....its like i moved the heater valve all the way down the line.....what do you think? possible?
 
Possible, not sure which is the best, meaning if it would help in the circulation path to keep those (inlet & outlet) connected together with a loop, or does that even come into play. Minds more knowledgeable than mine needs to chime in and educate the both of us.
 

Users who are viewing this thread

Back
Top Bottom