1978 LPB Teardown and Rebuild (1 Viewer)

This site may earn a commission from merchant affiliate
links, including eBay, Amazon, Skimlinks, and others.

Merb, I have a mask that works good. It's a 3M I think. Today I just went one spot at a time and cleared the air with the blower. I had to go one at a time because I forgot my auto-dark helmet at work and had to use the old school flip - not my strong suit given the delicate nature of the thin metal.

Some pics

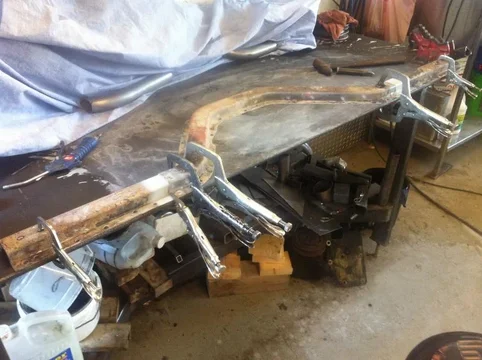
Had to weld the three parts of the x-member together straight and flat
IMG_0324.webp

IMG_0325.webp
Took an old bit and ground the end flat - then ground the back of the flutes. Made it like an end mill
IMG_0326.webp
IMG_0324.webp
IMG_0325.webp
IMG_0326.webp
 
Works real good to remove the primer
IMG_0327.webp
yep, burns through real good.
IMG_0328.webp
By the time I was done I had the welder dialed in :lol:
IMG_0329.webp
IMG_0327.webp
IMG_0328.webp
IMG_0329.webp
 
IMG_0330.webp
Now for the miker method...
IMG_0333.webp

IMG_0331.webp
IMG_0330.webp
IMG_0331.webp
IMG_0333.webp
 
A slight re-post here -

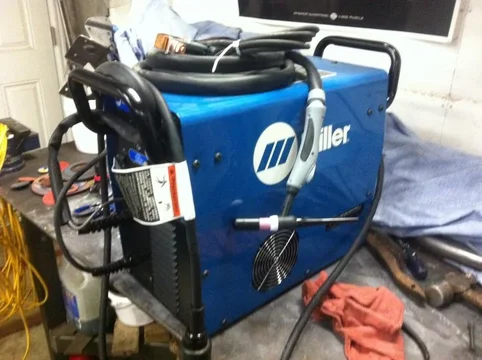
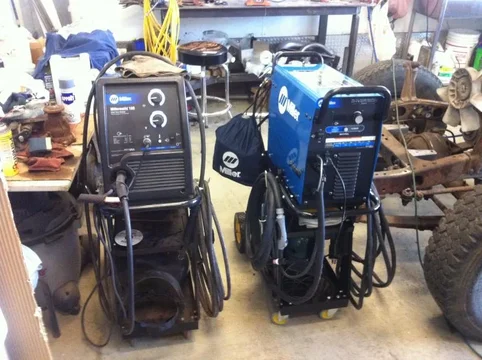
Bought myself a TIG welder. Very exciting. I'll spend tomorrow morning setting it up on a cheap cart I bought at Princess Auto and testing it out. I sheared up a bunch of weld coupons to test in on. And then if I have time I will try to do something about the rust in the drivers footwell
IMG_0378.webp

IMG_0377.webp

IMG_0379.webp
IMG_0377.webp
IMG_0378.webp
IMG_0379.webp
 
I guess it's contagious. :D

With already having some TIG experience under your belt, how come you didn't go for something like the Dynasty?
 
Simply the cost.

My needs at home even building beds don't truly justify the Dynasty. I am not a ticketed welder and would not apreciate all of the added features a Dynasty gives. Having played a bit with the diversion I see no difference in the quality or function compared to the 350DX at work. The only issue I notice is the weight of the torch. It is heavy compared to the water cooled units at work, and they are 400A torches. The weight makes for a shaky arc unless you can brace yourself. Guess I need to bulk up my wrist. I do like the Amp control on the torch body as an alternative to the foot control that comes with the 180. I tried it on some steel and it will prove usefull in awkward places. On aluminum it was too difficult to control and I found the foot pedal easier, though that may be just a matter of time.
image-2088205757.webp
 
Tool pron!!

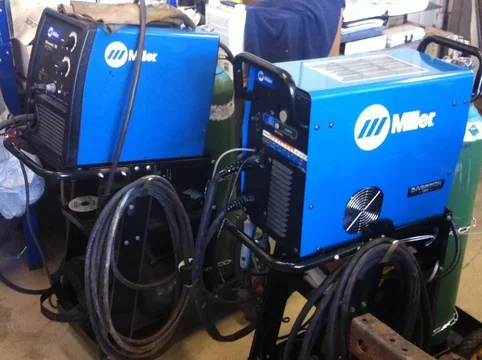
Bought the cheap welder cart at Princess auto, same one I have for the MIG. Took the cover off the TIG, drilled two holes through and through the base plate and bolted it to the cart. Went to Home Despot and bought 8m of 10/3 cable and ends to adapt the Miller cord to the wall plug already there. Also serves as an extension cord so I can TIG to the end of the driveway :D Bought a lid to go with the TIG, got tired of using the spare from work. I got the digital Miller Elite in pixalated camo - very much like. Lighter smaller and more comfortable than the lid I was using. I now have more money tied up in welding gear than I paid for the 45!?!

oh, and yes.... the garage is alarmed! And I have a big dog that can bark at you through the house door while you load it all up.:mad:
IMG_0387.webp

IMG_0386.webp

IMG_0383.webp
IMG_0383.webp
IMG_0386.webp
IMG_0387.webp
 
So - back to work...

I match drilled the cab mounting holes through the 2x4" tube. Took the tube to work and used the drill press to make the through holes straight. Then I opened them up with a hole saw to about an inch to fit a bit of small round tube through (not shown). Then I used the new TIG to weld the round tube inside the rect. tube to prevent it collapsing when the cab mount bolts are tightened. I just bolted it in place for now. I will have to set the cab back on the frame to complete the miker method and mark out the exact locations of the roll cage.
IMG_0391.webp

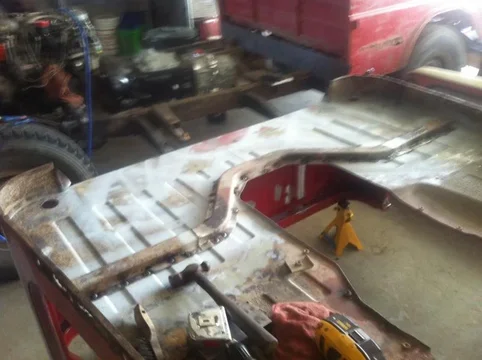
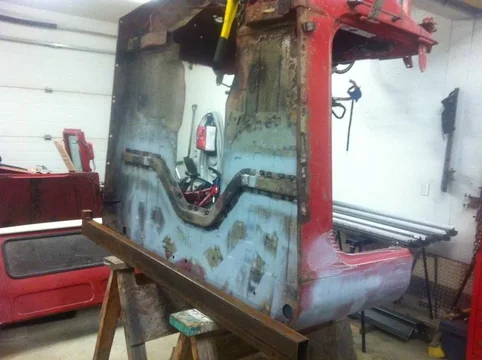
Now, to the front landing points for the cage. The worst rust in the cab is at the drivers feet where the factory put the drainage hole, a.k.a. the landing point for the cage. In order to properly access the rusty spots for repair I had to remove the cab mounting structure.
IMG_0392.webp

IMG_0395.webp
IMG_0391.webp
IMG_0392.webp
IMG_0395.webp
 
It may look worse here than it really is. I started cutting until all the rust was gone. I welded a brace across the door opening in case it decided to move because I cut away the rigidity of the A pillar.
IMG_0396.webp

IMG_0397.webp

IMG_0398.webp
IMG_0396.webp
IMG_0397.webp
IMG_0398.webp
 
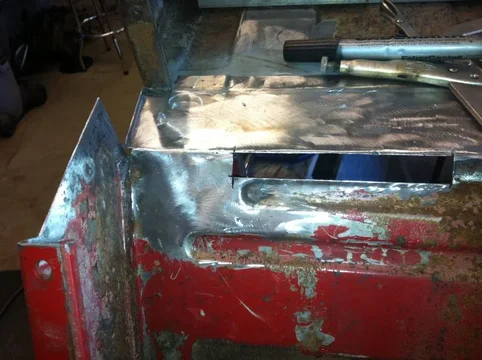
Started new metal with the main post. Shaped and welded in the patch.
IMG_0399.webp
ground it smooth
IMG_0401.webp
Then welded in the floor portion of patch, ground smooth. I used a big chunk of aluminum clamped in place to hold the floor panel flat while welding. Also used a chunk of copper to keep the welding from turning to "drilling" of holes. And that is where I ran out of Saturday to work on my rig. Sunday I was at the shop working on bed parts - check the other thread for details if you like.
IMG_0402.webp
IMG_0399.webp
IMG_0401.webp
IMG_0402.webp
 
Simply the cost.

My needs at home even building beds don't truly justify the Dynasty. I am not a ticketed welder and would not apreciate all of the added features a Dynasty gives. Having played a bit with the diversion I see no difference in the quality or function compared to the 350DX at work.

Good to know you think the Diversion has the same weld quality as the more expensive welders. I wondered if I was giving up some potential quality and would later regret not getting something more "high end".

The only issue I notice is the weight of the torch. It is heavy compared to the water cooled units at work, and they are 400A torches. The weight makes for a shaky arc unless you can brace yourself. Guess I need to bulk up my wrist.
I find the torch to be a bit bulky and heavy as well. For me I think the biggest issue is the stiffness and weight of the cable, hose, the sheathing. I've seen some info on how to change out this a more flexible one but haven't done this.

I do like the Amp control on the torch body as an alternative to the foot control that comes with the 180. I tried it on some steel and it will prove usefull in awkward places. On aluminum it was too difficult to control and I found the foot pedal easier, though that may be just a matter of time.
I do like the option of foot and torch control as well but I find the foot control to be easier to use than the torch if I'm at a bench. The torch controls are just not quite in the right place for the way I like to hold the torch. I hold the torch very close to the head and the controls are placed much further down on the handle.

I did purchase a smalled torch head. I think its a WP-9 125 amp air cooled. The heads are easily interchangable on the Diversion welder cable. You end up with the same body/controls, but the head is significantly smaller. Good for tighter places and thinner materials since torch is only rated to 125 amps. The other thing that helped with the weight was to purchase a smaller tungston end cap for the torch that comes with the welder. The long cap that Miller provides with the torch lets you use a full length tungston but its really bulky to me and is harder to control with that long end cap.
 
I said torch head in previous post, but I guess the correct name is torch body. Also had to purchase gas cup, end cap, collet and collet body, as well as smaller tungstons.
torch_body.webp
 
Yes, a smaller cap and cup will help with tight spots. Mine came with a #7 cup and I prefer a #5 on the 350DX at work.

The only thing you give up with the Diversion compared to the Dynasty is the fine tuning of the waveform and post flow etc. And 20 Amps. And water cooled torches. In the grand scheme of things the Diversion is all a guy in the garage needs. If I was welding 8 hours a day I would need more but in reality I will likely weld for less than 2 min and then spend 25 min setting up or getting the next workpiece ready.
 
De-rusting continued...

I bent the two flanges of the "A" pillar into shape. One goes under the main floor and the other lands on top of the firewall where it meets the floor.
IMG_0492.webp
I decided that I wanted to shorten the last rib in order to accommodate the roll cage landing point so I chopped out a little section.
IMG_0493.webp
Then I found this little section was too rusted and too thin to weld well so I cut that out too.
IMG_0494.webp
IMG_0492.webp
IMG_0493.webp
IMG_0494.webp
 

Users who are viewing this thread

Back
Top Bottom