1978 LPB Teardown and Rebuild

This site may earn a commission from merchant affiliate
links, including eBay, Amazon, Skimlinks, and others.

It is always nice to do something, even small stuff. Sometimes you just have to get out there and get going again. That is why I try not to let too much time pass between shop visits. It is like exercise. It takes months to create a habit and only one day to screw it up. Not like I exercise or anything, just an analogy. Can you post the part no. for the spot weld cutting bit you bought from McMaster please?
 
+ - ?

I must be in trouble because BOTH my front OMEs have pluses and so do the backs. I was able to see other installations that showed the plus on the firewall side of axle on the front. The rears I just installed so the axle was pushed further "back" on my lv to help clearance of the tire in the wheel well.
I too had an odd collection of bushings...we used the lathe to mill them into fitting. Not running yet, so I can't attest to being right or wrong. Good luck.


It seems odd that SO many people end up having questions about the install of this kit...I thought it was just me at first.

Dukes
IMG_9846.webp
IMG_9788.webp
 
Dukes, I too had installation issues and it has been soooo long since I worked on this project I have no idea where I am at with the springs etc, but what I do remember was that installation was not clear at all. Oh well, I will deal with it when I get back on it. Post what you find for future reference.
 
I don't think the +/-/0 really mean too much. My thinking is that they load test each spring off the line and mark them to denote how they do compared to the ideal deflection. Then if you get two different fronts, for example, you could put the stronger one on the drivers side due to the "permanent" higher load created by the driver.

My fronts are a "+" and a "0" so I'll (eventually) put the + on the drivers side. Both the rears are "+" but they are also the 45 heavies. I plan on a set of loaded bed drawers, dual tanks, RTT on a canvas covered bed topper etc,etc - lotsa weight.

:D mini me has a short attention span - the pictures were about all he did. He thought folding the windscreen was pretty cool though.

McMaster Carr link pt#4096A11 - the cutter end is reversible so each bit is like having two. I snapped one of the six teeth off at one point due to an infirm grip. I kept going to see if it would cut and it did fine so I never flipped it.
 
Awesome pics of the weeman. I love it when the kids help out.
 
Been hovering around page three for quite a while now. Hopefully sticking to the first page more often now :repost::repost:
 
Took the weekend off from building parts for other guys. Spent most of Sunday playing in the garage.

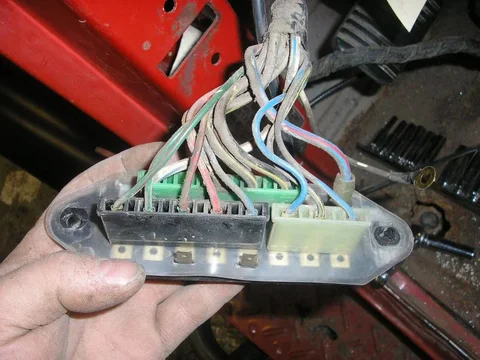
Finished tagging and pulling the harness out. The plan is to get supplies from Coolerman when the time comes and build a custom harness from scratch using this one as a template/ starting point. I plan to upgrade the headlight circuit and add in stuff like Ham radio, alarm, fog lights and anything else like webasto, house battery, OBA control etc, etc
P1010001.webp

P1010003.webp
What are the two bare spades for on the back of the fuse block? They were bare and unconnected as you see here - and live.
P1010002.webp
P1010001.webp
P1010003.webp
P1010002.webp
 
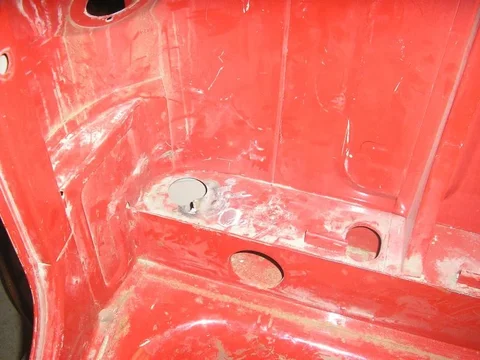
After seeing the "miker method" solution to the cage rear hoop anchoring in his thread I have decided to make a reasonable facsimile of his work. That means the "bench" across the back of the cab has to go.

Here is the start
P1010006.webp

P1010007.webp
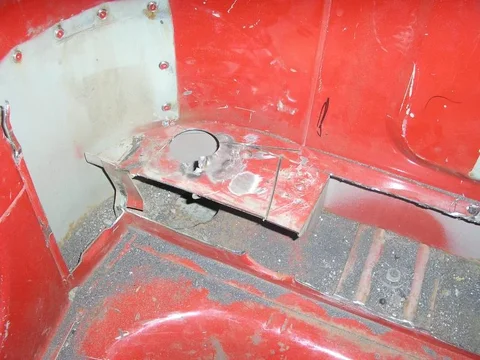
And after attacking it with a few tools I found there is quite a lot of connection points in there. I started with the spot weld cutter but soon switched to the cutoff disc on the grinder to get the majority of material out of the way.
P1010010.webp
P1010006.webp
P1010007.webp
P1010010.webp
 
Some progress - pretty awkward area to grind in without damaging the rear wall

P1010011.webp

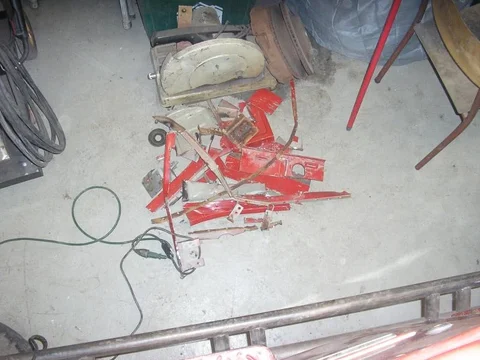
This is the pile at the end of Sunday - worked on it some more tonight and made the scrap pile twice as big. Still not quite done
P1010012.webp
P1010011.webp
P1010012.webp
 
This is the pile at the end of Sunday - worked on it some more tonight and made the scrap pile twice as big. Still not quite done
View attachment 487542

This looks remarkably familiar. :D

I tried to carefully take mine apart and then became more and more impatient and agressive until I ended up with a pile of scrap metal just like that.

Yours looks very clean and rust free behind the shelf. :)
 
I definitely scored when it comes to rust on my truck. I have to cut out a bit under the pedals by the drain hole on the drivers side. Otherwise it looks solid. I'll know for sure after blasting in the spring.
 
Last edited:
Save that pile for people that may need factory bends and curve to do their own repairs. :D
 
I know just the guy - ;)
 
Yes, I could. Wouldn't be cheap though. Lots of welding and bit of machining involved in the one I made.
 
Wow, that cab is in great shape.

I can't wait to see what you come up with at the end of this little adventure. Keep up the great work.:cheers:

It's got a couple holes but I'm not complaining.

I found a new one at the rear cab mount - above the x-brace
P1010001.webp

I got the rest of the bench removed - just gotta grind off the buttons from the spot weld cutter and a few factory weld beads. Then I can begin the "miker method" cage mount install
P1010002.webp
the scrap pile
P1010003.webp
P1010001.webp
P1010002.webp
P1010003.webp
 

Users who are viewing this thread

Back
Top Bottom