1978 LPB Teardown and Rebuild (2 Viewers)

This site may earn a commission from merchant affiliate
links, including eBay, Amazon, Skimlinks, and others.

That looks like a great system Mike. I had always planned on sandwiching the body between two plates to "pass the cage structure through" the tub but hadn't really thought past that point yet. I quite like the idea of using a bushing for the mount to the frame. I'm gonna have to design something up from the parts I have availiable to me.

Question for you...

I have to mount my sliders and cage to the frame at nearly the same spot on the frame. Rather than making three mounting points for the slider and then two more for the cage and then to more stock cab mounts (7 total) I was toying with the idea of combining them. They would run from front to back as follows: front brush guard/cage/slider mount, then front stock cab mount, then middle slider mount, then rear cab/cage mount and finally the rear most slider mount just in front of the rear wheel. That would make 5 mounts in 6' of frame rail. There is also skid plate issues later on. Whadaya think? Combining mounts would sure clean it up and simplify it. I guess I'm asking: any drawbacks to having the brush guard, slider, cage, and cab connected at one spot? If a guy came off a big rock and hit hard on the slider, what would that do to the cab and cage? If it was all solid enough and properly designed nothing would happen I guess. I would make the slider and brush guards bolt on - so they could be replaced if damaged.

I'm gonna spend a little time lying on the creeper thinking the mounts through:hhmm:

I think your right - maybe I'm over building it. I don't plan on thrashing this truck much anyway, but once on the trail I want a vehicle that can clear almost any obstacle at least once.
 
;)
I have to mount my sliders and cage to the frame at nearly the same spot on the frame. Rather than making three mounting points for the slider and then two more for the cage and then to more stock cab mounts (7 total) I was toying with the idea of combining them. They would run from front to back as follows: front brush guard/cage/slider mount, then front stock cab mount, then middle slider mount, then rear cab/cage mount and finally the rear most slider mount just in front of the rear wheel. That would make 5 mounts in 6' of frame rail. There is also skid plate issues later on. Whadaya think? Combining mounts would sure clean it up and simplify it. I guess I'm asking: any drawbacks to having the brush guard, slider, cage, and cab connected at one spot? If a guy came off a big rock and hit hard on the slider, what would that do to the cab and cage? If it was all solid enough and properly designed nothing would happen I guess. I would make the slider and brush guards bolt on - so they could be replaced if damaged.

I'm gonna spend a little time lying on the creeper thinking the mounts through:hhmm:

I’m really not sure and I guess it depends on how it’s done. Personally, I like simple and functional designs but sometimes they are the most difficult to achieve. If me, I think I would try to separate the brush guard/slider from the cab/cage. I would also try to build a little bit of a crush zone around the brush guard/slider as well so if you were to hit something and they moved/bent a little it would not compromise the cab or bed.
Some things I would keep in mind if combining...
- Can you combine and locate in a spot that makes it convenient for assembly and disassembly?
- Will the now combined location be subject to higher force/loads/leverage making it more prone to failure or bending?
- Will you improve the looks/aesthetics?
In a combined mount setup it seems like if designed correctly that a hit in the slider/brush guard would not damage the cab and cage but it would probably transmit the noise into the cab and make it seem worse than it was while sitting inside.
For this one, there are probably a bunch of ways to do it that will work well.
I think your right - maybe I'm over building it. I don't plan on thrashing this truck much anyway, but once on the trail I want a vehicle that can clear almost any obstacle at least once.
Not overbuilding, just building what you want. ;)
With mine, I’m trying build a reliable rig that can do most trails around this area without getting thrashed (mainly body and bed) but at the same time trying to keep the weight down as much as possible. I hope to drive over most obstacles but those I can’t, I have no problem driving around or taking a bypass.
 
I have been able to get some work done on the sliders this weekend. Not as much as I would've liked, but waddaya gonna do?

I spent some time deciding exactly how to mount the sliders, brush guards and roll cage. Decided to go with my original plan and use the tapered rectangular tubes to mount the sliders. I will also terminate the front brush guards at the front slider mount. The cage will mount through bushings to custom cab mounts.

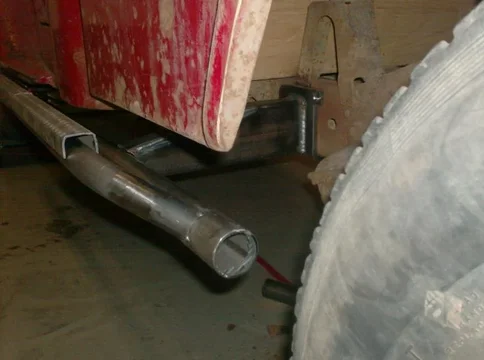
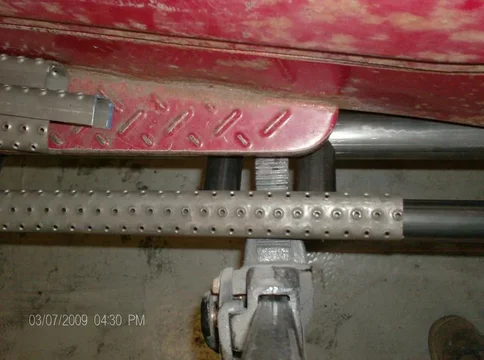
Here is a shot down the cab showing the slider. It is tack welded to the frame until the cab comes off and then I'll match drill the holes and it will eventually be bolted on. For the bolts I will drill an oversized hole through and through the frame and slip in a solid piece of round bar that is drilled and tapped, then welded to both sides of the frame. That will tie the box section frame together, prevent "squashing" the frame, leave the inside of the frame clean and make the removal of the sliders an easy thing. Also in this shot you can see the tread material I will be using. It is just held on by gravity until I figure where to put it. There will be a few connectors between the 1.5 and 2" tube as well.

HPIM2287_2.webp
HPIM2290.webp


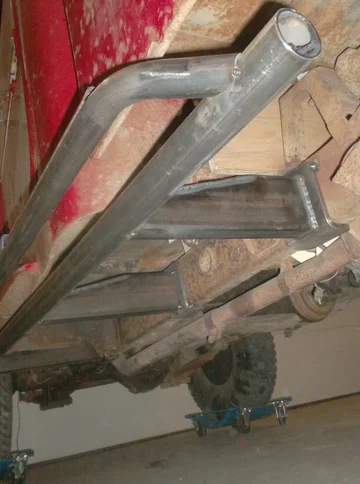
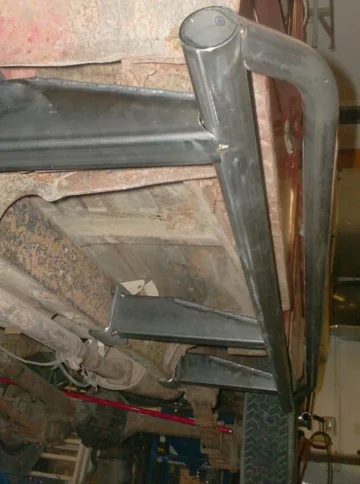
In this shot you can see the basic structure of the slider. On this third mount I had to actually cut off a part of the bed mount bracket so that the slider mount would sit flat. The frame narrows from the rear to the front so the slider mounts get progressively longer as you move forward. At this rear mount the frame is actually parallel to the long axis of the truck. The same is true of the front mount, so they come straight off, perpendicular, to the frame. The middle of the three mounts is at a spot where the frame is tapered and so I angled it to match the other two. Sorry for the confusing explanation. Basically I mean to say that if you were to take off the cab you would see the slider mounts make a straight line across the frame even where it is tapered. The wood you see through the wheel well is just a piece of plywood between the cab and bed to protect the cab when lifting the bed off.
HPIM2291.webp
HPIM2287_2.webp
HPIM2290.webp
HPIM2291.webp
 
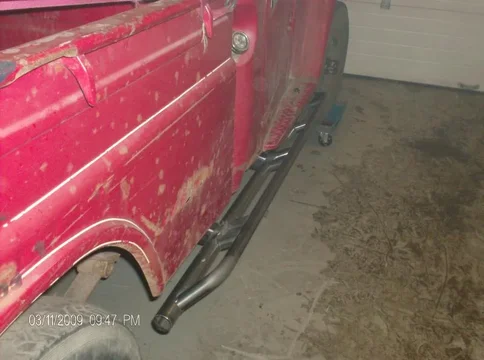
I may be adding another round tube support run from the end of the slider to the frame. There are two stock holes in the frame in just the right spot. The rear overhang is about 16-18". I couldn't move the rear mount back any because the frame starts to taper out and curve up for the rear axle. Well, I could have but this was easier. As well as the bolting method I described above, I will be running two countersunk flat head bolts up into the bottom of each mount to act in shear as the sliders support the weight of the truck. There is a surprising volume of space up under the bed here. I have visions of two deep cycle batteries or an old propane tank for an onboard air reservoir.
HPIM2295.webp

The exhaust will be run on the other side with the 3B, and it will be above the bottom of the frame rails. That will leave the sliders and frame at about the same height off the ground. I plan on making a custom skid plate to protect my vital bits too.
HPIM2296.webp

I might run a length of tube to connect the three slider arms about halfway out from the frame to stiffen the whole affair. Also there will be two or three flattened spots on the 1.5" tube for jacking points. The two tubes will be joined at those locations with short lengths of tube so they both support the weight.
HPIM2297.webp

I did all of this on Saturday and never made it out to the garage on Sunday to do the other side and finish the details. But with one side figured out the other will be quicker. I intend to hide in the garage in the evenings this week.;)
HPIM2295.webp
HPIM2296.webp
HPIM2297.webp
 
Slow tedious progress... here's a few pics. Cutting, notching and fitting all the little pieces is slow without a proper notcher, but oh well I've got time.
HPIM2316.webp

HPIM2319.webp

HPIM2322.webp
HPIM2316.webp
HPIM2319.webp
HPIM2322.webp
 
Got a head cold so I'm struggling for motivation
HPIM2323.webp

HPIM2324.webp
HPIM2323.webp
HPIM2324.webp
 
Nice work you are probably going to be done your project before I am done mine haha. I want a tube bender...
 
Nice work you are probably going to be done your project before I am done mine haha. I want a tube bender...

I still have to start my drive train swap so YOU may be in the lead.

Tube benders are on sale at JD squared. $295 US plus dies. Shipping is the killer though....

Thanks Mike, I just replied to your post on your thread:cheers:
 
Oh, and my head cold is tapering off now so I feel some motivation coming on. Never touched the truck yesterday. Just watched the Flames miss another road game.:mad:
 
Tube benders are on sale at JD squared. $295 US plus dies. Shipping is the killer though....

Thanks Mike, I just replied to your post on your thread:cheers:

Saw the post, thanks!

Speaking of benders, do you have any experience with the low-buck tools bender and how it compares to the one you are using?

I was considering getting the low buck tools one.
 
The JD squared one looks nearly identical to the one I borrowed from my buddy. Same frame structure and mechanics. I would bet the dies would even be interchangeable. Derek (my source) just added a Princess Auto (Harbour Freight type) hydraulic system to it - it was originally a manual. I used the tips in the tech section for layout and had no trouble at all bending tube. As for price, I think Derek has like $2000.00 into it because he bought every die set from 1/2" to 2" and the bigger ones cost as much as the bender! Shipping was real expensive from Florida to Calgary cause the stuff is heavy.
 
You do nice work, cool project. Notching without a dedicated tool can get real old, real fast, especially the small pieces.
 
You do nice work, cool project. Notching without a dedicated tool can get real old, real fast, especially the small pieces.

Oh yeah! I had to make 12 pieces 2-1/2" long to fit 2" on one end and 1.5" on the other. Very boring but by the end I was pretty quick with it.:rolleyes:
 
So I finished the other side far enough for now..
HPIM2332.webp

HPIM2336.webp

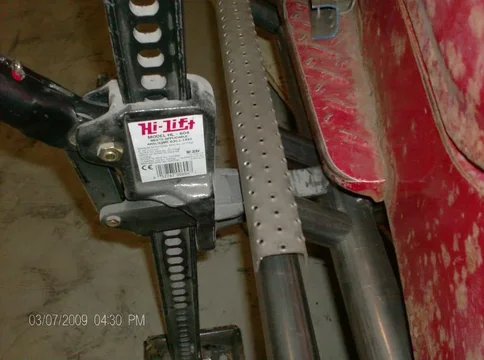
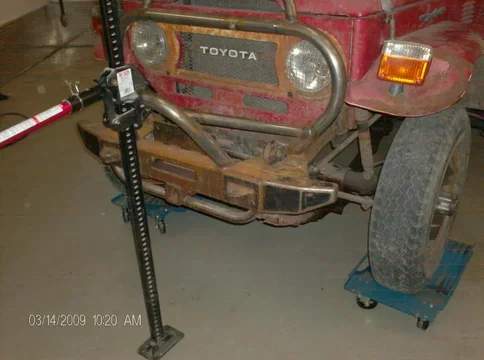
And I can start the front now. I spun the truck around and tightened the bolts on the front bumper to secure it in place and build the brush guards. I needed to bash the left fender into proper shape to build to fit. Just for kicks I lifted the front off the ground... there were no marks on the 2" tube with the full weight of the truck on it :cool:
HPIM2341.webp
HPIM2332.webp
HPIM2336.webp
HPIM2341.webp
 
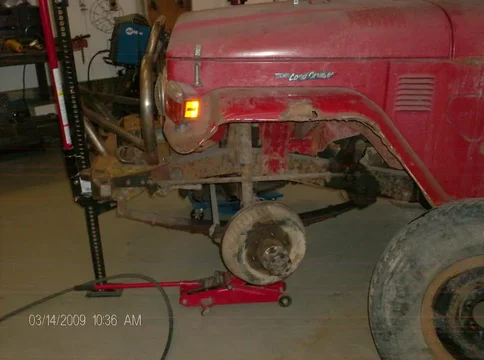
She was a bit squirrely with the roller skates under the four corners so I moved the jack to the corner and stuck a jack stand under there. Popped off the wheel and removed the light. Grabbed a hammer and bashed it out.
HPIM2343.webp

HPIM2344.webp

HPIM2346.webp
Now both sides are about the same shape
HPIM2343.webp
HPIM2344.webp
HPIM2346.webp
 
It's a bit risky doing all of this when I have new fenders coming and the front clip is not even straight but I'm building in some clearance and my stuff is built off the frame evenly so I'll hope for the best. I am going to build the whole truck then tear it all down for blasting, coatings and paint.
P1010013.webp

P1010014.webp

P1010015.webp

You can see the tube is just tack welded to the bumper hoop. Tomorrow I'll fab up some tabs to bolt things together. At the slider end I am going to put a solid core in and tap it to bolt through the slider with a single bolt. At some point I will build a guard off the brush bars to protect the signals and anchor some limb lifters.
P1010013.webp
P1010014.webp
P1010015.webp
 
I'll be getting them from Ryan @ Hilltop Cruisers along with quite a few other bits this spring.
 
I decided with all the variables in the front clip that I should wait till I can straighten it and install some new fenders to finalize the fender/ bush guards. I have them tacked where I want them but there is a 3/8" difference in height left to right and the whole clip is offset to the right a bit. I'll get the clip into primer and then reassemble before hard mounting the guards.


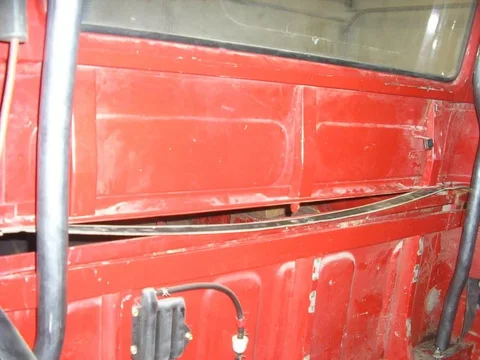
So - on to the roll cage... with the two rear drops in place I needed to remove the top to finish the hoop by adding the front top cross bit.

Removed all the hardware. Got to use the father-in-laws impact screw loosener thingy
P1010003_2.webp

P1010006.webp

P1010001_3.webp


The top is actually quite light, even with the glass in.
P1010003_2.webp
P1010006.webp
P1010001_3.webp
 

Users who are viewing this thread

Back
Top Bottom