1976 FJ40 BUILDUP - Chief $*itty Pants

This site may earn a commission from merchant affiliate
links, including eBay, Amazon, Skimlinks, and others.

progress

Right, I will file the epoxy over POR for future reference. A little aggressive on the blasting might be a good thing for the POR it will level off and smooth out but it likes tooth.

Looked like a fun day out--some of those little Sammy's are amazing


I think welding in a patch might be easier than getting all that stretched metal back into shape

Sounds like you got a deal on the sandblasting
 
Not bad price huh! I painter friend is trying to talk me into acid etching it after it gets blasted. ?? He said it wouldnt be necessary with the por15 but since i am only using it in certain spots i should (not need to but should) acid the rest i guess it will help bond even better along with sealing it enough to prevent flash rust?? As for the sammi's ya they were crazy. There were a couple wranglers and a cj7 that didnt make it to far. A camo bobbed yota whipped but along with my painter friend with an early 70's ford that started as a standard cab long bed and is now a crew cab (sectioned) with a bed that the front is bobbed to heck with 44" 's. As usual he broke and then didnt want towed so he drove off the rocks nearly rolling and everyone was running looking like this:crybaby:

As for mine I agree with the patch panel. It is always crazy what you find under the bondo.
 
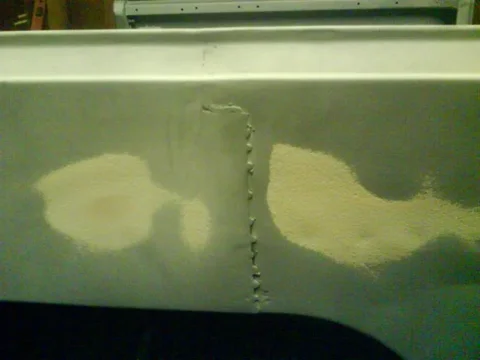
So it is blasted now ($300.00 included trans hump, and radiator support) and they did a great job!! I am very pleased with how aggressive they were or should i say weren't. I am also very very pleased with the condition of my tub. All I have is the rear sill as suspected :doh: and now i understand the whole damage to the driver side thing. I had a feeling they sectioned it in the middle of the wheel well. I hate the fact that they overlapped it and am questioning fixing it.....?? I spent 705.00 today. This included blasting, another quart of por, a gallon of epoxy primer and the two part, a new gravity feed sprayer since my suction gun is tired, and a tube of automotive caulk. Anyways it is late and enough with the typing crap since all you guys do is view it anyway;p (not you bsmith123 LOL Thanks) :) Here are some pics
DSC00694.webp

DSC00698.webp

DSC00695.webp
DSC00694.webp
DSC00698.webp
DSC00695.webp
 
My tub is now sealed and caulked and i dabbed the durabak in all the hard to get to places with a brush in which i will be spraying it on the underside tomorrow. My chasis paint will be showing up so that i can put another coat on the frame since i tried to fix two little runs and ended up with dry patches. :bang: So far i am not real pleased with the durabak but after reading a billion other posts i am certain i will be. I attempted to roll it on the underside and ya right good luck..... And just so no one does my stupid mistakes i tried to hurry the sealer over the por and it gassed on me... :doh: Big suprise.... Believe it or not it was suppose to rain here and i was worried about the humidity even though it is (barely) in the shop. Today i got to grind it back off and respray the sealer in the POR areas.
The inside will be dark grey durabak however i gave up on trying to roll it on the underside so it got a first coat in black on some of the inner tub. Just something as an FYI that i didnt think of is how well the sandblaster gets up into those hard to reach areas (like under the dash) and how you can't get a spray gun in!! I have decided to use the dupont rattle cans of undercoating on the underside of the dash so that i can blast it up in the nooks and crannys

DSC00701.webp

DSC00703.webp

DSC00702.webp
DSC00701.webp
DSC00703.webp
DSC00702.webp
 
looking Good

Man that's looking good,


Once you start the durabak with the roller it will be a lot better to apply and it will look good too


You are at the point where you've spent the money and put in the prep work and are thinking Oh no, what if this doesn't turn out good?!! Just Nerves from wanting the finish to reflect the effort and $$$ expended


But it will:):)
 
MAN OH MAN you know my pain!!!! That is exactly right!;) You were right i rolled some on to see what it would be like and it was fine. The edges and stuff would not have been easy to get into though. I borrowed a bed liner suction spray gun from a friend and used it instead. It was NICE!!!! It left a great end product and i was able to blow it into the hard to get to areas. The gun only plugged once and it was simple to clean. I used the whole dang gallon though! I wish i wouldnt have done that spot on the back of the inside of the tub. I saved just enough to cover the inside of the rear sill once i replace it. I did miss one of the heat shields so i will have to cheat and do it in some kind of spray can! :confused: Oh well it looks pretty darn good. As mentioned elsewhere you dont really get a large millage. If you wish for great coverage you will need more than a gallon. How was yours BSMITH using the roller did you use it all?? I will post pics in a second.
 
One disadvantage of spraying it is the overspray is chunks of rubber and will travel all the way across the shop!! Oh and i am half black and half white and soap isnt helping!! :D
DSC00705.webp

DSC00709.webp


I sprayed wildly on the front fire wall since i plan to tape it off right where it makes that sharp bend and spray the Dark Grey with UV up the rest including the inner tub

DSC00707.webp


Sorry I didnt realize those pictures are terrible!!!!!!!!!!!!!!!!!!!!!
DSC00705.webp
DSC00709.webp
DSC00707.webp
 
Last edited:
s*** that's awesome... i fly back home tomorrow.. can't wait to try and catch up to you.

i might have missed it but did you put down a primer before the durabak? what was it?

**edit saw you said something about epoxy primer up top.. is that what you used?
 
Good i wondered how yours was going!! Ya that is an epoxy primer down prior to everything except the POR. It is kinda a white color and the pics make it look like it is still bare blasted metal!! :hhmm: I was shocked at the cost of the epoxy! They didnt have the middle of the road stuff which was 150 so i had to buy the 180.00 a gallon (that was with the two part mix):eek:

You must have a stack of parts waiting at home by now!!
 
:) you have no idea... easily a couple of hundred of pounds of parts just sitting in my closet.. can't wait to start going again.

as far as the bedliner is concerned i'm looking towards doing something close to what crazygeek did with his cruiser.. he used straight up duplicolor bedliner and painted over it with the ACE tintable paint and then LIC 30 clear coat.. seemed to come out nicely..

https://forum.ih8mud.com/paint-body/182419-ace-tintable-rustoleum-product.html
ACE tintable Rustoleum product - IH8MUD™ Forums
 
WOW ya i dont blame you that looks nice! It may be a lot better for your resale too since it wont look like your trying to hide something! I didnt care because i inherited mine and would never sell it so *&^& resale :D

Dang that did look nice :hhmm:
 
yea.. i'm hoping it will save some $$ in the end too - i didn't start off with as nice of a base as you..
 
lookin' good! :cheers:


did the steering box get there? just wanted to make sure.


last but not least, do you need a t-case saver?! :grinpimp:
 
OrangeFJ45,
Shoot sorry I forgot to tell you it made it.....:whoops: Thanks it is very tight also!!!!!!!!!!! I still need to fab it on. I have welded the scab plate but still need to drill and tube the frame for added support. As for a t-case saver i didnt know what one was untill you just mentioned it so now after reading it isnt a bad idea. How much are they? They look/sound well needed! Even if I dont buy one yet i will be back for one before i slap it back together.

THANKS!

I hauled the tub out to a friends to store it so i can get through hunting season! I still have the frame to stay busy with:

Tube frame for Scout Box
Mount Box
Pickup oil pan, brackets, etc. from powdercoat shop
Through the motor together along with bolt to tranny
Place drivetrain on Frame
Try to cut down and utilize my PTO winch

Tomorrow I am off to a 4x4 competition (just to watch)
 
Few questions

I pmed downey a couple weeks ago but he must be busy.
Does anyone make a bracket to remove the dust shields from the front rotors? I found where Downey does for the round body yotas Is it the same??

Will the downey high steer work with a scout box and the front forward about 2" with a SOA? I hate to spend that money if it isnt going to work....
 
you can cut up the stock backing plates to use them as a spacer. i usually utilize a 4.5" cut off wheel and it only takes about a minute per side to cut them off. you end up with a large washer with 8 holes. it needs to be there for proper spacing.

fwiw, try calling jim @ downey. he's usually able to get to the phone and he's more than willing to help. he also has more experience with this stuff than most people out there..........
 
the high steer kit clearance will depend on your ps box location. if i were you, i'd get the hs kit and then mount the box to ensure you don't end up with tie-rod to drag-link interferrance. the closer you can get them to parallel, the better. make sure you don't hang the box too low or the tr and steering arm might hit the driver side spring under compression.
the best way to approach this is to clamp the steering box in place with some large vise grips and then cylse the steering and suspension.
you'll mostlikely have to remove the stock shock towers to run the scout box. ford f150 towers are the perfect solution to that 'problem". they will also allow you to run longer shocks to help with the increased travel.


hth

georg @ valley hybrids
 
Thanks i programmed his number in my phone for tomorrow and will call on the high steer - I am sure he gets swamped with email

I will cut the backing plates up as you mentioned!

What was the price on the t-case saver??

Thanks
 
Great thanks! I have already removed the towers.. and i will do a little more searching on what is the best high steer for the buck and place an order tomorrow. (unless someone already knows) Hitting on articulation is what i am worried about so good point i will clamp and test. Unfortunately i have no weight right now to flex but i guess i could wait untill i was done to mount the box other then cutting the sheet metal after paint ...
 
the tg hs kit is the cheapest but it's also the lowest quality imho. chinese steel with lots of impurities does'nt hold a candle to the arms/kits sold by marlin, allpro, downey and others.

i like marlin's billet arms a lot. i'm about to order a set for my wife's 40. so obviously i have quite a bit of confidence in them. i have installed a few sets of them on cruisers at my shop................


fwiw, luke at 4x4labs has a great hs kit as well but it is a little more money than the others. however, his kit deals with running the tr behind the axle and gives you just about the perfect ackerman angle/geometry.
 

Users who are viewing this thread

Back
Top Bottom