Tackling the doors

This site may earn a commission from merchant affiliate
links, including eBay, Amazon, Skimlinks, and others.

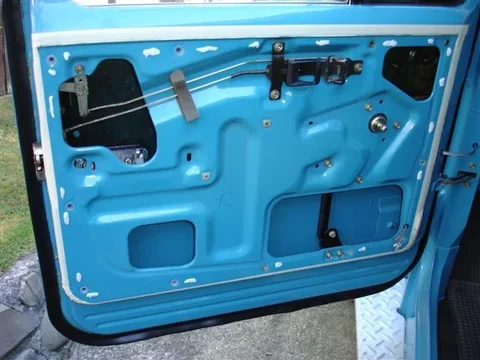
Once the main glass is put back in, the "vent window assy" can go in.

Here's the glass being fitted:

D68n1.webp

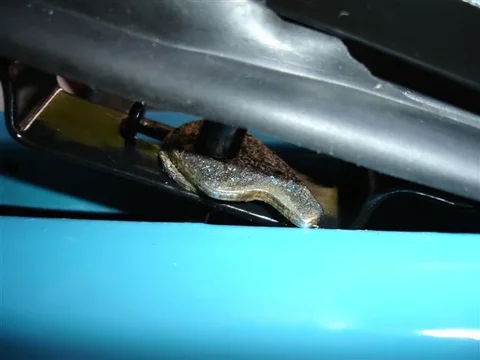
And now for the tricky part:

D68o.webp

There's no way I can stop this bit from scratching my new paint!

Edit: While doing the second door I realised there IS a way. "Opening the vent window and turning it to its limit" moves this "cam" into a safe position where it will no longer interfere with the sill! (So you can learn from my mistake here.)
D68p.webp
D68n1.webp
D68o.webp
D68p.webp
 
Last edited:
This bit here has "interference":

D68q.webp

Just close your mind to "paint damage" and give it a bash into place with your hand. Edit: - With the second door - and having the vent window opened and turned to its limit - the assembly went in much more smoothly with no force required at all!

(Actually it doesn't take THAT much force and perhaps the paint doesn't get scratched right through... But I don't plan on stripping it apart to find out!)

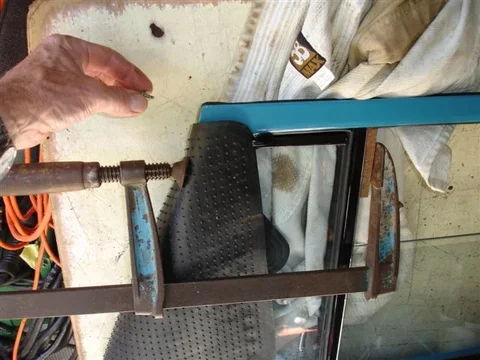
Next.... a little "tweak" is required to get this screw fitted:

D68r.webp
D68q.webp
D68r.webp
 
Last edited:
Now you definitely don't want to present the door to the opening ... only to find that you can't fit the hinges.

So you need to "trial fit" the hinges beforehand.

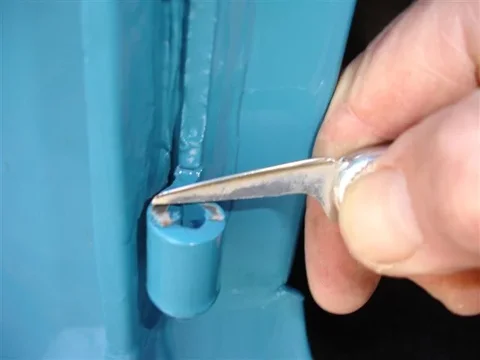
And there is no way they'll fit if there is any paint interfering with where the plastic bushes sit. So I scraped this paint away first:

D71.webp

D72.webp

D74.webp
D71.webp
D72.webp
D74.webp
 
Then I test fitted both hinges like this (with new bushes fitted):

D73.webp

D75.webp

And test-fitted the new pins

D76.webp

As you can see, the top pin has half its head cut off.
D73.webp
D75.webp
D76.webp
 
Then I fitted just one hinge-half (the top one) to the door (leaving its bolts slightly loose) and carefully presented the door to the opening so this hinge (with bushes in place) mated with its counterpart ... and at the same time ... the door lock "clicked" onto the striker.

Here's a pic of the opening ready for the door to be presented to it:

D80.webp

Note that the top pin is sitting there just waiting to be pushed down.

I also put masking tape around the opening and a towel/rag on the step in case I needed to rest the door on either of these during installation. (I ended up only resting it briefly on the towel/rag.)

In this way, the door was held ..... and I could then "take my time" with fitting the lower hinge and lining up the door.


....All this was done single-handedly (without assistance).

Even though the original hinges had no gasket, I fitted some (cut from thin plastic of a similar colour to "Sky Blue 854"):

D81.webp

D82.webp

Stainless bolts (with split and flat washers) of course.
D80.webp
D81.webp
D82.webp
 
The door was adjusted into the best position mainly via the hinge bolts on the door itself. (I've never touched the other hinge bolts/screws.)

But I did adjust the striker position too.

Here's me marking its original postion:

D96.webp

And an impact driver is required to loosen the screws:

D97.webp
D96.webp
D97.webp
 
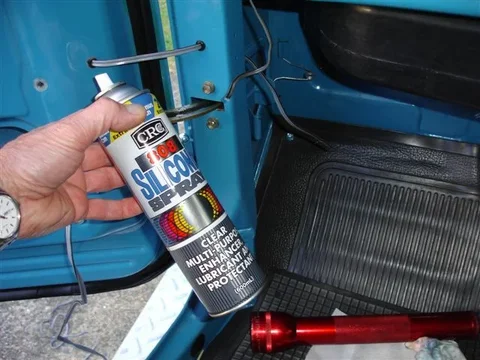
Next step was to replace the wiring to the speaker that is mounted in the door trim.

I find silicone spray is great to help you pull wire through grommets:

D89.webp

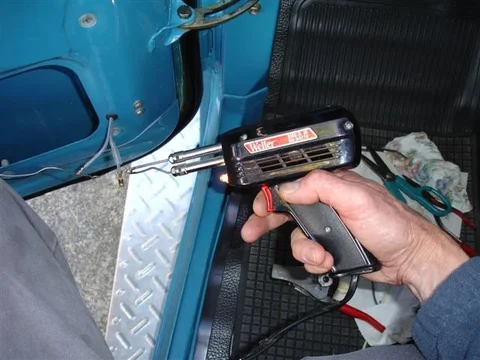
Soldering the bullet connectors in place:

D90.webp

The finished wiring:

D91.webp
D89.webp
D90.webp
D91.webp
 
If you're wondering what those two screws are for, here's a pic of the other door showing what sits behind them:

26Mar10 002.webp

It is a "clamping device" I made for the speaker wire to ensure that there can never be any "pull" on the wires to the speaker itself (resulting from opening the door .... or from some little brat grabbing hold of the accessable wires and yanking them).
26Mar10 002.webp
 
Next thing was to make a replacement plastic sheet to sit behind the door trim.

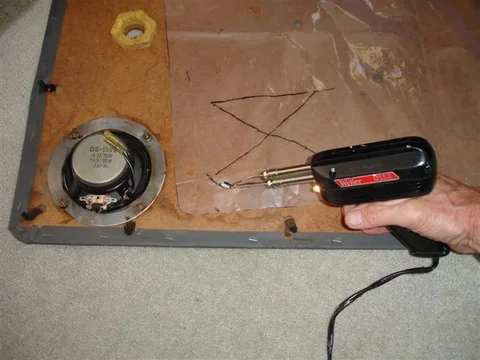
Here me melting "little flaps" onto the outside of the sheet to direct water back inside the door-cavity (and to direct it away from the speaker too):

D93.webp

Here's the outline of the trim panel marked out (using masking tape) and little bits of "blue tack" that'll hold the plastic sheet in place on the door:

D92.webp

And here is the plastic fitted:

D94.webp
D93.webp
D92.webp
D94.webp
 
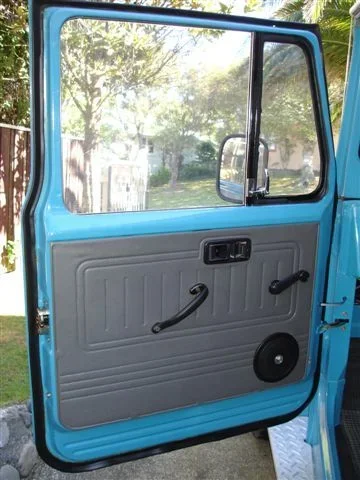
Finished job inside (LH door):

D95.webp

Fitting the mirror:

D98.webp

Finished job outside (LH door):

D99.webp

That's it really..... Although I might add a few more photos as I complete the RH door over the next few weeks.


:cheers:
D95.webp
D98.webp
D99.webp
 
Nice writeup, I might take the opportunity to ask if the only way to remove the lock/latch from the door is to totally take out the glass and window regulator? I have to replace a latch on my HJ 47 troopy and looks like a total PITA.:doh:
 
Great work...I have an 82 BJ42 and I will be refurbishing my doors shortly. I've got this thread printed out as a reference when I start putting it all back together.

I'm flattered!

.. ask if the only way to remove the lock/latch from the door is to totally take out the glass and window regulator?...

Sad to say... I think the answer is "yes" (that the main glass needs to be removed).

Theoretically, I think it could be possible to have the glass wound right up and then remove the "lower window run channel" to allow the lock/latch assy to be dropped out inside the door cavity.

But the lower part of the "chrome-beaded bailey channel (that the rear edge of the main glass will still be sitting in) fits into the top section of this channel. .... So wiggling the "lower window run channel" free of the bailey channel and lifting it out is likely to be very difficult with the glass in place.

But at least you don't need to remove the regulator (not that that is much consolation).

Edit..... Hey. Give it a go I reckon (after a bit more thought). That is ... wind the window right up, undo that single bolt/screw (at the BOTTOM of the channel) holding the "lower window run felt channel", and then try pulling this channel directly downwards from inside the door cavity. (If it comes free .... you're in business and you could then remove the lock assy from within the door cavity once its operating-rods are unclipped (including the hidden one connected to the key tumbler), once the "outer latch" is disconnected from it, and once its 3 screws are removed (and once that single bolt holding part of the connecting-linkage is removed too).

Lower window run.webp


:cheers:
Lower window run.webp
 
Last edited:
I'm feeling in a talkative mood (with beer in hand) so why not....

I don't expect people to take too much notice of my thinking on "painting" because I'm quite radical. After all ... who else brushes on their primer?

But if you're interested.... here's some other things I do..

  • Never buy POR15 in larger sizes than 500ml tins. (It tends to "go off" so whatever you gain pricewise by buying in bulk - you lose in wastage.)
  • Always pour out what you intend to use into an old jam jar (or similar) and NEVER pour back unused paint into the tin (because it undergoes chemical changes on exposure to the air)
  • Always keep the rim of the tin clean of paint and use "cling-wrap" between the lid and tin (otherwise you'll end up destroying the tin trying to get the lid off next time)
  • Reseal the tin as soon as possible after pouring out what you think you'll need. (Be generous in your estimate too and simply discard the surplus.)
  • Don't use POR15 thinner for cleaning brushes. It's too expensive. Use cheap brushes that you can discard after use, or if you must wash a brush, use ordinary paint thinners (like Dulon AAA) and wash it VERY well (or else the residual POR15 will stiffen it). In fact ...you never need to use POR15 thinner for anything AT ALL!
  • Use a primer colour that most closely matches your topcoat - so chips and scratches won't instantly become unsightly.
And that spray gun I've shown earlier in this thread is a bit too small for top-coating large surfaces like the outside of a door.

Here's a pic of the old gun I use for big surfaces alongside a 4 litre tin of Dulon "Toyota Sky Blue":

29MarE.webp


This gun can lay down a lot of paint FAST.

I like to apply 6 coats of topcoat on most things I paint.

And I obviously I do get good "adhesion" between my topcoat and primer because of the way I see stone-chips affecting my paint.

A flying stone will tend to leave "a small chip revealing a speck of primer underneath". (Contrast this with a typical paint job where the chip is usually much larger and where the primer almost behaves like "ceramic" to encourage chipping!).

And the roadworks in this country are certainly a good test. A lot of our road surfaces are made by spraying tar on the old surface road, sprinkling stones on top of the liquid tar, and then using passing traffic to press the stones into the molten tar. This can work okay but the competence of some of the contractors leaves a lot to be desired. So the result is often millions of flying stones (that will fill your chassis rails is a matter of few minutes where the tar-soaked stones bond together to become almost immovable).

I buy a lot of my tools second-hand so this gun is ancient (but it still works well). I suspect the modern guns with the paint reservoir above the gun (gravity feed) are better. After all, I sometimes knock the base of my reservoir on the paint surface while spraying - which can leave a bit of a mark!!!

Oh and about the topcoat. Dulon is a PPG brand that is used in this part of the world. It's good stuff and I get it from "Union Hardware" which a employs a couple of great geriatrics who I get alonmg really well with (because I'm one of those too).

Topcoat Paint is very simple when you have a good supplier like i have in "Union Hardware". Basically - just give them something to colour-match -and the fuel-door on a forty-series is ideal because the inside surface won't have had much sun-exposure.

Then they'll mix up your paint untill they get a DRIED colour that matches it. (You can really just ignore "paint codes" and "paint formulae" when you dealing with competent people like this!

And to do a decent paint job you'll need a lot more paint that a normal "panel and paint" shop uses. (They'd probably use about 3 litre of sky blue for my entire cruiser - whereas so far I've used about 8 litre with the inside of the tub and hard-top still to be painted.)
29MarE.webp
 
Got quite a bit done today. (I am determined that the RH-door won't take anywhere near as long as the LH-door did.)

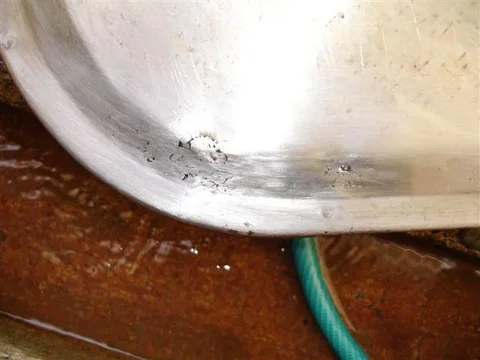
Cut a liitle bit of patch steel from a panel off an old washing-machine:

29MarA1.webp

Oops. My sheetmetal/panel skills leave a lot of room for improvement. (If you want to see REAL skills - look at the work of "Uted" on this site and on Downunder4x4.)

29MarA2.webp

Bit more welding (keeping the panel cool with a wet-rag between welds):

29MarA3.webp

PS. The rag shouldn't be "really soaking wet" (just "very damp" really) and I use it just to "take most of the heat away rapidly". .. The important thing is - the area must be DRY for the next time you "strike an arc" - so try to leave it "a bit warm". (If it is left damp - your welding will turn to sh#t ... or should I say.."turn more sh#t than it already is"!) On the occasions when I have used the rag too heavily - I have had to resort to a hair drier before welding again!
29MarA1.webp
29MarA2.webp
29MarA3.webp
 
Last edited:
Getting there. I'll finish it off tomorrow (all going well):

29MarA4.webp

29MarA5.webp
29MarA4.webp
29MarA5.webp
 
Painted this bit today too:

29MarB1.webp

29MarB2.webp

29MarB3.webp

Now how many Panel&Paint companies whould take the door off to access that area properly?

And it is vital that the paint gets right in around the rubber surrounding those hinges!
29MarB1.webp
29MarB2.webp
29MarB3.webp
 
Darn hard to pick out where the old paint meets the new (if I do say so myself):
(That's the benefit of making the "join lines" correspond with welds or corners etc.)

29MarB4.webp

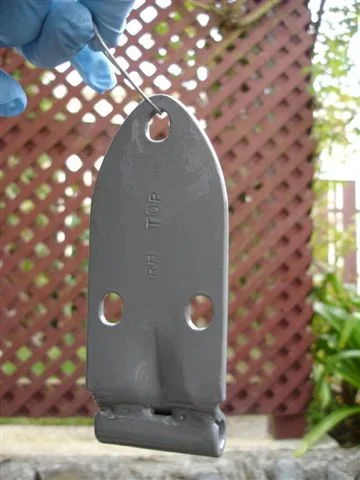
And I'm so anal that I even stamped the details of where each hinge was taken from (so it goes back in the same place):

29MarC1.webp

Got into a argument with the :princess: over the clothes she hung on my paint rack too:
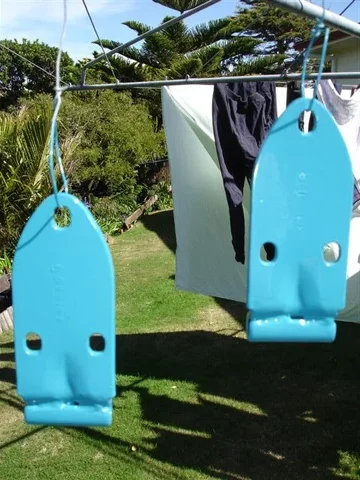
29MarC2.webp
29MarB4.webp
29MarC1.webp
29MarC2.webp
 
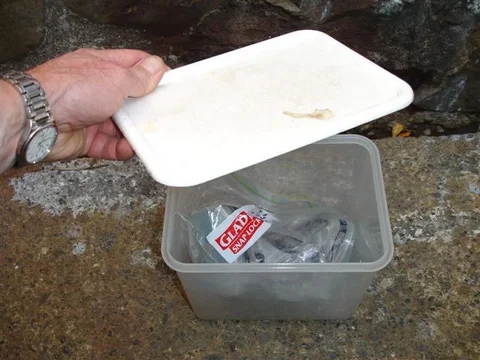
Here's a tip concerning your spraypainting mask:

29MarC3.webp

Dry the "breathing area" out with a hair drier (to avoid mould growth during storage) and then pack it all away in a "snaplock bag" and put that in a sealed container.

In this way, the "activated carbon" in the filter-element doesn't deteriorate during storage.
29MarC3.webp
 
Thanks for the heads up Lostmarbles, I now have a passenger side door that opens from the outside and inside.:grinpimp:

Edit: Yes, the lock can be removed with the glass wound all the way up and the bottom bolt removed that holds the bailey channel in place. I'm rather skilled at it now....
 
Last edited:

Users who are viewing this thread

Back
Top Bottom