Switching my 97LC-4bt swap to Isuzu 4bd1t

This site may earn a commission from merchant affiliate
links, including eBay, Amazon, Skimlinks, and others.

Yes that is a TD04L turbine, its the middle size turbine wheel. The 19T looking at the maps should preform very well all over the 4BD RPM range. I plan to run mine in the 20-25psi range. The TD04HL i have is almost the same size turbine as a the small TD05 so should work will with the 6cm turbine housing. The turbo you have will work well for a lower boost I have a feeling it will run out of breath though. The great thing with these turbos is they are cheap and there is lots of upgrades that can be done. All sorts of different size wheels and covers. I have only seen one 4BD1T with compounds and it was running a big plunger pump and other mods. If you are keeping the stock pump i would not worry about it. Just try what you have if it runs out of steam get a 19T upgrade kit and rebuild the turbo with that.

I do have a thread on here in the diesel section: https://forum.ih8mud.com/diesel-tec...uzu-4bd1t-lexus-lx450-land-cruiser-build.html

Cheers

I'll check out the build thread.

I wasn't sure if the "L" denoted a certain size, model, etc. You see them also with an "H", but you also see them with actual numbers denoting specifics, 13g, 15g, 19t. Then you have 04,05,06. I haven't seen anything above an 06, but as you mentioned the great thing about the 04's is they are cheap as turbo's go (I got mine for $125.00 on Craigslist), since everyone seems to want to take them off their cars and put 05's on in there place. The internals that you bought on ebay, how did you determine their quality, when I look at some of that stuff I start to get worried that I am about to buy some junk?

In the pics below the engine is going in and getting bolted up, except for the front engine mounts which weren't made yet.

IMAG0924.webp


IMAG0931.webp


IMAG0939.webp
 
I'll check out the build thread.

I wasn't sure if the "L" denoted a certain size, model, etc. You see them also with an "H", but you also see them with actual numbers denoting specifics, 13g, 15g, 19t. Then you have 04,05,06. I haven't seen anything above an 06, but as you mentioned the great thing about the 04's is they are cheap as turbo's go (I got mine for $125.00 on Craigslist), since everyone seems to want to take them off their cars and put 05's on in there place. The internals that you bought on ebay, how did you determine their quality, when I look at some of that stuff I start to get worried that I am about to buy some junk?

In the pics below the engine is going in and getting bolted up, except for the front engine mounts which weren't made yet.
Its almost a mirror to my thread on 4BTswaps.

The way MHI turbos are named is really easy.

TD04 = the family/CHRA size
The letter on the end tells you turbine size (L/HL) some do not have one and that is the smallest for that given family.
-13,16,19 is the compressor size larger number = bigger
G/T/B after the number is the wheel family
Finally the 4/5/6 is the turbine housing size in CM2.

Anything on EBay is a gamble i was fortunate that my turbo was in good shape. The turbine housing has few small cracks but they will be easy to weld up.

Engine sits in there well!

Thanks for the insight on the MHI turbos, good info.

Here are some pics of the rear axle starting to get bolted back where it belongs.

IMAG0801.webp


IMAG0802.webp


IMAG0804.webp
 
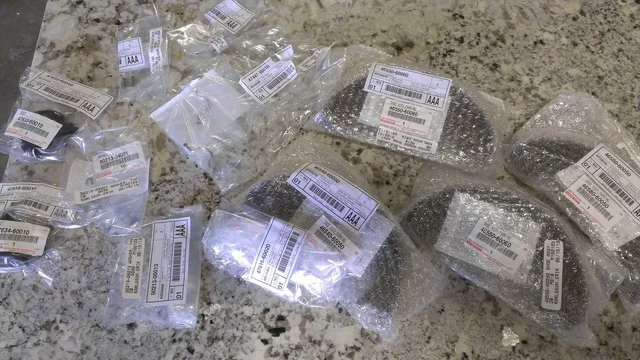
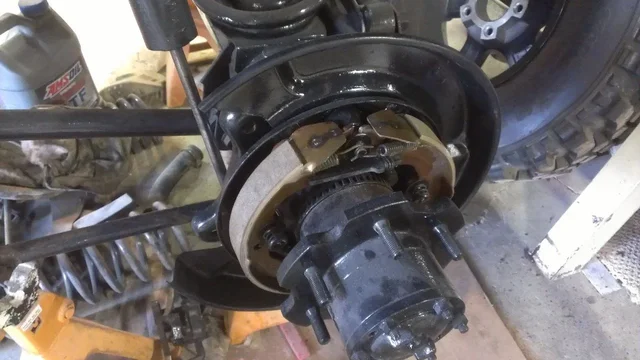
The only thing holding up the completion of the rear axle, is the emergency brake. I need to go through and figure out exactly what I need. At one point I inquired how much it would cost to replace everything and it was over $300.00, I don't recall if that was for one side or both.

I did replace the inner axle seals.

IMAG0828.webp


IMAG0983.webp


IMAG0985.webp
 
I suppose I should get this build/swap thread up to date. This will probably take a few days, but I will get it done. Thank you Jeremy for letting people know where they could find my other swap thread.

I will try to pick up where I left things. I went ahead and ordered just about every part that goes with emergency brake system. I think the only thing I didn't replace was the cabling. I used a high temp anti-sieze on the moving parts of the e-brake when I put it all back together. Once that was done, on went the new rotors and brakes.

I also am using Amsoil stuff for all of the lubricants. So I filled the rear diff with the Amsoil gear oil pictured.

IMAG1211.webp
IMAG1295.webp
IMAG1296.webp
IMAG1474.webp
IMAG1508.webp
IMAG1211.webp IMAG1295.webp
 
One of my objectives with this swap was the capability to travel long distances with out the need to stop for fuel. This meant I would need an additional fuel tank which meant I needed/wanted a dual filler neck. They are a little pricey but are also very well made.
The installation is fairly straight forward. The existing plastic pieces already have the location for the knob for the diverter marked in the casting of the plastic. All you need to do is drill it out to the correct size and push the supplied grommet in place.

To mount the main part of the assembly I captured an existing weldnut that lined up with a corresponding hole on the aluminum casting. You obviously need to cut the existing filler pipe and breather pipe to make room for the new unit.
IMAG1513.webp
IMAG1540.webp
IMAG1544.webp
IMAG1547.webp
IMAG1555.webp
 
Here are a few additional pics regarding the dual filler neck. I used 1.625" ID marine exhaust hose for the connection between the new filler neck and the original fuel pipe. I doubled up the clamps on the original fuel pipe since it has no bead on the end to help keep it from coming off and to help make sure I don't get diesel fuel seeping out.

I have not made my rear fuel tank yet as I am getting ready to install a new rear bumper from Sean (I will post some pics of that up shortly) and I didn't want to make the fuel tank only to find out there was some interference with the new bumper set up. Anyway the aluminum tube in the pictures will go to the new yet to be made fuel tank.
IMAG2871.webp
IMAG2874.webp
IMAG2876.webp
IMAG2768.webp
 
Nice build. Any updates?
 
Nice build. Any updates?

In for updates too.

I see you're also in central Ohio. I'm a new 80 owner in Columbus. What part are you in?
 
IMAG3867.webp
IMAG3862.webp
IMAG3871.webp
IMAG3924.webp
IMAG3931.webp
Nice build. Any updates?

I know I have been negligent in keeping up with this build/engine swap thread. I have been very busy with work, but I have periodically been doing things to my 80. I just haven't been taking the time to post them. I will add a few pics to this post and see if I can get anyone who is interested up to speed.

In for updates too.

I see you're also in central Ohio. I'm a new 80 owner in Columbus. What part are you in?

If that is your new 80 in your avatar it looks like you might have got a good one.
I am in between New Albany and Johnstown.

I seem to have been cut off at 5 pics instead of nine, so maybe something has changed since my last post. All of my intercooler piping is done. I will post up more pics in separate posts.
 
If that is your new 80 in your avatar it looks like you might have got a good one.
I am in between New Albany and Johnstown.

Yup that's the one in my avatar. Yeah it's pretty decent a almost 100% rust free. I drove it up from Florida just before Xmas. I'm pretty happy with it but it needs a few things as well as a few changes with things I don't like. Right now I'm tracking down an exhaust leak that's about killing me every time I drive the truck.

We will have to meet up sometime. I'd love to see your project for sure.
 
If you have pics of the engine mounts and how they measured out etc using the Allmaras kit I would really like to see those.
 
Here are the other pics I was going to post of my air intake adapter.
In the process of welding the two pieces together I got some pitting in my turning due to splatter. It is just a visual thing which you can't even see when the hose is on it.

I bought some gasket material at the local CarQuest and made my own gasket.

I will post some pics of my motor mounts later today.

IMAG3935.webp
IMAG3942.webp
IMAG3946.webp
 
IMAG0956.webp
IMAG0944.webp
IMAG0979.webp
IMAG0980.webp
IMAG1002.webp
If you have pics of the engine mounts and how they measured out etc using the Allmaras kit I would really like to see those.

The angle of the Toyota mounts is the same as the engine mounts on the 4bd1t, but of course it is not so simple as just bolting things together. The Toyota mounts are too high when you take in to account making room for an isolator/dampener, and they do not line up quite right front to back. I cut the Toyota mounts off of the frame rails and welded them to a piece of plate. I then welded the plate to the frame rail.
 
That is what I was thinking might have to happen. I was also wondering how the 7* rotation would need to be accounted for. Did you have to mod the Toyota mounts in any other way before reusing?

I am impressed by the way you and others doing these swaps are machining their own parts. Are these parts not available in the retail market or do you just like making your own stuff? I don't have access to those type of tools/machines. The biggest part of this swap that worries me is all the turbo/intercooler stuff that needs to be made as I have zero experience with those, even though I am reading as many of these swap threads as I can.

Thanks for reviving the build thread!

Here are some more pics of my engine mounts.
IMAG1005.webp
IMAG1877.webp
IMAG1885.webp
IMAG1882.webp

IMAG1886.webp
I believe that I used the Toyota isolators, I also had the Isuzu isolators as I had purchased the entire NPR. My recollection is that they were similar in design and size, but no I did not have to do anything to the isolators other than clean them and paint them.

I am not sure what you are referring to regarding the 7deg rotation. My engine is almost vertical/plumb.

I believe there was only one other part that I had to fab for my turbo/intercooler piping system. You will need to be able to cut various lengths of pipe.
 
Hmm... the Allmaras kit advertises 7* of rotation to the passenger side to help the turbo clear.
 
Hmm... the Allmaras kit advertises 7* of rotation to the passenger side to help the turbo clear.
I found with mine that 7* was too much. I ended up with 5* on mine. I have good clearance on my turbo and throttle assembly.
 

Users who are viewing this thread

Back
Top Bottom