
I wonder if anyone has mounted these to flexible magnet sheet, or Neodymium on the corners.. If you did you could use it when on trips, and take it off when not needed (especially if you utilized a dual source charge controller).
Navigation
Install the app
How to install the app on iOS
Follow along with the video below to see how to install our site as a web app on your home screen.
Note: This feature may not be available in some browsers.
More options
Style variation
You are using an out of date browser. It may not display this or other websites correctly.
You should upgrade or use an alternative browser.
You should upgrade or use an alternative browser.
Roof Mounted Solar
- Thread starter TeCKis300
- Start date
This site may earn a commission from merchant affiliate
links, including eBay, Amazon, Skimlinks, and others.
I see these 40 amp hr lithium batteries fairly cheep all the time and they are rated for 5000 cycles. ($150 to $300).
The large group 31 AMG are like $400 of 100 amp hr.
I read that AGM you can only drain down to 70% 300 times and they are toasted.
If I'm running a fridge will the 40 amp hr lithium run the fridge longer than the 100ah amg?
They have this chart.

The large group 31 AMG are like $400 of 100 amp hr.
I read that AGM you can only drain down to 70% 300 times and they are toasted.
If I'm running a fridge will the 40 amp hr lithium run the fridge longer than the 100ah amg?
They have this chart.
I got the Group 31 for simplicity, I have a small jumper box in the back as well. I live in AZ and I run the fridge 24/7.
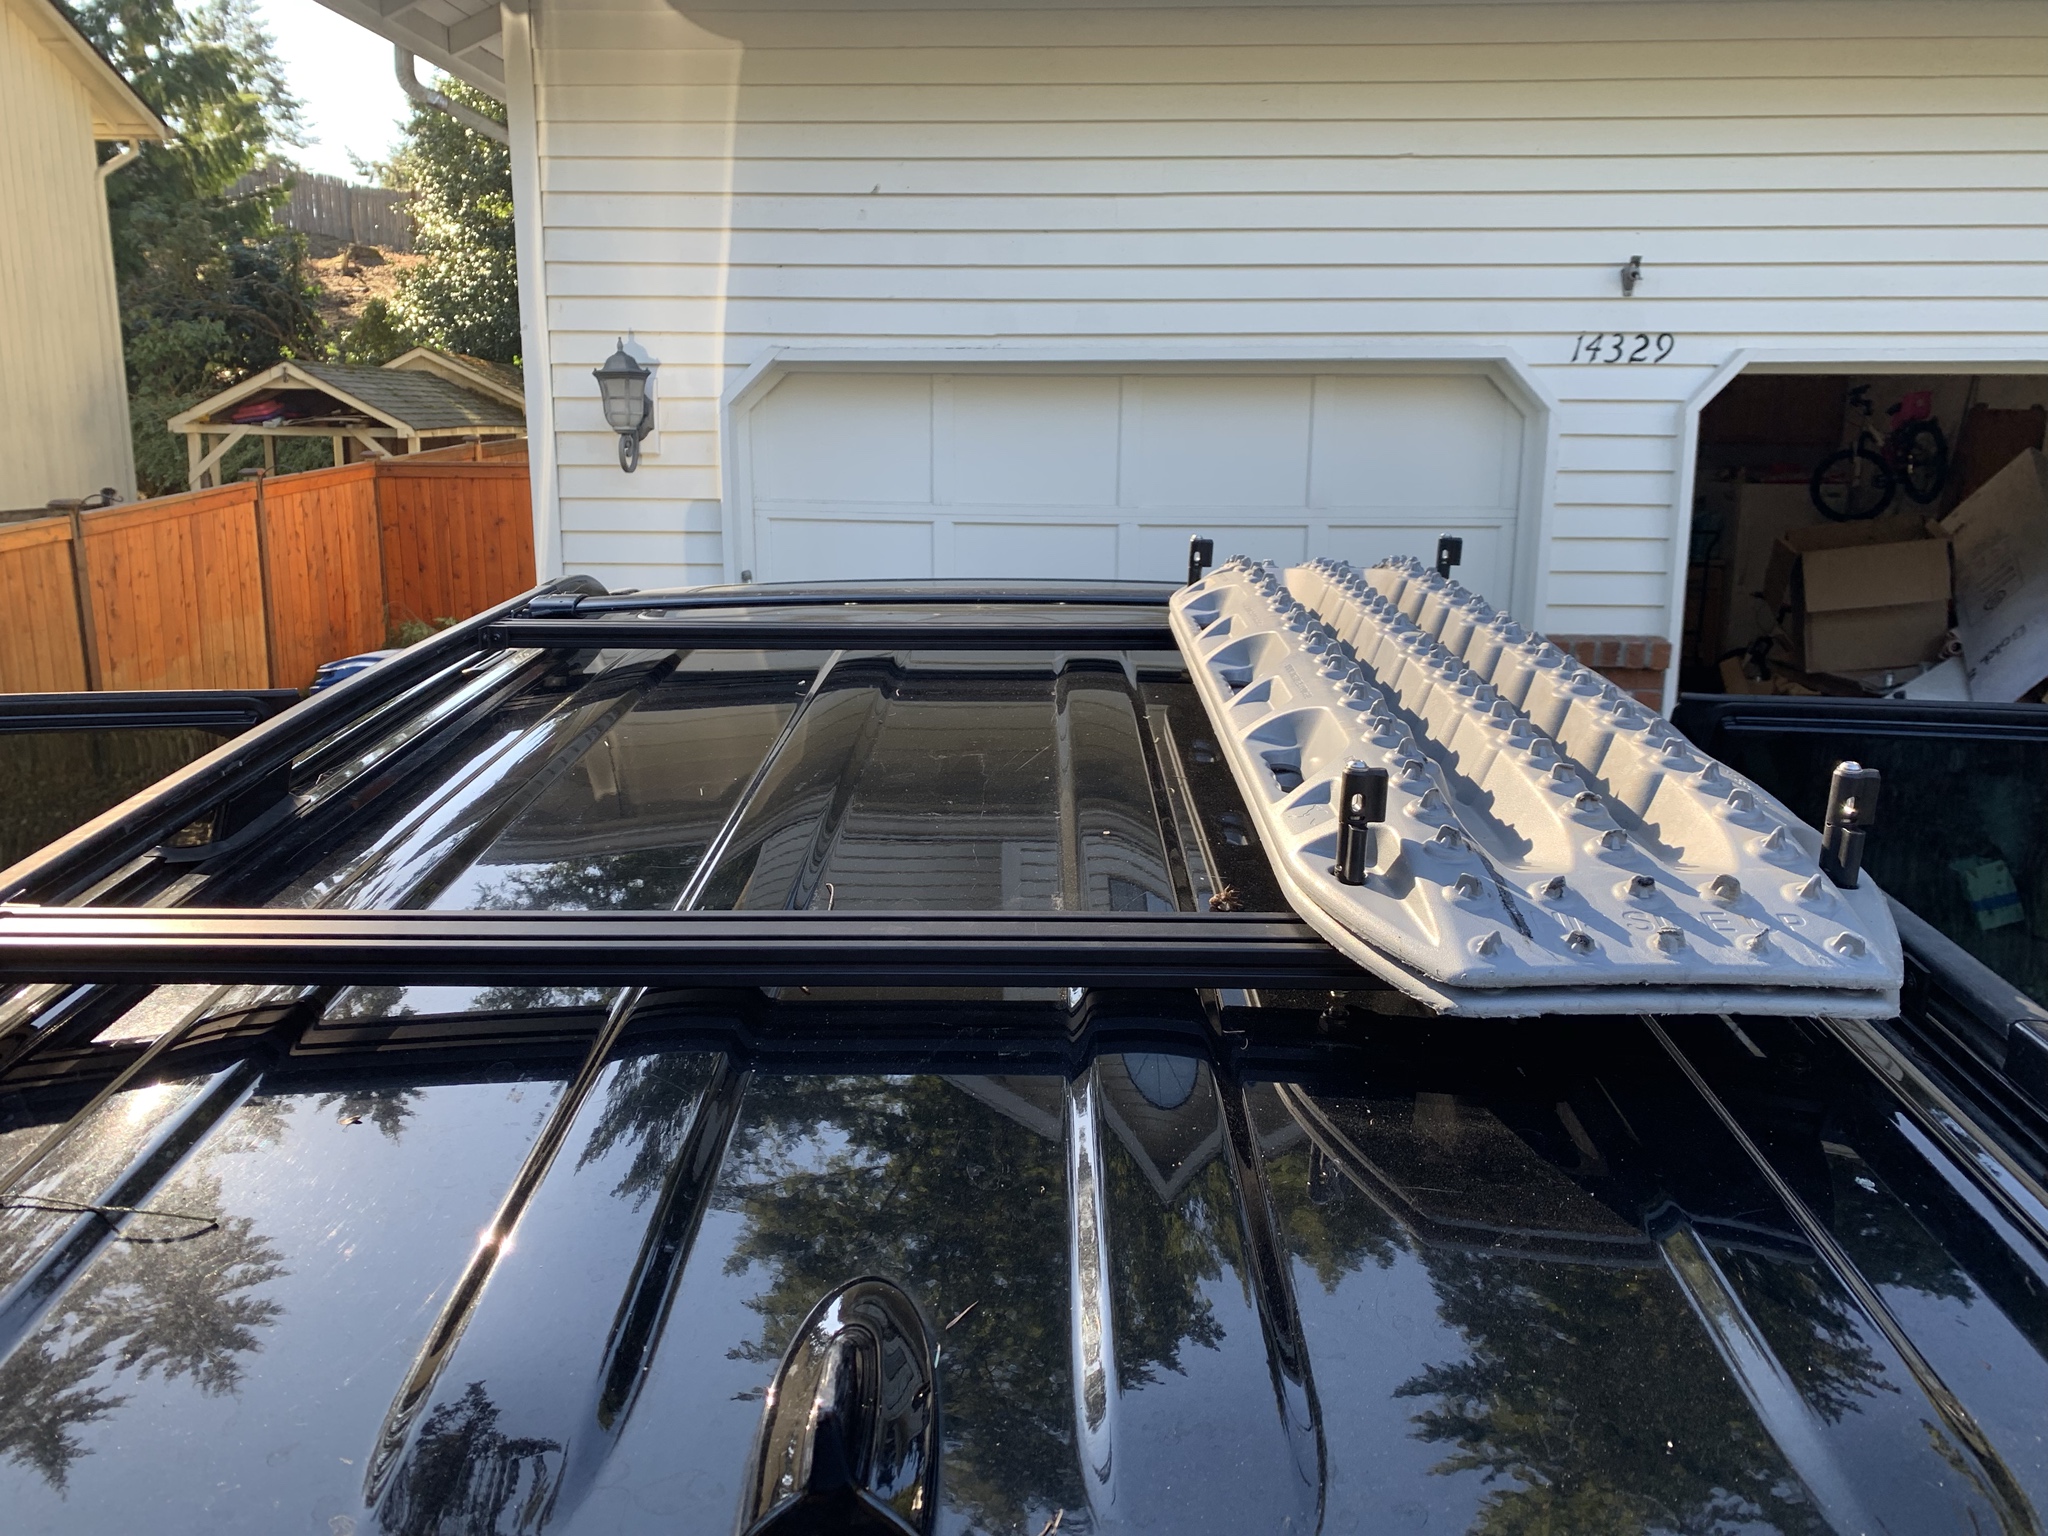
So about 7 weeks later, I finally got around to installing my panel.
Couple things of note:
I can definitely hear some wind noise on the highway and lower speeds.
It sits above the rails I installed - which is not a surprise - so I may try flipping the brackets and seeing if I can get the panel below the top of the rails in the event I need to carry a cargo box or other roof cargo.
My plan of running the wires down the a-pillar was not well thought out. I don't really have a way to secure the wires to the pillar. So I had a lose wire driving to work this morning. This will need to be resolved. I might have enough to run rearward and under the truck to the batter that way. Is there any chance to connect the MPPT to my fuse block in the rear (which is 2AWG +/- direct to battery) or is that just stupid?
Don't pay attention to the fasteners. I was going to try some carriage bolts with wing nuts so I could easily remove the panel if needed. If I have to carry a cargo box, I could just keep the panel in there then remove it and move around as necessary.
I don't see why you couldn't connect it through the fuse block, pop a 10A fuse in since its a direct connect. If the battery is tied to another you'll want to isolate it.So about 7 weeks later, I finally got around to installing my panel.
Couple things of note:
I can definitely hear some wind noise on the highway and lower speeds.
It sits above the rails I installed - which is not a surprise - so I may try flipping the brackets and seeing if I can get the panel below the top of the rails in the event I need to carry a cargo box or other roof cargo.
My plan of running the wires down the a-pillar was not well thought out. I don't really have a way to secure the wires to the pillar. So I had a lose wire driving to work this morning. This will need to be resolved. I might have enough to run rearward and under the truck to the batter that way. Is there any chance to connect the MPPT to my fuse block in the rear (which is 2AWG +/- direct to battery) or is that just stupid?
Don't pay attention to the fasteners. I was going to try some carriage bolts with wing nuts so I could easily remove the panel if needed. If I have to carry a cargo box, I could just keep the panel in there then remove it and move around as necessary.
View attachment 2081648
I think if that's possible I'd just wire directly to where the leads from the battery attaches to the fuse block. There is an in-line 10A fuse already from the controller. Just wondering if this would be a problem when I'm running the fridge and topping the battery off while parked. I assume there'd be a little voltage drop but may be worth trying out at least.I don't see why you couldn't connect it through the fuse block, pop a 10A fuse in since its a direct connect. If the battery is tied to another you'll want to isolate it.
So about 7 weeks later, I finally got around to installing my panel.
Couple things of note:
I can definitely hear some wind noise on the highway and lower speeds.
It sits above the rails I installed - which is not a surprise - so I may try flipping the brackets and seeing if I can get the panel below the top of the rails in the event I need to carry a cargo box or other roof cargo.
My plan of running the wires down the a-pillar was not well thought out. I don't really have a way to secure the wires to the pillar. So I had a lose wire driving to work this morning. This will need to be resolved. I might have enough to run rearward and under the truck to the batter that way. Is there any chance to connect the MPPT to my fuse block in the rear (which is 2AWG +/- direct to battery) or is that just stupid?
Don't pay attention to the fasteners. I was going to try some carriage bolts with wing nuts so I could easily remove the panel if needed. If I have to carry a cargo box, I could just keep the panel in there then remove it and move around as necessary.
View attachment 2081648
Curious how you mounted the 80/20 on the factory rails? I have some 80/20 in the shop that would loved to be used up!
")
Hard to tell, but it looks like you used the 90 degree brackets at each end. How's the support?
Check out @tbisaacs great thread, good info for going this route.Curious how you mounted the 80/20 on the factory rails? I have some 80/20 in the shop that would loved to be used up!
Hard to tell, but it looks like you used the 90 degree brackets at each end. How's the support?
Get more from your factory roof rack with t-slotted aluminum (8020)
Hey gang, In the summer I keep an XL Thule box on top, plus maxtrax, shovel, and a pop-up shelter that I hope to replace with a fixed awning. Someday I want to get a Gobi or FrontRunner rack for my 570. But today ain’t that day. One common improvement is extra crossbars. But rather than do...
 forum.ih8mud.com
Have to give credit to @tbisaacs. Look here: Get more from your factory roof rack with t-slotted aluminum (8020)Curious how you mounted the 80/20 on the factory rails? I have some 80/20 in the shop that would loved to be used up!
Hard to tell, but it looks like you used the 90 degree brackets at each end. How's the support?
Sac Cerevisiae
Reid
Here’s how I did mine.Curious how you mounted the 80/20 on the factory rails? I have some 80/20 in the shop that would loved to be used up!
Hard to tell, but it looks like you used the 90 degree brackets at each end. How's the support?
Which profile did you use; 10 (1") or 15 (1.5")?
Awesome idea. Ironically, I have everything I need in the shop from an old "unfinished" project. This may be my weekend project. Might also save me $900 on a planned prinsu. Not to mention, I won't look like I'm going on a safari every time I leave the house.
I read @tbisaacs post...good stuff! Thanks!
This turned out awesome

Sac Cerevisiae
Reid
Which profile did you use; 10 (1") or 15 (1.5")?
I used 10 Series (1030 or 1" x 3") cut to 43 9/16". I've seen other guys measure differently. I would error 1/16 to 1/8 shorter. If you recall, the brackets will hold the bars and the bars do not need to be flush with the side rails.
Make sure to include the mounting hardware with your bracket order.
I do experience some road noise above 50 mph. I'm working on either a wind faring solution or wrapping the bars with some thin rope to break up the profile. 8020.net does offer other profiles (not squared off) but they were much more expensive.
Sac Cerevisiae
Reid
Also, I added washers to the side rails. See my assembly. I went with the double economy (1x2") nuts. The gap in the side rails is a little larger than the 10-series opening.
If I were to do it again, I would use (COMBO-010-A) 10 Series 1/4-20 Economy T-Nut & 1/2″ lg screw | TNUTZ | TNUTZ as you could angle the nut to "grab" more of the side rail.
How I assembled:
I placed the washers over the "lip" of the nut.


Here's the "difficult" part:
1.) Take off the plastic covers on the front of the side rails. Use a trim tool or flathead screwdriver.
2.) I also undid the two star pattern bolts on the bottom of the side rail. This gave me a bit more wiggle room for #3.
3.) Slide the nut and the washers on the inside. Note in the picture below I messed up and the washer is half-in and half-out. I used a flathead screwdriver to help push the washer/net assembly into the rail.

If I were to do it again, I would use (COMBO-010-A) 10 Series 1/4-20 Economy T-Nut & 1/2″ lg screw | TNUTZ | TNUTZ as you could angle the nut to "grab" more of the side rail.
How I assembled:
I placed the washers over the "lip" of the nut.
Here's the "difficult" part:
1.) Take off the plastic covers on the front of the side rails. Use a trim tool or flathead screwdriver.
2.) I also undid the two star pattern bolts on the bottom of the side rail. This gave me a bit more wiggle room for #3.
3.) Slide the nut and the washers on the inside. Note in the picture below I messed up and the washer is half-in and half-out. I used a flathead screwdriver to help push the washer/net assembly into the rail.
Sac Cerevisiae
Reid
Lastly, have a friend help you position the bars. I tried a couple ways to do it. If you had more space (your bars were shorter than my perfect fit) then you pre-assemble and loosely attach the brackets to the bar and you and slide the whole assembly on each side simultaneously. As mine was such a tight fit that was a pain in the @$$. I just slid the brackets in individually and then attached the bar after I had roughly positioned the brackets.
Thanks for the detailed reply. I’m actually toying with mounting the bars above the factory side rails, extending out on each side a few more inches (maybe 54” or 55” total length). This won’t be as aero, but it seems like it might provide a little more flexibility.Lastly, have a friend help you position the bars. I tried a couple ways to do it. If you had more space (your bars were shorter than my perfect fit) then you pre-assemble and loosely attach the brackets to the bar and you and slide the whole assembly on each side simultaneously. As mine was such a tight fit that was a pain in the @$$. I just slid the brackets in individually and then attached the bar after I had roughly positioned the brackets.
I believe 8020 sells a rubber mounding strip that can be used to fill the t-slot channel if that’s a source of wind noise.
Is it wire thickness that makes the A pillar option not work? The A pillar will fit a 3/8” wire loom. You can secure it with a bit of RTV. Now if you’re using 8 gauge wire you might need to route positive down one A pillar and negative down the other...
It probably will fit both. Is there a good wire loom that would work there? UV resistant?Is it wire thickness that makes the A pillar option not work? The A pillar will fit a 3/8” wire loom. You can secure it with a bit of RTV. Now if you’re using 8 gauge wire you might need to route positive down one A pillar and negative down the other...
I'm not sure what gauge the wires are.
Is there any chance to connect the MPPT to my fuse block in the rear (which is 2AWG +/- direct to battery) or is that just stupid?
You can definitely run your controller in the back. I ran mine in the back before I switched to a DCDC charger under the hood.
I would recommend vinyl tubing which is available in 1/4" and 3/8" to run the wires down the outside of the trim piece, but there may be better choices too.It probably will fit both. Is there a good wire loom that would work there? UV resistant?
I'm not sure what gauge the wires are.
I definitely wouldn't recommend it to the faint of heart, but you can actually run solar panel wires under the windshield trim piece too, but it isn't a walk in the park


Last edited: