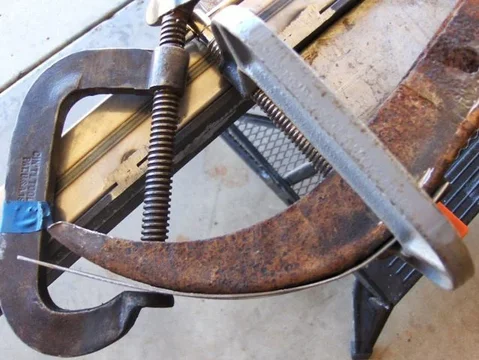
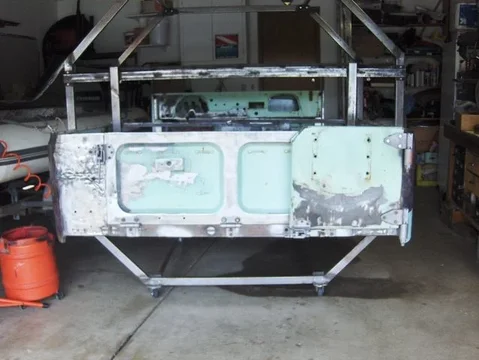
Pyramids are square to the outside edge. So you need to cut your material at an angle. I had a post or thread about it here somewhere.....
Navigation
Install the app
How to install the app on iOS
Follow along with the video below to see how to install our site as a web app on your home screen.
Note: This feature may not be available in some browsers.
More options
Style variation
You are using an out of date browser. It may not display this or other websites correctly.
You should upgrade or use an alternative browser.
You should upgrade or use an alternative browser.
Builds Rods 65 FJ 40 thread
- Thread starter Icantdive55
- Start date
This site may earn a commission from merchant affiliate
links, including eBay, Amazon, Skimlinks, and others.
More options
Who Replied?Icantdive55
SILVER Star
- Thread starter
- #42
pyramids
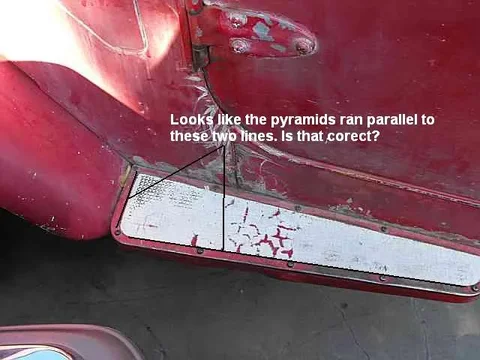
I searched but didn't find much. I did find a decent photo that i shamelessly stole from 3jvj. The matt looks to have been installed the way I was thinking. I made my template today since it was raining. I may cut them out tomorrow. I think this is what you were describing Cruiser_Nerd. am I correct?
Rod

I searched but didn't find much. I did find a decent photo that i shamelessly stole from 3jvj. The matt looks to have been installed the way I was thinking. I made my template today since it was raining. I may cut them out tomorrow. I think this is what you were describing Cruiser_Nerd. am I correct?

Rod
Hey...very cool! Did you buy the roll from that place in NY?
That is a lot of material! How many you figure you can get of it? I was thinking of buying 24" x yard, and I figured I'd have more than enough for a couple of sets, as I only need two...maybe three sets...always nice to have spares
Oh, and I believe that you are correct in the orientation of the pyramids, as this is how they were on my old short runners I got from John last year.
Icantdive55
SILVER Star
- Thread starter
- #44
Hey...very cool! Did you buy the roll from that place in NY?
That is a lot of material! How many you figure you can get of it? QUOTE]
Ya I got it from Canal rubber. I ordered it quite a while ago. They said they were out but it had been re-ordered already and they would ship it ASAP. I actually thought that they had lost my little order and ws going to call them again when it showed up.
Not sure how many I'll get from it. I'll post up something later. The sun is shining so that means I have lawns and gutters to do first. While I'm doing that I'm sure the list will growif you know what I mean.
Rod
Rod,
Yep, what you have pictured is correct. Here's a thread from when I did it:
https://forum.ih8mud.com/fj25-owners-group/69657-non-skid-step.html
You have to cut on a 45* angle, so you get a lot less out of the raw material than you could otherwise.
Yep, what you have pictured is correct. Here's a thread from when I did it:
https://forum.ih8mud.com/fj25-owners-group/69657-non-skid-step.html
You have to cut on a 45* angle, so you get a lot less out of the raw material than you could otherwise.

Icantdive55
SILVER Star
- Thread starter
- #46
Rod,
https://forum.ih8mud.com/fj25-owners-group/69657-non-skid-step.html
You have to cut on a 45* angle, so you get a lot less out of the raw material than you could otherwise.
Thanks for the link. It's nice to go where those have gone before. I make a lot less mistakes that way. I had just came in the house from laying out my caps on the mat to see just how many I would get. I didn't cut them only because I need a good straight edge. I then read your last post and decided that I need to go do it again, this time making sure my mind doesn't wander into la la land. Well as you stated there will be a lot of waste. Thanks again for making life easier.
Rod
Icantdive55
SILVER Star
- Thread starter
- #47
Running Board eye candy
Well it's time for a small update. I cut some of the matt for the running boards and fitted them. One side turned out good and the other is off 1/2 pyramid from end to end. I'll use that as my daily driver and replace it with a correct cut if I meet someone I want to impress.

I've also completed the filling of some of the holes in the windshield frame. It went from this

to this
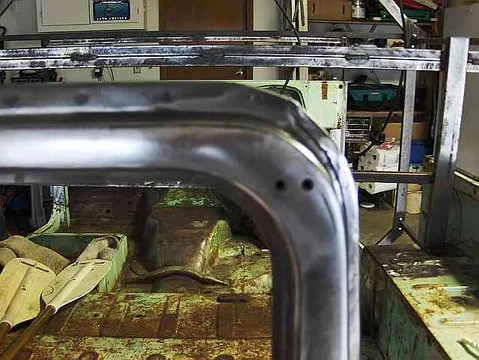
Hopefully the rest of the holes will come out as well as these did. I sure like the idea of them being filled with steel vs. some form of bondo.
Rod


Well it's time for a small update. I cut some of the matt for the running boards and fitted them. One side turned out good and the other is off 1/2 pyramid from end to end. I'll use that as my daily driver and replace it with a correct cut if I meet someone I want to impress.

I've also completed the filling of some of the holes in the windshield frame. It went from this

to this

Hopefully the rest of the holes will come out as well as these did. I sure like the idea of them being filled with steel vs. some form of bondo.
Rod
nice 
looking great man
Running boards look sweet!
looking great man
Running boards look sweet!
Icantdive55
SILVER Star
- Thread starter
- #49
Thanks Destin, I know the fasteners are not OE. I used them because they were easy to get my hands on and I wanted to check the fit. The correct Phillips head screws are in a bucket somewhere.
Rod
Rod
Now I understand why you needed so much mat...you have the long boards.
Looking good...and that frame looks like it never had those holes
Looking good...and that frame looks like it never had those holes

Great work Rod. I have to get some of that mat!!
Icantdive55
SILVER Star
- Thread starter
- #52
Thanks Guys, it's really slow but I can see the finished product in my mind. Heck I'm already thinking about my next one!
Rod
Rod
Icantdive55
SILVER Star
- Thread starter
- #53
Seat Belt hardware
Well I got enough time over the past few days to remove the seat belt support from the inside of the fender well. I had removed the passenger side quite some time ago. All in all I have to say this has been the hardest part of the rebuild so far. I don't know who installed these in the first palce but man what a pain in the rear. Being that the nut for the "I" bolt anchor is SAE I would think they were installed in the states. If that is the case it might explain why they were so rusted. Welding them in place probably destroyed any body coating and they wern't properly sealed after the repaint.
Almost removed. Still have 4 spot welds to remove but I need to do it from the cab area of the tub. I can't get the drill into the tight space.
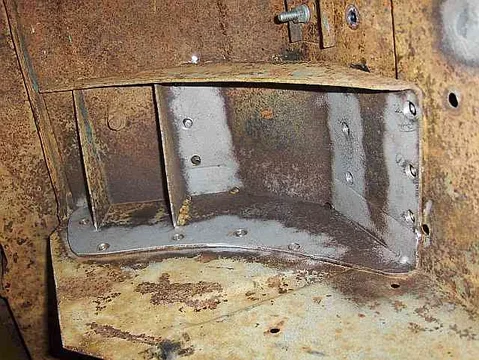
The piece is removed and I had a total 22 welds to cut it loose. The holes were close but not exactly like the other side making me think a dealer drilled them to weld it into place. I have a fair amount of rust damage to take care of.

The piece removed and on the work bench.

Now to perfect the making of a few replacement Ribbs, or better yet find a used wheel well that I can cut them out of and replace my overly rusted ones. I don't want to replace the entire wheel well just the rusted sections.
Rod


Well I got enough time over the past few days to remove the seat belt support from the inside of the fender well. I had removed the passenger side quite some time ago. All in all I have to say this has been the hardest part of the rebuild so far. I don't know who installed these in the first palce but man what a pain in the rear. Being that the nut for the "I" bolt anchor is SAE I would think they were installed in the states. If that is the case it might explain why they were so rusted. Welding them in place probably destroyed any body coating and they wern't properly sealed after the repaint.
Almost removed. Still have 4 spot welds to remove but I need to do it from the cab area of the tub. I can't get the drill into the tight space.

The piece is removed and I had a total 22 welds to cut it loose. The holes were close but not exactly like the other side making me think a dealer drilled them to weld it into place. I have a fair amount of rust damage to take care of.

The piece removed and on the work bench.

Now to perfect the making of a few replacement Ribbs, or better yet find a used wheel well that I can cut them out of and replace my overly rusted ones. I don't want to replace the entire wheel well just the rusted sections.
Rod
Icantdive55
SILVER Star
- Thread starter
- #54
Rear sil
Well i've been making a rear sil this weekend and so far it is going OK using what I have around the shop. I had a piece of 2" square and a piece of 1" X 1/4" flat and some 1/16"sheet. A piece of cardboard a die grinder,andle grinder and a welder.

My old sil was a very poor fit where the holes are drilled for the tire mount. So on this one I made a small modification. During a test fit I painted over the holes to get a general idea of how things will line up.
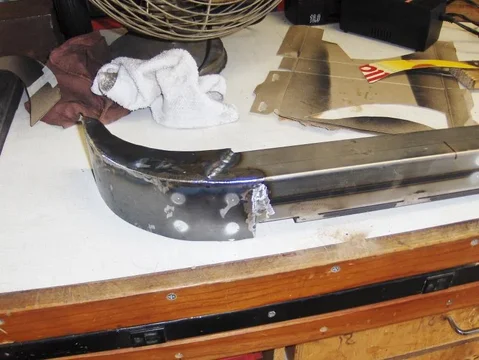
Being able to flip ypur rig to get the FIT right is priceless. Couldn't do this project without some kind of rotisserie.

Again the ideas and techniques used were gained from numerous posts here on MUD. thanks to all. Hopefully I can start spending a little more time on it.
Rod


Well i've been making a rear sil this weekend and so far it is going OK using what I have around the shop. I had a piece of 2" square and a piece of 1" X 1/4" flat and some 1/16"sheet. A piece of cardboard a die grinder,andle grinder and a welder.

My old sil was a very poor fit where the holes are drilled for the tire mount. So on this one I made a small modification. During a test fit I painted over the holes to get a general idea of how things will line up.

Being able to flip ypur rig to get the FIT right is priceless. Couldn't do this project without some kind of rotisserie.

Again the ideas and techniques used were gained from numerous posts here on MUD. thanks to all. Hopefully I can start spending a little more time on it.
Rod
Living in the Past
SILVER Star
Well I got enough time over the past few days to remove the seat belt support from the inside of the fender well. I had removed the passenger side quite some time ago. All in all I have to say this has been the hardest part of the rebuild so far. I don't know who installed these in the first palce but man what a pain in the rear. Being that the nut for the "I" bolt anchor is SAE I would think they were installed in the states. If that is the case it might explain why they were so rusted. Welding them in place probably destroyed any body coating and they wern't properly sealed after the repaint.
Almost removed. Still have 4 spot welds to remove but I need to do it from the cab area of the tub. I can't get the drill into the tight space.
View attachment 375550
The piece is removed and I had a total 22 welds to cut it loose. The holes were close but not exactly like the other side making me think a dealer drilled them to weld it into place. I have a fair amount of rust damage to take care of.
View attachment 375551
The piece removed and on the work bench.
View attachment 375552
Now to perfect the making of a few replacement Ribbs, or better yet find a used wheel well that I can cut them out of and replace my overly rusted ones. I don't want to replace the entire wheel well just the rusted sections.
Rod
I would be surprised if these were dealer installed. The I bolts were used by Toyota on the early seat belts. The Seat belts were red and have a Toyota label on them. I have a 63 cruiser and it has these same brackets. Don't believe Toyota used any body coating in the early years. Look what most of the rear corners look like on most FJ40s where it was double wall in the rear corners. Moisture get between the two and you got rust.
Don't know how I missed this post last year. Looks like your doing a great job on the rear sill. Keep up the good work

looking good man 
Keep the photos coming
Keep the photos coming
Icantdive55
SILVER Star
- Thread starter
- #57
Icantdive55
SILVER Star
- Thread starter
- #58
it's done for now
Finish it up with a little sanding.

Check the fit one more time.

Next step is to coat it with weldable primer. seal the inside with a rust preventer and drill the body mount holes.
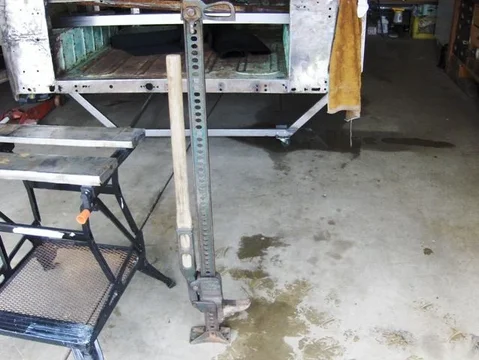
A little off topic but check out the period specific Hi-Lift jack I picked up. $15.00 I couldn't pass it up. I love the wooden handle


Finish it up with a little sanding.

Check the fit one more time.

Next step is to coat it with weldable primer. seal the inside with a rust preventer and drill the body mount holes.
A little off topic but check out the period specific Hi-Lift jack I picked up. $15.00 I couldn't pass it up. I love the wooden handle

Nice work...Sweet jack 

Looking good Rod.
Cheers Dobster
Cheers Dobster
Similar threads
Users who are viewing this thread
Total: 1 (members: 0, guests: 1)

