Navigation
Install the app
How to install the app on iOS
Follow along with the video below to see how to install our site as a web app on your home screen.
Note: This feature may not be available in some browsers.
More options
Style variation
You are using an out of date browser. It may not display this or other websites correctly.
You should upgrade or use an alternative browser.
You should upgrade or use an alternative browser.
Removing the Roof Rails
- Thread starter FirstToyota
- Start date
This site may earn a commission from merchant affiliate
links, including eBay, Amazon, Skimlinks, and others.
More options
Who Replied?orttauq
SILVER Star
Yep, driver side was all OK although it has the two "glues" too. A harder black one then the the softer white stuff.
Anyone know if both are normal? or maybe a TSB/recall to fix issues/leaks......
Anyone know if both are normal? or maybe a TSB/recall to fix issues/leaks......
Congats on finding the capture plate! I lost one while removing my 4 runner TRD pro roofrack and installing the FR rack. Luckily, I managed to also find the capture plate w/ out removing much of the headliner.Installing a Prinsu rack on 2015 LX is my current C-19 Project.
View attachment 2255554
Drivers side bolts came out fairly easy with the captive nut plate staying put. When I started the passenger side I could tell the captive nut plates were both broken loose with a lot of up and down movement. There was some damage to the OEM rack so I am guessing there was some work in the past. One of the rubber grommets was missing too.
View attachment 2255552
Using specialized tools (copper wire) I was able to keep the rear plate in place until I got the rack foot off and out of the way to get a bolt back in one of the holes.
View attachment 2255648
The front capture plate was all messed up and I lost it down in the headliner. LED light down in one hole, I played Operation until I recovered it. FUN
View attachment 2256412
Two different 'glues' in gutter/seam that will take a few hours to clean-up
I had to stop and glue the 2 captive nut plates in place as best I could and wait overnight...more to come.
Soooo. Has anyone remove the factory flush rails on an ‘17 LX? It appears you have to come from underneath?
Yeah it’s a bit more involved. I believe @Chrisleduc1 did thisSoooo. Has anyone remove the factory flush rails on an ‘17 LX? It appears you have to come from underneath?
orttauq
SILVER Star
Well my FUN never ends. The passenger side plates were really buggered by the last "work" so today as I tried to install the Prinsu side plates I had to tap the rear plate (8x1.25) to get the new bolts the thread back in correctly. What is good about the LX is 2 of the 4 are not used by the OEM rack so they were not eff'd up.
Basically passenger side 3 hours work; drivers side 30 mins.
Let me tell you the 80 is so much easier to install a Prinsu on...
Basically passenger side 3 hours work; drivers side 30 mins.
Let me tell you the 80 is so much easier to install a Prinsu on...
orttauq
SILVER Star
TrekboxX
Supporting Vendor
Hey guys. Here's a dirty fix I came up with to keep the nut plates from falling if you break one loose. Take another M8 bolt and grind the head round and just small enough to fit inside the roof rack's hole but not small enough to slip through the roof itself. grind a screwdriver slot across the head. Use this to secure one side of any loose nut plates while you take the rails off. Fast and easy.


Need more photos of your wheel and tire setup! Without rack would Be cool, too. Love the bronze. What size nittos?
orttauq
SILVER Star
They are these from the ClassifiedsNeed more photos of your wheel and tire setup! Without rack would Be cool, too. Love the bronze. What size Nittos?
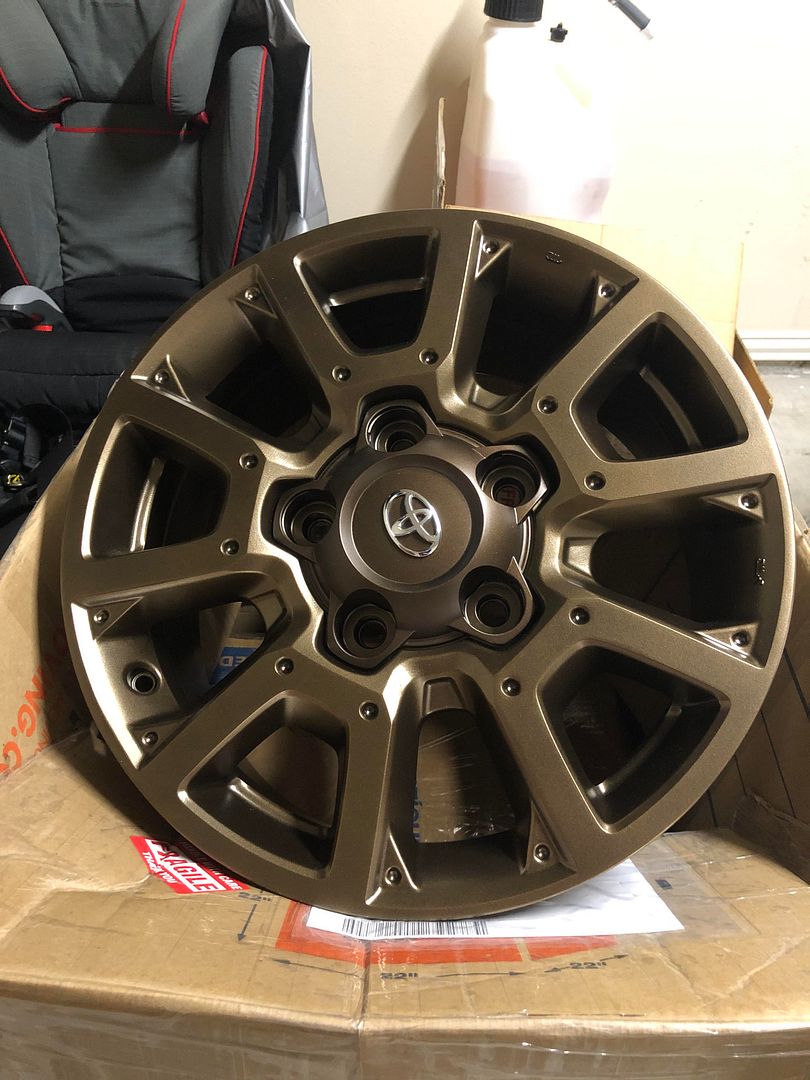
For Sale - Tundra TSS wheels - Powdercoated Bronze for LC200
For sale: 4x Tundra TSS Off-road wheels powdercoated triple bronze. They are 18"- 5x150 +60et wheels CB is unchanged to fit 200 series LC. I bought them as straight used wheels with center caps and had painted triple bronze to replicate the heritage look on my LC. The center caps are also...
 forum.ih8mud.com
They are these from the Classifieds
Nittos are 285/60R18For Sale - Tundra TSS wheels - Powdercoated Bronze for LC200
For sale: 4x Tundra TSS Off-road wheels powdercoated triple bronze. They are 18"- 5x150 +60et wheels CB is unchanged to fit 200 series LC. I bought them as straight used wheels with center caps and had painted triple bronze to replicate the heritage look on my LC. The center caps are also...
Thanks! Meant on your rig. I have the same LX and was curious how they look.
orttauq
SILVER Star
Let me see if I can find any. You don't want to see it right now...a dusty mess with dirty wheels 
Hi All, thanks for all the great posts on removing the roof rails. We followed the guidance and successfully installed the prinsu rack BUT we still had problems with the back, passenger side mount point. One of the screws is in the nut plate but the other side of the nut plate is bent and will not line up with the other screw. We tried pulling it closer with a long, modified nail with no success. I have that screw hole filled in with silicone for the moment. Any ideas on how I can get the nut plate to line up with the screw? Or must I move on to headliner removal? Any ideas welcome!


drill out the rack foot a bit and throw a washer on it
Maybe loose all the others so that the bad one can be threaded. Tighten it up slowly to see if you can reshape the bent one a little. If it can’t be threaded your gonna have to drill out the prinsu a littleHi All, thanks for all the great posts on removing the roof rails. We followed the guidance and successfully installed the prinsu rack BUT we still had problems with the back, passenger side mount point. One of the screws is in the nut plate but the other side of the nut plate is bent and will not line up with the other screw. We tried pulling it closer with a long, modified nail with no success. I have that screw hole filled in with silicone for the moment. Any ideas on how I can get the nut plate to line up with the screw? Or must I move on to headliner removal? Any ideas welcome!
View attachment 2425178
View attachment 2425179
CharlieS
GOLD Star
Loosen the other bolt holding that plate as much as you can (without it coming off) so you have some movement, try to get both bolts started before tightening either all the way. If it is the rearmost mount point, you could pop off the interior trim panels and back of the headliner to get to it for adjustment or replacement.
I recently removed my roof rack to have my '09 LC painted. I was disappointed to find that 3 of the 4 mounts had been broken by a prior removal. Two of the mounts were missing bolts, so I was driving around with two open holes in the roof and didn't even notice! Getting to the front two rails is a pretty big chore. The rear ones are not too bad. If you decide you need to access them from in the car, here is what I did:
Note - I'd recommend removing the negative battery cable as you'll be near the side curtain airbags. This is especially true for the front mounts.
Rear (super easy) - I only had to remove the passenger side, as the driver's side was fine. I removed the upper right seat belt bolt and popped off the upper panel. After that accessing the mounts was not bad at all. I installed a new mount and positioned the clip in place.
Front - I needed to access both front mounts. You don't have to remove the entire headliner, but you have to loosen up a good bit of it. Even after, the mounts are directly above an airbag and there' s a trick to getting to it. I removed: the bolted grab handles ("Oh s*** bars") in the front and back; grab handles above the front and rear door; sun visors; front sunglass holder console; and the rear entertainment system (RES) trim. The RES is held by two bolts under the light lenses, and rest is held on by clips. I pulled the upper trim panel where the front seat belts are (seat belts do not need to be unbolted). There is a bolt on the bottom part of the trim panel. After everything was removed I pulled down on the headliner and accessed the mounts by reaching into the headliner from the moon roof area.
Front tricks for reassembly - The side grab handles are held in by clips. When reinstalling, take the clips out of the ceiling and put them in the handle. Push one side in at a time and place the plastic trim piece in to hold the handle in place.
Replacing the clip - this is a little tricky because you need keep the mount in place and press a clip in all in a tight area. This would be easy with a friend, but alas I had none. I was able to reach outside the car and thread a bolt while holding the clip in place. Then I threaded the second bolt. With the bolts holding the mount, I was able to push a clip in. I used a long punch and rubber mallet to help make sure it was seated.
Torque - For Land Cruisers, the values are 29 ft lbs for bracket mount bolts and 23 ft lbs for the side mount bolt (shorter bolt).
Overall, this job was time consuming but not difficult. Make sure to keep your hands clean since you're messing with the headliner; don't want to create a second job for yourself. If you're reading this before removing your roof rack - don't be scared of taking it off. If you follow the removal procedure and don't put a lot of downward pressure on the mount, it should almost certainly stay in place. If you're concerned, try it on a rear mount first, as they are very significantly easier to get to.
I was planning to take pictures, but I was in a rush and forgot.
Last edited:
Thanks all! This is extremely helpful. It is the rear most mount on the passenger side so hopefully we can access it as easily as @BluffCruiserDC did. Wondering if an LX will be any different.
Last edited:
I’m glad I found this thread or I would’ve definitely broke the nut plate. Are you guys trimming the yellow tabs so that the spacer sits flush? Or do the yellow tabs compress when tightening the mount?
Similar threads
Users who are viewing this thread
Total: 1 (members: 0, guests: 1)