Rear Heater Delete/Coolant Line Cleanup

This site may earn a commission from merchant affiliate
links, including eBay, Amazon, Skimlinks, and others.

I've been mulling over the rear heat delete decision as the *SOFT / RUBBER* parts of my lines in the back are really bad. As mentioned those two rubber section pairs are only available OEM as a part of the HARD line sections. I decided to replace the back section of hardline ($150) with new as it appears accessible (two brackets that go onto studs attached to frame) and replaceable and will do the soft line connecting the two hard line sections with another solution. I also debated replacing the entire hardline run with soft and will go down that road if that front unreachable hard part goes.

heater.jpg


Deleting is certainly easier and eliminates a lot of potential failure points. But I kinda like my rear heater as it keeps the memories of my family warm back there. Shrug.
 
Last edited:
If I want to delete the TB coolant lines, how many coolant caps should I order?
According to this thread, I understand that 2 are needed to block the thermostat outlet and TB inlet, but no need to cap the outlet of the TB?
Just two caps. I did this a couple years ago. One at the thermostat housing and one for the “PHH neighbor”(little guy to the left of the PHH). Eliminates quite a few connections and potential leaks. But if you live in a cold climate and are cruising down the hwy at a constant throttle I suppose there’s a possibility of your TB icing up 🤷‍♂️ Not concerned about that myself because mine is situated right above my headers. -25° last winter and no issues.
 
Thank you. I have no problem of icing here in Israel...
It puzzle me - if the water enter thru the “PHH neighbor” and circulate thru the TB, how do they get out?
 
FWIW, you can also use Gates PN 19161 hose for the “U” shape one piece heater hose. You have to trim it down but it works.

I’ll update the parts list at the beginning of the write up.
 
These are really awesome ideas, thank you for taking the time to post them up.
 
I just wanted to give a quick picture tutorial on how I cleaned up my heater and coolant lines under the hood.

On my '93, this method reduced the number of heater hose connections from over 50, to about 10. It also makes the whole system much more simple. This method requires deleting the rear heater (obviously), PAIR system (which Toyota did on later models anyway), and the throttle body coolant lines. On colder-climate trucks, you may want to avoid deleting TB coolant lines.


Replacement parts needed:

  • OEM Heater Control Valve (Toyota PN: 87240-60140)
  • Gates 5/8" Green Stripe Hose (Wits' End, Solutions for Problems You Didn't Know You Had)
  • ‘95 to ‘97 model one-piece thermostat housing to firewall hard pipe (Toyota PN: 87208-60161)
  • PHH hardline top "Elbow" to heater valve (Toyota PN: 87245-60480)
  • Breeze Constant Torque Hose Clamps for 5/8" Hose (Wits' End, Solutions for Problems You Didn't Know You Had)
  • One piece "U" Shape heater valve hose (Toyota PN: 87245-60420 or Gates PN: 19161, trim to fit)
  • Two high quality 5/16" lined silicone caps (HPS PN: RSCC-032-BLK) and clamps

To start off with, now is a good time to replace your Pesky Heater Hose ("PHH") and heater valve, since you're going to drain the cooling system and replace lines anyway. There are plenty of great write-ups on this portion of the procedure, so I won't include too much on that topic.

Slee - PHH (Toyota 80 Series Land Cruiser)
ExpeditionLCMajorcoolingoverhaul


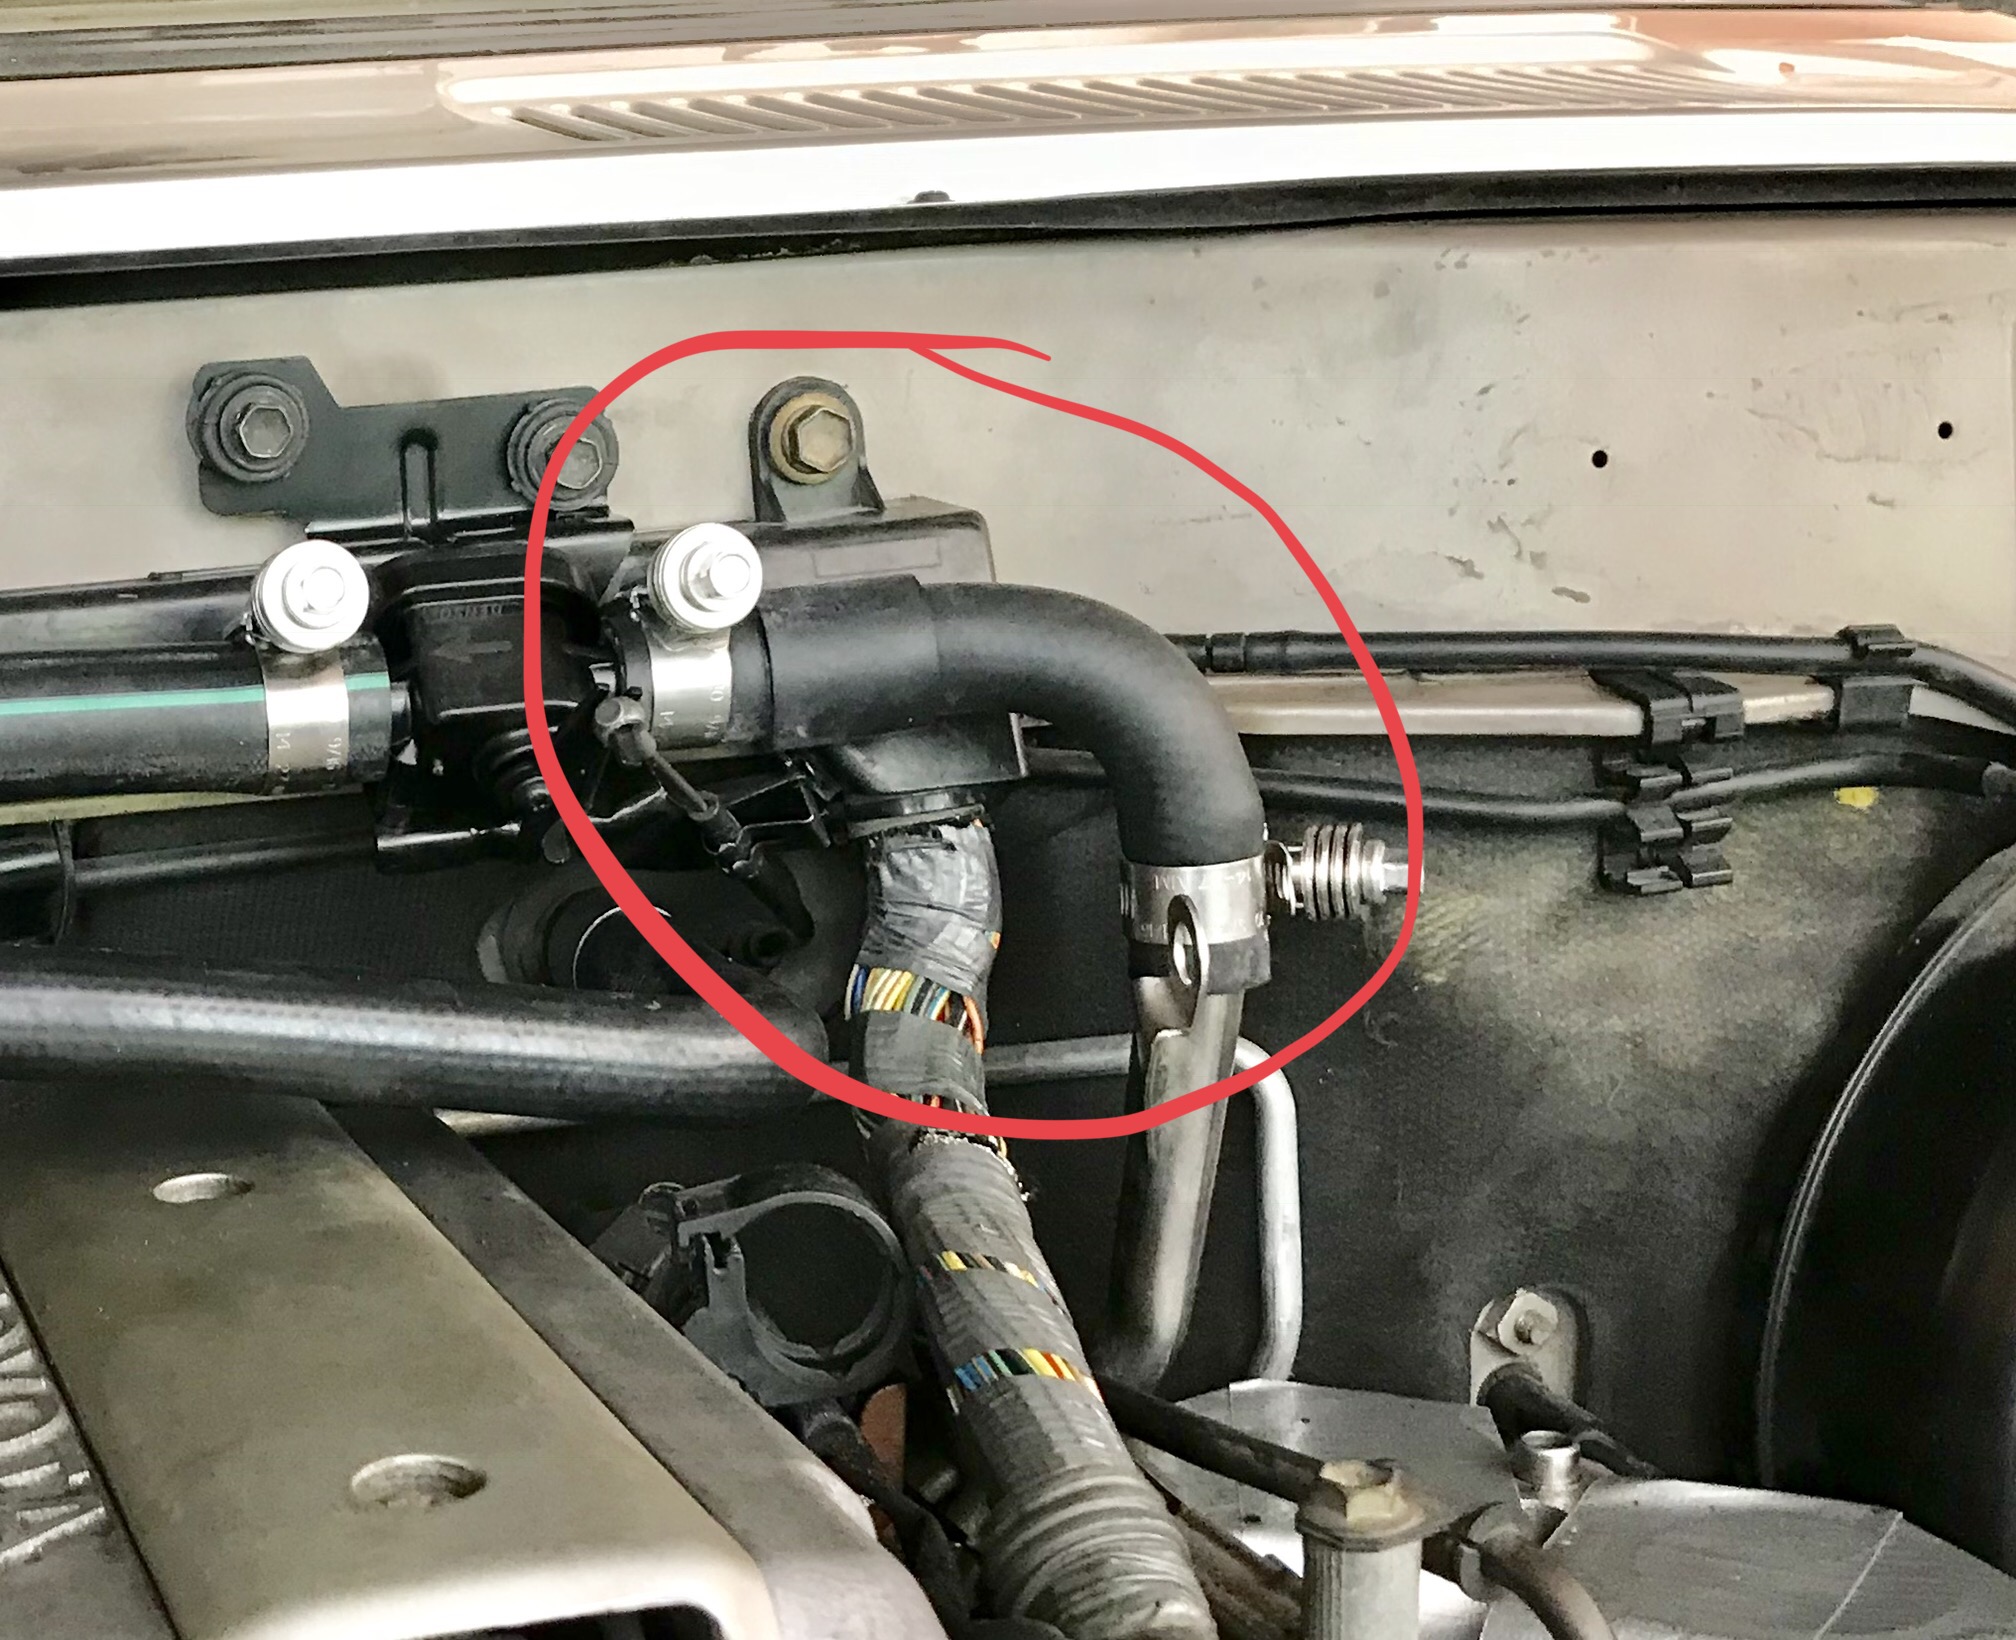
The 90* heater elbow (Toyota PN: 87245-60480) goes on top of the PHH hard line. You can bypass the hardline for even fewer connections, but I was afraid a rubber bypass line would rub somewhere and leak. Don't worry, I re-wrapped the engine harness after this photo was taken.

BD26_D5_F5_ED2_C_46_C6_946_E_00_E89_A67_AF3_A.jpg


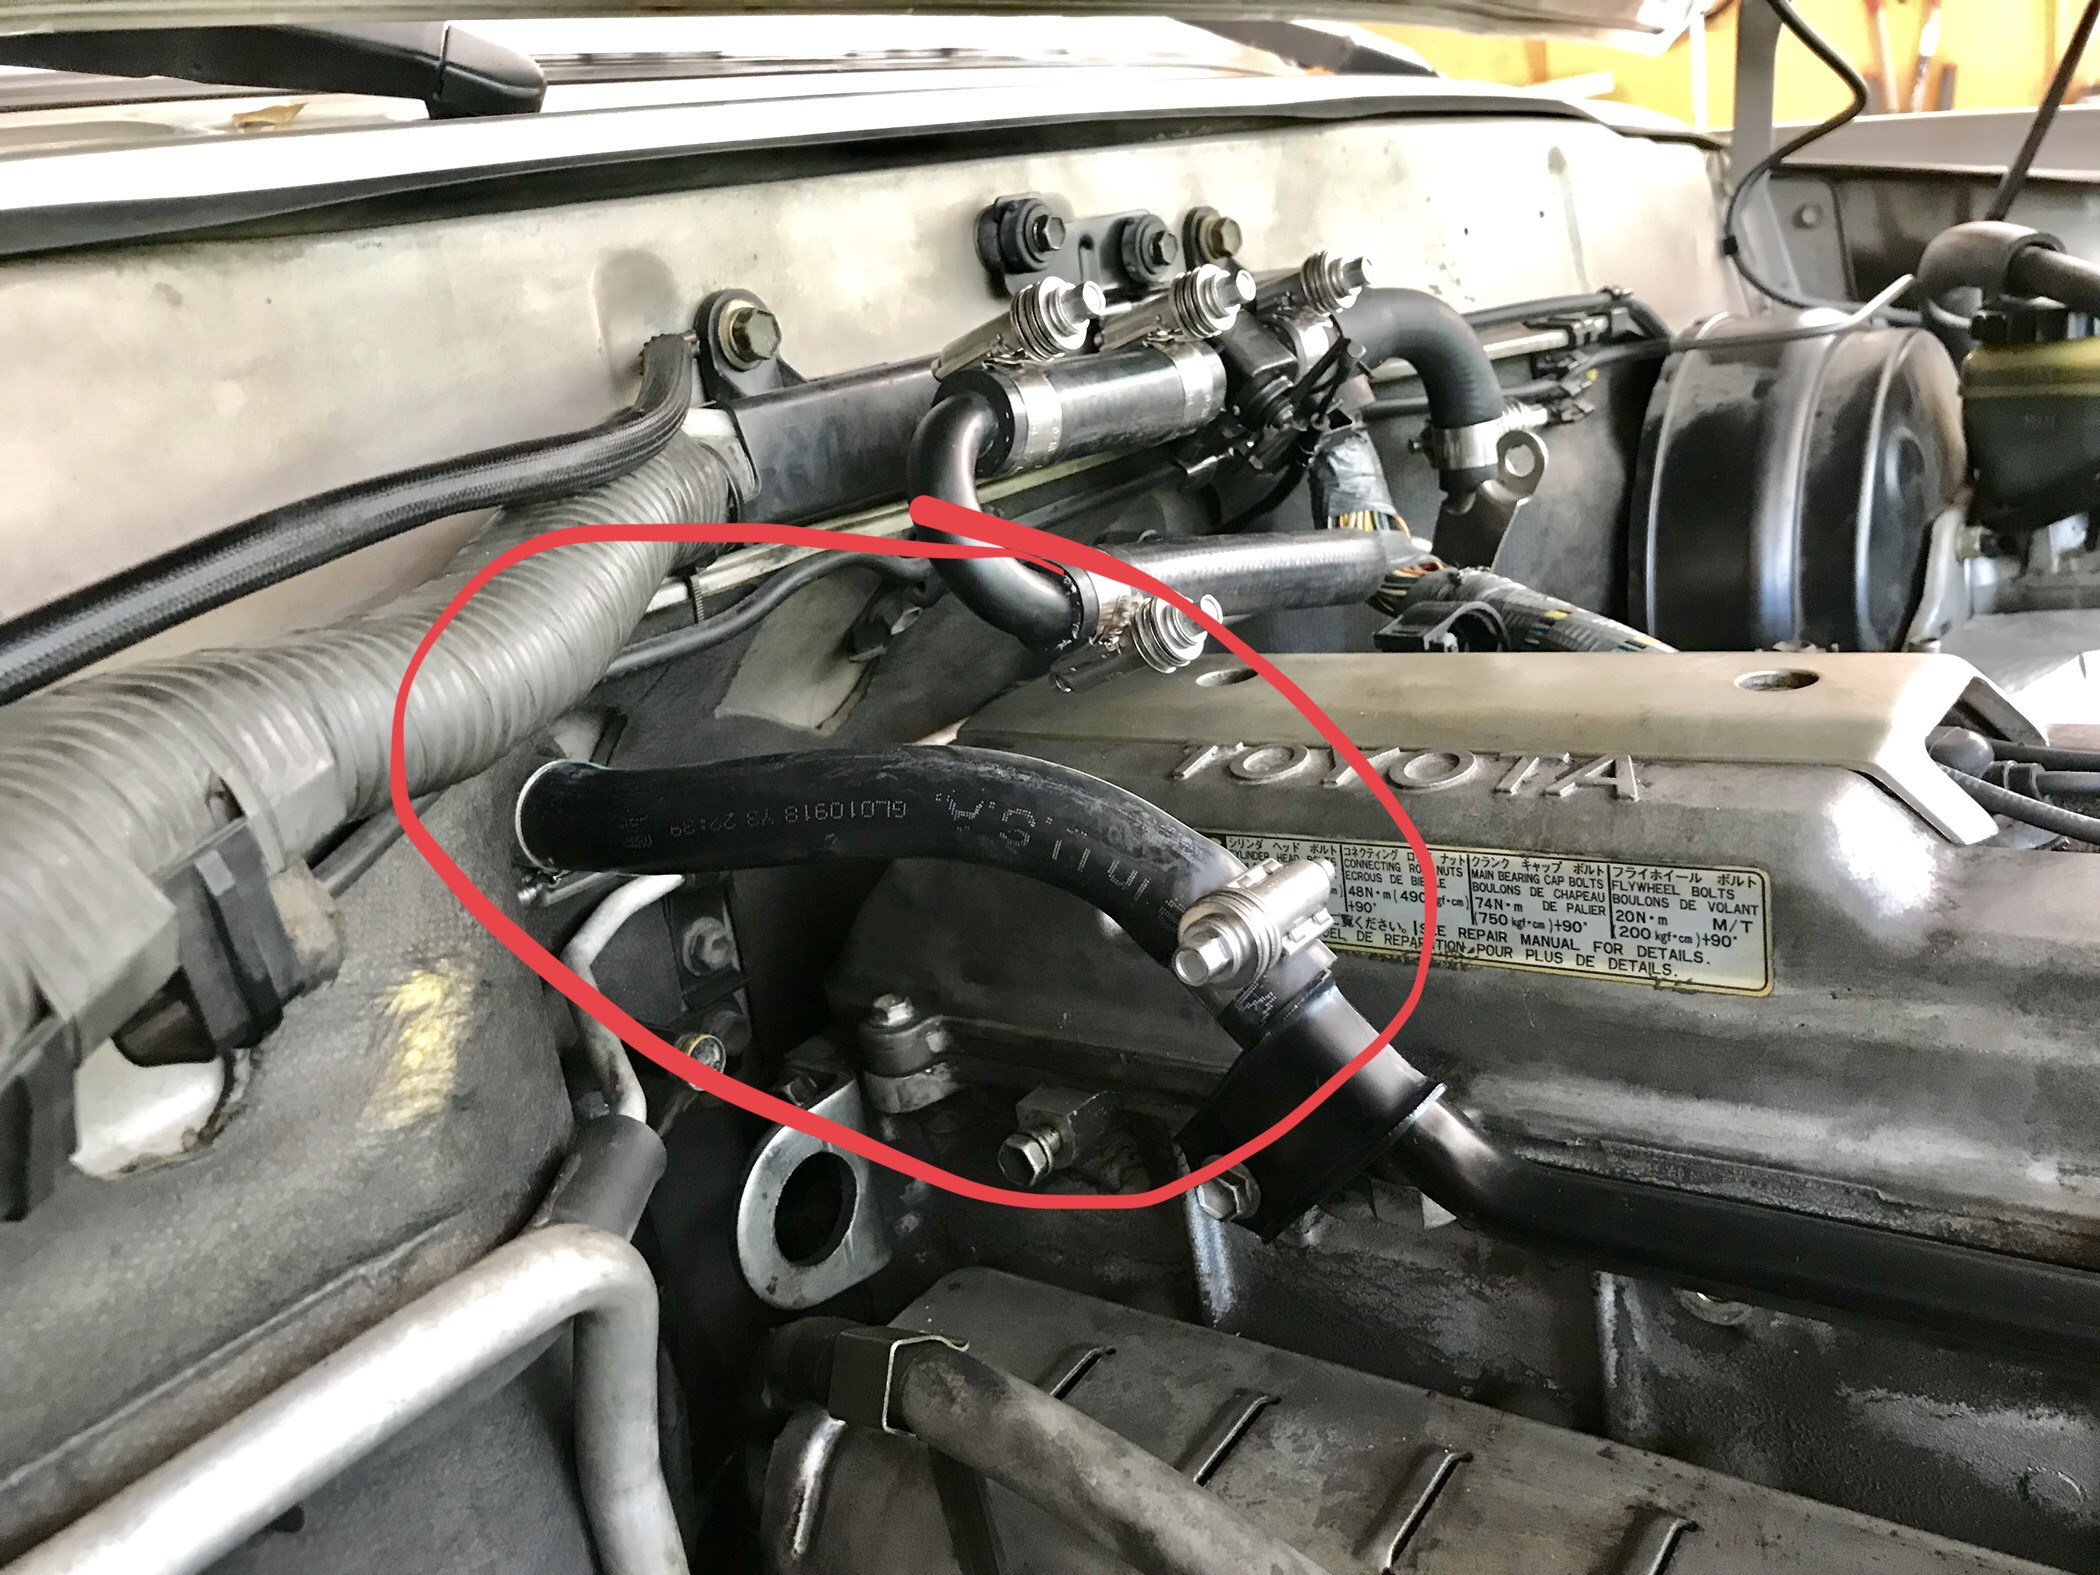
While you're in the DS front fender doing the PHH, pull the line for the "PHH Neighbor" that routes from the head to the intake manifold hardline.

A77_AE53_D_4_A3_F_4_DD4_A112_04_D04950_F97_E.jpg


Cap the "PHH Neighbor" port with one of your 5/16" rubber hose caps.
D306_B952_DC01_48_A8_A272_82_D5_C7_F42_D34.jpg


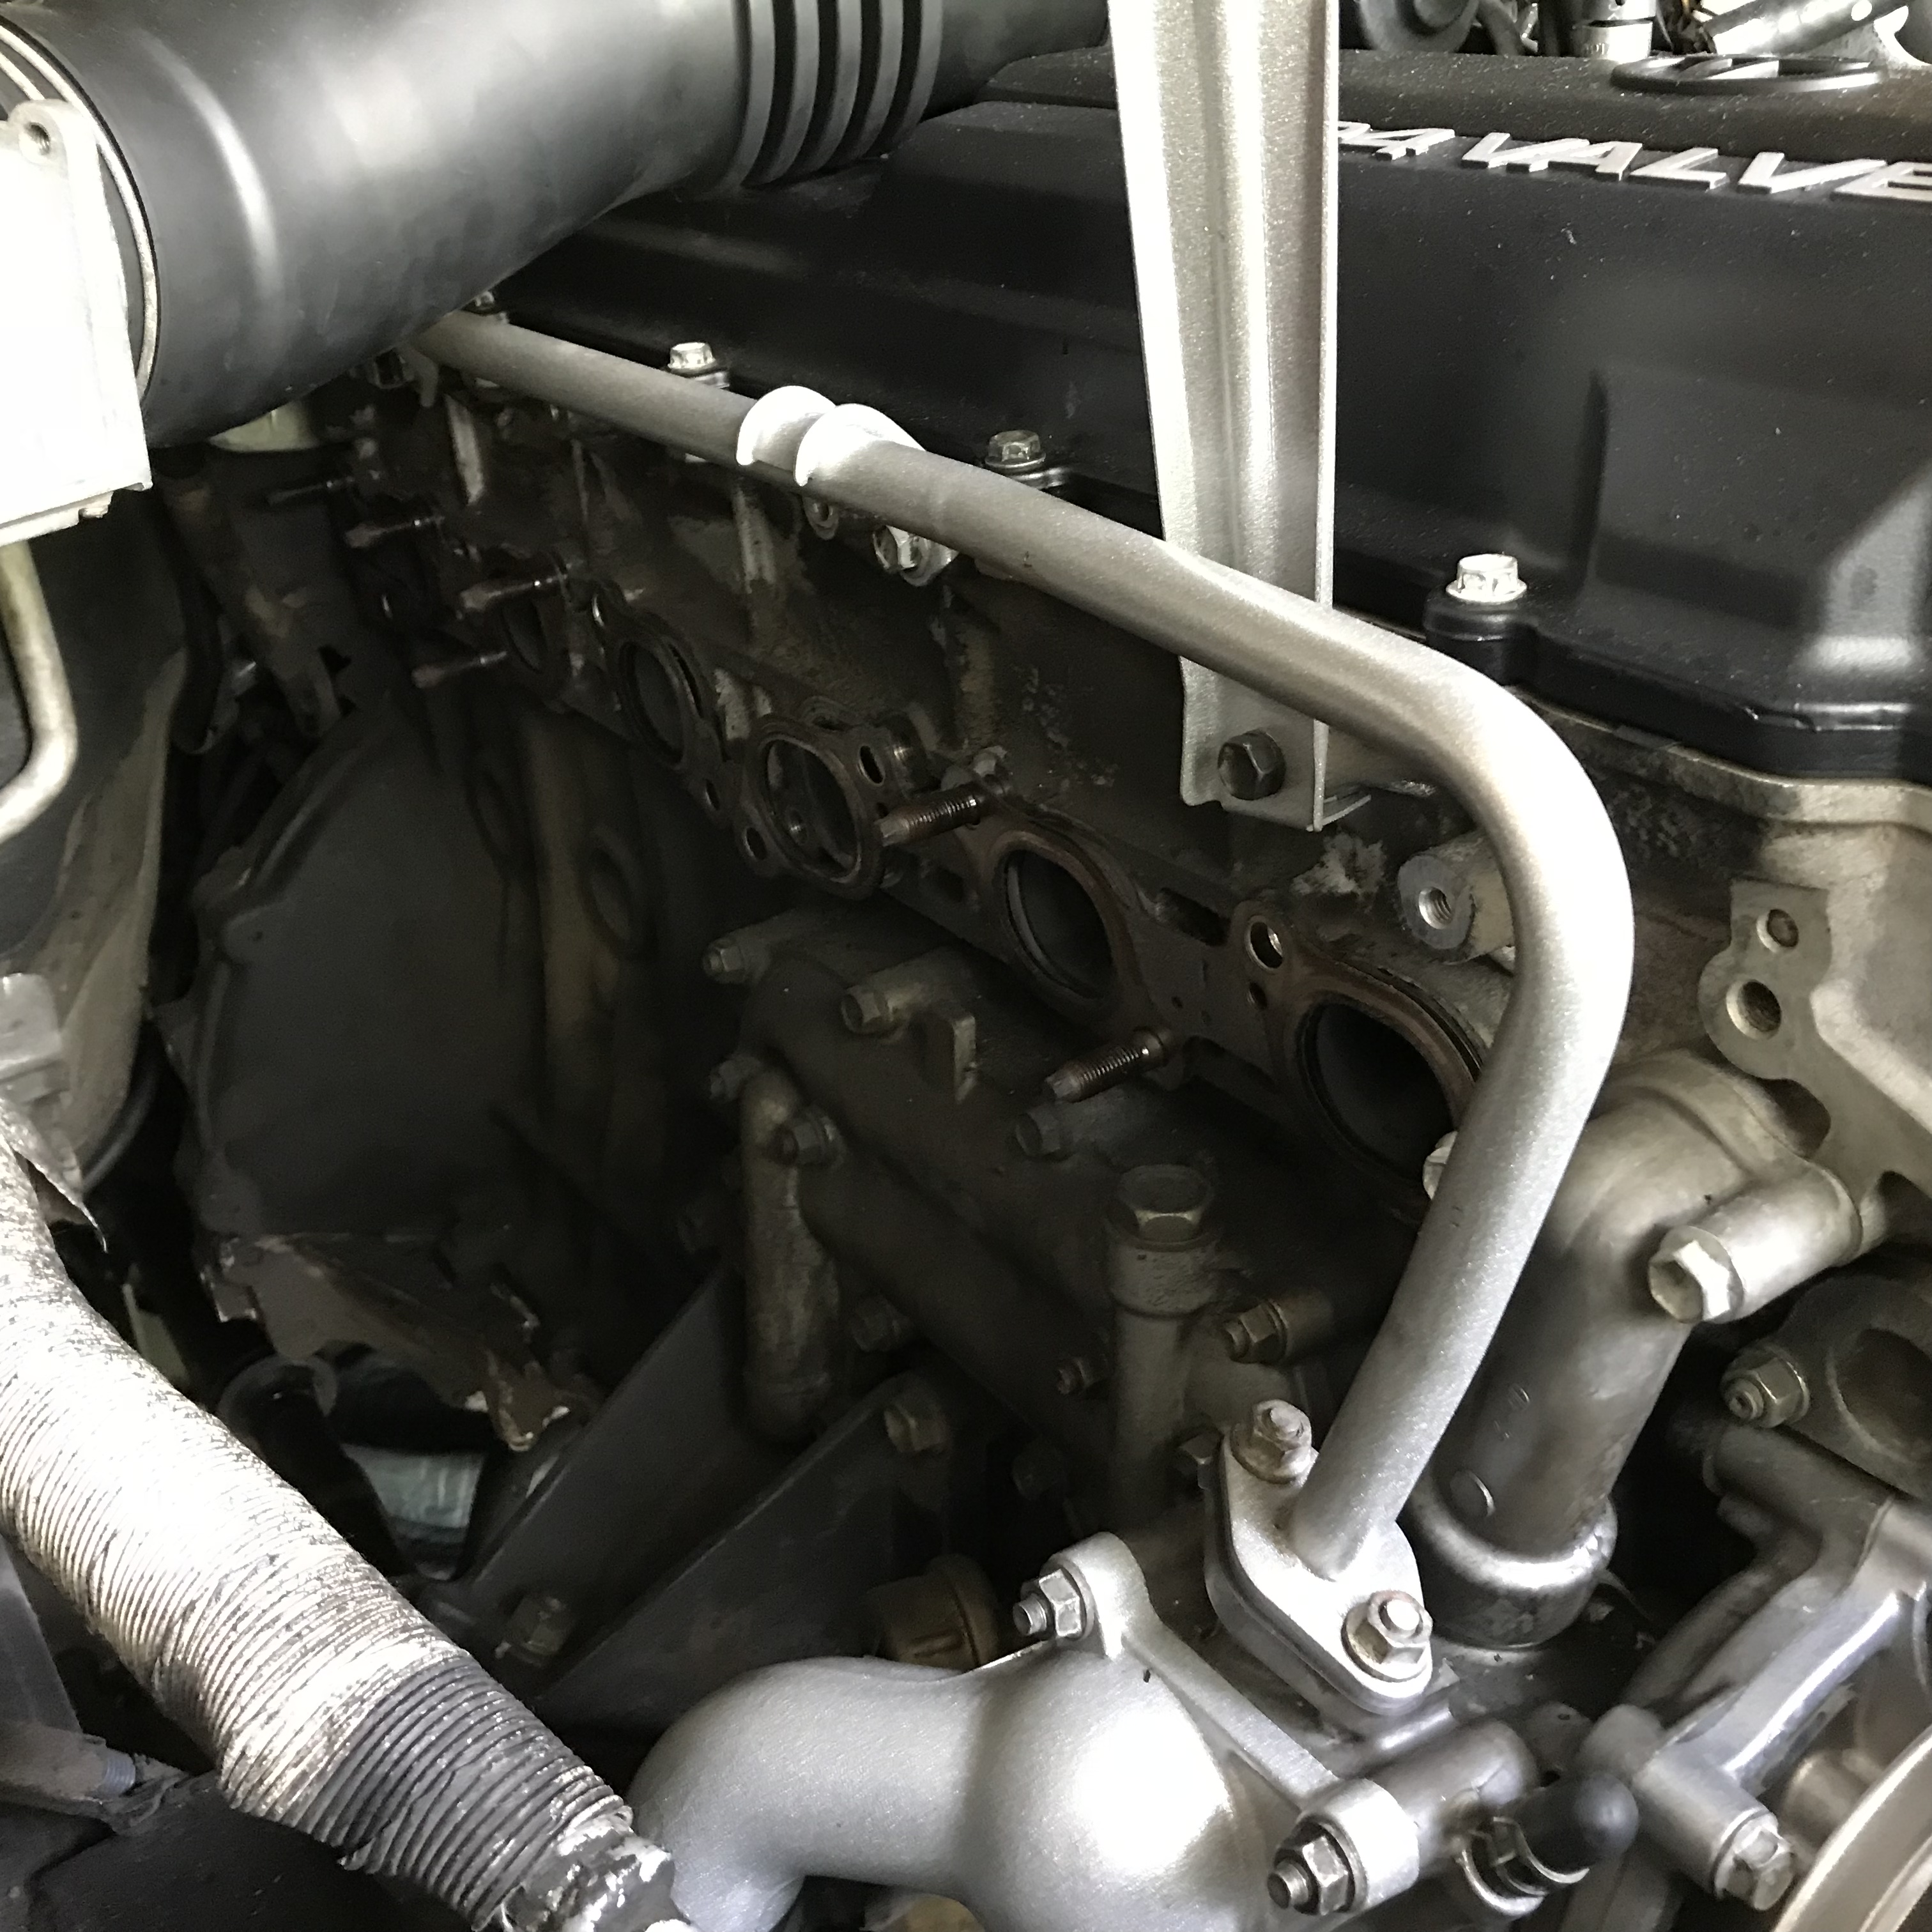
Now move to the water pump and pull the 5/16" line coming off the top of the thermostat housing.
0229131_B_E54_E_40_F0_B871_B21_EA343_D898.jpg


Cap the thermostat port with the other 5/16" rubber cap.
989275_E8_6_F22_4_B2_D_88_E9_7_EA44_F0_D537_F.jpg


At this point you have isolated the TB and can remove all of the abandoned TB coolant lines/connections at the front of the motor and under the intake manifold.


Next, we'll move to the Firewall Heater Hoses ("FHH"), heater valve, and thermostat hardline.

I followed this excellent writeup and video tutorial for FHH (Project FJ4door: How I did my 80 series floor heater bypass fzj80 fj80 lc80 lx450). This is the meat and potatoes of the rear heater delete.

The majority of the rear heater deletes I have seen simply use a Gates 90* heater hose from a Dodge Cummins. This is what I did initially.

75_CA838_B_A4_F4_48_F4_B33_C_110526284_D48.jpg


This setup still utilizes the factory "U" shaped hard pipe and simply deletes the rear heater hard pipe on the DS with the 90* Dodge heater hose.

Member @LandCruiserPhil came up with a very clever one-piece solution from Toyota/Gates (Rear Heater Bypass Hose - Land Cruiser Products - LCP). This converts the "U" shaped hardline to a one-piece hose, and reduces the number of connections at the firewall.
9726_D174_6661_4_C17_8083_398_DFE01373_A.jpg

CF042_BB5_97_B5_4_A54_ADA5_F9_E685434_E75.jpg


Finally, the '93 and '94 trucks had two-piece hard pipe and multiple connections from the thermostat to the firewall because of the PAIR system.

7_E78_D9_D0_C018_4070_9_D22_DEF645_C90_A4_C.jpg


If you delete the PAIR system, you can run a one-piece hardline (Toyota PN: 87208-60161) and regular Gates 5/8" green stripe directly from the firewall to the hard pipe. This also deletes the PS portion of the rear heater at the firewall.

0_DF5_B7_C8_9624_4744_91_BD_4_CB22_A2_D4_B7_E.jpg


1_DFB9_F3_E_C815_46_E5_979_D_00_FFFB6_A805_C.jpg


That's about it! Please let me know if you have any questions.
Nice detailed writeup! Last year I did the Rear Heater delete and the PHH.
Is it necessary to cap de PHH neighbor and all the other hoses that go to th TB? Just wondering since I haven't done any of that.
I am currently with the engine out of th truck, so will tackle de EGR delete and PAIR delete. Should I also cap de PHH neighbour and TB hoses?
Cheers!
 
Nice detailed writeup! Last year I did the Rear Heater delete and the PHH.

Is it necessary to cap the PHH neighbor and all the other hoses that go to th TB? Just wondering since I haven't done any of that.

I am currently with the engine out of the truck, so will tackle the EGR delete and PAIR delete. Should I also cap the PHH neighbour and TB hoses?
Cheers!
Thx!

It depends on your climate. If you live in a very cold climate, you could leave the PHH neighbor plumbed to the throttle body. If it is a warmer climate, I would delete the lines and cap. Especially while the engine is out of the truck, it's super-easy.
 
Just two caps. I did this a couple years ago. One at the thermostat housing and one for the “PHH neighbor”(little guy to the left of the PHH). Eliminates quite a few connections and potential leaks. But if you live in a cold climate and are cruising down the hwy at a constant throttle I suppose there’s a possibility of your TB icing up 🤷‍♂️ Not concerned about that myself because mine is situated right above my headers. -25° last winter and no issues.
So then all the lines going into the throttle body can just be removed??

What did you do??

Thanks, nice write up
 
So then all the lines going into the throttle body can just be removed??

What did you do??

Thanks, nice write up
You can just leave them in place or remove them altogether.

I wanted to remove as much clutter as I could in the engine bay, and since I had the engine out, everything was easy to completely remove.

And just in case some maniac wants to hook everything back up in the future, I put little rubber caps on all the unused ports so they don't get full of mud and dust.
Awesome thats super helpful! What size caps did you use?
 
oh, my bad. I left my TB hard pipes open since no water is going through them any more.
 
Haha no worries.

I don't remember the size, maybe 1/4" or 3/16". I think it was smaller than the silicone coolant line caps I used. Either way, they were one of the few standard sizes of rubber vacuum hose caps you can get at any auto parts store.

The radiator for my Volvo has a chamber in the end tank for the auto transmission fluid to flow into, much like on our 80s. Well, my Volvo is a manual transmission and doesn't use those fittings, so when I installed a new radiator I capped them off with rubber. The first time I drove the car and it got up to temp after the new radiator install, I heard a loud "POP" and thought, "Oh boy what did I screw up this time?!"

Turns out, the air got hot in that little chamber I capped off and blew one of the rubber caps off!

I know that's a stupid story, but I tell it to you to explain why I put little slits on the ends of the vacuum caps that I used to block off the unused coolant passages. YMMV

Good luck!
 
Sorta related topic: if you just want to replace the metal U shaped water heater pipe and eliminate a couple of clamps (but still keep the rear heater) there is a Gates hose that can be cut to fit:

First photo shows the pieces that were cut off during test fits:

Gates formed heater hose 18701 cut to fit Land Cruiser.png


Final cut-to-fit hose section (same as in the above photo just without
the cut off pieces)
Gates formed heater hose 18701 Land Cruiser.png


This shows the above cut-to-fit Gates hose replacing the U pipe
and traditional clamps with Gates Power Grip (heat shrink) clamps:

If anyone is wondering how do you adjust those funky "clamps", the answer is you don't have to, they self-adjust everytime they heat up.

To remove the heat shrink clamps you melt a thin groove in them using a pencil tip soldering iron. Just run the hot tip back and forth as it melts down through the clamp, only takes 10-15 seconds. Once you get all the way through the clamp will pop open under it's own tension, and the rubber hose is not damaged. The clamp cannot be reused of course. FWIW

Heat control valve heater hose modification.png


Previous discussion:

 
Last edited:

Users who are viewing this thread

Back
Top Bottom