Navigation
Install the app
How to install the app on iOS
Follow along with the video below to see how to install our site as a web app on your home screen.
Note: This feature may not be available in some browsers.
More options
Style variation
You are using an out of date browser. It may not display this or other websites correctly.
You should upgrade or use an alternative browser.
You should upgrade or use an alternative browser.
Project Duragoat: My 1974 FJ40 Build Thread
- Thread starter Bsquared
- Start date
This site may earn a commission from merchant affiliate
links, including eBay, Amazon, Skimlinks, and others.
More options
Who Replied?- Thread starter
- #102
Instrument Cluster Makeover
Been wanting to do this for a while. ordered a kit with the sheetmetal, gages, and lighting from Drew here on Mud. Last i checked he was not selling the kit any longer. too bad, because, this really came out well if you ask me.
original configuration. it's really dim at night. i also don't currently have oil pressure and temp working since the vortec conversion.
plan is to update and get all the gages functioning properly.

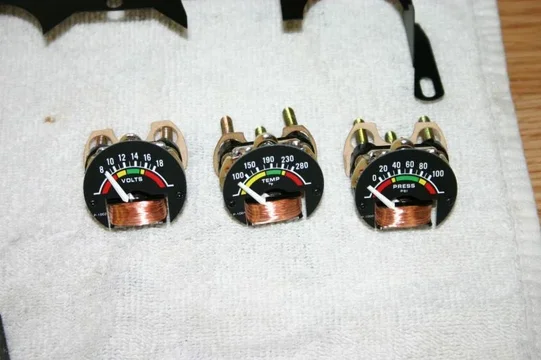
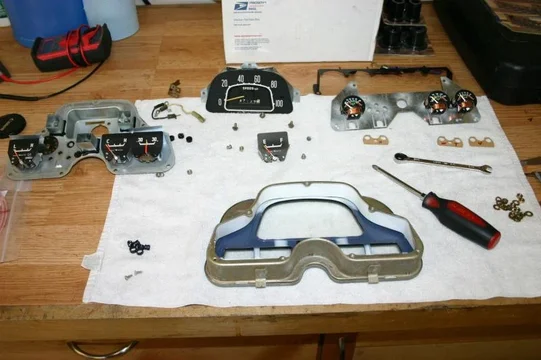
Parts of the kit. gage mask (black), gage holder panel, gages (removed from original housing), and lighting kit.

since i don't use the stock toyota vss, the two electrical leads get removed. not needed with current configuration.


Been wanting to do this for a while. ordered a kit with the sheetmetal, gages, and lighting from Drew here on Mud. Last i checked he was not selling the kit any longer. too bad, because, this really came out well if you ask me.
original configuration. it's really dim at night. i also don't currently have oil pressure and temp working since the vortec conversion.
plan is to update and get all the gages functioning properly.

Parts of the kit. gage mask (black), gage holder panel, gages (removed from original housing), and lighting kit.

since i don't use the stock toyota vss, the two electrical leads get removed. not needed with current configuration.

- Thread starter
- #103
- Thread starter
- #104
instrument Cluster Makeover pg 3
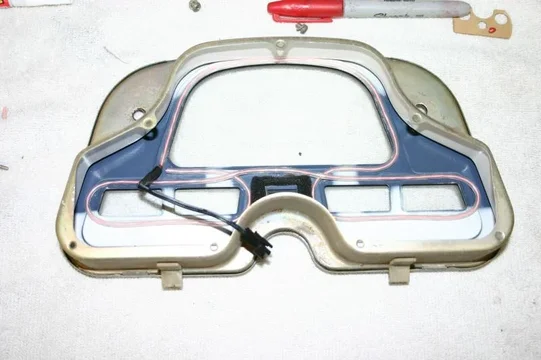
Light wire glued in place. I used a gel superglue. worked fine but took a while. i used a heat gun to make the line pliable. it helped.
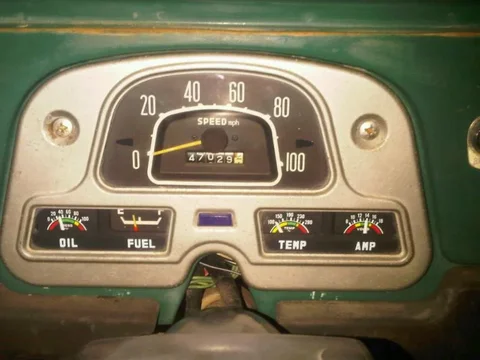
Shot with the new gages inplace. the fuel gage sits up a little, need to adjust it down. Finally got all the gages up and running.
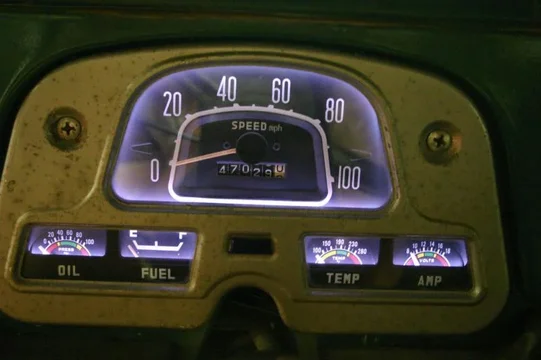
It's hard to get a decent night shot. it really is about 10 times brighter than the stock configuration. there are now LED's firing the two turn signal indicators and the high beam indicator. they are really bright as well. it looks awesome at night.


Light wire glued in place. I used a gel superglue. worked fine but took a while. i used a heat gun to make the line pliable. it helped.

Shot with the new gages inplace. the fuel gage sits up a little, need to adjust it down. Finally got all the gages up and running.

It's hard to get a decent night shot. it really is about 10 times brighter than the stock configuration. there are now LED's firing the two turn signal indicators and the high beam indicator. they are really bright as well. it looks awesome at night.

You need to testor's orange your needles!
what LEDs did you use for the turn signals?
what LEDs did you use for the turn signals?
- Thread starter
- #106
That dash makeover is awesome! I need to do the light wire for my 84 GMC dash lights.
Mike
Mike
78fj40mg
TLCA #23510
Light wire glued in place. I used a gel superglue. worked fine but took a while. i used a heat gun to make the line pliable. it helped.
View attachment 678384
Shot with the new gages inplace. the fuel gage sits up a little, need to adjust it down. Finally got all the gages up and running.
View attachment 678383
It's hard to get a decent night shot. it really is about 10 times brighter than the stock configuration. there are now LED's firing the two turn signal indicators and the high beam indicator. they are really bright as well. it looks awesome at night.
View attachment 678382
Does the light wire come in different colors?
Awesome buid!!


- Thread starter
- #111
Hard Top Roof Rebuild
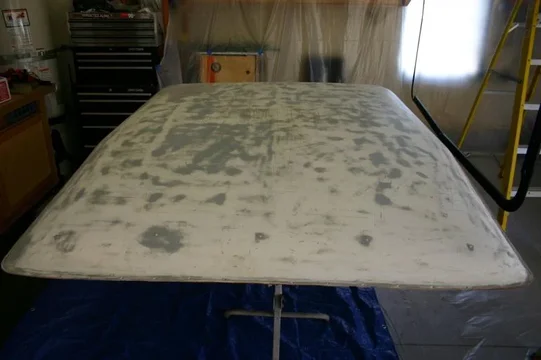
Have been dreading this for some time, it's starting to cool off in San Diego, had to start the roof rebuild. Going to post several shots of the existing condition. it was in horrible shape.
Tons of scratches.

P/O somehow poked a hole in the top and there was a horrible patch job done.
some fiber glass and bondo, and it was never smoothed out. at one point it was about 2 inches thick. literally

i also had it stored in the shed, and some gas from the weed eater leaked all over it. it was really in bad shape.


Have been dreading this for some time, it's starting to cool off in San Diego, had to start the roof rebuild. Going to post several shots of the existing condition. it was in horrible shape.
Tons of scratches.

P/O somehow poked a hole in the top and there was a horrible patch job done.
some fiber glass and bondo, and it was never smoothed out. at one point it was about 2 inches thick. literally

i also had it stored in the shed, and some gas from the weed eater leaked all over it. it was really in bad shape.

- Thread starter
- #114
hard Top Roof Rebuild
Got the rest of the headliner out. used a wire brush and some sanding to get most of it out.

i got the roof ring kit from CCOT. came in about 9 pcs.
i first bolted it to the hard top walls to get it lined up, then taked the pcs with it on the truck

fully welded and ground it down off the truck.


Got the rest of the headliner out. used a wire brush and some sanding to get most of it out.

i got the roof ring kit from CCOT. came in about 9 pcs.
i first bolted it to the hard top walls to get it lined up, then taked the pcs with it on the truck

fully welded and ground it down off the truck.

- Thread starter
- #115
- Thread starter
- #117
hard Top Roof Rebuild
After paint. i ended up using duplicolor Lacquer. autozone sells it by the quart, pre-mixed and ready to shoot. they have primer and paint. a little pricy, it was 24 per quart, but it was really easy. stir it up, shoot. paint can go on 30 min after primer.

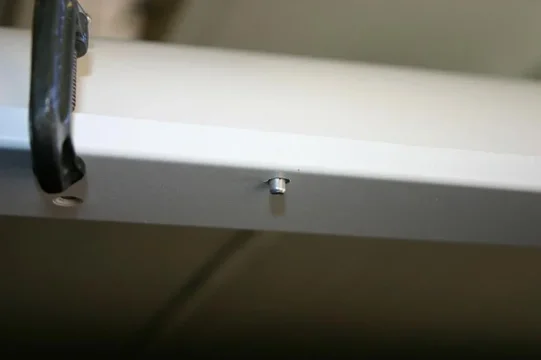
good clamping is key before bucking the rivets. here is a pre buck shot. have more pics later with how they all turned out. believe it or not, did everyone without any major problems. did not have to cut any out. did have a few chips in the fiberglass edge.
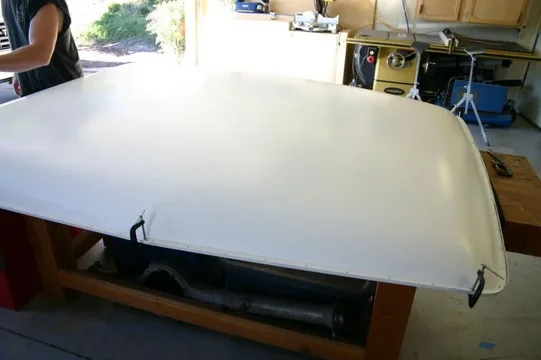


After paint. i ended up using duplicolor Lacquer. autozone sells it by the quart, pre-mixed and ready to shoot. they have primer and paint. a little pricy, it was 24 per quart, but it was really easy. stir it up, shoot. paint can go on 30 min after primer.

good clamping is key before bucking the rivets. here is a pre buck shot. have more pics later with how they all turned out. believe it or not, did everyone without any major problems. did not have to cut any out. did have a few chips in the fiberglass edge.


- Thread starter
- #119
hard Top Roof Rebuild
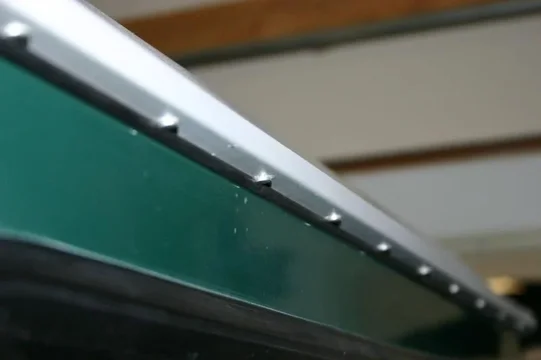
Here is another shot that shows the relationship to the gasket.
i ended up using the CCOT aftermarket gasket. it was a total pain in the butt, but ended up working fine.
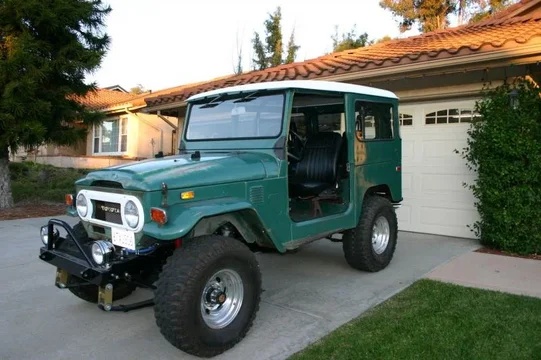
Finished top, I think it turned out great. ill have some shots of the headliner too.
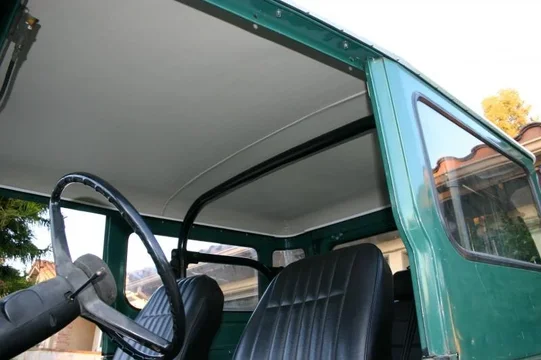
i also used the CCOT headliner. overall went well, but was nerve wracking as hell. i ended up having to put a miter in the rear corners, just couldn't get it smooth otherwise.


Here is another shot that shows the relationship to the gasket.
i ended up using the CCOT aftermarket gasket. it was a total pain in the butt, but ended up working fine.

Finished top, I think it turned out great. ill have some shots of the headliner too.

i also used the CCOT headliner. overall went well, but was nerve wracking as hell. i ended up having to put a miter in the rear corners, just couldn't get it smooth otherwise.

Similar threads
- Replies
- 48
- Views
- 6K
Users who are viewing this thread
Total: 1 (members: 0, guests: 1)


