Official LandBruiser build thread!! (1 Viewer)

This site may earn a commission from merchant affiliate
links, including eBay, Amazon, Skimlinks, and others.

Ok got some progress for the past couple days,not as much as there should be due to my leg but here it is anyway.

Got the shackle reversal done,took apart my springpacks to derust them and brushed a little grease in between each leaf,also i used half of my old hyper shackles as normal shackles and it worked out sweet.Sorry for the crappy pictures!


Used a piece of stainless tubing fed through the bushings and new shackle hangers i made in the frame to get everything square and perfect before welding,also...as with the rear,the front shackles i have changed to a much larger bushing size.

IMG_2263.jpg

IMG_2265.jpg

IMG_2267.jpg

Crappily taken photo of th overall look after the reversal
IMG_2268.jpg


If you cant see what this is (damnit!! maybe my monitor just sucks??:meh:)its what i did after realizing that my saginaw box was going to have to be spaced towards the inside of the frame by 1/2" (at least without doing a hack job!:wrench:),due to the front spring hanger.I was going to make a new mounting plate anyways since the one i made years ago was pretty heinous.I think its waaay better and it should work sweet.

IMG_2269.jpg


Thats it for now.next step is POR-15 von the frame and start the spring over:clap:
 
Nice work. One concern.

The rear shackle hangers you fabbed ( in the 05/11/2008 post)look solid, but theorhetically can catastropically fail. Toyota placed the hollow round tube for the bushing and shackle screw THROUGH the bent steel and then welded it in, so if the welds failed the hole the cylinder portion of the hanger was in would prevent the shackles from detaching in a catastrophic failure with rollover.

You placed your hollow tubes/cylinders into a groove, not into a totally enclosed hole. If you fail where most welds fail (just around the weld and not the weld itself) you will detach the cylinder/bushing holder from the assembly and roll.

I would reconsider the design if you plan on going hard on this vehicle.

I think your work and welds look outstanding, and I don't mean to insult you here. Please do not take offense.

Best,

T
 
:)
You placed your hollow tubes/cylinders into a groove, not into a totally enclosed hole.

I do understand what you are saying.However despite how it looks in the photo,the hole actually is well over 200 degrees of a circle,or in otherwords the tube did have to be fed into the square stock from end to end,it could not be placed in from the top,however the weld does make it look that way.Good thought though.


I think your work and welds look outstanding, and I don't mean to insult you here. Please do not take offense.

No problem,and thanks
 
Alright next step nearly done.I have got the frame exterior PORed and have got the spring over nearly buttoned up.Ive spent the last few days measuring continuously as well as grinding and laying down a bunch more TIG welds.I have to reiterate just how awesome the stuff from ruffstuff really is,worked out way better than i thought!:grinpimp:

Only problem was i got all the way to the point of installing the rear ubolts and realized i never bothered to by new rear spring plates:doh:.So a luckily i had some 3/8" plate laying around and an afternoon to spare again so i just made my own:D

Anyway this is more or less my report for the day.

Ok well photobucket isn't working right now so i'll get the pics on tomorrow or maybe later i guess.:mad:
 
Ok as promised!

lk4.jpg


lk5.jpg


my homemade plates:

lk3.jpg


lk7.jpg


lk8.jpg


lk10.jpg


lk11.jpg


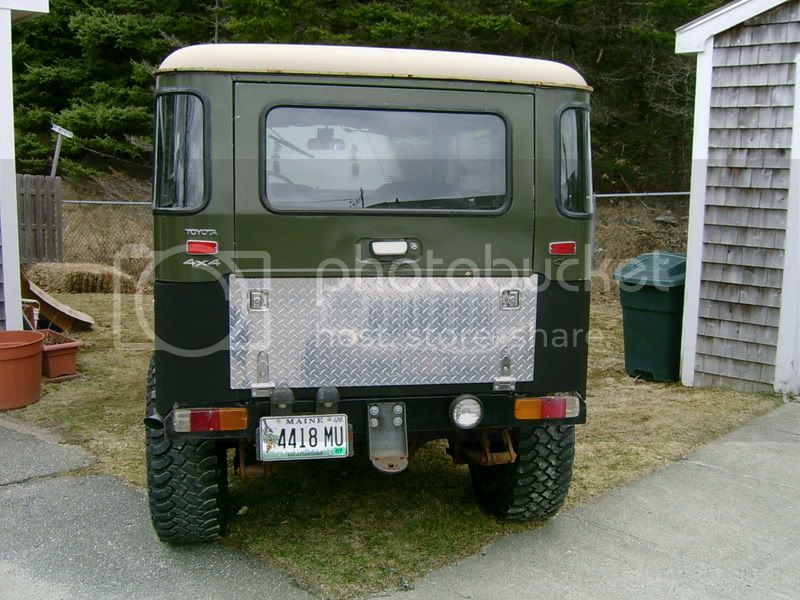
My current rig,can you tell i missed my cruiser?:D

lk6.jpg


Oh yea,i dont think i posted any before pics yet :hmm:

S3600004-1.jpg


S3600009.jpg


S3600005-2.jpg


And that concludes todays session folks,i'll keep at it...till i die :cheers:
 
Yay!!...

so i ordered a bunch of stuff today! - Here is what i got:

4:88 ring and pinions.:bounce2:

front and rear diff rebuild kits.

knuckle rebuild kit.

rear axle rebuild kit.

Marlin heavy duty seals.

some new knuckle studs.

new pinion flanges.

4x4 labs crossover steering kit.:bounce:

And of course a new aussie locker :clap:


Now let the fun really begin.Cant wait for the new stuff to roll in,i got my axles spring plates,knuckles and hubs all painted up and waiting for new parts.i'll get some pics up tomorow and definately when my parts show up.
 
you have some real fab skill Im signing on for the long hual on this one

Its funny,having done so much of this crap i never really even have to think about it anymore..but everyone else is always so impressed.

Thanks:D
 
Some more progress and pics to go with it.


As i stated earlier the cut and turn has been made and TIGed back together i went with about 2 degrees more than i had before of caster even though it handled alright before.The cut and turn was pretty simple but trying to figure the caster took a little thinking with all the changes made,actually i probably made it more of a big deal than it really was.Also put my best welding to work to make everything look as "factory-esque" as possible and not to mention as strong as possible.

Here is the axle housing simply marked out with some fine line masking tape:

mmk1.jpg


mmk2.jpg


Here is the finish cut,i also want to point out that with my axle after having ground off the original welds,cutting only 1/8" deep was necessary,not 1/4" which i have read a few times elsewhere...something to keep in mind! This cut was carefully done with a 4" narrow cuttoff wheel also.


mmk3.jpg


These pics show post turning and final welding (sorry all i have are pics after POR-15 was put on):

mmk4.jpg


mmk5.jpg


mmk7.jpg


mmk9.jpg


mmk6.jpg


Overall look,still have to trim the u-bolts and fashion new turn stops and shock mounts but thats for later:

mmk11.jpg


mmk12.jpg


Also got the rest of my axle parts painted and dressed up waiting for the new parts i listed in previous post:

mmk.jpg


Once again that sums it up for today...signing out!:cheers:
 
Not much progress lately as i am still waiting on a bunch of parts.The last thing i ordered were the 4x4 labs arms which are made to order and came from the other side of the country yet i got those first??.Anyway the aussie locker,steering arms and motor mounts came but these are useless to me until the axle parts come.I'll post up some pics of the arms,if youve never seen their steering parts let me tell you they are like overkill beefy.Hopefully the rest of my stuff comes in tomorrow.
 
Nice!! I am right behind you i am sitting bare frame and only one front hanger cut off due to running out of &$#^ing oxygen. I was hoping you could tell me why you or someone else could tell me why you and a lot of others go with the front hanger about on inch forward of the end of the frame...??? The reason i ask is .. do you have to?? I was hoping i could go flush loosing an inch of wheelbase and then flipping my springs around and gaining all plus more back. Everyone seems to do it your way and i just wondered why?? I am collecting pics to start a thread but now i am like @%& you are going to be hard to keep up with!!!!!! I spent my money on a stroker...............
 
Actually, I like the Subaru! You have got to be kidding me! You have to say you have done this before, studied 10 years at a Buddist retreat or something. because you have the best pictures I've EVER seen in a thread.
 
Nice!! I am right behind you i am sitting bare frame and only one front hanger cut off due to running out of &$#^ing oxygen. I was hoping you could tell me why you or someone else could tell me why you and a lot of others go with the front hanger about on inch forward of the end of the frame...??? The reason i ask is .. do you have to?? I was hoping i could go flush loosing an inch of wheelbase and then flipping my springs around and gaining all plus more back. Everyone seems to do it your way and i just wondered why?? I am collecting pics to start a thread but now i am like @%& you are going to be hard to keep up with!!!!!! I spent my money on a stroker...............

Basically part following others lead and part slight wheel base extension without flipping springs.I also have my springs set on the forward hole of the perches.I dont see any reason why you cant go flush myself,but people who have done it more than me do it the other way ;).


Actually, I like the Subaru! You have got to be kidding me! You have to say you have done this before, studied 10 years at a Buddist retreat or something. because you have the best pictures I've EVER seen in a thread.


:D:D thanks and more pics to come soon i hope!
 
as nice as the 40 is coming along....your subaru rocks.


seriously. That is fantastic.

I have seen those older ones DEEP in the woods up here. Nothing funnier than wheeling all day, thinking your truck is pretty tough, and having three yahoos with kids in the car putting by you in beat, jacked up subarus.
 
Ok getting pretty pissed off :mad:.

Waited like 3 weeks now and apparently according to ups my package has "experienced an exception" due to Adverse weather conditions.It has been in ups possession for like 2 weeks now and has not moved from current location in like 3 days should have been here like monday at the latest!.Wondering if my box full of goodies is now floating down the mississippi river?? or not so much floating since its like $900 worth of sweet metal parts.:bang:

Worst part is i have a non movable cruiser sitting on my lift and i have customers wanting to get work done on their cars,luckily i do carpentry as well but still this is pissing me off.And to boot ups doesnt speed up a shipment due to crap like this so nothing will happen this weekend even if they are able to....hey UPS :censor::censor::flipoff2::flipoff2::crybaby:
 
like the rig so far... what part of maine are you from

Damnit how do you know im in maine??

Anyway i am just about 10 minutes south of Damariscotta. Skow-vegas isnt too far...well about 2 hours or so.
 

Users who are viewing this thread

Back
Top Bottom