Well, every story has a beginning, a middle and an end. I'm a ways away from the end and "stuck" in the middle. I hope that this thread serves mostly as as motivation to me, now that I have a deadline and a thread to keep up. If it inspires others, great.
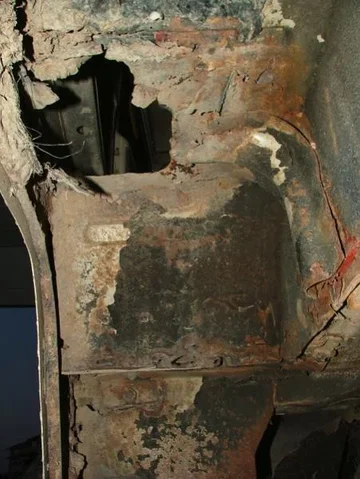
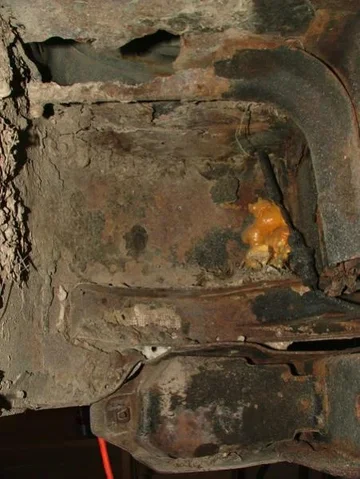
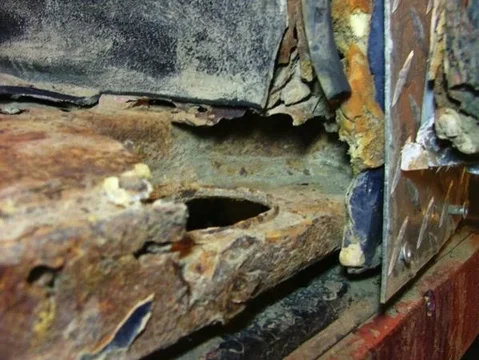
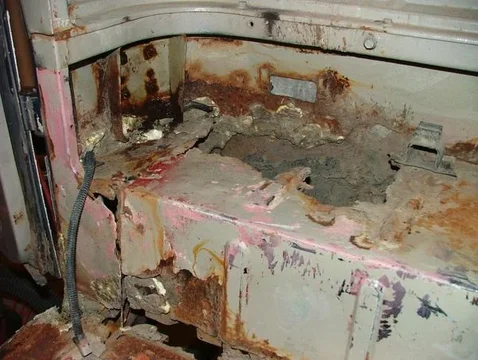
Where am I now?... with a truck in about as many pieces as it comes...


I finally need the motivation to finish what I started. That motivation comes in the form of being signed up for ACT2010.
Here's what I'm looking for:
I want to build (that's half the fun) a reliable expedition truck that's stable and predictable on road that can be wheeled reliably off road.
My motto: "Go Far, See Much."
I'm not looking for a rock crawler, that'd be a different truck in my mind. Most of the wheeling I do is either in winter or forested trails with a little, kept to a minimum where at all possible due to sustainability reasons, muskeg, skag, mud...
I plan to build a KISS (Keep It Simple Stupid) truck. Functional and reliable is the name of the game. I will not be putting on a roof top tent and a bunch of expedition gear. That'll go in or on a military trailer at some point. I don't like tippy trucks. Each unto their own.
Truck Spec Highlights (Starting point):
1HZ
H55F
60 Series axles with FF rear
4.88 R&P
Limited slip rear, ARB front
2.5 OME Sprung under, body lift and major bodywork to accommodate...
37" tires (Probably Cooper Discoverer STT 37x12.5xR17)
Spring flip (to get the "magic 100" wheelbase")
Airbags in the rear to support "expedition" weights (I'm of the pack the kitchen sink variety but weaning myself off that gradually)
Engine driven hydraulic winch with electric back-up
60 Series PS with potential hydro assist
York Air
Suspension seats
Snorkel (either Safari or Canadian military)
Endura paint
HAM / 2m Radio, CB for back-up although if you have a HAM license, you will know that a VHF radio beats all comers for wheeling. Nice to have on the road as well.
Webasto (If you live in Canada, Alaska or Minnesota, you'll get it
I might try to squeeze a second fuel tank in if I have room after other mods.
Some custom TBD sliders
Some custom TBD front and rear bumpers
Some custom TBD fuel and spare tire carrier
Some custom TBD fender flares
Some custom dodads I haven't even thought of yet
Oh... and a bucket load of bodywork to boot.
Wish me luck...I'll need it.
If you aren't already laughing,...it's OK, you can laugh now
Regards,
Jim BTW
P.S. Yes, I have a full time day job. No, I'm not loaded. Fortunately I have accumulated most of the parts over the years wheeling and dealing (wow, did I really take that long to strip down the truck? Started end of 2006)


Where am I now?... with a truck in about as many pieces as it comes...


I finally need the motivation to finish what I started. That motivation comes in the form of being signed up for ACT2010.
Here's what I'm looking for:
I want to build (that's half the fun) a reliable expedition truck that's stable and predictable on road that can be wheeled reliably off road.
My motto: "Go Far, See Much."
I'm not looking for a rock crawler, that'd be a different truck in my mind. Most of the wheeling I do is either in winter or forested trails with a little, kept to a minimum where at all possible due to sustainability reasons, muskeg, skag, mud...
I plan to build a KISS (Keep It Simple Stupid) truck. Functional and reliable is the name of the game. I will not be putting on a roof top tent and a bunch of expedition gear. That'll go in or on a military trailer at some point. I don't like tippy trucks. Each unto their own.
Truck Spec Highlights (Starting point):
1HZ
H55F
60 Series axles with FF rear
4.88 R&P
Limited slip rear, ARB front
2.5 OME Sprung under, body lift and major bodywork to accommodate...
37" tires (Probably Cooper Discoverer STT 37x12.5xR17)
Spring flip (to get the "magic 100" wheelbase")
Airbags in the rear to support "expedition" weights (I'm of the pack the kitchen sink variety but weaning myself off that gradually)
Engine driven hydraulic winch with electric back-up
60 Series PS with potential hydro assist
York Air
Suspension seats
Snorkel (either Safari or Canadian military)
Endura paint
HAM / 2m Radio, CB for back-up although if you have a HAM license, you will know that a VHF radio beats all comers for wheeling. Nice to have on the road as well.
Webasto (If you live in Canada, Alaska or Minnesota, you'll get it
I might try to squeeze a second fuel tank in if I have room after other mods.
Some custom TBD sliders
Some custom TBD front and rear bumpers
Some custom TBD fuel and spare tire carrier
Some custom TBD fender flares
Some custom dodads I haven't even thought of yet
Oh... and a bucket load of bodywork to boot.
Wish me luck...I'll need it.
If you aren't already laughing,...it's OK, you can laugh now

Regards,
Jim BTW
P.S. Yes, I have a full time day job. No, I'm not loaded. Fortunately I have accumulated most of the parts over the years wheeling and dealing (wow, did I really take that long to strip down the truck? Started end of 2006)





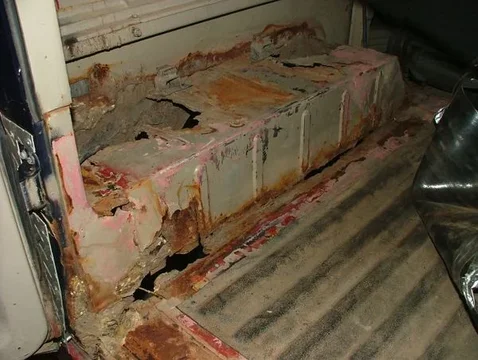
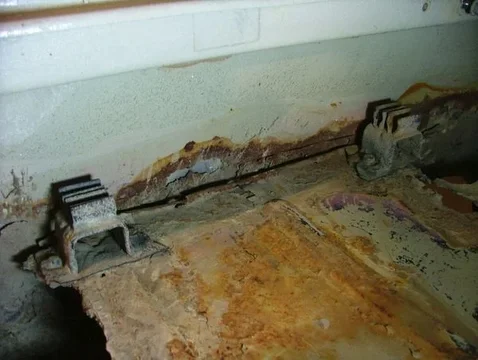


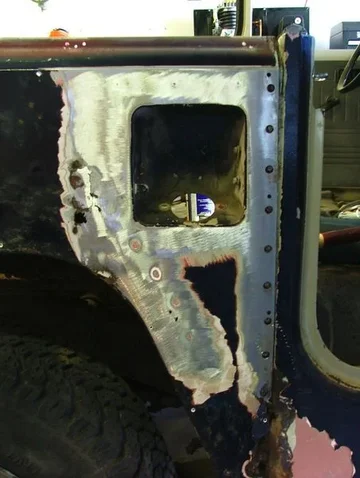
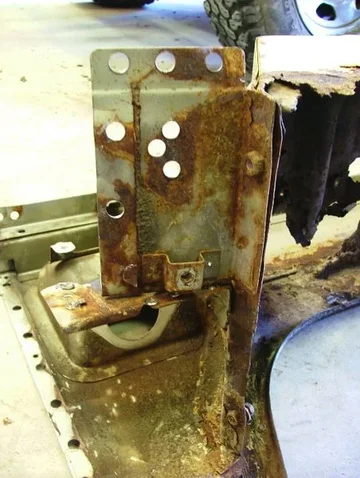
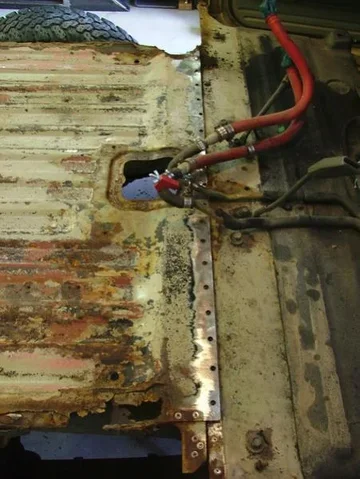


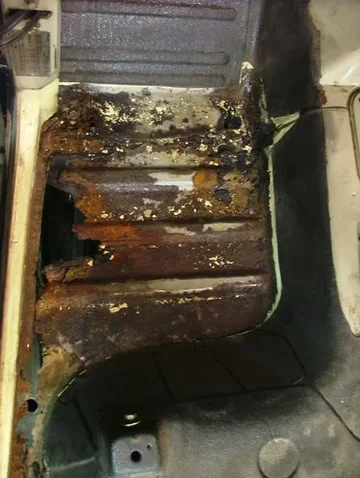


 I only sold the engine though. The rest of the truck as well as 1 1/2 other 40 series body parts lie neatly stacked under the deck.
 retentive. Yeah, I can get a bit carried away with the detail but I hope that the deadline will keep me on the straight and narrow. If you're around, be sure to pop by. I hope to be sandblasting the frame and cowl next week in preparation for spraying. I'm working on insulating the last 170 sq ft of the garage and installing a temporary spray booth...