Morph: a 1HZ/H55F into a BJ40, Expedition Truck - Alaska bound (1 Viewer)

This site may earn a commission from merchant affiliate
links, including eBay, Amazon, Skimlinks, and others.

I don't give up easily...

WOW, I would have just given up on it and bought another truck! :eek:

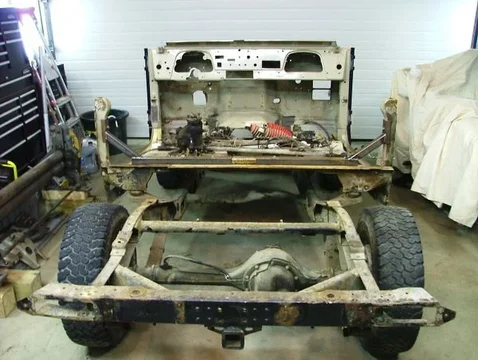
WOW, about describes my feelings once I pulled up the bedliner. I did know the body was bad when I bought it but as the frame and engine were strong, I didn't care. I had to have the truck.

As for giving up on it, I like a challenge and it was then pretty easy to decide what parts to keep and what not :D Furthermore, I wasn't in a financial position to change my luck. I knew the frame was good. The hard top parts also seemed to be good. Rust in all the usual places and I'm confident I can fix the problem areas.

Cheers and thanks.

Jim
 
Last edited:
The 3B

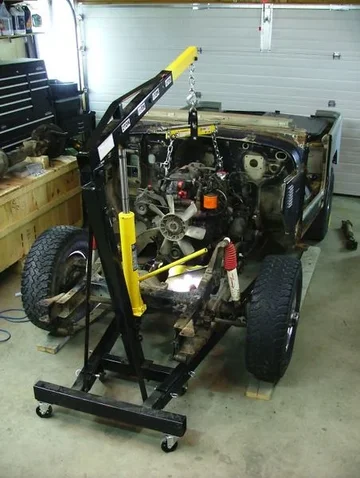
For the record, before I get to start fixing stuff, the 3B engine was pulled and sold this year to a fellow 'Mudder.

DSCF0351.JPG DSCF0368.jpg

DSCF0424.JPG
DSCF0351.JPG
DSCF0368.jpg
DSCF0424.JPG
 
The tub...

Well, I'll try and make the long rear tub story short. After looking at my options and being financially constrained, I bought a tub from a Canadian supplier. The tub was a good price and I was informed that these were the first offs and may have some fitment issues that need to be resolved.

I told the supplier that I would provide feedback on the issues I found, something I will do when I have detailed and documented them all. I believe the tub is made somewhere in the South Americas and no, it's not a Pilgrim tub.

The tub duly arrived...

DSCF8130.JPG DSCF8131.JPG

DSCF8133.JPG

Superficially, the tub looked good. Only upon closer inspection did I start to detail the issues. In fairness to the supplier, I will not air my laundry here and give them the chance to rectify the issues found in later batches...so I will not be providing the supplier name.

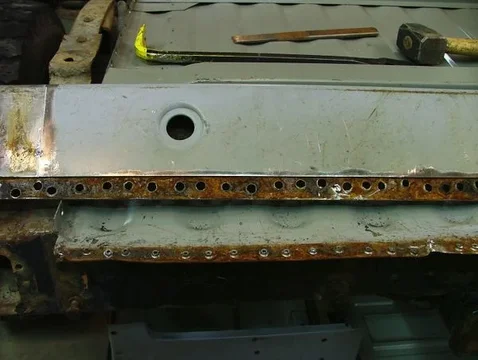
In short, I could have used it as is. As, however, I am picky, I weighed up my options and tore the whole tub apart. What I didn't like was that the tub had been manufactured in raw steel and then painted. That meant that all of the hidden folds and spaces were bare metal. If I am going to go to this extreme in building a metal truck, I want to ensure it isn't going to rust away on me in 3 years or so. The fitment issues, I could have dealt with.
DSCF8130.JPG
DSCF8131.JPG
DSCF8133.JPG
 
B-pillar fix

What I did decide to do was use the rear tub (once I drilled all of the floor spot welds out to correct the fit) to determine where my errant B-pillar should sit.

DSCF2000.JPG DSCF2001.JPG

DSCF2002.JPG

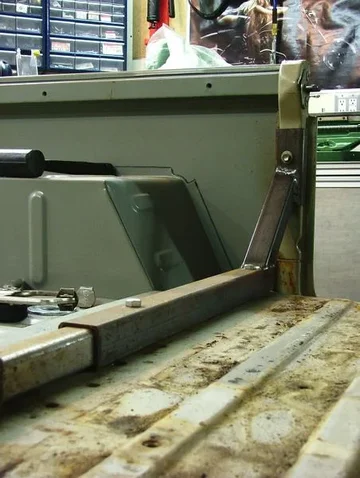
I built a supporting frame / jig that bolts to the rear seat mounts, split in the middle but with a supporting bar such that the parts will slide together when done for removal, and supports the B-pillar using an existing bolt hole. I forget what is bolted here but this saves making more holes. I have enough holes to fill as it is anyways.
DSCF2000.JPG
DSCF2001.JPG
DSCF2002.JPG
 
B-pillar brace cont'd...

More pics of the brace once completed...

DSCF2003.JPG DSCF2004.JPG

DSCF2053.JPG

I had thought of bracing the b-pillar in a different axis, in this case across the door. A comment by a friend stating that when he and colleagues didn't, the welding repair caused the door "frame" to close up by 3/8" requiring the use of a high-lift to fix late on in the game. Based on this and my own thoughts, having also seen what welding can do to 2+ inch Inconel plates at work, I'll be bracing across the door frame, using the front door stop and the rear catch plate holes.
DSCF2003.JPG
DSCF2004.JPG
DSCF2053.JPG
 
Apart comes the tub...

Once the B-pillar brace was completed (I still have to do the cross brace in the door frame), I took apart the tub.

What I did and do like about the tub is that it stays true to the original. The floor and wheel wells are rib stamped. I also purchased some replacement driver and passenger floor panels from the same source, also ribbed.

DSCF2013.JPG DSCF2015.JPG
DSCF2013.JPG
DSCF2015.JPG
 
Last edited:
Last tub disassembly pics...

And the last tub tear down pics...

DSCF2025.JPG DSCF2038.JPG

DSCF2040.JPG
DSCF2025.JPG
DSCF2038.JPG
DSCF2040.JPG
 
Ooooh, Aaaaah...teaser

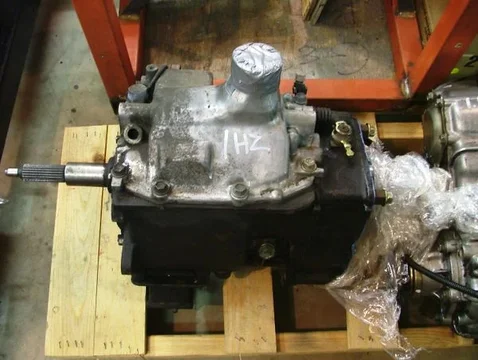
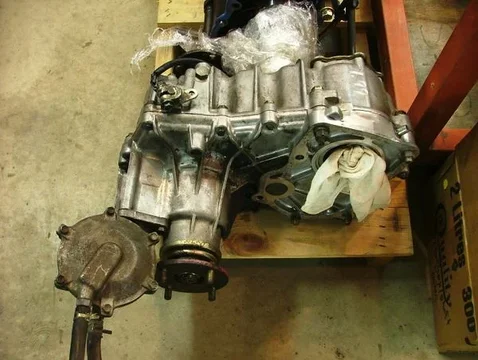
So before I sign off for the night, here's a teaser or two. This is what's going in instead of the 3B. Many thanks to my friend Herb for selling me his 1HZ and to G&S Cruisers for the tranny / transfer combination...

DSCF0337.JPG

DSCF0401.JPG DSCF0402.JPG

to be continued. Now comes the fun bit. Putting in all the goodies and building and procuring the rest. The daunting but doable part is fixing the body rot.
DSCF0337.JPG
DSCF0401.JPG
DSCF0402.JPG
 
Well, you have my full attention. Good call on disassembling the replacement tub.
 
Looking good Jim!

I like the cross brace idea for holding the door pillars, I might have to rent that from you in a few years :) That's going to be one mean HZJ40 when you're done!

Cheers!

Tyler
 
Project interruption & flying visit

Well, the project got relegated to this this weekend...
DSCF2081.JPG

For good reason, to convert this...
DSCF2084.jpg

to this (still to be completed)...
DSCF2095.JPG

A lot of time was devoted to the finicky stuff such as figuring out where I wanted fresh air vents and how to fix the filters into them (16x25 furnace filters). When the paint booth will be running, I'll need plenty of fresh air and that'll be supplied by the roof vents. The air will come in the sides of the roof, hopefully pick up a little heat and then enter the paint booth and be ejected out the bottom of the garage door. That's the general plan anyways.

Highlight of the day, a flying visit from Ratpuke in her HZJ77 passing through on her way back home. (Ratpuke, Thanks for the visit, brief though it was.) The 1HZ sure sounds good and I hope mine does too one of these days soon.

I will probably finish up the insulation and vapour barrier by the end of the week and then focus on the DIY paint booth, which will probably go in a separate tread and then I can get back to the truck. I already figured that probably the most efficient method to get the chassis and cowl to the DIY sandblast place (Consolidated compressor in Calgary) is to flat tow the frame and cowl, also suggested by a friend. It'll make for a rare sight on the roads, that's for sure. :hillbilly:

I figured today, I have about 8 months to go. That's ~64 weekend days (assuming I don't have to do anything else (which I always do because I have a hard time saying no and helping others in need). That'd make 512 hours if I can average 8 hours on each of those days. Add 9 hours a week of evenings after work and that makes 288 hours for a grand total of 800 hours, which, unfortunately, I don't think will be enough...

Well, it'll have to do. I don't have any more time than that. I might just have to call in a favour or three...
DSCF2081.JPG
DSCF2084.jpg
DSCF2095.JPG
 
Did you get the garage done?
 
Last edited:
Finishing touches...to garage

Did you get the garage done?

Well, after 40 or so hours over 2 weekends and a couple of evenings last week....Er, no....but I'm nearly done. :bang:

So far, 4 bales of R40 glass fibre insulation, 2 bales of R20 wood fibre insulation, 24 linear feet of 2"x2", 76 lin ft of 2"x4", 16 lin ft of 1"x4" lumber, 180 sq ft of vapour barrier and a few beers have been consumed so far.

I rebuilt my garage door opener hanging system from metal, because it would be excessively in the way when drywalling, to lumber; I figured out how I could still maintain access to my rafter suspended chain hoist and electric winch, which I wasn't about to give up on, whilst maintaining a vapour barrier to prevent paint fumes from getting into the "attic" space; I built two insulated cubby holes for the inverted suspended push bikes (that's bicycles to the rest of you), moved some electrics because they were in the way of the aforementioned; insulated the bonus room wall whilst I was in there because the bonus room is a couple of degrees colder than the rest of the house in winter; framed in the missing rafters to be able to drywall a section; framed in some edging strips for same drywalling reason; framed up and installed some furnace filter boxes for ventilation; finished insulating the rest of the roof and finally laid up 2/3 of the vapour barrier last night.

Oh, and I only fell off a ladder once and fell on my ass onto my tool cart which took the brunt, so to speak...My backside is fine, the cart might need a little TLC with a lump hammer...

The one positive aspect, because I'm not sure yet how much the insulation will keep the heat in, that's TBD, is that the end of the garage now insulated is brighter because the roof now reflects the lights at that end instead of the dark roof absorbing it. :cool:

A couple more evenings this week and I'll be done...
 
Last edited:
Tuned in. :cheers:
 
Yak shaving...

Almost done with the garage roof. Turns out that the little things take time. A dry wall hoist is my new favourite toy (borrowed, thanks Behemoth60) "Paint cell" next and then to sandblasting in the next 2 weeks.

I will continue to post as I make progress. I didn't want to post a bunch of insulation / drywall pics in a truck build thread. I might put the "tadaa," done pics up and move on to the more exciting stuff.

Presently deliberating how deep I want to go into the axle rebuild. They are '87 HJ61 axles and I know the PO, and these come prior to his 54" TippyR days. They've been around the block a bit and have approx. 270 thousand klicks on them. So, I am leaning towards rebuilding them as they are available and easy to work on right now. Rebuilding them isn't really that expensive, just laborious.

What is expensive are the lockers. I am now leaning to ditching the factory limited slip. I have been convinced that LS on 37" tires is a waste of time, a quite probably correct assumption. The present leaning is ARB front, Detroit rear. I guess with this, the rebuild and 4.88's I do have quite a bit of work in those axles. Let's hope I don't really need to cut and turn the front as well (shouldn't have to given the SUA and mild spring lift intent).

Cheers and thanks in advance for the patience. Work gets in the way of all these hobbies :hillbilly: and "yak shaving" the garage doesn't help either.

Jim

P.S. "yak shaving" = "Any apparently useless activity which, by allowing you to overcome intermediate difficulties, allows you to solve a larger problem." Geek phrase :rolleyes: commonly used by a good friend of mine.
 

Users who are viewing this thread

Back
Top Bottom