Builds Keeping it low with Rockwells (a.k.a. under the knife again)

This site may earn a commission from merchant affiliate
links, including eBay, Amazon, Skimlinks, and others.

The finished product, mocked up on the machinist's axle.. The holes in the end of the arm are bored at 10° to compensate for the kingpin inclination, and the sleeve then goes straight through them, and will be welded in place.

There's another sleeve for the outer-most hole, which is also bored at 10°.

I don't think there is a stronger setup for a hi-steer system...
histeer1.webp
histeer2.webp

And, just a shot inside the CNC machine while it did its thing..
cnc1.webp
histeer1.webp
histeer2.webp
cnc1.webp
 
Very nice! It's crazy how thin they look compared to the rest of the knuckle. Keep up the good work!
:beer:
 
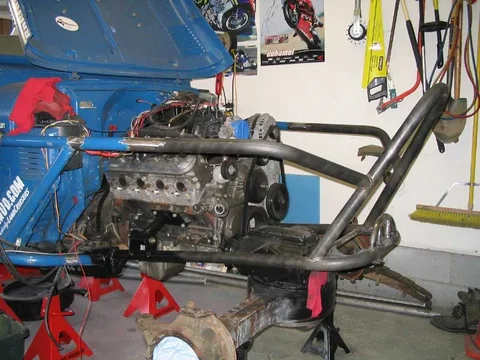
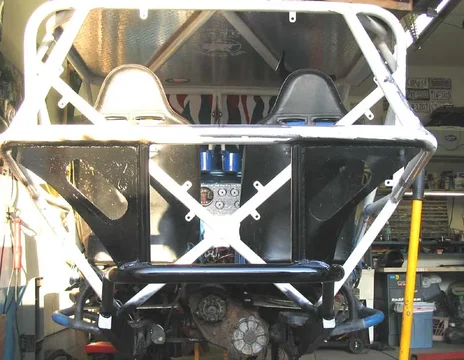
Good progress this weekend.. front tubework is almost complete (need shock hoops), and the engine is now part of the rig. (engine mounts complete)

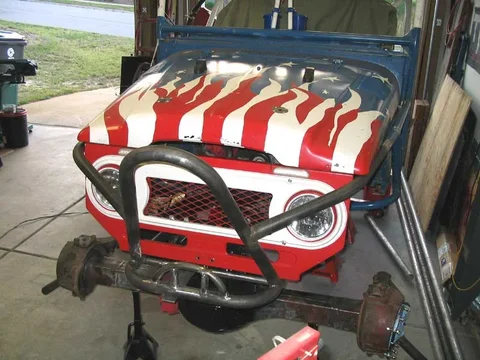
Went alot different than I was planning, but it keeps the protection for the front end but has a more 'agressive' line.

Because I'm doing away with the "fender-lets", I was able to narrow the front tubework 4".. it used to run alongside the hood, now it goes under it at the corner. It sticks out slightly past the hood line, but I already warned the wife that the corner will probably get crunched.

front.webp

front-high.webp

side.webp
front.webp
front-high.webp
side.webp
 
Last edited:
I spent alot of time getting the stinger dimensions how I wanted them (not too tall, not too short), I TOTALLY forgot to see if it interfered with the winch! Oops. I wasn't totaly pleased with the original winch mount anyway, and the new one will also have the winch down about 2" lower than before. (CoG baby!)

Had to open up the tube, and then plate it with some 1/8" plate, contour it to fit. it doesn't look like much, but it makes a big difference.

stingerwinchrelief.webp

And, the engine mounts. The engine is offset to the left, which is why the tubes are different lengths, and the driveshaft will be running right under the right side, which is why that one is mounted so high on the engine plate.

leftenginemount.webp

rightenginemount.webp
stingerwinchrelief.webp
leftenginemount.webp
rightenginemount.webp
 
Last edited:
Not alot of photos, but got a pretty fair amount done.
Installed the TCI full manual reverse valve body, and then had to take 1/3 of it apart again when I was cleaning up and found a spring... s***.
Did the twin-stick mod on the 205, cleaned it a little more, and re-sealed everything. Need a seal inside the adapter, but other than that, it's ready to go.
Tapped the steering ram mounts all the way through, 7/16-20, has about 1.5" of threads in there, it outta hold.. :D
Bent some shock hoops.
What's visible-
Whole lotta mockup - I decided I have to put the steering on the front for a few reasons - link clearance mostly, but also I would have to mount the ram 6" lower if it was on the back side of the axle. I think it'll be pretty well protected up high.
frontsteeringrammockup.webp

Made the lower link mounts adjustable, and taaacked them in place, enough so they'll hold with some weight on them. Most of the mounts on this are 3/8" thick.. :D
frontaxlelowermount.webp

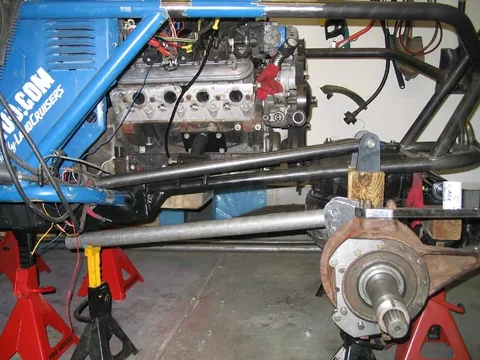
A side shot to give a general idea of the link separation and the angle.
links-side.webp
frontaxlelowermount.webp
frontsteeringrammockup.webp
links-side.webp
 
I think i have seen that front tubework somewhere before...hmmm....:lol:

HarlanAprilFoolsRide-2007050.jpg
 
I think i have seen that front tubework somewhere before...hmmm....:lol:

Except my stinger doesn't add 3 feet to the overall length of the cruiser... :flipoff2:

Honestly though, when I started mocking it up in my mind, yours did pop into my head.
 
Except my stinger doesn't add 3 feet to the overall length of the cruiser... :flipoff2:

Honestly though, when I started mocking it up in my mind, yours did pop into my head.

Ofcoarse...mine has always been bigger :D ;p
 
Today I started on the rear frame... The rocks require the rear framerails to be this high to clear the chunk and the links...

rearframeside.webp

Have to tie the 2 sections together, and thought about using 1/8" plate and integrating the taillights into it... Though I don't think it'll be strong enough to serve a structural purpose?

Thoughts on this?

fillpanel.webp

(And yes, I know the frame is ALOT narrower than the existing tube.. maybe over next winter I'll narrow the ass-end a little bit, but for now, it's just more time that I don't have)
fillpanel.webp
rearframeside.webp
 
1/8th gusseted and dimpled would be structural..
 
I would not do round, I would either bend the edges or add flat stock..

Course, I have no real reason for this, other than it seems harder to bend the flat stock than the round stock. That may be garbage..

do it with chromo 1.5". Should be plenty strong then..
 
Spent much of the day frustrated.. I came to realize that I need to not only re-do the entire transmission crossmember, but also the engine mounts, all because of the swap to the NP205.

So, here's the crossmember before...

xmemberbefore.webp

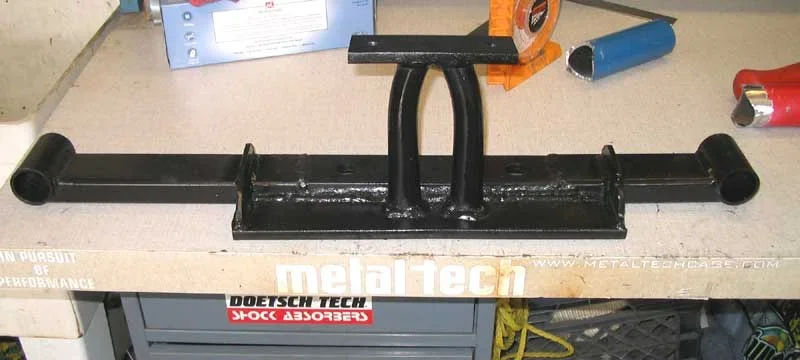
And now... It solidly ties the transmission and transfer case mounts together so they move as one unit, taking the rotational stress off the 4 small bolts attaching the t-case to the trans.. the most common place to break a 700R4/TH350.. The 205 mount's "foot" has quite a bit of angle to it, as you can see because the tower that bolts to the transmission is basically parallel to the ground once mounted. If you look closely, a 9" long chunk in the center of the crossmember was cut out, and the 205's mounting foot now sits on a piece of 3/8" plate. MUCH thanks to Butch Baker (Texican) who inspired this idea.

xmember1.webp
xmember2.webp

I have to finish the frame-side mounts and then cope & weld the new engine mount tubes in place, and I'll be back to making more progress.
xmemberbefore.webp
xmember1.webp
xmember2.webp
 
Last edited:
Curious... why are you narrowing them? The one thing I love about my Rock's, or any other full width, is the stability in some crazy situations ( mine is 93" outside tire ). I drove one rig that had narrowed Rockwells... just didn't feel right. Hats off to ya for clean fabrication and a VERY nice parts collection :cool: keep the pics comin'!

B

Hey Barry,

Clean out your mailbox, would you? I tried to send you a PM and it's full. :eek: :grinpimp:
 
Anyway, more progress tonight.. the engine is back mounted to the frame again, and got the transmission crossmember frame-side brackets cut, drilled, and rough-shaped. grind 'em smooth, weld 'em on, and I'm back in bidness... :rolleyes: I just keep telling myself it's an improvement... :lol:

The welds on this came out rather nicely I thought..

enginemount.webp
enginemount.webp
 
Another weekend in the books. I spent much of the day Saturday getting the motorcycle back up (wired the HID, changed sprocket, installed the fuel tank & pump, front brake rotors & pads, changed the oil, etc..), but still got a good bit done.

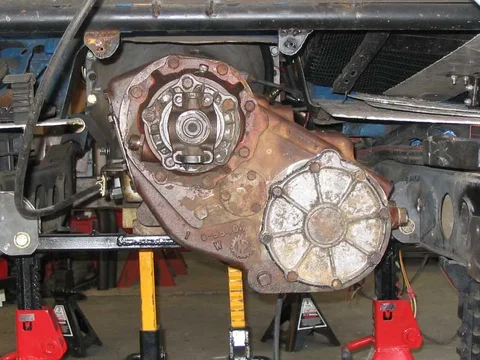
Tacked the trans crossmeber in place, I want to wait until the clocking ring comes in until I determine the final location. Also hefted that big-ass NP205 into place.. damn she's a heavy bitch.
205mockup.webp

Finally finished something I've been working on for a while, off and on... shaving down 2 of the pinion flanges on the rockwells.. I don't have room for them, but since they have a seal on them, I can't just run without them. Unfortunately, they were hardened, so turning them on a lathe is out.

Before:
flangebefore.webp
After: (yeah, it was a bitch)

shavedflange.webp
205mockup.webp
flangebefore.webp
shavedflange.webp
 
I also capped the rear framerails just like the front... Nothing special, but a bit time consuming.

Also made the taillight panels and tied in the rear frame rail to the mid... Need to trim one side a little, but all in all it came out decent.. (it's actually recycled from when I had a tailgate on the rig, and had the lights in that)

taillightpanel.webp

Front upper link box / coilover mount is 80% done, I just need to weld the cap on and the edge closest to the diff (have to lower the axle). It was a pain to slot the 1/4" over the lower link mounts, but the end result is very strong, as it needs to be. Most people will probably look and think I mounted the lower link mounts off the tower, too. It's welded inside and out.

frontlinktower1.webp
frontlinktower2.webp
taillightpanel.webp
frontlinktower1.webp
frontlinktower2.webp
 
Last edited:

Users who are viewing this thread

Back
Top Bottom