Builds Intro: Ugly Betty(so far) (2 Viewers)

This site may earn a commission from merchant affiliate
links, including eBay, Amazon, Skimlinks, and others.

Time for an update :p
Due to the location of the P/S pump my engine only had 1 engine hoist bracket and therefore I had to fabricate 2 longer ones from some big angle iron
P1050162.JPG

With them installed and a borrowed hoist from JB it was smooth sailing :cool:
P1050165.JPG

inspite of the size and weight of the combo
P1050163.JPG


P1050176.JPG


P1050170.JPG


P1050169.JPG

With our spirits up and our curiosity getting the better of us we decided to pull the rear shafts in order to see what the 3rd member's condition was like in our notso expert opinions. :hillbilly:
P1050172.JPG


P1050173.JPG


P1050174.JPG


P1050175.JPG

There is some definate backlash that JB will have to set but the rest seems very good actually. Oh did I mention that when I dropped the G/box and T/Case at JB, he declared the clutch and pressure plate as brand new :D
 
Inspite of the ice rain I got a little done today...
P1050201.JPG


P1050232.JPG


P1050235.JPG


P1050236.JPG


P1050239.JPG


P1050249.JPG


P1050247.JPG


Now just the rear susp to go and then the chassis can go for galv :bounce:

P1050250.JPG


P1050259.JPG


P1050270.JPG


P1050274.JPG


Both axles together awaiting a the rebuild

P1050275.JPG


Leaving just the bare chassis ready to go for galv

P1050277.JPG


And the result

P1050414.JPG


Which means I have reached the turn around and from now on stuff will start going back on :cheers:
 
Betty

Well its been a while since I've seen your build but I see you haven't been slacking. I have had the opposite prob here with waiting for summer to be over so I can get some serious work done--too hot in florida for me!

Looking Good!
 
Thanks bsmith :cheers:

Another update

My gearbox and tc was pretty wet from the leak and so I dropped my boxes at JB. When I drained them I found some metal filings and therefore feared the worst.The news was better than I could ever have hoped for... :D
P300908_11.07.JPG


P300908_11.07%5B01%5D.JPG


In order to replace the offending seal you have to remove the rear nut on the output shaft seen here.This nut had to be removed with the aid of some heat:eek: - 
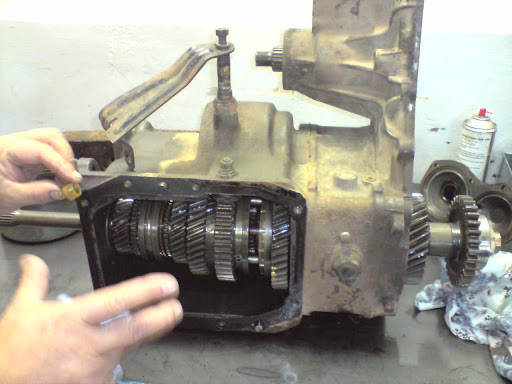
a possible sign that this box and tc has never worked hard before.

P300908_11.08.JPG


P300908_11.09.JPG


The offending seal: Clearly not well fitted if you look at the folded "lip" ....
P011008_08.32.JPG


P011008_08.33%5B01%5D.JPG


Usually the rear nut comes loose from hard work /wear and then the gear will damage the output shaft, leaving it looking like this

P011008_08.33.JPG


Fortunately mine still looks like this

P011008_08.32%5B01%5D.JPG


:cheers:
 
And the result

P1050414.JPG


Which means I have reached the turn around and from now on stuff will start going back on :cheers:

Theo - I'm jealous. :lol: That chassis looks absolutely great. Time to start bolting back up now, yes? That gearbox and transfer case look practically new - good news! :D

Good to see the progress.

:cheers:
Dan
 
If you go on at this pace then you might make it for our Legends trip in August 2009! :clap:
 
If I don't make it Adolf, it will not be from lack of want :lol:

Finished tapping all the required threads that were filled with galv
P1050492.JPG


P1050486.JPG


P1050488.JPG


P1050489.JPG


Now it is on to prep and paint, as I don't like the Heep look :cheers:
 
I started the prepwork on the bottom and sides of the frame tonight but I am not entirely happy with the results.I brushed the etch cleaner/primer on and sprayed it off with warm water after leaving it on for 1 hour. Tomorrow I will redo it but I will wash it on and off, using a sponge instead. In fairnes the directions did say that 2 or 3 applications may be needed for newly galved steel, so we will see... :rolleyes:
Etch Cleaner/primer on
P1050495.JPG


P1050498.JPG


Etch Cleaner/primer "rinsed" off but some fatty areas clearly visible.(Could be all the cutting fluid I used when tapping ?)
P1050499.JPG


P1050500.JPG
 
Time for an update: I "washed" the frame for a second time with Galv Etch but this time using some coarse steelwool. The result was much more to my liking...
P1050505.JPG


P1050506.JPG


P1050507.JPG

This meant I could paint with the Direct to Galv Hammerite immediately.However at the last minute I decided to go with a primer first, just for that bit of extra protection :wink: I used Hammerite's Special Metals Primer which I was very impressed with as it spreads nicely and dries without leaving any brushmarks and becomes very hard. The only drawback is the fact that brushing takes a huge amount of time and it is difficult if not impossible to get in everywhere :eek:
Ready for topcoat(s?)
P1050572.JPG


P1050573.JPG


P1050574.JPG


:cheers:
 
While the primer coat went on relatively easy and quickly, the top coat was a complete different story.....
P1050619.JPG


P1050623.JPG

But eventually tonight she was done !
P1050631.JPG


P1050632.JPG

:cheers:
Now on to the small bits of the chassis etc ....
P1050610.JPG
 
Time for an update: With the bad weather we have had for the last 2 days I have not been able to paint the topcoats on the bumpstops and Gbox mount, so I moved on to the leaf springs to keep myself busy. The only problem was that the bottom blade of the driverside pack was broken.
P1050647.JPG


P1050651.JPG

Fortunately I had come into posession of an old set of 60 ser springs recently(thanx Rob :D ), that I was able to raid for a blade that could be butchered.
P1050656.JPG


P1050657.JPG

Then it was just a simple matter of measuring and cutting it to the exact lenth as the camber et al was exactly the same. I could even use one of the centering pins as the OEM one's nut was shot. These springs are in any event just a temporary fit untill I get my new leafs :cool:
All cut and test-fitted
P1050658.JPG

Then tonight I whirewheeled all 4 spring packs and reassembled them ready to be painted as soon as the weather clears
All done and shiny, ready for paint
P1050662.JPG


P1050665.JPG

:p
 
Holy cr** TMArx, Looks like we are both at same stage of ground up, actually you are ahead and it looks great, I really wanted to do the galvanizing thing and still can but its just a pain in the butt to transpo it 4 hours each way. I may have to call on you for some detailed enigine bay and engine pics for I lost all my teardown pics in my laptop crash and now I have nothing? but good thing we have identical vehicles. keep up the good work! keep in touch with me on anything you might think I need to know, for I am ignorant when it comes to anything about this vehicle.

Rob
 
Any time Rob, just shout and I will see if I have a pic for ya. As a noob to this myself, I took plenty ....:lol:
 
Another update ... :bounce:

With totally rebuilt axles it was time to get some visual progress done

P1050702.JPG


P1050724.JPG


Lots of whirewheeling later ...

P1050731.JPG


P1050733.JPG


And then the same old routine of etch clean, prime and paint...:rolleyes:

P1050738.JPG


After the prime and topcoat the axles came out pretty good

P1050747.JPG


P1050790.JPG


Which meant it was eventually time to start assembly of the chassis..

P1050759.JPG


(Note to self: Do not let Swambo order custom bushes from a guy who asks:"Madam, what colour would you like those bushes ?", ever again !) :eek:

P1050760.JPG


New greasable Ironman springpins

P1050762.JPG


At least the front ones are yellow

P1050773.JPG


P1050781.JPG


P1050782.JPG


P1050784.JPG
 
And suddenly we had a rolling chassis again

P1050799.JPG


But then as preventative "maintenance" I had decided to replace my rear main oil seal and pilot bearing. JB borrowed me his fancy pilotbearing puller which actually made it feel like cheating- no mess no fuss, 10 seconds and it was out ! Thanks JB ! The old non leaking seal and bearing. Also note the brand new welch plug(just like all the others) - one more telltale sign that motor was in fact rebuilt 8000kms ago

P1050801.JPG


P1050804.JPG


New seal installed- the exact same one as found in the KZTe motor

P1050803.JPG


Bearing in and flywheel torqued

P1050809.JPG


Clutch and pressure plate installed. Do you recognise that old shaft serving as an alignment tool, Keith ? :hillbilly:

P1050814.JPG


I had previously restored the bellhousing

P1050666.JPG


After hours of wirewheeling
P1050688.JPG


Primed with Hammerrite's Special Metals primer and then topcoated

P1050689.JPG


P1050744.JPG


Then tonight after torquing the flywheel etc it was finally time to re-unite the motor and boxes with the help of a crane that I borrowed from JB. Thanks again JB :)

P1050818.JPG


And then I found out that sometimes daughters' boyfriends can actually be usefull creatures if you intimidate them enough :grinpimp:

P1050824.JPG


P1050826.JPG


And then it was done

P1050832.JPG


Next up, some detail/cosmetic work on the motor and boxes etc, but first a much needed Xmas break :cheers:
 
Mr T

Did you check and repack the wheel bearings before bolting the axles back in, and what about the brake wheel cylinders, have they been cleaned and rebuilt ?

C'mon no slacking now ! !
 
...
C'mon no slacking now ! !

Oom Keith, with you watching I would never take a chance ! :p

Wheel bearings cleaned and repacked with Omega 57 high temp grease & Graphite for the birfs, rear drums skimmed and new linings & bell crank cable fitted , rear wheel cylinders rebuilt , new complete axle, knuckle & pinion oil seal kits fitted, new TRE's and Idler arm kit fitted :bounce:
 

Users who are viewing this thread

Back
Top Bottom