HJ47 welcome here?

This site may earn a commission from merchant affiliate
links, including eBay, Amazon, Skimlinks, and others.

another set

Hi HJ.

Interesting that your holes for the pins on your "Toyota landcruiser" badges appear too large.

But that isn't a problem if you do what I did. - I just used glue to hold them and used the pins (the ones that hadn't already broken off that is) to hold the emblem in the right position.

emblem.webp

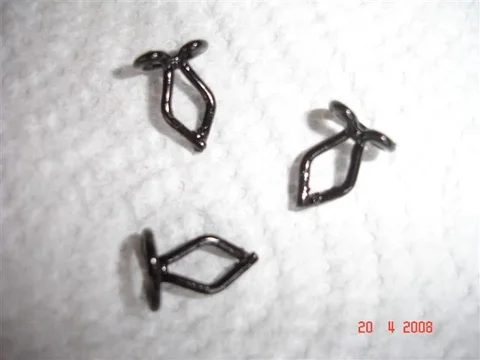
Also - Are those clips that hold those little bits of weatherstrip stainless? (If so, where did you get them from?) I had to paint my steel ones with POR15:

clip.webp
clip.webp
emblem.webp
 
Tom,

those clips I put on the aprons are oem and cad-plated.

As for the emblem, your solution for fitting the ones with the smaller pins to the hole is a good one.

I figure toyota made the pins bigger as the early ones (1980) were more fragile. They usually don't add beefiness to a part unless absolutely necessary. I thought about gluing mine on for a while as well, and chose another route.

I will try to sell the ones I have (anyone with a 1980 out there looking for emblems?), and have ordered the correct ones from the local Toyota dealer. SOR was cheaper, but then add in the s&h and it's the same or more money. The price out of Japan was higher than my local dealer. About $50/ea.

Upon closer inspection, the cab turned out to have several areas with insufficient paint, so I masked off the firewall, scrubbed the exposed section down with a type of Scotchbrite pad. Then on went another coat of paint this afternoon.

I don't mind the extra paint layer.
DSC00382-small.webp
DSC00383-small.webp
DSC00384-small.webp
 
In other news, I got the transfer case output shaft and new bushings, put the bushings in myself at a local place kind enough to allow me the use of their press. I then took the shaft and the two gears to a local machine shop for getting the fit between the part honed to the precision clearance of 1.5 to 2 thou.

I picked the shaft an fitted gears up today all done. Next i need to press a couple of bearings onto the ends of the shaft, so that will be something to tackle tomorrow morning sometime.

I have the goal of completing the painting in a matter of days. The two doors and the hood are all that remain of the panels going blue. Then there is the roof and bezel again. Two more hangs hopefully.
 
...and now transferring over to the splitcase rebuild. It's nice not to have to work around the cab, and gives a very clear window for shooting pictures.

The second gear installed on the tranny output shaft is the gear that drives the pto. The FSM could have been clearer about which ways the gear face, as they are not symmetrical, and i had to puzzle over that for a while.
DSC00397-small.webp
DSC00398-small.webp
DSC00399-small.webp
 
Next the bearing retainer goes in, and then the output shaft along with its two gears (one drives the front axle, while the other drives the rear) slides in. So far so good. It's my first time doing this, so a bit of fumbling around in the dark seems to be the price to pay. It doesn't help that the FSM often skips steps in showing how to service and assemble the various components.
DSC00403-small.webp
DSC00404-small.webp
DSC00405-small.webp
 
Smooth sailing was interrupted however when I tried to fit the output shaft retainer housing into place and found it wouldn't quite go together all the way on the output shaft. After a little more force was applied to no avail, i puzzled over why the thing wouldn't go together. Then it dawned on me that the bearings I had pressed onto the shaft were different sizes each end and that I had them in the wrong way :doh:

So, after having torqued all the case bolts down, I had to take it all apart again, take the output shaft back down to the local cruiser shop, pull the bearings off, switch them around and press them back on. A couple of hours later and I had the shaft reinstalled and the case all buttoned up again. Then I attended to the linkage for the shifter and the pto gearbox was hooked up to its driveshaft again. Then I staked the companion flange and tranny output nuts nuts after torquing them to 110 ft.lbs.
DSC00420-small.webp
DSC00421-small.webp
DSC00422-small.webp
 
Last edited:
Nice, did ya red lock tight that little retainer bolt?

I have seen this bolt back out before, well George sent me photos of the shaft backing out.


..and the shaft is tapped into position.
 

Users who are viewing this thread

Back
Top Bottom