Builds Hi Guys! Intro and restoration Hj60 12ht #build (1 Viewer)

This site may earn a commission from merchant affiliate
links, including eBay, Amazon, Skimlinks, and others.

I never took the plate out, what does it do on the other side?
Because there is a lot of air when filling up, without air escaping I would think filling takes longer but the filler tube is pretty wide.
The U shaped tube for rollover is not needed I think, the rest is not checked at APK roadcheck I think, so it seems ok to remove it.
When I removed the tank and saw 6 connections plus sensor wire I scared out :beer:
It goes to he vacuum black thing thats mounted in the wheel arch. I am going to fix it the way that Rusty wagon had done :).
The big single tube is for air escaping I think.

Cheers!
 
Thanks, of course, the black plastic thing, I forgot, picture of the setup here, My Hawaiian HJ60 Refresh, Maintenance and Good Times

She replaced hoses so I think just bypassing the plate is no problem but if the plate and plastic it is not useful why keep it.
So the plate is just for the factory guys to quick install and connect it seems and replacing the hoses and bypassing the plate after 30 rusty years seems a common problem in the next years.
If you can please measure the hose size and length when bypassing the plate because a helper can stick the new hose trough the rear fender and then connect it, maybe it is pretty easy but I dont dare to remove them all and then replace, just one by one I think.
I will problably keep the plastic thing but remove the rusted plate.

Next Tuesday apk/roadcheck so I am getting pretty nervous, 4 seconds 4300 rpm :skull:
 
Last edited:
New Update!
After half a yes of nothing I finally found some time and some enegy to get the Cruiser rolling again.

All parts are wire brused and painted in 2k epoxy or Brantho Kurrox.
44081450_1828625507235886_7535822138637287424_n.jpg


44098178_1828625517235885_3818076744749940736_n.jpg

44100771_1828625650569205_1147687008919879680_n.jpg


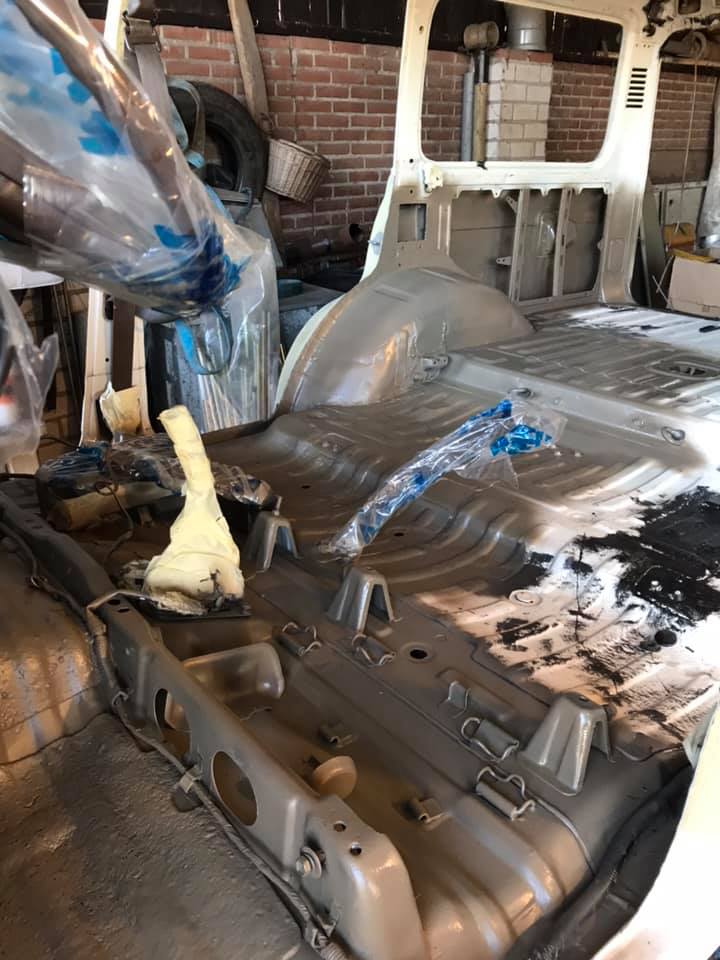
Some new metalwork all around the bottom. What a rusty suprise and its finally gone!
44180470_1828625847235852_5593396215216603136_n.jpg


Nice hole full of kit.
44287003_1828626013902502_3796852657050615808_n.jpg

44104156_1828626040569166_6372643530573086720_n.jpg

fuel tank stripped and painted.
44129408_1828626117235825_5791514007084990464_n.jpg

44193215_1828626193902484_5599332366825816064_n.jpg

44190192_1828626197235817_638947716096851968_n.jpg
 
So lets have a look athe the chassis first.
Man there is allot of space to work with now the body is off.

OW nice rubber body mount. Bought a new ones (€500)and poly block for 1 inch lift.
44088753_1828626600569110_2313651440146448384_n.jpg


Hammer time and well hello there!
44277345_1828626820569088_4251397455532261376_n.jpg


Body mounts where hit with a grenade ;).
44067927_1828626990569071_2205126361129943040_n.jpg

44110873_1828627040569066_5346991643637579776_n.jpg


Nothing 8mm of new steel cant fix!
44089955_1828627060569064_8936422110713085952_n.jpg

44113542_1828627073902396_7363034762505617408_n.jpg


Welded the leaf point. I saw a post on the Aussie facebook groep that the rivet and mount came loose.
44228315_1828627077235729_1609548589132939264_n.jpg


Wire brushed everything and the put 3 layers of good paint on it. Total 10 liters/€350
44143057_1828627287235708_4879254668422676480_n.jpg

44149959_1828627330569037_1669561750548119552_n.jpg

44165086_1828627347235702_4912653081440681984_n.jpg
 
44162529_1828627110569059_506473504300859392_n.jpg

New 3 inch dump pipe and a 3 inch exhaust.

Next doors. All the flags are from the previous owner. He made a Africa trip with the car.
44170520_1828627173902386_7658113511255441408_n.jpg

My Welder worked on the Doors. (me nephew Tom is a body workers so glad he Helped me out).
44115352_1828627390569031_5438883409533337600_n.jpg

44190275_1828628563902247_4460643911391510528_n.jpg


Next Underside of the body John Deere time Again:
44274922_1828626907235746_9171229896930754560_n.jpg

44125432_1828626977235739_7615304906496278528_n.jpg

That Stuff is a bi*ch to get off. Took me two days and I was dirty to the bone.
44164479_1828628757235561_8565532224206667776_n.jpg
 
Lets inspect the clutch:
Again the John deere came in handy.
44585362_1837430029688767_4687441669501485056_n.jpg


All looked really wel used. And the Bearing was shot.
44602284_1837430053022098_7181954238317068288_n.jpg

44728470_1837429976355439_3688295503218343936_n.jpg

44742976_1837429956355441_8745769577595535360_n.jpg


Cleaned all and now waiting for a heavy clutch set.
44683193_1837429883022115_7073197699218014208_n.jpg


44610370_1837429873022116_6214361255432421376_n.jpg
 
Some Raptor black on the Bars.
48424722_1917278025037300_8819906141963157504_n.jpg
'
Its becoming Winter in The Netyherlands so cleaned up some space and put the hj60/61 inside. Its one of the advances of living on a farm, space everywhere.
-PAXP-deijE.gif
48402918_1917273891704380_5600667710812848128_n.jpg


Lets put some isolation in there:
48394444_1917271795037923_7542635928158732288_n.jpg


After that some more mechanical work.
New Waterpump genuine toyota. I first installed had a aftermarket one but people told me they only last 20.000km
48398280_1917278041703965_947266178277965824_n.jpg

49017799_1917278095037293_2180566518360702976_n.jpg

New Thermostat:
-PAXP-deijE.gif

-PAXP-deijE.gif

48396593_1917277821703987_375962062494367744_n.jpg

Flushed the engine cooling:


48403067_1917277728370663_5618425708364693504_n.jpg

Thats done!
 
Rear Pinion Seal leaked so put a new one in.
The Nut feels a bit loose. Not much Nm to crank it. I will let a mechanic look at it.
48384836_1917277705037332_8731854244333748224_n.jpg

49125038_1917277661704003_6584153691895365632_n.jpg


Fixed the brake weight thing. Dont know what is in English ;).
48411614_1917277801703989_6899262394292240384_n.jpg

48929040_1917277598370676_3591109009014259712_n.jpg


Out a longer shackle on the front sway bar:
48390353_1917274095037693_5662092237136199680_n.jpg

48415640_1917273985037704_1092820004304322560_n.jpg


Installed a 3 inch Exhaust:
It needs some modding because I got Rear airlift.
48427346_1917274638370972_3996560050674991104_n.jpg

48383822_1917274771704292_8315181423791177728_n.jpg


Made new Brake lines on the chassis:
48403771_1917274888370947_5722637209991905280_n.jpg

48395400_1917274895037613_1519454404489510912_n.jpg


Did a Piston renew on the brake master and Clutch slave:
48377926_1917278318370604_2897658102096592896_n.jpg

44606640_1837430143022089_9109228749773078528_n.jpg
 
Last edited:
Not the Read Axle needed some love:
New: bearings, back Plates, Brake cylinders, brake lines and some paint.
47320460_1890920941006342_1757646865454596096_n.jpg


48962018_1917271528371283_4909842274453553152_n.jpg

Bought a new makita drill :) :)


Arghhh the hand brake line hinge was broken €25 new part :(
49001754_1917271368371299_4884821693362601984_n.jpg

48422747_1917271408371295_7879697389521469440_n.jpg

48422311_1917271301704639_817658161367351296_n.jpg

-PAXP-deijE.gif
Painted a bit to much. Some parts needed to be non painted.
48384749_1917271398371296_3536196649544056832_n.jpg

Putting things together again in the wrong order. First the Bake stuff then the bearing stuff!
48994272_1917271291704640_3138788861858021376_n.jpg


IT worked! Job done!
48415846_1917271118371324_8834754269107191808_n.jpg

-PAXP-deijE.gif
Brake line could be nices but it will work:
49025839_1917271061704663_5829131271988576256_n.jpg

Old Junk:
48406002_1917271045037998_2354968557382533120_n.jpg


Next job is some more painting. All non visible from outside: Inside of doors, rear hatches and inside of bonnet.
Will keep you guys posted!
 
Really really nice work! Thank you for sharing. Nice save on that truck. In the American west with that amount of rust the guys would say scrap it. In middle and east America we call that "normal".

Mmmmmmm....Fritesaus.

Happy winter solstice longer days coming.
 
Winter is over so the work finally goes on!
Rear axles are in! (Left alle was a bit worn and will be replaced when the airlocker is fited)

Guys I need your advice. Shall I put one inch lift blocks between the chassis and body? I already used long anti inversion shackles.
BA4EDD2D-47FC-4C1D-9898-21D1E82B0545.jpeg
764CF80F-A102-4EE6-BD08-068AFC5A75A6.jpeg
I dont want a hardcore 4x4 truck. I want to travel with it mostly!
 
That's a lot of work. Very impressive!

Unless you're planning on big tires, I don't think I'd go with a body lift. The OME 2.5 lift gives you plenty of room for up to 33" tires
 

Users who are viewing this thread

Back
Top Bottom