First Time Pig "Build"

This site may earn a commission from merchant affiliate
links, including eBay, Amazon, Skimlinks, and others.

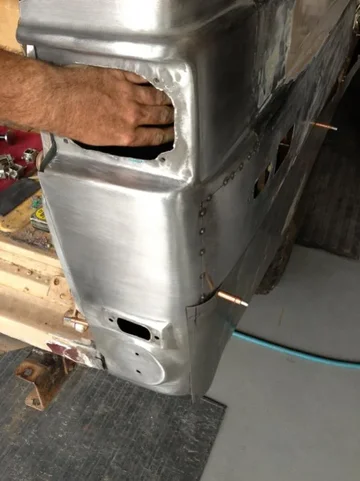
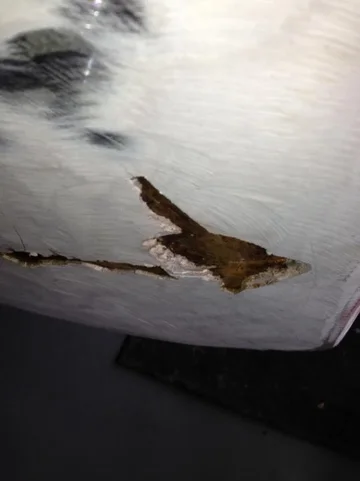
You have to admit, it's neat to see the inside of a pig. No wonder they rust out so bad.

There are areas prone to pooling, it appears, but maybe only after other seams fail.

I know the bill is adding up, but at least you'll have a really nice body to work with.

Can't say that the path of getting to the starting point was most efficient or effective, but it will be done right.

I feel sorry for the old man that runs into the back you at the parking lot! :)

Assuming you mean because I will come unglued :) and I do, too.

Thinking of a way to reinforce an airbag rigged bumper to force and impact away from the now precious rear corners.
 
Awfully shiny....

image-2062444903.jpg

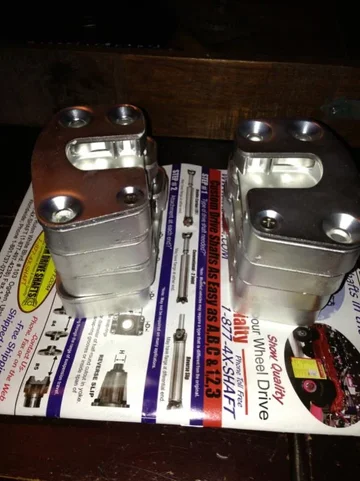
Now to find new fasteners that work.

image-2062444903.jpg
 
Chris,

Do those have the cad. silver ( clear ) on them. Look good.

I'm not having any luck finding the right taper for those bolts either.

Maybe use your new ones and put a few drops of Loctite- Blue on them, instead of the lock washer.
 
Chris,

Do those have the cad. silver ( clear ) on them.

Yes, and as shiny as chrome.

I'm not having any luck finding the right taper for those bolts either.

I've found nothing closer than what I have. I've got specs dimensioned somewhere, that I'll post if anyone can offer anything up.

Maybe use your new ones and put a few drops of Loctite- Blue on them, instead of the lock washer.

Had considered that.

Have considered rehabilitating the heads of the OEs, too. Unsure the viability, but probably next.
 
Thinking the washers are the issue with the head protruding.


image-3589900301.jpg

There's some difference in the thickness, but not sure how much compression may alter.


image-3910589700.jpg


image-243398566.jpg


Going to try installing before claiming a complete fail.

The heads are significantly smaller, but the bevel (??) is the same pitch, just shorter.... :confused:

Anyhow, picking the best (12) OEs I have and going to rehabilitate for this Pig, reserving the option to use the replacements.

Probably try these on the 76, if/when/as needed.

I learned this much about this experience, going to take blasted parts, not utilize their blasting services, since they're rate is double and efficiency half that of the normal blaster I use.

Now, what to do about these things....


image-3198017869.jpg

Have (6) in bad condition, need (12) good ones.

Any experience on these?

image-3589900301.jpg


image-3198017869.jpg


image-3910589700.jpg


image-243398566.jpg
 
Last edited:
Chris,

Those rubber bumpers are going to be hard to find. I've got four good and four not so good ones. Of the four not so good, the little cap is ripped, so thinking a guy could glue and screw them in a pinch.

They clean up nice with some soap.
 
Wow cant believe i am just now getting to this thread. Glad to see this little piggie be saved! Once the body is done being frankensteined, what are the plans (at this point) for frame and drivetrain? Kinda feel at this point you're already balls deep, may as well blast the frame and rebuild..... Everything....

Good luck!
 
Kinda feel at this point you're already balls deep, may as well blast the frame and rebuild..... Everything....

Ahhh.....fond memories of the days I was ONLY balls deep.

Everything mechanical, except what resides in the F and the 72 OE AC unit has been sourced, if it's available, be it OE or suitable alternative.

Once the metal work is done, the mechanical will begin, including rebuilding the F and all other systems. Body will come off shortly after and torn down to frame to coat, then begin the reassembly process, paint, then the devilish details that may consume another years time finishing up.

Goals and timeline changed after acquiring the 76, since I'll have a driving Pig, allowing as much time as necessary to restore the 72 to OE glory, with added rust prevention measures to ensure another 41 years of existence.

:popcorn:
 
Not sure what's up with this app.

Anyhow, both rear corners were smashed at some point, as was the tailgate, which explains why it isn't a 72 gate.

Plan is to swap to DS, start at the front and come back to the corner, replicate process on drivers, to the point it is, brace more, remove cargo panels first, swap for a minty reworked replacement from 71, then tie the inners in to the outers, replacing wheel wells at the same time.

I have no choice but to continue the course at this point, essentially replacing all of the shell, except the firewall and forward pillars.

At least the hood, inner fronts, need very little attention and the lower fronts are new.
 
Chris, I know you have a lot of time and $$$ invested in the PIG. At least its in the right hands. Keep your Eye focused on the end result. WHAT NO GREEN HAIR PICS W.T.F.:)

Thanks Bob.
 
MIA today, so no ninja shots.

I'm in pretty deep, to say the least, so goal is to do it right, regardless of time or bankruptcy.

The mechanical is all here for the 72 and 76, to add to the fray, including engine bits for the 76.

Gonna be fun if I can ever get started.
 
I am now in the process of rebuilding the F155. Have you tried sourcing any engine parts for the F1? I have exhausted many resources with only a handful of parts to show for it. I am just wondering if you have something up your sleeve....
 
Mundane, but as is life at times.

One rear heater motor working like a charm and, empowered, tore into the second.

Removed board, but couldn't remove armature, for whatever reason, so lubed a bit and finally freed it to spin effortlessly.

Freed the springs for the brushes, reassembled and nada, so removed board again.

Flattened the ends of the brushes (in 41 years, so little was used, that decided no point in replacing) with a Dremel wheel, reassemble.

Spins free, good contact, all smiles, until I put juice to it and it locks it in place.

After a few "hmmm"s, pull the spacers that hold the board in place and replicate procedure and can see the armature move to one side, locking it in place.

Not the sharpest tool, but all is connected properly and best of my knowledge, I have continuity, as I have magnetism, but can't figure out where I've erred.

The wires were marked before disassembly and they're reinstalled exactly as the working motor.

Any clues?
 
Maybe its broke....
 

Users who are viewing this thread

Back
Top Bottom