I was approached by Mark Hawley from MetalTech about doing a test and evaluation on their new swingout bumper for the FJ Cruiser, the Red Eye II. Through FaceTime I was given a tour of the shop, and a sneak peak of the new bumper as installed on Mark’s orange FJ.
Because I had been contemplating on getting a swingout, I quickly made arrangements and was able to work out all the details with Mark. The prototype was removed from Mark’s truck in Oregon, and shipped to me in Florida. It arrived on a Friday afternoon, just in time for a weekend with no plans other than “Install the Red Eye II”.
The installation went very smooth, and all the required hardware was provided in sealed bags. I familiarized myself with the installation procedures of the Red Eye I, as the II also bolts to the frame-rails and uses the 4 long 3/8″ bolts that provide a clamping force onto the frame. Additionally, the bumper bolts to the rear frame crossmember to the OEM hitch bolt provisions. No alignment necessary, simply bolt it on and you’re done.
The thing I had going for me, was the fact I had a MetalTech tube bumper on my truck, so very little additional plastic trimming was needed. Trimming the plastic is easy, just cut a little bit at a time.
MetalTech addressed the two biggest complaints about the Red Eye I with this one: The rear exposed frame and the rear-door link.
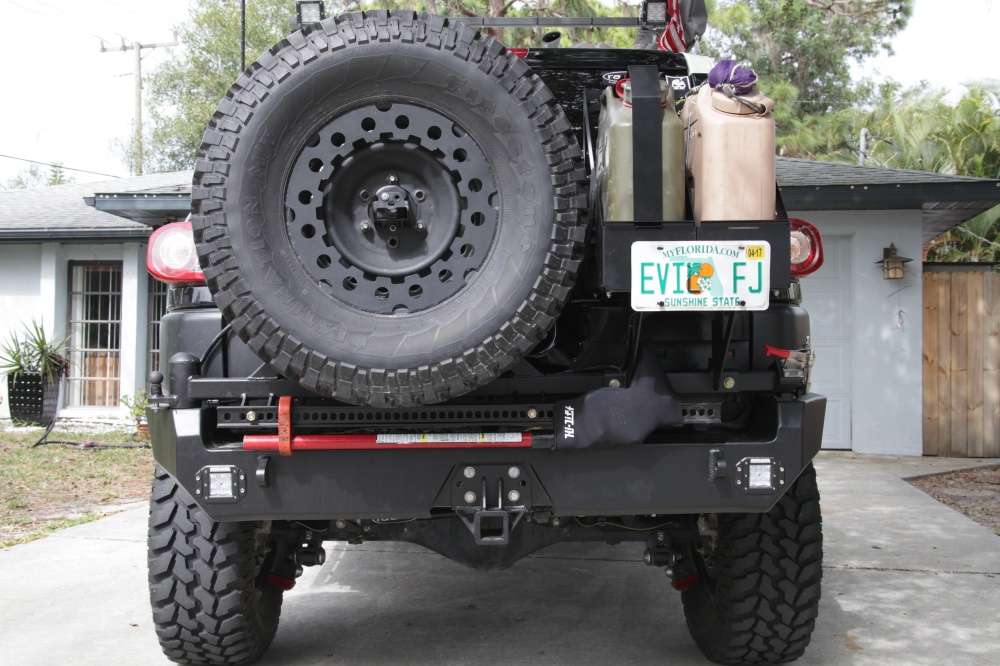
The Red Eye II is now a 1 piece bumper, leaving no frame exposed. While some like that look of the exposed frame, most don’t.
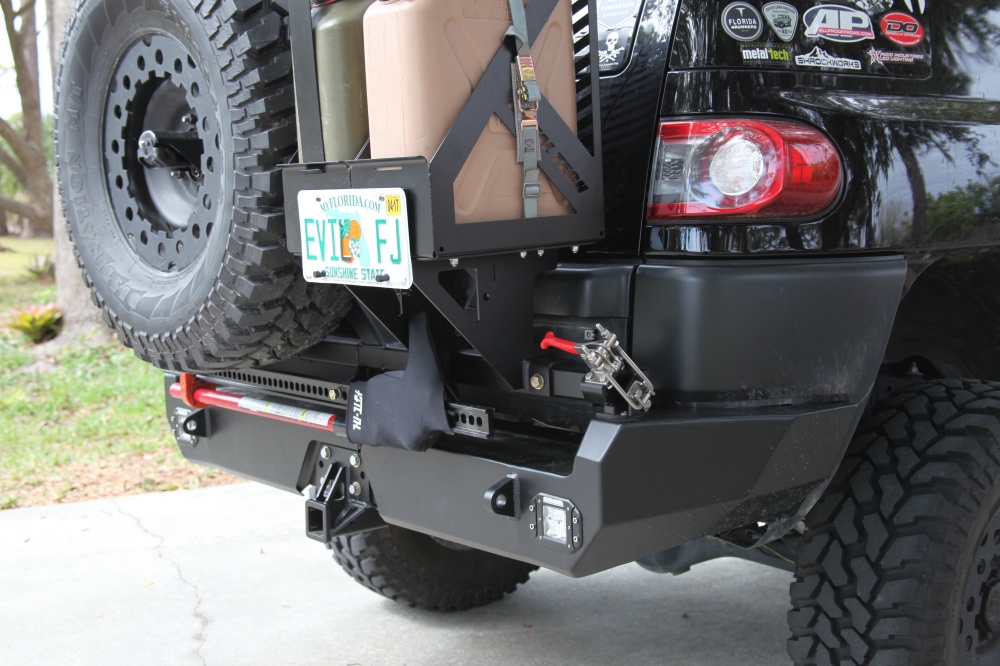
The swingout arm has a big stainless steel over-center latch on the passenger side of the vehicle, and a spring loaded pin on the driver side, which latches the arm in the closed and open position, and the arm can be opened and closed independently from the door.
While the door-link is not included, it is an option, though I can’t see why anyone would want it. “Timing” the arm with the door on the Red Eye I, to both be in a position where they can be latched can prove challenging, and the door is essentially attached to the arm, so all the weight and momentum of the arm swinging open is still absorbed by the door and its gas strut. The Red Eye II has it’s own gas strut that does a great job opening the arm.
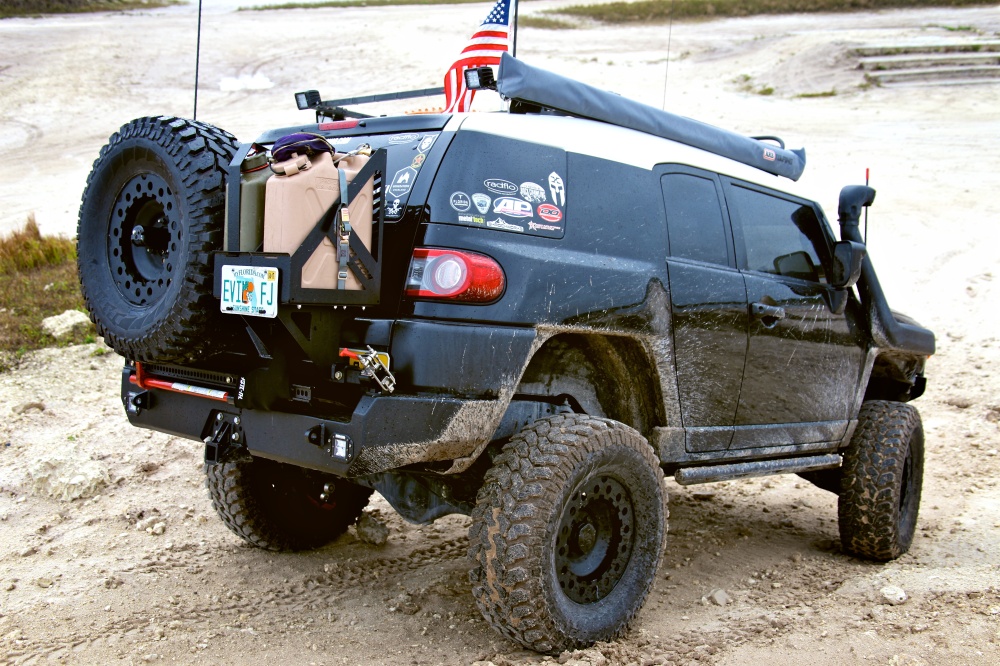
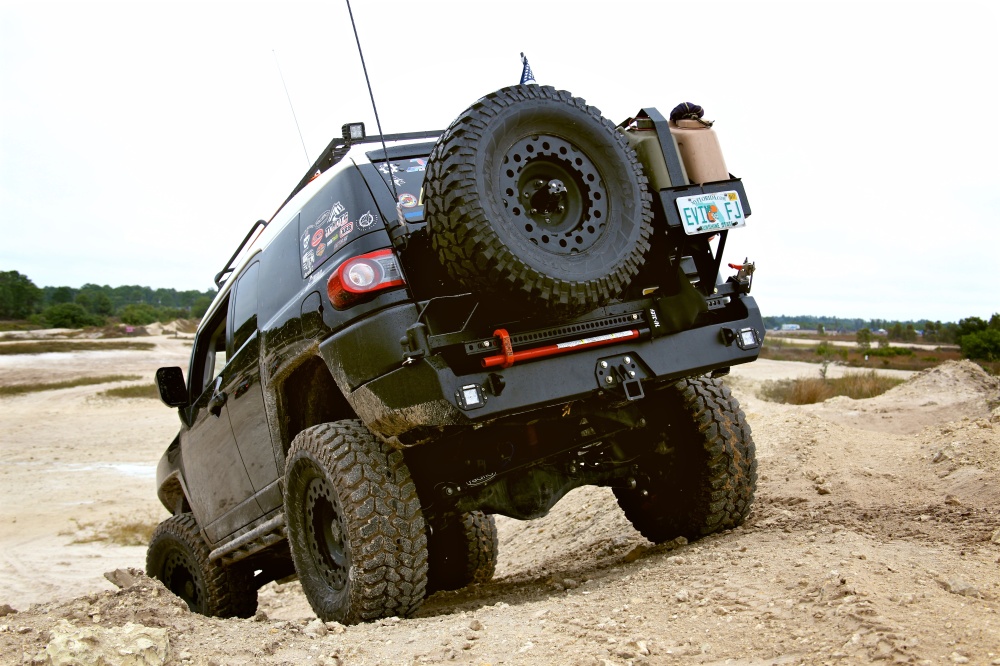
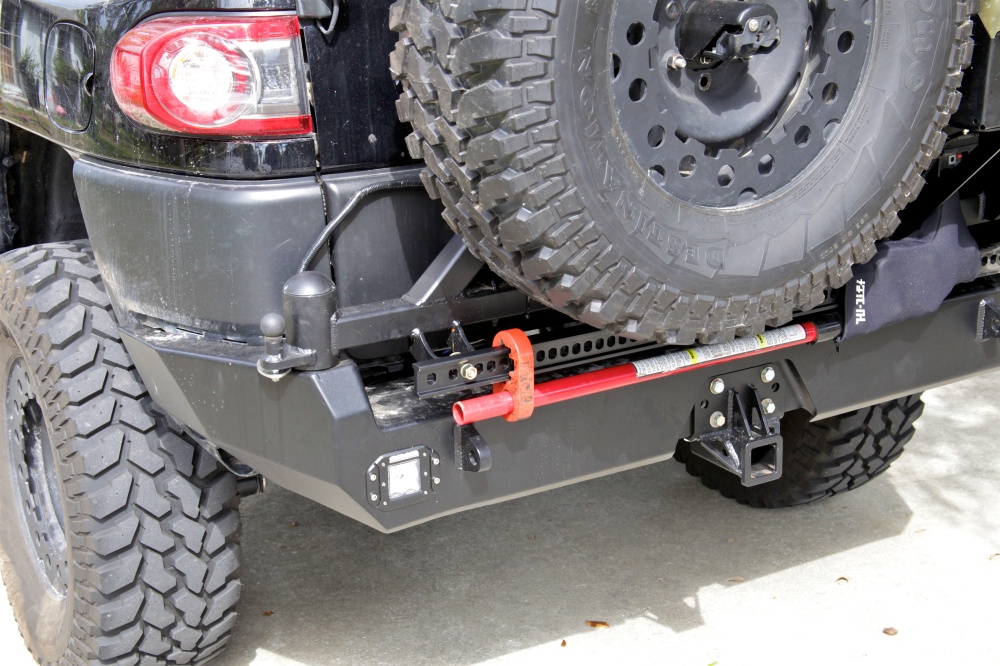
Once the bumper was installed, and the arm was attached with all the accessories I received with it, I was very impressed with the overall product. It’s a great looking bumper, very well made and finished. It becomes apparent from looking at the internals of the bumper that Mark and his team have spent countless hours designing the system to be as robust as it is. It easily handles the weight of a 35″ tire on a steel wheel with steel Rock Rings welded in place, as well as dual Scepter MFC or MWC cans and a Hi-Lift jack.
In the weeks I’ve been running it, I’ve quickly grown used to having to open the swing arm before the door, I’m happy I finally mitigated the issues that can develop from that big heavy spare. Plus, compared to having dual MFCs and a Hi-Lift on the roof as I had before, the truck is a bit less “tippy”.
Head on over to MetalTech 4×4, and talk to Mark or his team about this awesome bumper.
As with most things MetalTech, it’s offered in multiple “stages”, based on options.
Few more pictures and some install tips on my website, Evil FJ
Because I had been contemplating on getting a swingout, I quickly made arrangements and was able to work out all the details with Mark. The prototype was removed from Mark’s truck in Oregon, and shipped to me in Florida. It arrived on a Friday afternoon, just in time for a weekend with no plans other than “Install the Red Eye II”.
The installation went very smooth, and all the required hardware was provided in sealed bags. I familiarized myself with the installation procedures of the Red Eye I, as the II also bolts to the frame-rails and uses the 4 long 3/8″ bolts that provide a clamping force onto the frame. Additionally, the bumper bolts to the rear frame crossmember to the OEM hitch bolt provisions. No alignment necessary, simply bolt it on and you’re done.
The thing I had going for me, was the fact I had a MetalTech tube bumper on my truck, so very little additional plastic trimming was needed. Trimming the plastic is easy, just cut a little bit at a time.
MetalTech addressed the two biggest complaints about the Red Eye I with this one: The rear exposed frame and the rear-door link.
The Red Eye II is now a 1 piece bumper, leaving no frame exposed. While some like that look of the exposed frame, most don’t.
The swingout arm has a big stainless steel over-center latch on the passenger side of the vehicle, and a spring loaded pin on the driver side, which latches the arm in the closed and open position, and the arm can be opened and closed independently from the door.
While the door-link is not included, it is an option, though I can’t see why anyone would want it. “Timing” the arm with the door on the Red Eye I, to both be in a position where they can be latched can prove challenging, and the door is essentially attached to the arm, so all the weight and momentum of the arm swinging open is still absorbed by the door and its gas strut. The Red Eye II has it’s own gas strut that does a great job opening the arm.
Once the bumper was installed, and the arm was attached with all the accessories I received with it, I was very impressed with the overall product. It’s a great looking bumper, very well made and finished. It becomes apparent from looking at the internals of the bumper that Mark and his team have spent countless hours designing the system to be as robust as it is. It easily handles the weight of a 35″ tire on a steel wheel with steel Rock Rings welded in place, as well as dual Scepter MFC or MWC cans and a Hi-Lift jack.
In the weeks I’ve been running it, I’ve quickly grown used to having to open the swing arm before the door, I’m happy I finally mitigated the issues that can develop from that big heavy spare. Plus, compared to having dual MFCs and a Hi-Lift on the roof as I had before, the truck is a bit less “tippy”.
Head on over to MetalTech 4×4, and talk to Mark or his team about this awesome bumper.
As with most things MetalTech, it’s offered in multiple “stages”, based on options.
Few more pictures and some install tips on my website, Evil FJ

")