Dads 1971 FJ40 Swap

This site may earn a commission from merchant affiliate
links, including eBay, Amazon, Skimlinks, and others.

JT, you're doing some great work. Keep it up.

Subscribed!
 
Thanks Austin, if you are ever traveling through this way, feel free to stop in, have a beer and talk cruisers :)
 
Thanks Austin, if you are ever traveling through this way, feel free to stop in, have a beer and talk cruisers :)
Thumbs up! I'll shoot you a PM when I'm in the area.
 
Took a break from working on the FJ40 - hard finding time with a 6 month old :biggrin:

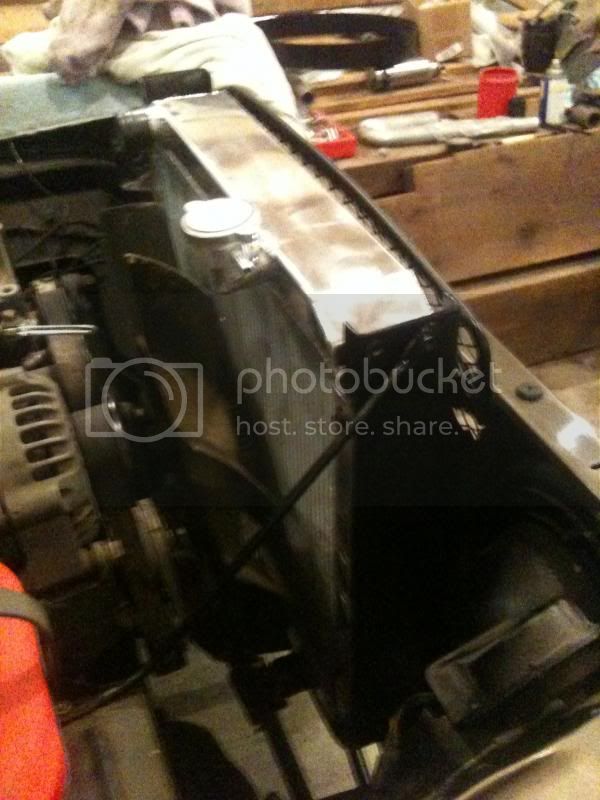
Anyway, the radiator is finally in and done, had to lower it in the factory mount and move the mount over to the passenger side, as well as forward to clear the fan and center it. Overall I think it came out well.
Radiatordone1_zps9a39e0e3.jpg

Radiatordone2_zpsf57f4a09.jpg


Next up is making a mount for the computer and hooking the wiring harness up.
 
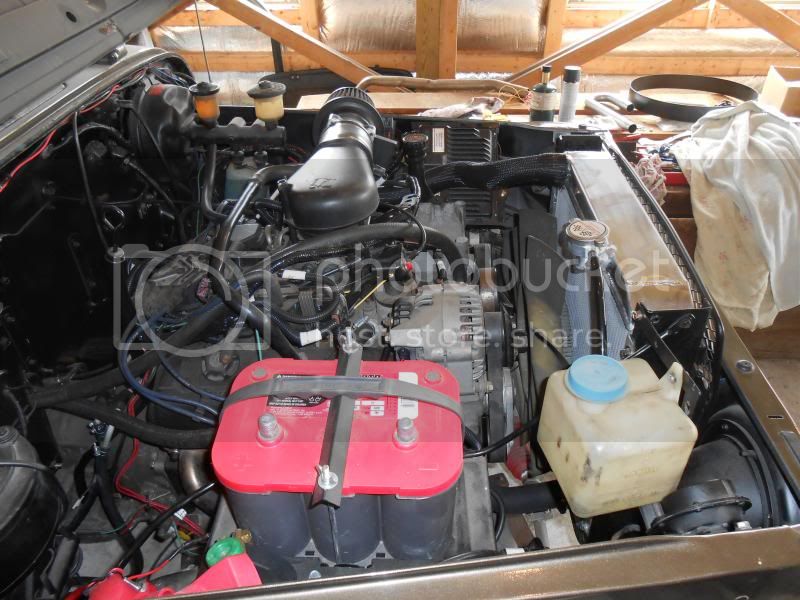
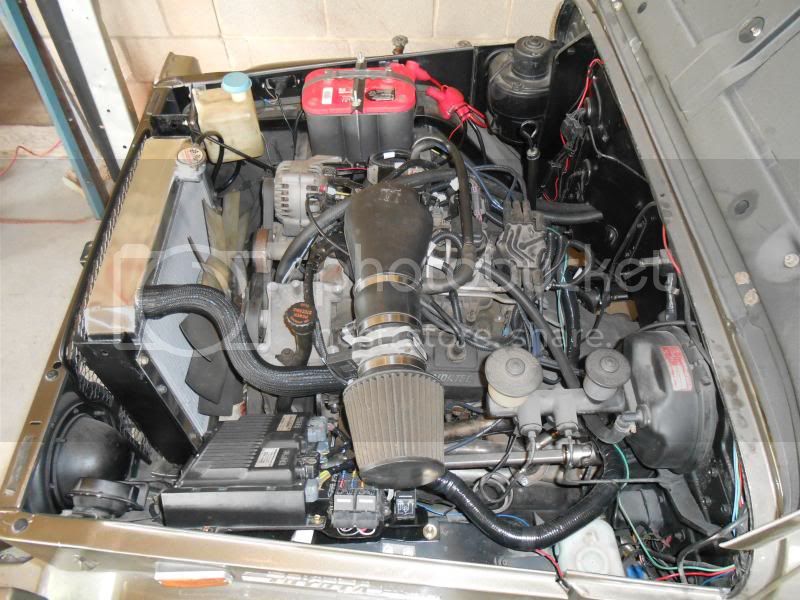
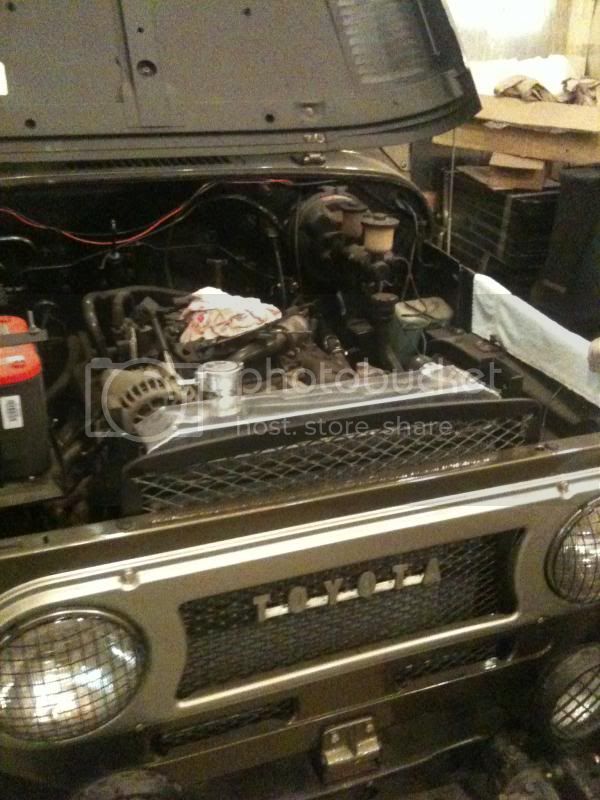
Well I have been knocking things out on this project over the last few weeks. Only a few things left to do, which includes building the rear driveshaft, installing the transmission cooler and lines, putting hte seats back in, and filling all of the fluids. Here are a few pictures of the completed engine compartment.
Finishedenginecompartment1_zpsc3e2bb88.jpg

Finishedenginecompartment3_zpsdc0b9b3b.jpg

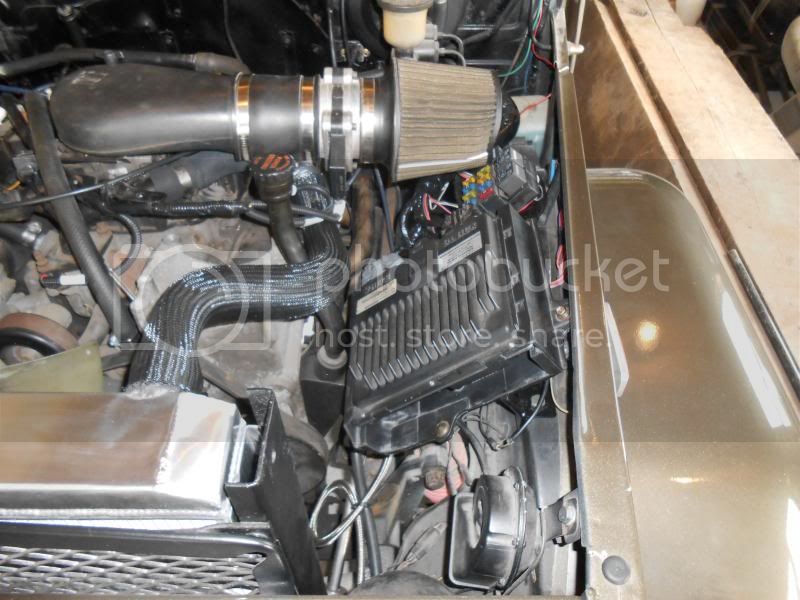
Finishedenginecompartment4_zps6888402c.jpg

Made a bracket that attaches to the inner fender to hold the ECU, fuse block, and fuel pump relay.
Finishedenginecompartment2_zps35ca8fe0.jpg

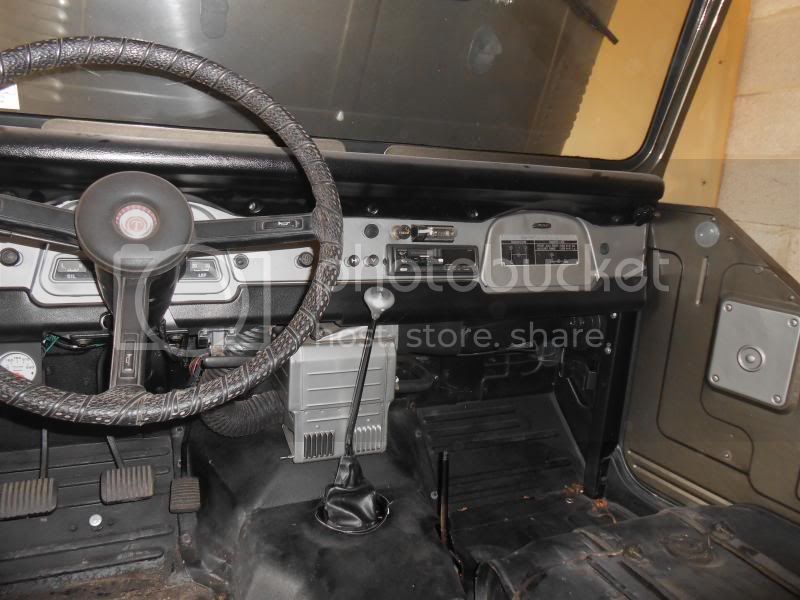
Here are the finished shifters, boots still need wrapped up.
Shifters_zps16316051.jpg

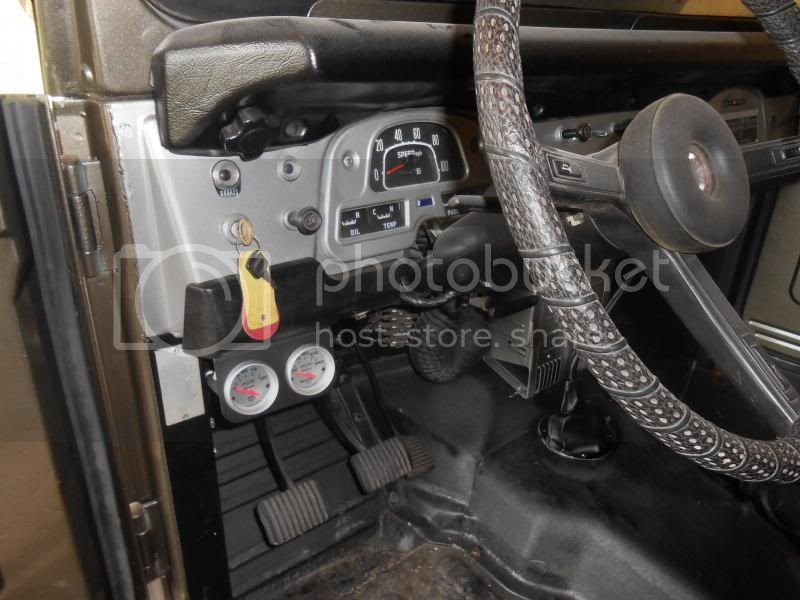
And here is where the auxillary engine coolant temp and oil pressure guages got installed.
Guages_zps2432b7c1.jpg
 
Got some time today so we filled all of the fluids. Everything went as we planned and bled the steering. Went out to get more gas and came back to small puddle of coolant on the floor. Checked all of the hose and nothing. Coolant was dripping off the crank pulley, which confused me until I looked a little further up and noticed a hole in the bottom of the water pump that was slowly dripping. Shoved a golf tee in it to stop it and did some research since I had never seen it before. Turns out it is a weep hole that indicates when the water pump input shaft seal is going bad. Not sure if it was an issue before we bought the motor or if it developed from sitting the last few years.

Going to pick up a new water pump, but hold off on installing it until we fire it up to make sure there aren't other problems. Hope to fire it up tomorrow after the battery is done charging. Not looking forward to tearing the radiator out, but no room to pull the water pump otherwise. So close.
 
Here you go. It is tight and I needed a heim joint support to get the shaft around the exhaust.
image.webp

image.webp
 
Looks like a fun build. Was the ecu mounted in the engine bay in the donor Chevy? Looks far more robust than the typical behind the glove box Toyota ecu, just thinking about heat.

Keep up the good work.

Matt
 
Thanks. Yes, the Chevy ECU is mounted in the engine bay from the factory. It is significantly heavier as well.
 
Things get tight quickly trying to fit the exhaust around the steering and frame while keeping the transfer case out of the frame as well. If I were to do it again, I would have set the motor back closer to the firewall.
 
Doing a th350 with a deep oil pan on my wife’s 40. Front drive shaft hits pan. Planning on buying the smaller AA flange and yoke to put a 2” tube. Is this your plan? I tried to get driveshaft shops in Dallas to modify the Toyota drive shaft to get me a thinner slip yoke along the oil pan but they wimped out. All seem to say they need to build me a new 2” drive shaft. With the longer AA adaptor, the Toyota yokes/ujoints clear the oil pain at the tcase end and would love to run them.
 
Sounds like the same setup that I have and I also have the Advance Adapters front driveshaft kit to build the front shaft, just haven’t done it yet since I wanted to get it running and driving first. It is a nice lots and should do the trick.
 
Found a place in Dallas that will keep my Toyota ends. They will turn down the 2-2.75” transition to 2” and add 2” tube (1.2 DOM).
 
Nice, I don’t trust any of the shops around here to do a decent job for the prices they charge. I made the rear and plan on doing the same with the front. If you cut the Toyota shafts right, they nearly self realign.
 
Awesome build! I'm getting ready to put a TH350 in as well and was looking at the AA crossmember when I found your build. Your mods to their adapter look awesome and it seems like it would be a pretty easy thing to make out of some square tube stock. What're your thoughts after seeing the AA one and needing to mod it?
 
Thanks, been driving it a bit, but trying to figure out a mis that the motor has. The crossmember works well and gave me a good base to work with, but it would have been simple to build myself and much cheaper. If you want any other pictures or measurements let me know.
 
Thanks, been driving it a bit, but trying to figure out a mis that the motor has. The crossmember works well and gave me a good base to work with, but it would have been simple to build myself and much cheaper. If you want any other pictures or measurements let me know.

Hopefully you figure out the miss pretty quick.

I was looking around some more and found this version from Proffitt’s Landcruisers and will be going this route. Super simple, low profile, and cheap and easy to make 😎

9B959B00-8EBE-49CD-8B68-62A26B3BF8FC.webp
 

Users who are viewing this thread

Back
Top Bottom