
Thanks. O'reilly had it in stock.
It sure would be nice if @NLXTACY would offer an all inclusive hose and clamp package for one stop shopping.
Already in progress
")
Follow along with the video below to see how to install our site as a web app on your home screen.
Note: This feature may not be available in some browsers.
This site may earn a commission from merchant affiliate
links, including eBay, Amazon, Skimlinks, and others.
Thanks. O'reilly had it in stock.
It sure would be nice if @NLXTACY would offer an all inclusive hose and clamp package for one stop shopping.
I'm having trouble with what you mean by "break the hard line". Can you explain or show any pictures of what you mean?Got the new PHH in! I loosened the transmission dipstick, but didn't remove it. For me, the most difficult parts were cutting the old hose and breaking the hard line. Breaking the hard line and reusing is definitely the way to go though. Once it's out, reinstalling is cake!
Lessons learned: Break and reuse the hard line...there is NO reason for the "workaround". When attempting to break the hard line, there is only enough room to wiggle back and fourth at first. Remember that you're trying to break something and get it a bit past the intake plenum and keep at it! It WILL break!
View attachment 1432714
View attachment 1423643
View attachment 1423644
This is the hard line...you're actually breaking the the lower bolt tab, not the entire line. Once it's unbolted at the top and disconnected from the heater valve, you will be able to wiggle/move it back and forth until the tab breaks off.I'm having trouble with what you mean by "break the hard line". Can you explain or show any pictures of what you mean?
You only need the top bolt.How do you mount it back on?
Or, you can throw that metal pipe away and install a continuous section of hose from PHH outlet at the head up to the heater valve. If you are interested, search “PHH work around”. I’m not the only one who has done this and @NLXTACY can hook you up with info and the very simple parts you need to do this.How do you mount it back on?
I tried that for 40 minutes yesterday before giving up and just installing while in the rig.This is the hard line...you're actually breaking the the lower bolt tab, not the entire line. Once it's unbolted at the top and disconnected from the heater valve, you will be able to wiggle/move it back and forth until the tab breaks off.
View attachment 1790655
Never understood why one wouldn't reuse the hard line. Once it's off, it is super easy to attach the new PHH and slide it on. Now that the lower bolt tab is broken, much easier to replace in 20 years when needed again.Or, you can throw that metal pipe away and install a continuous section of hose from PHH outlet at the head up to the heater valve. If you are interested, search “PHH work around”. I’m not the only one who has done this and @NLXTACY can hook you up with info and the very simple parts you need to do this.
By doing this, you eliminate two hose clamps thus simplifying the set up with less possibilities for leaks and less hassle if/when you have to address this tube now in the future.
Radiator In! Debated here and there about which rad to get. Sought some advice from a forum member and ordered one of the higher quality aftermarket radiators (won't mention which one as others run em and like them), but I got the aftermarket halfway installed and wasn't happy with it. I pulled it and ordered an OEM. Mine was original to the truck and showed no signs of failure after 23 years.
To me, the 3 core brass OEM just looked and felt much higher quality...the packaging was even waaay better. I believe the OEM is about 5 lbs. heavier FWIW. Lessons learned: If you're keeping the truck and can afford the OEM...just do it! Also...watch that the cooler lines don't get trapped under the new rad. Be very careful of the overflow and bypass nipples. When installing the fan and shroud, place a piece of cardboard in between the rad and fan or you may ruin the cooling fins.
View attachment 1432823
View attachment 1432826 View attachment 1432825
This whole job was pretty involved for me. I would say I'm awrench and after all of this I earned my 3rd
Edit for additional thoughts:
I collected many of the parts through the classifieds over the past couple years. The water pump, belts, and fan clutch (even though I re-sold it) and got them at a discount. Purchased the rad, PHH, t-stat, hoses, and heater valve new. Can't say how much $$ I have into this project, but it adds up! I'm really glad it's all done though. Having nearly the entire cooling system refreshed was causing me to forgo some summer trips in the past because I didn't want a failure and knew it needed to be done. No more anxiety and my parts box is empty!
I was in the same boat as you. So I had my wife try it and with her smaller arms she had enough space to wiggle it more than I could, breaking it off within 5 minutes.Just did my PHH yesterday and I couldn't get the tab to break off. Used every method of wiggling, bashing, yanking, bending I could think of, but it wouldn't let go. I also couldn't get a wrench on the lower bolt because the tube itself was in the way. The metal tube was too mangled from my attempt to kill it to be used. So I did the PHH bypass (which I planned to do anyway), and left the sorry busted little tube in place. Ghetto, but I wasn't getting anywhere with it and had to call it quits at some point.
The worst part: it turns out my PHH was in excellent condition. I really wish I had just left it alone. But I had the starter out, so I figured what the heck.
Not that this information will help you now, but it may help another Mud member when they go to do this job. Craftsman tools use to make a inline hacksaw, seeing as the saw blade is held inline with the handle it makes the saw very compact, so it works great to saw off that tab you had such problems with. The fact is, this is the very tool i used when i replaced my PHH. Below is a photo of that saw, Craftsman tools discontinued this tool years ago but if you search Ebay you can still find used ones for sale, the Craftsman part number is 35481.Just did my PHH yesterday and I couldn't get the tab to break off. Used every method of wiggling, bashing, yanking, bending I could think of, but it wouldn't let go. I also couldn't get a wrench on the lower bolt because the tube itself was in the way. The metal tube was too mangled from my attempt to kill it to be used. So I did the PHH bypass (which I planned to do anyway), and left the sorry busted little tube in place. Ghetto, but I wasn't getting anywhere with it and had to call it quits at some point.
The worst part: it turns out my PHH was in excellent condition. I really wish I had just left it alone. But I had the starter out, so I figured what the heck.
I'm trying to replace the heater(coolant) hose just under throttle body (PHH neighbor) which part no is it above? thanks again..HVAC hoses:
87245-60340: 1
87245-60350: 1
87245-60480: 1
99556-30100: 4
By-pass hoses:
99555-10200: 1
16264-66021: 1
16267-66020: 1
16261-66040: 1
Main radiator hoses:
16571-66030: 1
16572-66021: 1
16573-66010: 1
Thermostat and gasket:
90916-03117: 1
16346-66020: 1
Orings at outlet by-pass (all three are the same size):
90301-29006: 3
Hoses at firewall attached to rear heater pipes are not services by Toyota. Do as stated above and get some Gates good rubber stuff and be done with it.
Early heater valve: 1991-1994
87240-60140: 1
Later heater valve: 1995-1997
87240-60170: 1
Water pump:
16100-69325: 1 (comes with metal gasket)
2 Core aluminum radiator (1995-1997):
16400-66081: 1
3 Core brass radiator:
16400-66040: 1
These are manufactured by T.Rad (formerly Toyo Radiator). Not Denso, not Koyo.
Radiators are interchangeable.
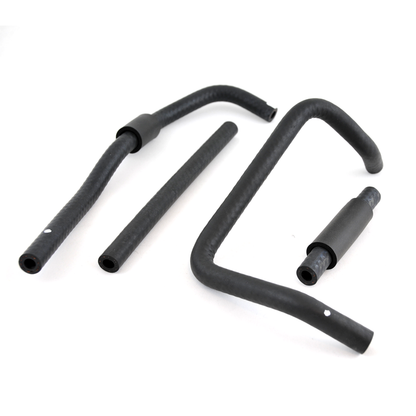
I'm trying to replace the heater(coolant) hose just under throttle body (PHH neighbor) which part no is it above? thanks again.
I'm trying to replace the heater(coolant) hose just under throttle body (PHH neighbor) which part no is it above? thanks again..
JUST what I was looking for this morning, thank you!HVAC hoses:
87245-60340: 1
87245-60350: 1
87245-60480: 1
99556-30100: 4
By-pass hoses:
99555-10200: 1
16264-66021: 1
16267-66020: 1
16261-66040: 1
Main radiator hoses:
16571-66030: 1
16572-66021: 1
16573-66010: 1
Thermostat and gasket:
90916-03117: 1
16346-66020: 1
Orings at outlet by-pass (all three are the same size):
90301-29006: 3
Hoses at firewall attached to rear heater pipes are not services by Toyota. Do as stated above and get some Gates good rubber stuff and be done with it.
Early heater valve: 1991-1994
87240-60140: 1
Later heater valve: 1995-1997
87240-60170: 1
Water pump:
16100-69325: 1 (comes with metal gasket)
2 Core aluminum radiator (1995-1997):
16400-66081: 1
3 Core brass radiator:
16400-66040: 1
These are manufactured by T.Rad (formerly Toyo Radiator). Not Denso, not Koyo.
Radiators are interchangeable.