Canadian BJ42

This site may earn a commission from merchant affiliate
links, including eBay, Amazon, Skimlinks, and others.

The issue of the mechanism lacking the centrifugal lock arm is this - that belt will travel a long ways before the speed lock stops it , generally about 6" past the steering wheel . The centrifugal lock, in any sort of impact will lock that belt instantly and make a huge difference. It's not just for "upside down" or on an incline , although I have been left hanging by more than one....
Sarge
 
Alternator

Now to explain where I'm at with the alternator.

I took it out of the truck because it looked disgusting.

IMG_0677.jpg


I took a razor blade and scrapped a small bit off just to show how thick it should actually be.

IMG_0678.jpg


IMG_0679.jpg

(that't not a fancy role of chocolate haha)

Anyway, I impacted the front nut off and then pried the pulley and other bits off. Turning it over, I unbolted the vacuum pump and took it and the "paddle wheel" out. Now that they aren't holding everything together I undid all the outer screws and gave it a tap then pulled the two halves apart.

IMG_0684.jpg


IMG_0682.jpg


IMG_0685.jpg

(The vacuum pump is still on in this picture but it was only for transporting it)

IMG_0698.jpg

(Not the greatest picture, that's the stator with the brush holder removed)

The slip rings are in good condition but the brushes are almost completely warn out. The bearing was a bit scratchy so I pressed it out using a socket on the inner race and a vice. I don't think I have pictures of the bearing removal but I'll remember to take more when I reassemble everything.

That's the quick summing up of the alternators removal till now. It's not very detailed and doesn't have many pictures but I'll take more as I said.
 
The issue of the mechanism lacking the centrifugal lock arm is this - that belt will travel a long ways before the speed lock stops it , generally about 6" past the steering wheel . The centrifugal lock, in any sort of impact will lock that belt instantly and make a huge difference. It's not just for "upside down" or on an incline , although I have been left hanging by more than one....
Sarge

I really should have taken pictures.

The incline locking weight thing was it's own mechanism and the centrifugal lock was another. They each could work independantly except that the centri. lock is apart of the belt winding assembly and the incline weight wasn't.
 
Seat Belts

I now have pictures!

IMG_1861.jpg

So after removing this cover I noticed this weight thing was locking the belt no matter what direction it was sitting.

IMG_1863.jpg


IMG_1864.jpg


I removed the weight and reassembled. Simple as that. Normal tugs will let the seat belt move but a quick pull will lock it.

IMG_1865.jpg

Free
IMG_1866.jpg

Locked


So since I exploded my other seat belt assembly I've been keeping my eye out at work for a seat belt. Since I work at a body shop the only way I could have got these would be if they were replaced. A few days of looking at I now have a matching set from a Acura MDX. The MDX had a hard front hit which set off the air bags. Seat belts in newer vehicles have a permanent lock once the air bags deploy, my mission was to reverse this.

IMG_1867.jpg


IMG_1872.jpg

Similar Style to the Land Cruiser's, except the weight isn't the problem

IMG_1874.jpg

On the other side I unscrewed the spring pack (this one has a cover to prevent accidents like mine :)) With it out of the way I then unbolted the torx screws underneath.

IMG_1876.jpg

Once I unscrewed them a bunch of metal balls fell out.

(Forgot actual pictures so my wedding ring will fill in)
The seat belt could spin freely when those balls kept that gear inline.
IMG_1878.jpg


When the air bags went off the balls moved up the tube and threw the gear off center and locked the belt.
IMG_1879.jpg


I removed the gear and the balls and it works perfect now. No need for my Cruisers original belt I guess :D
 
Here is some info I found here BJ Series Land Cruisers: Specs & Stats
I'll be attempting this tomorrow.

ALTERNATOR BRUSHES
1. Remove the brush holder cover by removing the two nuts on the top of the alternator.
2. How you remove the holder depends on whether you have an IC (internal) regulator or not. Either way, there's at least one screw holding things in, and without the IC there's a nut as well. To completely free the IC, you have a couple wires, and a couple screws to remove.
3. Once the holder is out, measure the exposed brush length. Standard exposed length is 20.0 mm (for new brushes), and Minimum exposed length is 5.5 mm. If shorter than minimum, replace the brushes.
4. Use a soldering iron to melt the solder and remove the brush and spring. The solder might be quite thick, so just hold your iron steady for a minute. Be careful that the brush doesn't spring out, or you could lose the spring.
5. Insert the brush wire through the spring, and install the brush in the holder. Solder the wire to the holder, making sure that you have an exposed brush length of at least 20 mm.
alternator.gif

I just measured and I'm at 3mm on the edges and 2mm in the middle. I would have had a short first drive when I was finished my project haha.
alternator.gif
 
Last edited:
Alternator Brushes

So I've finally made time to solder in my brushes.
(I forgot my camera again so I apologize for the quality of my phone's pictures)


http://i628.photobucket.com/albums/uu10/Shad0wTr0n/Alternator/BrushesBefore.jpg
This is what height they're at (around 2mm) I wonder how much further they would have taken me.


http://i628.photobucket.com/albums/uu10/Shad0wTr0n/Alternator/BrushCompare.jpg
A comparison of how much they were worn down after 350000kms (assuming the alternator is original).


http://i628.photobucket.com/albums/uu10/Shad0wTr0n/Alternator/Unsoldered.jpg
So I unsoldered the brushes according to the diagram I posted last.


I got a bit creative for threading the new brushes in. I broke off a bristle from a broom and taped it to the end of the wire and threaded it through the spring and brush holder.


http://i628.photobucket.com/albums/uu10/Shad0wTr0n/Alternator/ClippedEnds.jpg
After soldering the ends I trimmed them down.


http://i628.photobucket.com/albums/uu10/Shad0wTr0n/Alternator/FinalBrush.jpg
Here is the final product.


I wasn't really looking forward to this part of the alternator project because I thought treading the brushes would be a nightmare. When I was done and cleaned up I looked at the clock and it took me all of 24 minutes and some of that was the iron warming up.

If anyone is showing signs of an alternator in need of brushes and the rest is assumed to be alright, this would be a simple process of ordering the brushes (around $15 from the dealership), removing the alternator, removing one cover for the brush holder, following the steps above, and then reassembly.

I've ordered a bearing and should be picking it up this week. If i get the case painted I should have the alternator done for next weekend!!
 
I removed my front leaf spring packs today. This week I'll be looking into prices for lengthening my drive shafts. I had an idea for my steering that I'll also be looking into. Other then that and getting service manuals for everything (chassis, 3B, 5speed transmission), so that I actually do everything properly, nothing has changed much.
 
Quick update, I got my turbo and flanges to make my exhaust and route my intercooler. That is all.
 
Hi,
u have been busy.............
r u making ur own manifold,l have some turbo flanges and head flanges already cutted out u can have.
Simon
 
Thanks Simon, I'll give you a call this week.

I plan on making my whole exhaust. Haven't decided if I'll TIG it and do stainless steel or just MIG mild steel. These things keep moving farther back on my list of things to do...

Went to go drop off my turbo today and found that the barn has nearly separated down the middle. The beams are holding strong around my truck so I'll have time to move it. I'm hoping to rig up some temporary "leafs" since mine aren't on and at least push it out into the field is I can't get another place to work on it arranged tomorrow. Hopefully it doesn't get crushed over night.
 
Long time without an update.

So, the alternator case is painted but I now have a paint plan for my engine bay so it's on hold for now.

I purchased some 18 gauge metal and I've started making all my body panels (Wheel wells, quarters, rear floor patches, floor pans, fender patches etc). Forgot to bring my welding tank out so they'll sit until next week.

That's all!!
 
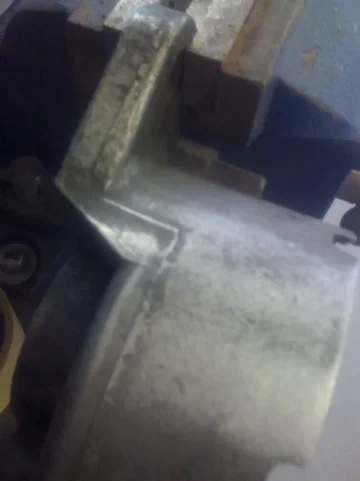
I ground down the joints on the alternator case where it was originally put together:

image-4115157656.webp

I sprayed black epoxy primer on the parts:
photo.jpg


photo1.jpg


photo2.jpg


Now it's all black:

photo5.jpg


photo3.jpg


photo4.jpg

image-4115157656.webp
 
Last edited:
Installed the alternator bearing. Here are all the parts:

photo6.jpg


And dropped in:

photo7.jpg


photo8.jpg
 
Last edited:
I finished cutting the quarters today:

photo9.jpg


photo10.jpg


photo11.jpg


Because my DD is a civic hatch I had to have all my panels cut to fit in it for transporting. That's why I had to make them in two pieces.

I'm realizing that I should have cut my floor pieces then my wheel wells THEN my quarters. I could have welded each one in after I finished cutting. I didn't though so I guess I'll be doing a lot of welding when I get all the panels cut :)
 
Last edited:


I was so excited to FINALLY put the alternator back together I ended up forgetting all the bolts at work. Figures. This is what it will look like along with the vacuum pump. Haven't decided on what color the pump should be, if there's enough gold already or just commit and go gold. I'll take pictures with an actual camera when it's done.
 
So back in the winter time when I moved the truck into the barn was the first and only time i drove the truck. I started fine smelt like diesel and was all good. It was idling while I moved some stuff around and then it started idling higher and faster so I moved it in and turned it off and didn't think twice about it. Yesterday I was measuring and looking around and saw a dark spot in the grass. I looked above it and saw it was coming off the fuel tank. I smelt it and it was pure gasoline. I drained the tank to find it only have 4 liters of gasoline, not a hint of diesel smell.

That was my weekend. Hope I didn't wreck anything and I hope next weekend I get more done. Happy Canada Day fellow Canadians!!
 
happy canada day...

on the injection pump is a hand primer.. at least on the 60 series 3Bs had them..
cant you open up the the line above the filter that is used to prime the system...

what i am getting at is i would try and get all of that gas out of the system and replace the fuel filter and prime it with some diesel...
 
Hope I didn't wreck anything and I hope next weekend I get more done. Happy Canada Day fellow Canadians!!

I doubt you did any damage.

I think a high percentage of small diesel road vehicles get fed gasoline at some point in their lives.

My BJ40 certainly has.

:beer:
 
I wouldn't think it did damage since diesels are usually bullet proof but I'll be pulling the engine to powder coat the frame. Is there anything I should check or do when I pull it?
 
I wouldn't think it did damage since diesels are usually bullet proof but I'll be pulling the engine to powder coat the frame. Is there anything I should check or do when I pull it?

I'd just prime fresh diesel through the fuel filter and injector pump before next trying to start it.

:beer:
 

Users who are viewing this thread

Back
Top Bottom