ACSD Removal 1HD-T (2 Viewers)

This site may earn a commission from merchant affiliate
links, including eBay, Amazon, Skimlinks, and others.

Wow! What a resource of a store! Thank you for sharing this.
 
Wow! What a resource of a store! Thank you for sharing this.

Here is a picture of one I removed from a customer’s hdj81. Notice how the armature has been eaten away. This type of problem results in an IP that has a bunch of metal shavings in the bottom of the pump. The shavings migrate towards the inlet screen and cause low idle. Some vehicles won’t run altogether, or worse catastrophic pump damage.

11D7B792-7777-4E71-A497-EA9F5AEC0F52.jpeg
 
Last edited:
I see you dont include new bolts in your kit. What is your recommendation on re-using bolts?

Leaking diesel. Going to tackle this project this weekend.
 
I see you dont include new bolts in your kit. What is your recommendation on re-using bolts?

Leaking diesel. Going to tackle this project this weekend.
I've always just reused the old bolts. If you're doing this job this weekend, I advise spraying all the bolts with penetrating oil daily, starting today!
 
Go to a tractor sales and service business. Many use same injection pumps and will have plates. That's where I got mine, from a Mahindra dealer
Got a leaky ASCD. Cannot find a plate! Anybody have any leads, ideas, or a plate and o-ring they'd sell?

Norwood, C
 
I used Toyota parts on this, apparently my 93 could have either two different sizes of o-ring so I bought both.
Came out to $40 and some change picked up from the dealer.

2219317840 - Cover
2219364750 - O-Ring
2261256350 - O-Ring
 
I used Toyota parts on this, apparently my 93 could have either two different sizes of o-ring so I bought both.
Came out to $40 and some change picked up from the dealer.

2219317840 - Cover
2219364750 - O-Ring
2261256350 - O-Ring
I got my numbers mixed up.
22612-56350 - Cover
22193-17840 - O-Ring (Larger, used this one for the delete.)
22193-64750 - O-Ring (Smaller)
 
Thanks, all!

l initially irdered from Cheapest Factory Parts. They, however, had to order the parts themselves before shipping to me.

Back4O Imports ACSD Delete Kit is the ticket. Ordered this week, arriving this week. Installing this weekend. Been treating bolts w PB Blaster daily. Crossed fingers for smooth removal...
 
1990 HDJ80 LHD MT 1HD-T
ACSD delete executed 13 Nov 21

Delete kit purchased from Back 40. Plate, o-ring, 2 x hose clamps, brass hose junction.
52E75B6D-CD0D-4F2F-8B31-8E074FF9DB77.jpeg


Plate, o-ring, and short screws (1 & 2) taken from "A/C RevUp" device.
1E0D474B-0362-488A-9D52-4AA911910AF7.jpeg

I first removed short bolts 1 & 2 on "A/C RevUp" apparatus. Then the long bolt #3.

F4CE2AFA-C780-4C46-8652-1956527F3B93.jpeg


Bolts 4 & 5 attach ACSD to Injector Pump.
126D13EF-5BAE-481B-AE21-7A16E4233DA7.jpeg


This is the "A/C RevUp" device mentioned in other forums/posts. I put it in quotes, because it seems to only be affected by the ACSD, and has nothing to do with A/C or any vacuum apparatus. ??? Obviously l'm not much of a diesel mechanic...
7C76E789-61E8-46B5-9760-6D9C8683424B.jpeg

I put this contraption back on, but seems unnecesarry. May pull back off again.


...continued in next post...
 
Last edited:
...continued...

In order to get access to bolt 4, beneath the ACSD, l had to use a screw driver to engage the ACSD spring counter-clockwise, and hold it in place with a ziptie to the power-steering reservoir return hose.
This arm extends in the way of straight access into the bolt head with an allen, moving it CCW gets the plate rotated out of your way.
0F298A3B-24C9-432B-A252-7AF5D1A8DF75.jpeg


The view thru the wee wheel-well access at 5mm allen in bolt #4. Access is tight.
6FCE46E0-7B4D-4A35-9C63-BBDAABCC3454.jpeg


A round-end allen seems critical.

Once bolts 1-4 are removed, only #5 remains. I removed the screw driver to gain access to #5 bolt head.
The spring arm gets in the way (circled in yellow), but the short, square head of allen was able to be keyed in deep for purchase to break bolt loose. Definently did not want to waller the hex head out! Once broken loose, round-head was used to remove bolt. Awkward and slow process for both of these bolts.
E6CC693E-E96F-4D09-8FC8-AAE67D0B2092.jpeg


My ACSD, removed (at 226km). No wear apparent, black o-ring (removed in pic) seemingly in fine shape. However, after 3weeks in temps down to 20F, the unit leaked diesel while running (one drip every 3sec).

3E5D3BFE-108D-4149-8343-58F45F1F7CDC.jpeg
 
Last edited:
...continued...

Pic of bolts 4 & 5 fully sunk at ACSD mount on IP. Original bolts are too long by about 2mm.
56B88C0F-A534-41C2-86B0-A91111D7C6C0.jpeg


I tried the ACSD long bolts (from 4&5) in IP at "A/C RevUp" device mount (1&2). Even without device, long bolts sink to head. This is the last pic in the post: ACSD removed, long bolts sunk to head where A/C RevUp thing was. Unless advised otherwise, will remove this seemingly unpurposeful contraption.


So l switched bolts, per recommendation on this site. Upper short bolts holding delete plate in lower bolt holes and vise versa.
3005B35A-5899-4CB5-9EE1-DF30B2300651.jpeg


The coolant hoses took just about as long as the ACSD removal did, cause l had to run to town. I took off the top hose first from the removed ACSD unit, and plugged it with a rubber stopper. This was worth the $.55 the stopper cost. Then the lower hose.

The brass joiner included in kit was too big. Purchased a 3/8" joiner. In the pic, the too-big joiner beneath hose. The 3/8 stopper and smaller 3/8 joiner did the trick. I bought 14" of coolant hose, to loop from port to port, but the prospect of re-attaching new hose securely at bottom port seemed a daunting task! So l cut off a bit of the ends of each existing hose and coupled.
A7DF4D85-6303-4921-88FB-D4774B2A0A3B.jpeg


l know there's similar posts and pictures. Forgive my three posts for one chore. This work took a few hours, because l'm a layman. Per advice from mudandrock (thank you!!!), l sprayed the bolts daily with PB Blaster for a week prior to the mission. Had no trouble breaking bolts loose. My fuel loss was about 8oz. Coolant loss about 4oz.

Pumped fuel filter primer approx 20 times before pressure built up in IP. Fired up immediately. Running smooth and strong. No more fuel leak.

I live at 7200', commute to 10500'. Temp in winter -15F to 20F lows. Utilizing a block heater now (l have a spare brand-new block heater l dont need...). Am installing a Webasto Thermo Pro 50, when it gets here from Europe...

Hope this is useful to another. Advice/input invited on cold-weather, tuning (my RMPs idle at 920rpm...is this normal??, should l install a glass-globe water separator??, advice?, input?), operating practices for cold, etc... Thanks!

Rock on, hombres!

4ED58060-6AC0-4B75-A413-EA419CAA79C0.jpeg
 
Last edited:
One week and 300miles after ACSD delete, noticing a small leak on IP where aluminum housing mates with cast iron housing.

l can hand pump diesel into IP, and cause a small amount of fuel to run down this interface. Been driving a bit, and havent noticed much new leakage.

1990 1HD-T with #714 IP.

Some lessons l've learned since researching rebuilding IP:
1) have an experienced (in this) mechanic do it

- It seems wise to do timing belt at same time
- The IP must be kept immaculately unscrupulously sparkling squeekey clean. l practice a good cleaning, but not to the nth degree l would've having known how very closely machined and complicated these mechanical pumps are, and how the weeest bit of the tiniest dirt contamination can destroy things. So be ULTRAclean removing the ACSD!
-You're working on the Injector Pump of your truck. Read the posts about IP replacement, leaks, etc before working on the IP. 60minutes of reading could save you $3000.
- ACSD fails, deleted, other seals fail. Unless failure was was metal eroded into the IP--then more than seals fail.
- Did running injector cleaner thru contribute to seal failure?

There's a small leak. It'll become a bigger leak...

I reckon if your ACSD is still on and starts leaking fuel, it's a sign to start studying logistics of an IP rebuild.

And, what will go next...???
 
Last edited:
Great write-up @Stiles ! For what it is worth, I went through something similar several years ago on my 91 HDJ81 where I thought the leak in my IP was from the ACSD area, only to find the leak was elsewhere on the IP once I did the ACSD delete. Unfortunately, it is one of those things where if this is the original IP, then it is likely that if one seal is going bad, there are bound to be other seals going bad as well. Time for either a rebuilt, or an IP swap, depending on how you use the vehicle (daily driver vs. ocassional trail rig). I ended up getting a rebuilt IP and then sending my leaky one back for a core refund, as I didn't have the luxury of having our HDJ81 down for a couple weeks for the IP to be rebuilt. Perhaps you will be lucky and can figure out the offending seal and that it is easy to access and replace.
 
A HUGE shout out to all the Ih8mud folks that gave me helpful tidbits, advice, and pictures. I wanted to return the favor by posting a bunch of photos of my recent (Dec. 9, 2017) removal of the ACSD on my 91 HDJ81 (RHD, 5-speed manual) with the 1-HDT.

In addition to preventing a future, expensive disaster with the ACSD when it would have inevitably sheared off, I removed it recently because I though it was leaking diesel by the ACSD spring. Hindsight being 20/20, I found out after I removed the ACSD that my injection pump is leaking elsewhere, so I will be having the injection pump replaced (exchanged with a rebuilt one) soon :) Go figure. At least I went through the process and can share my experience with others looking to do this as well.

A few tidbits:
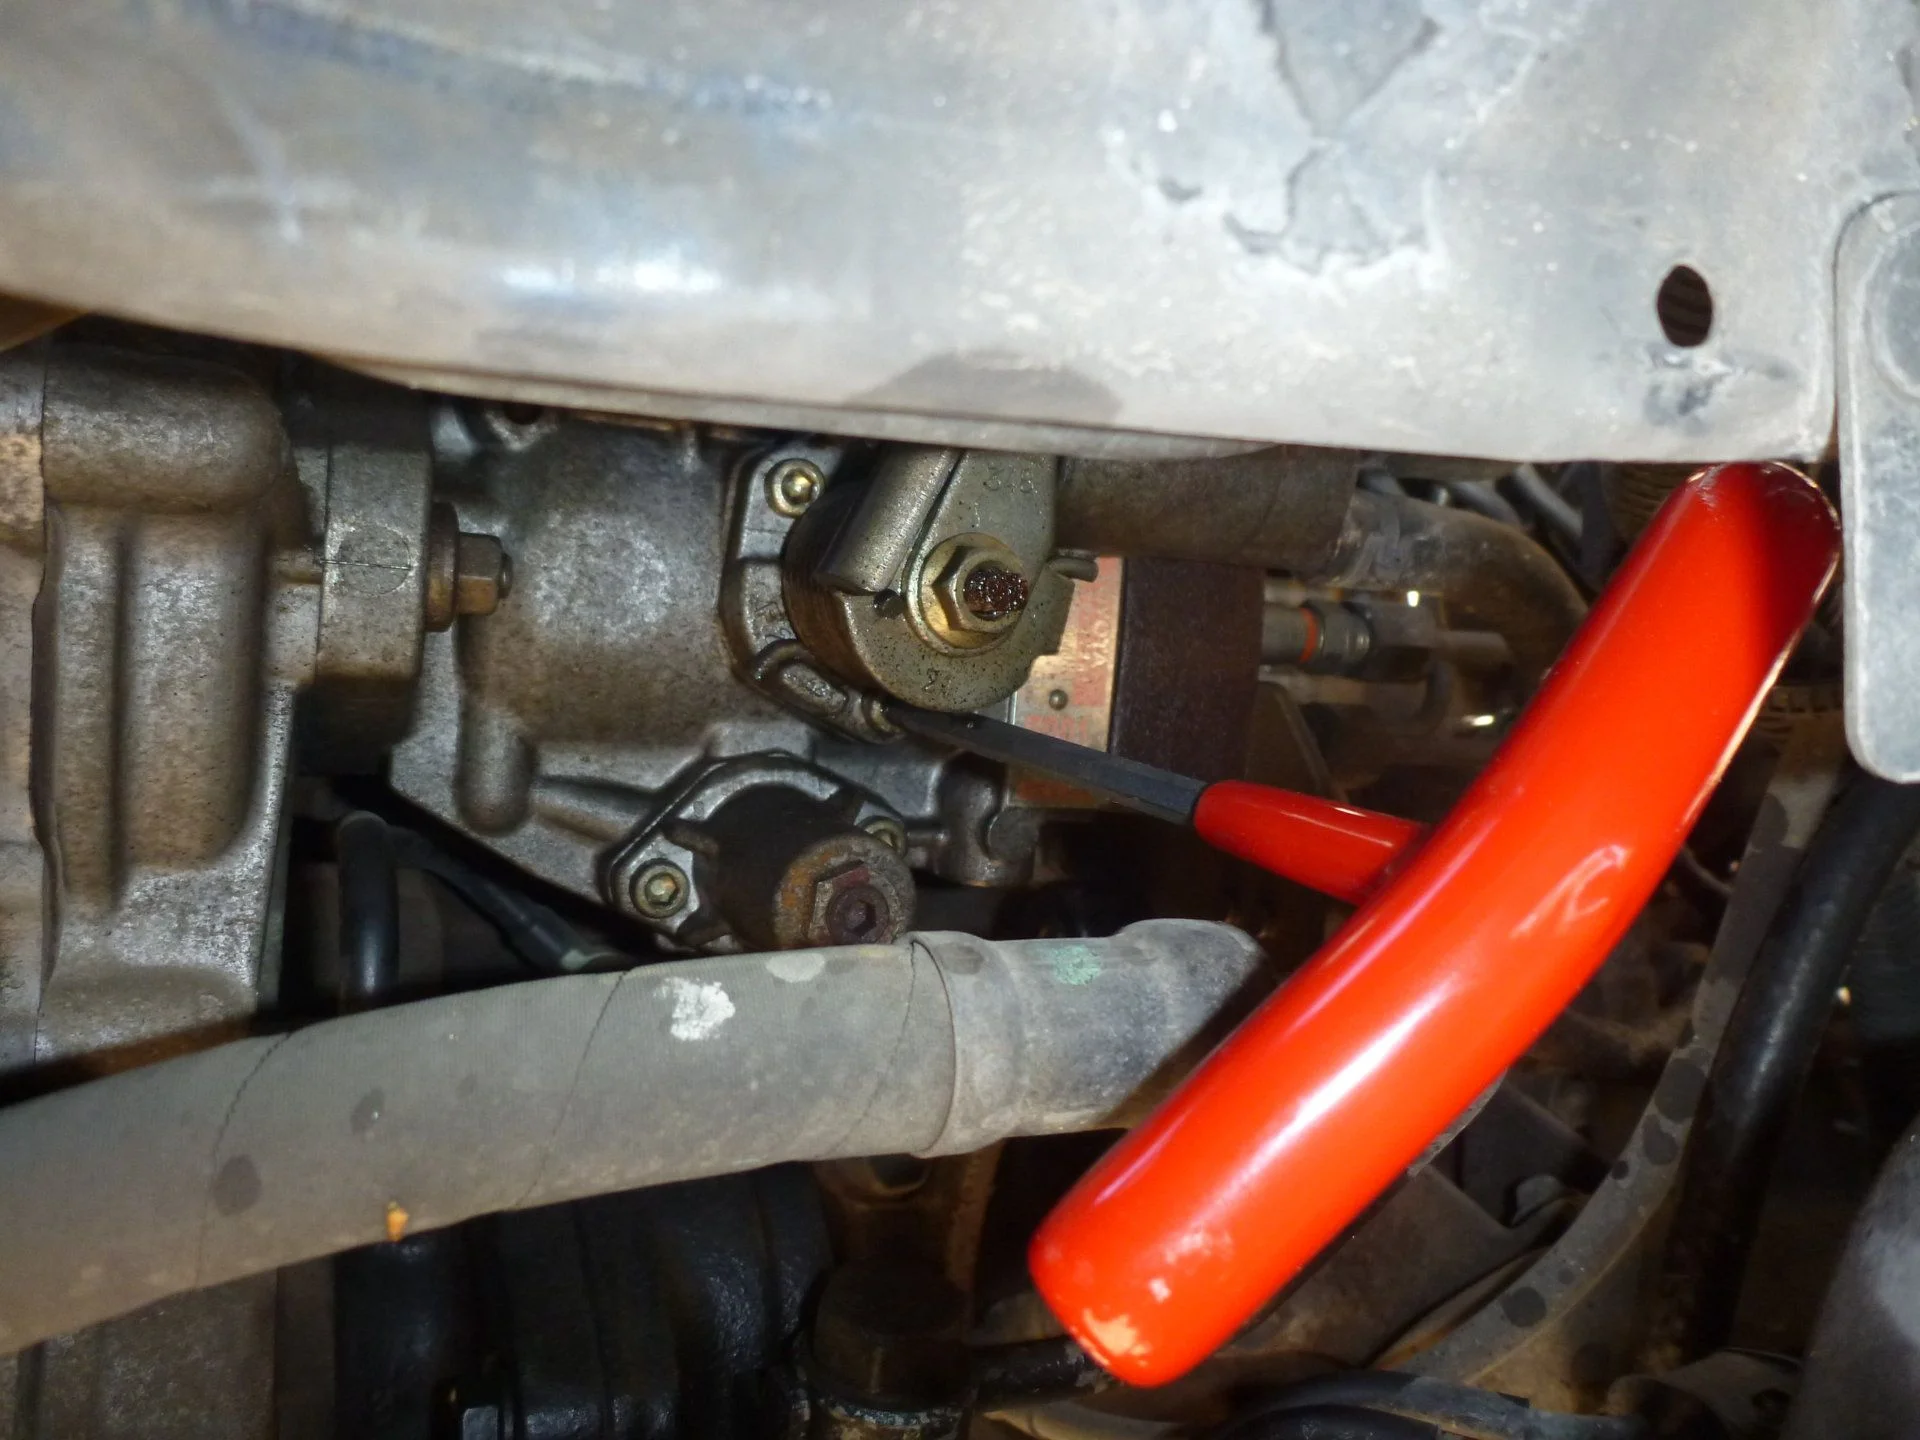
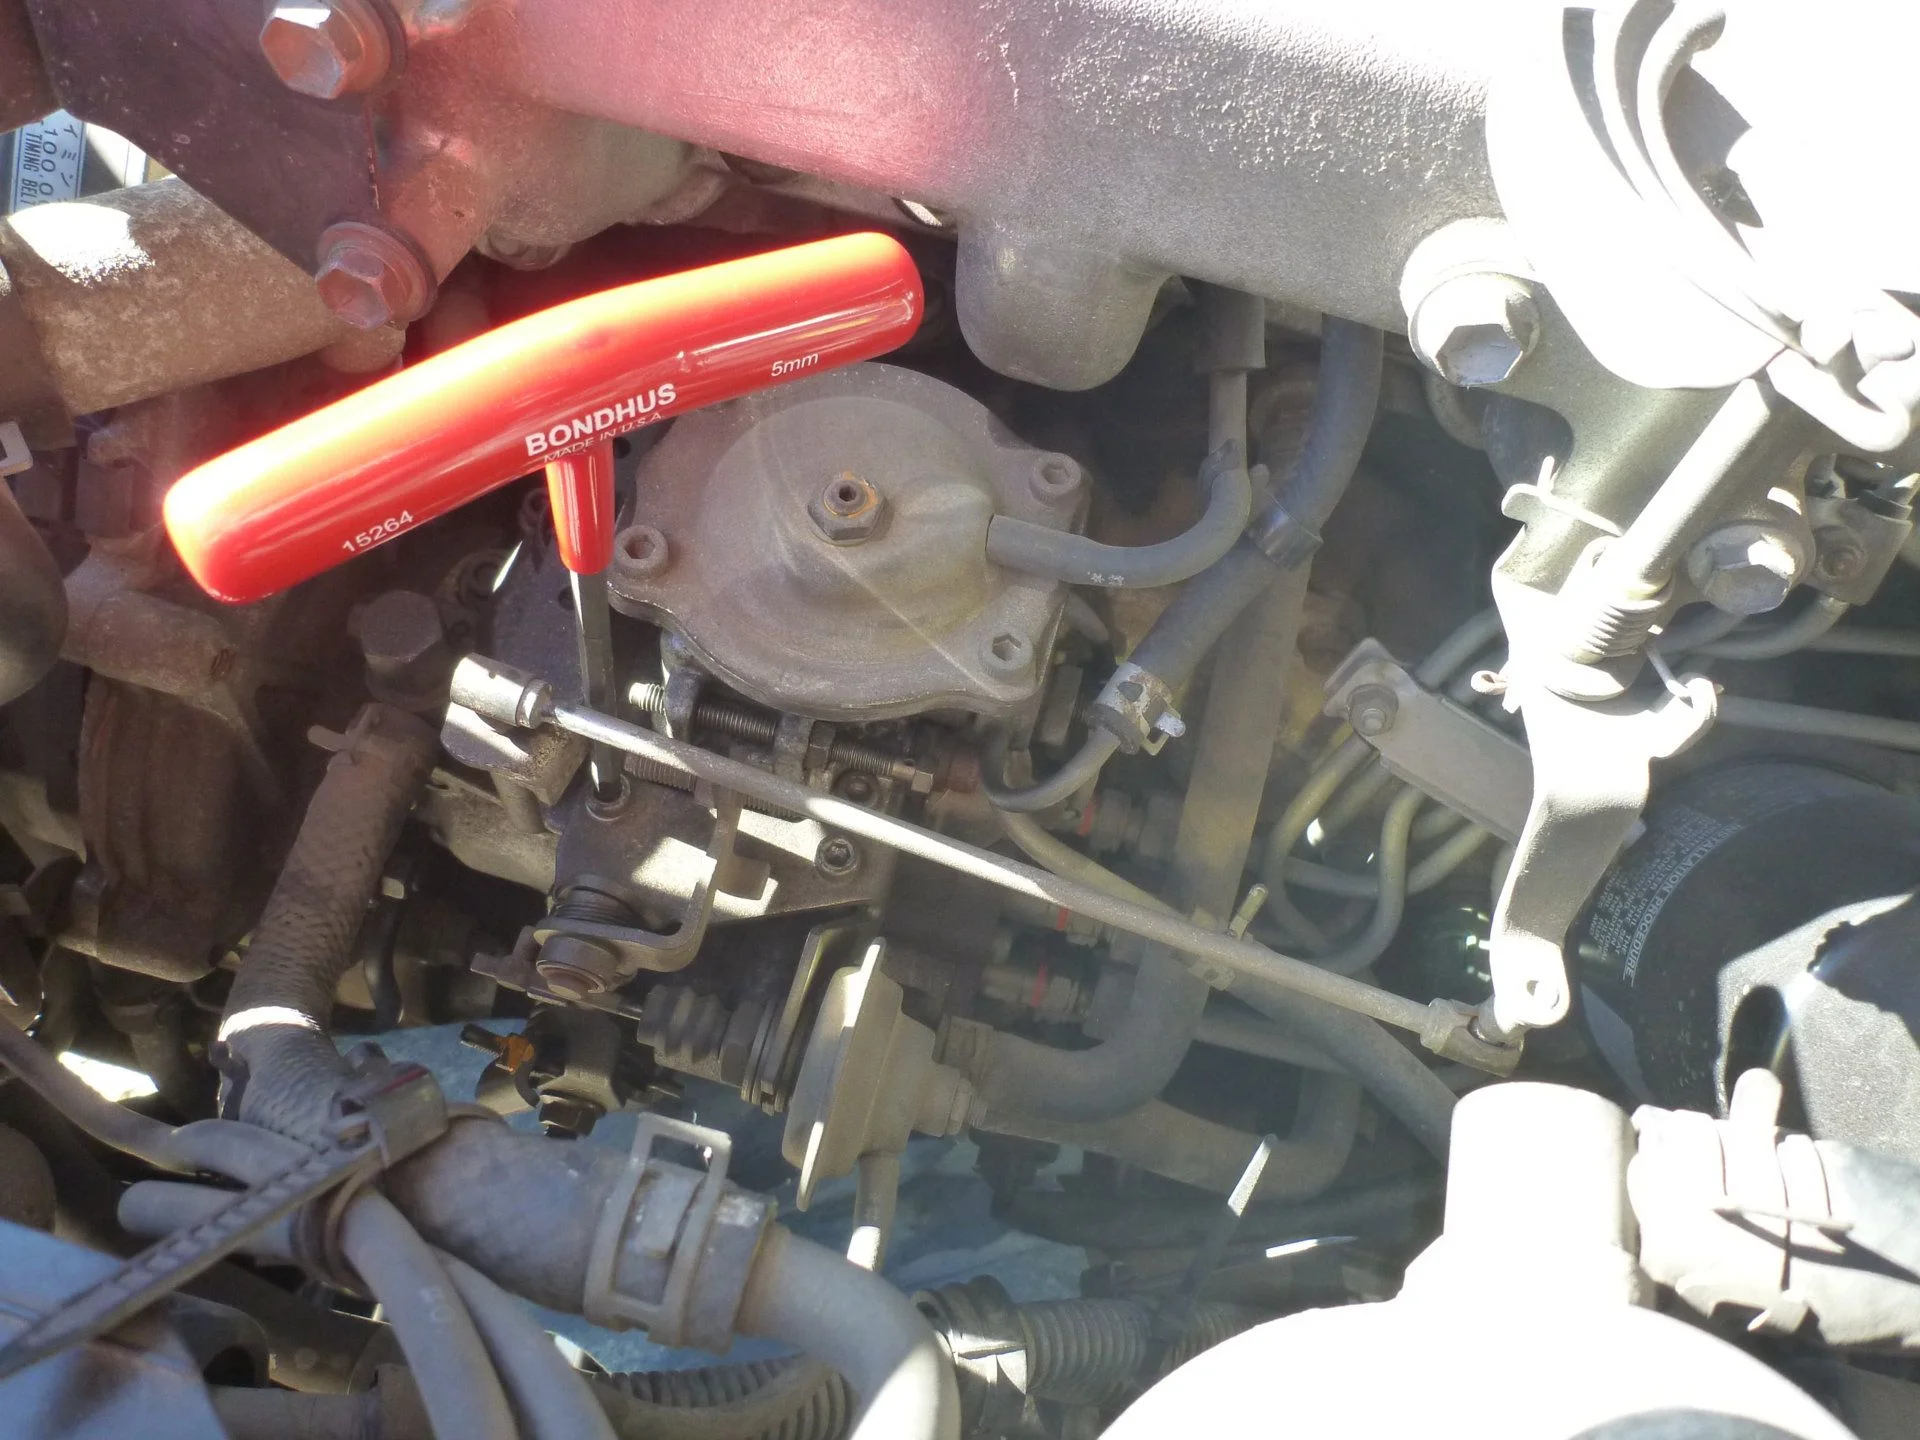
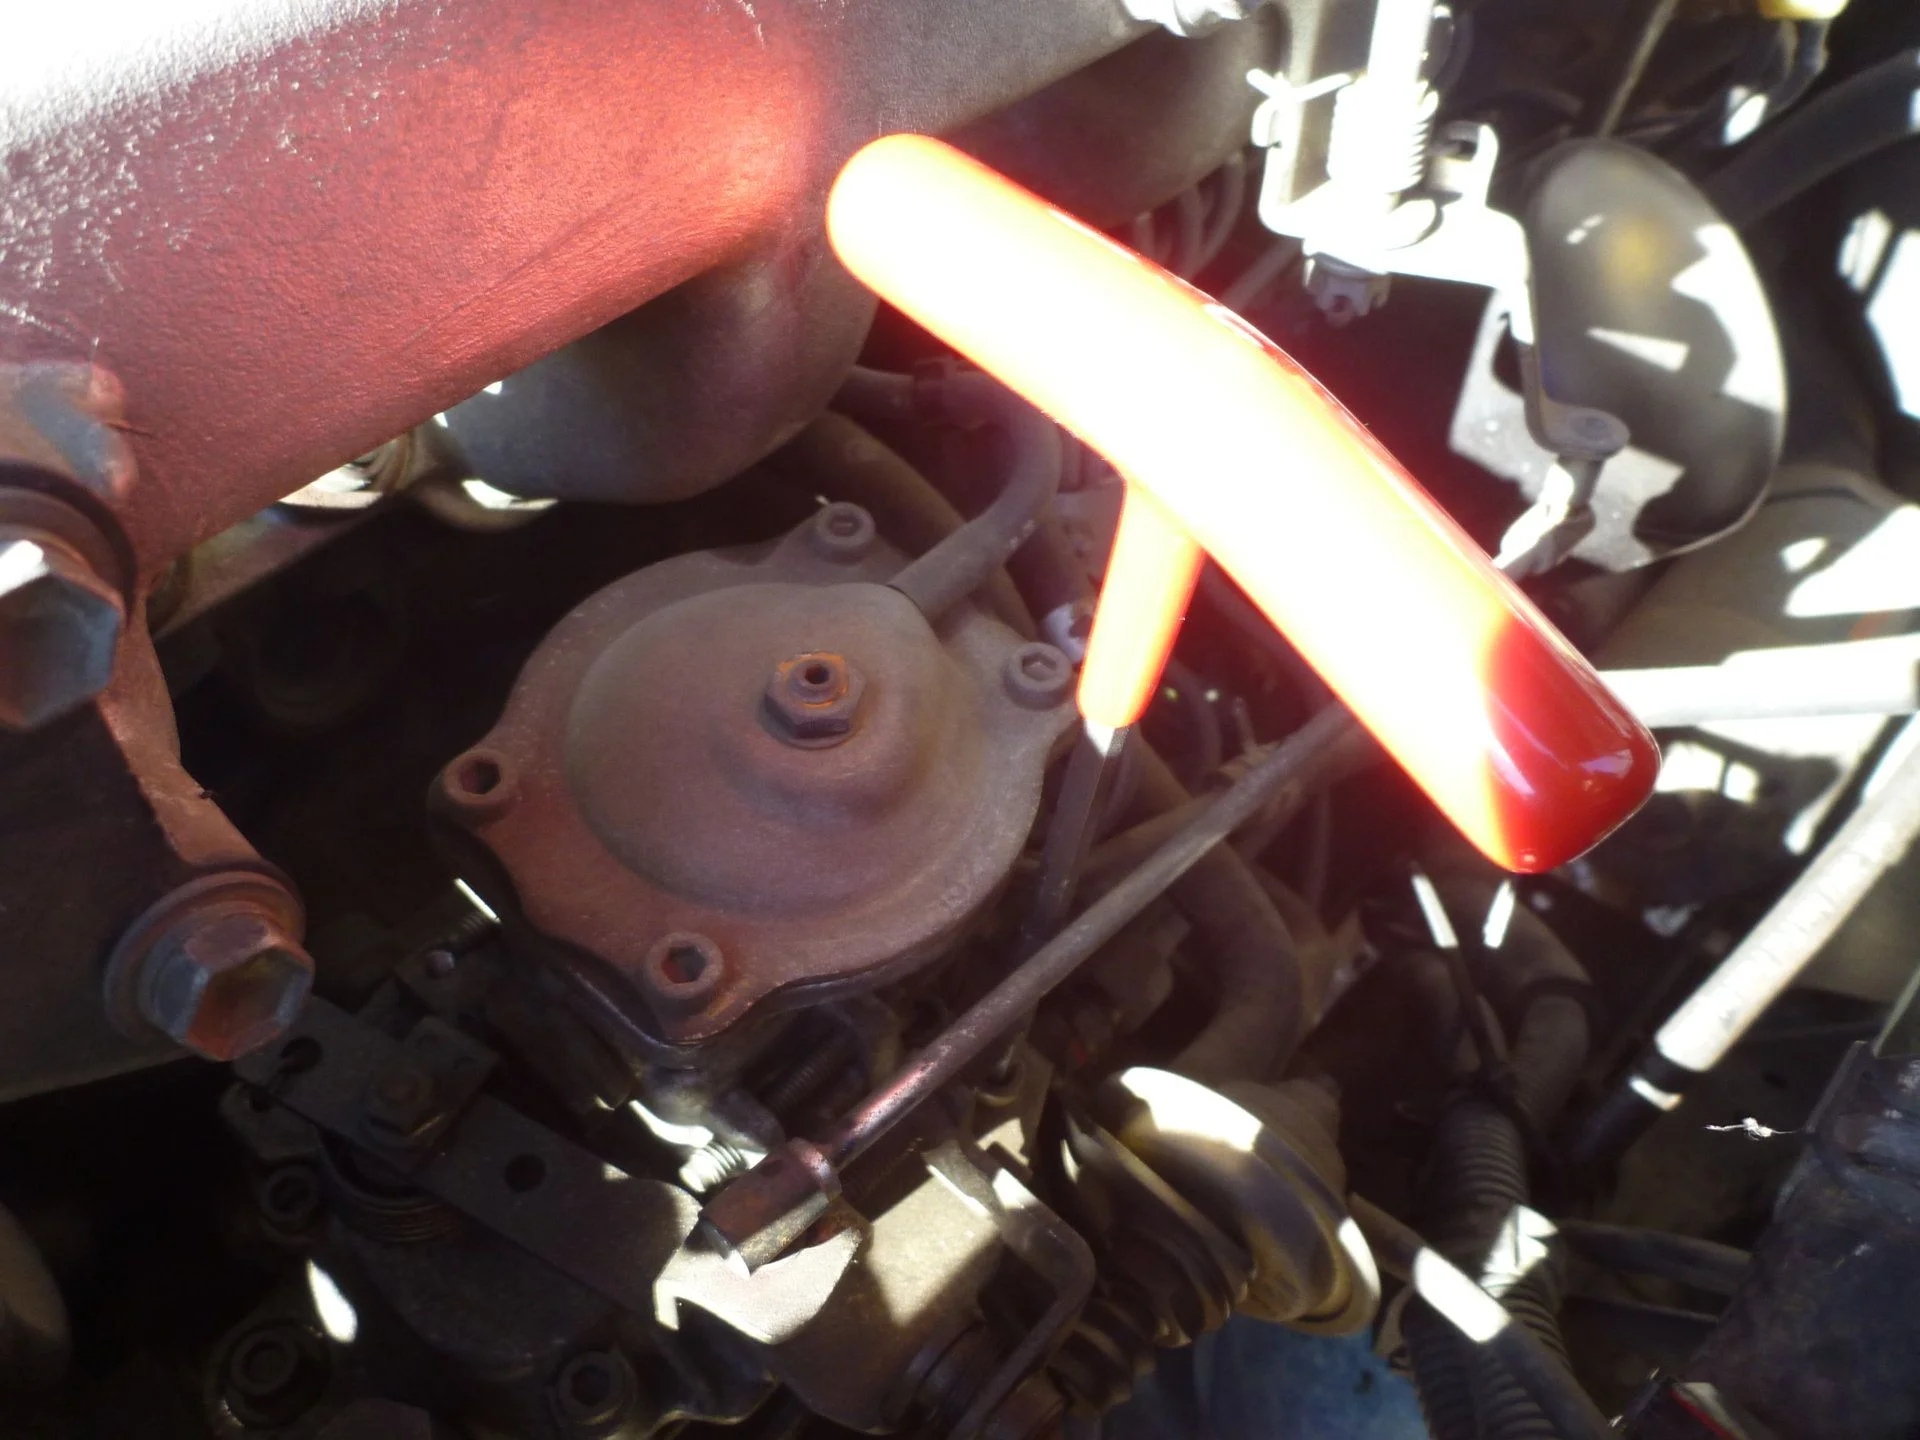
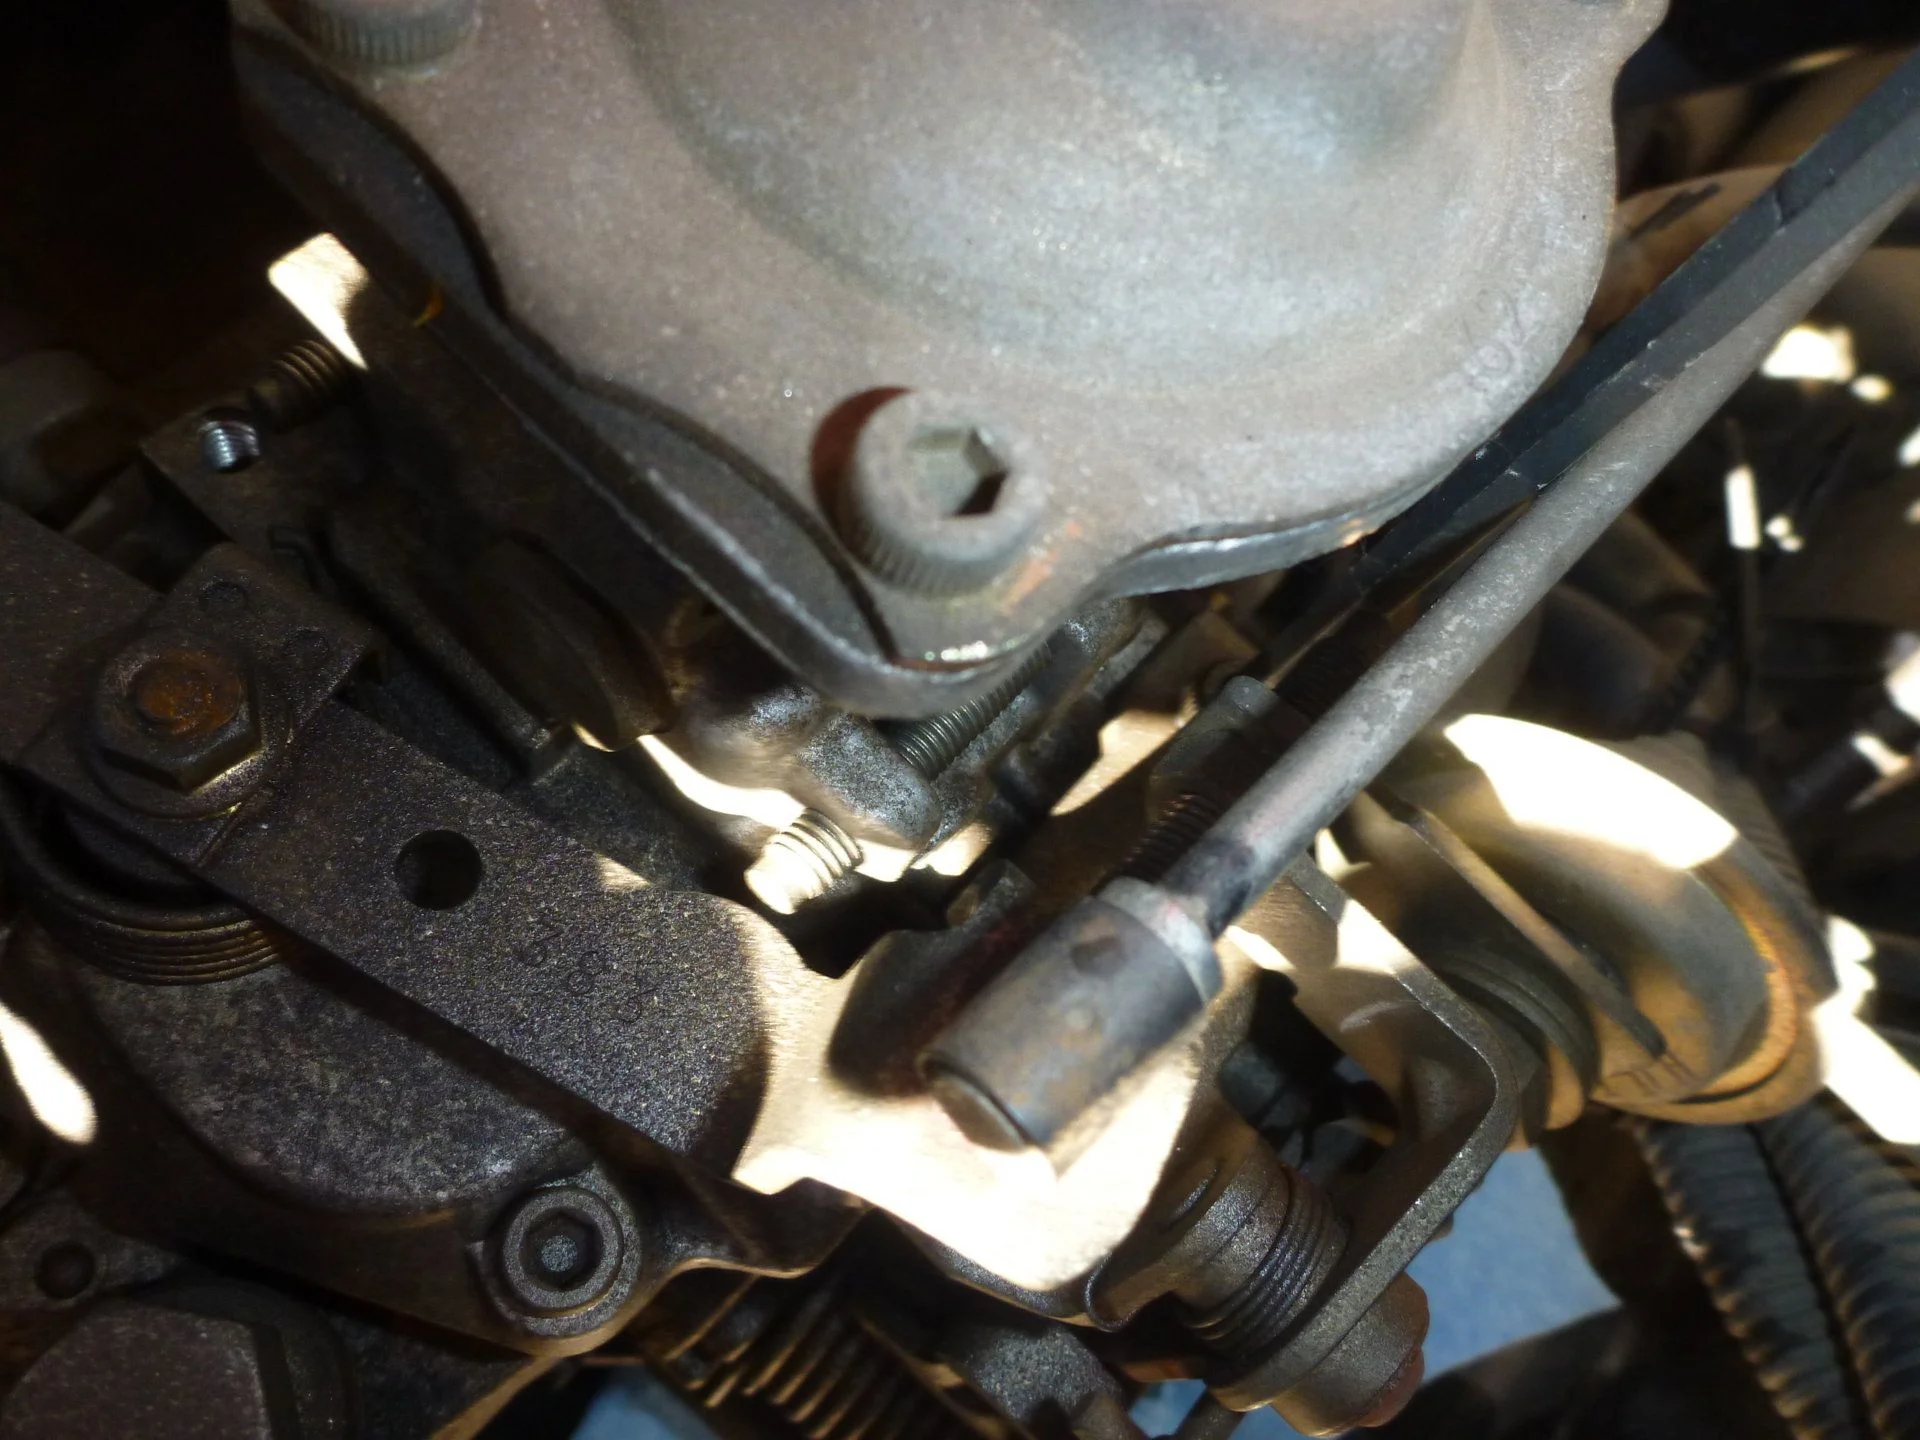
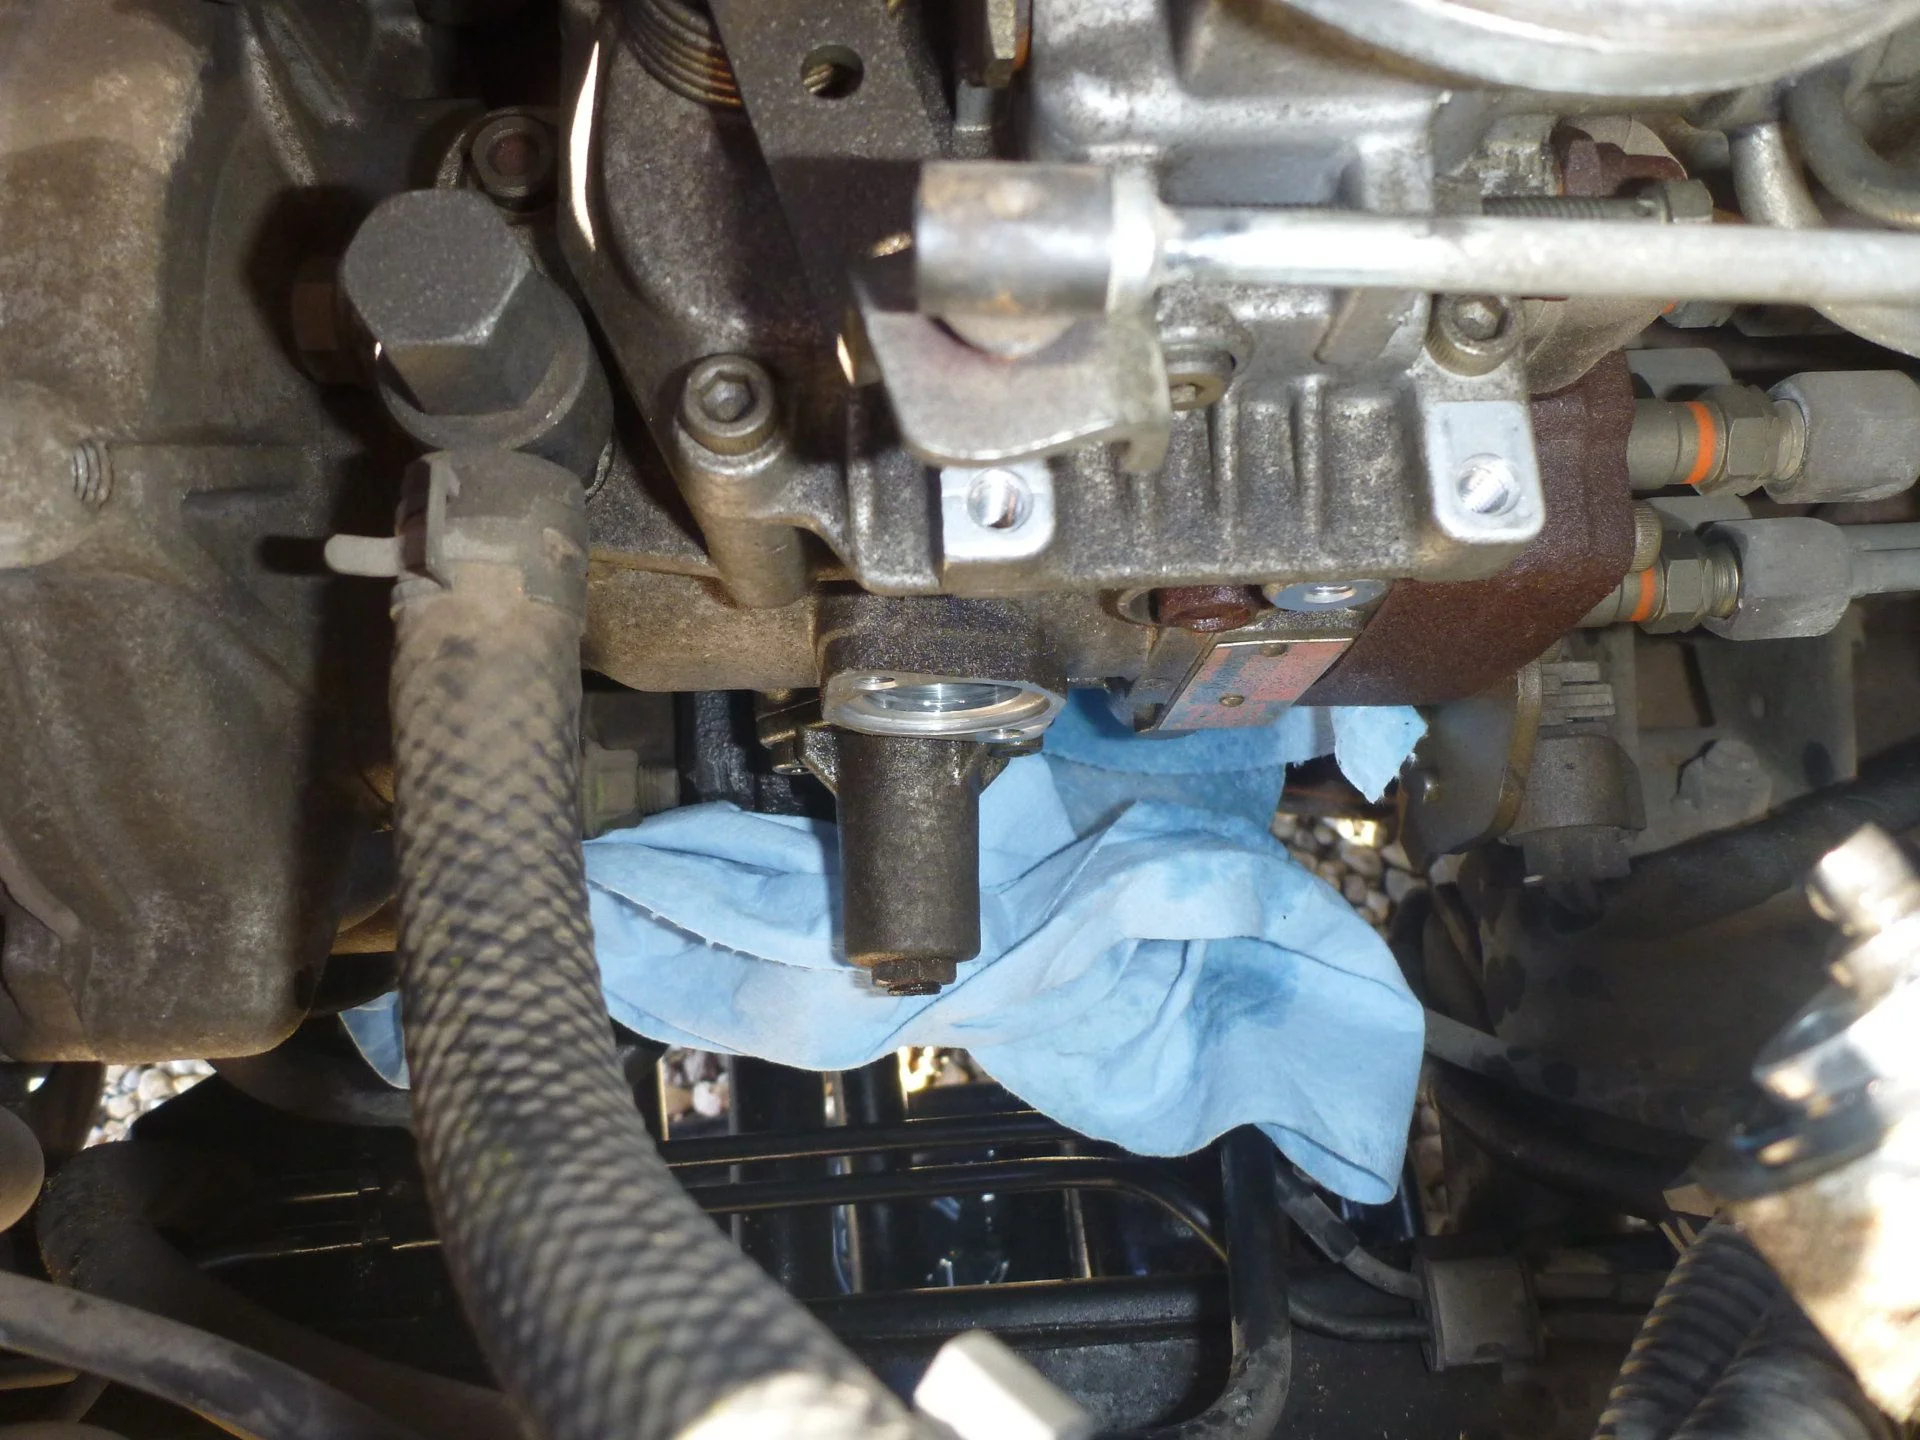
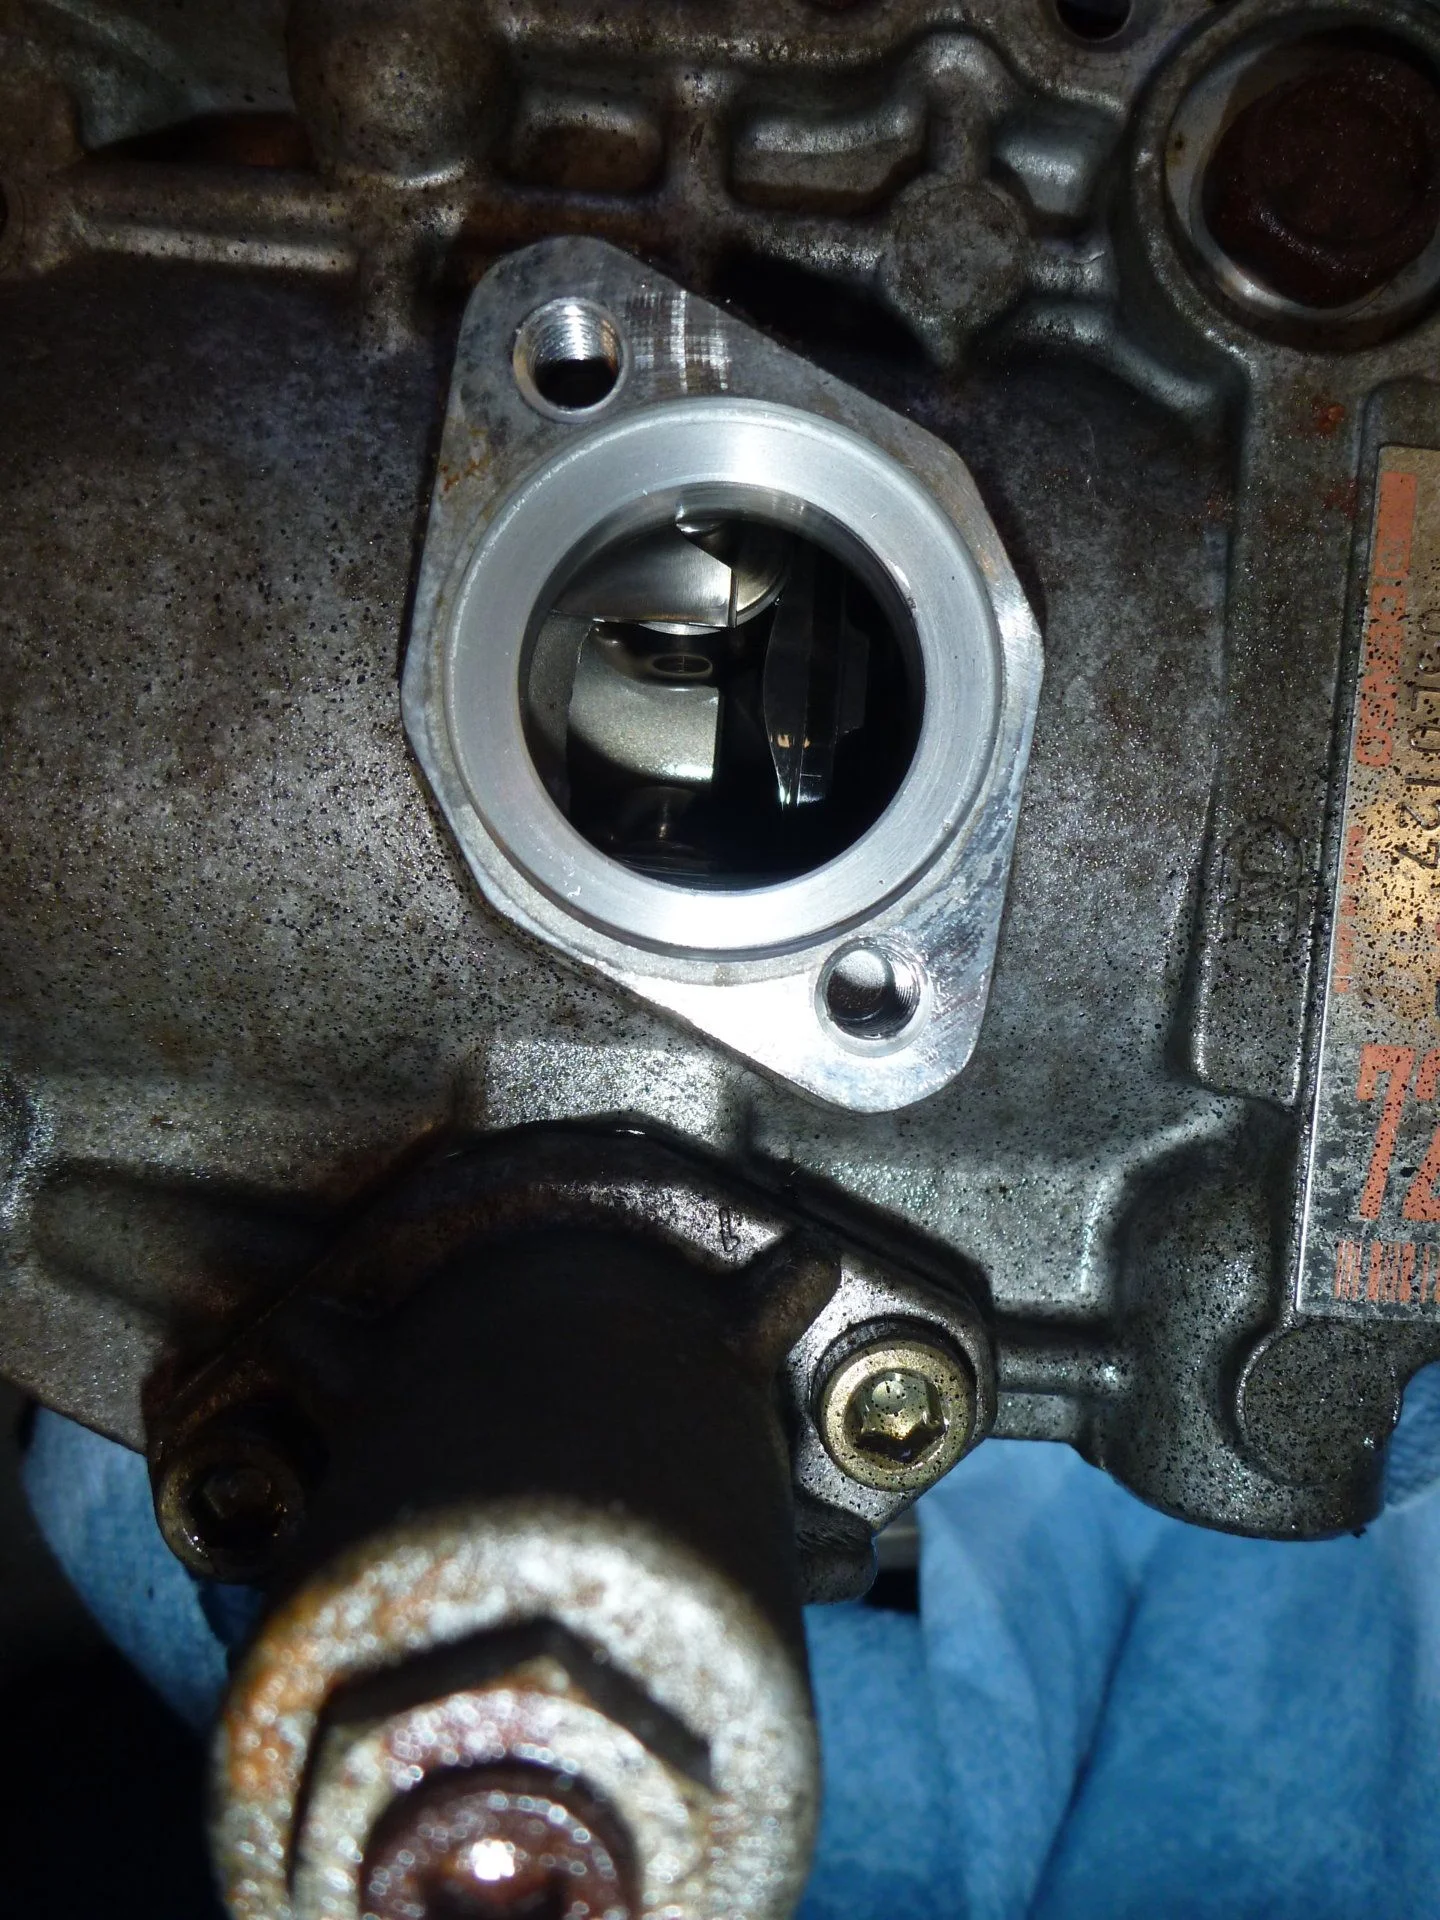
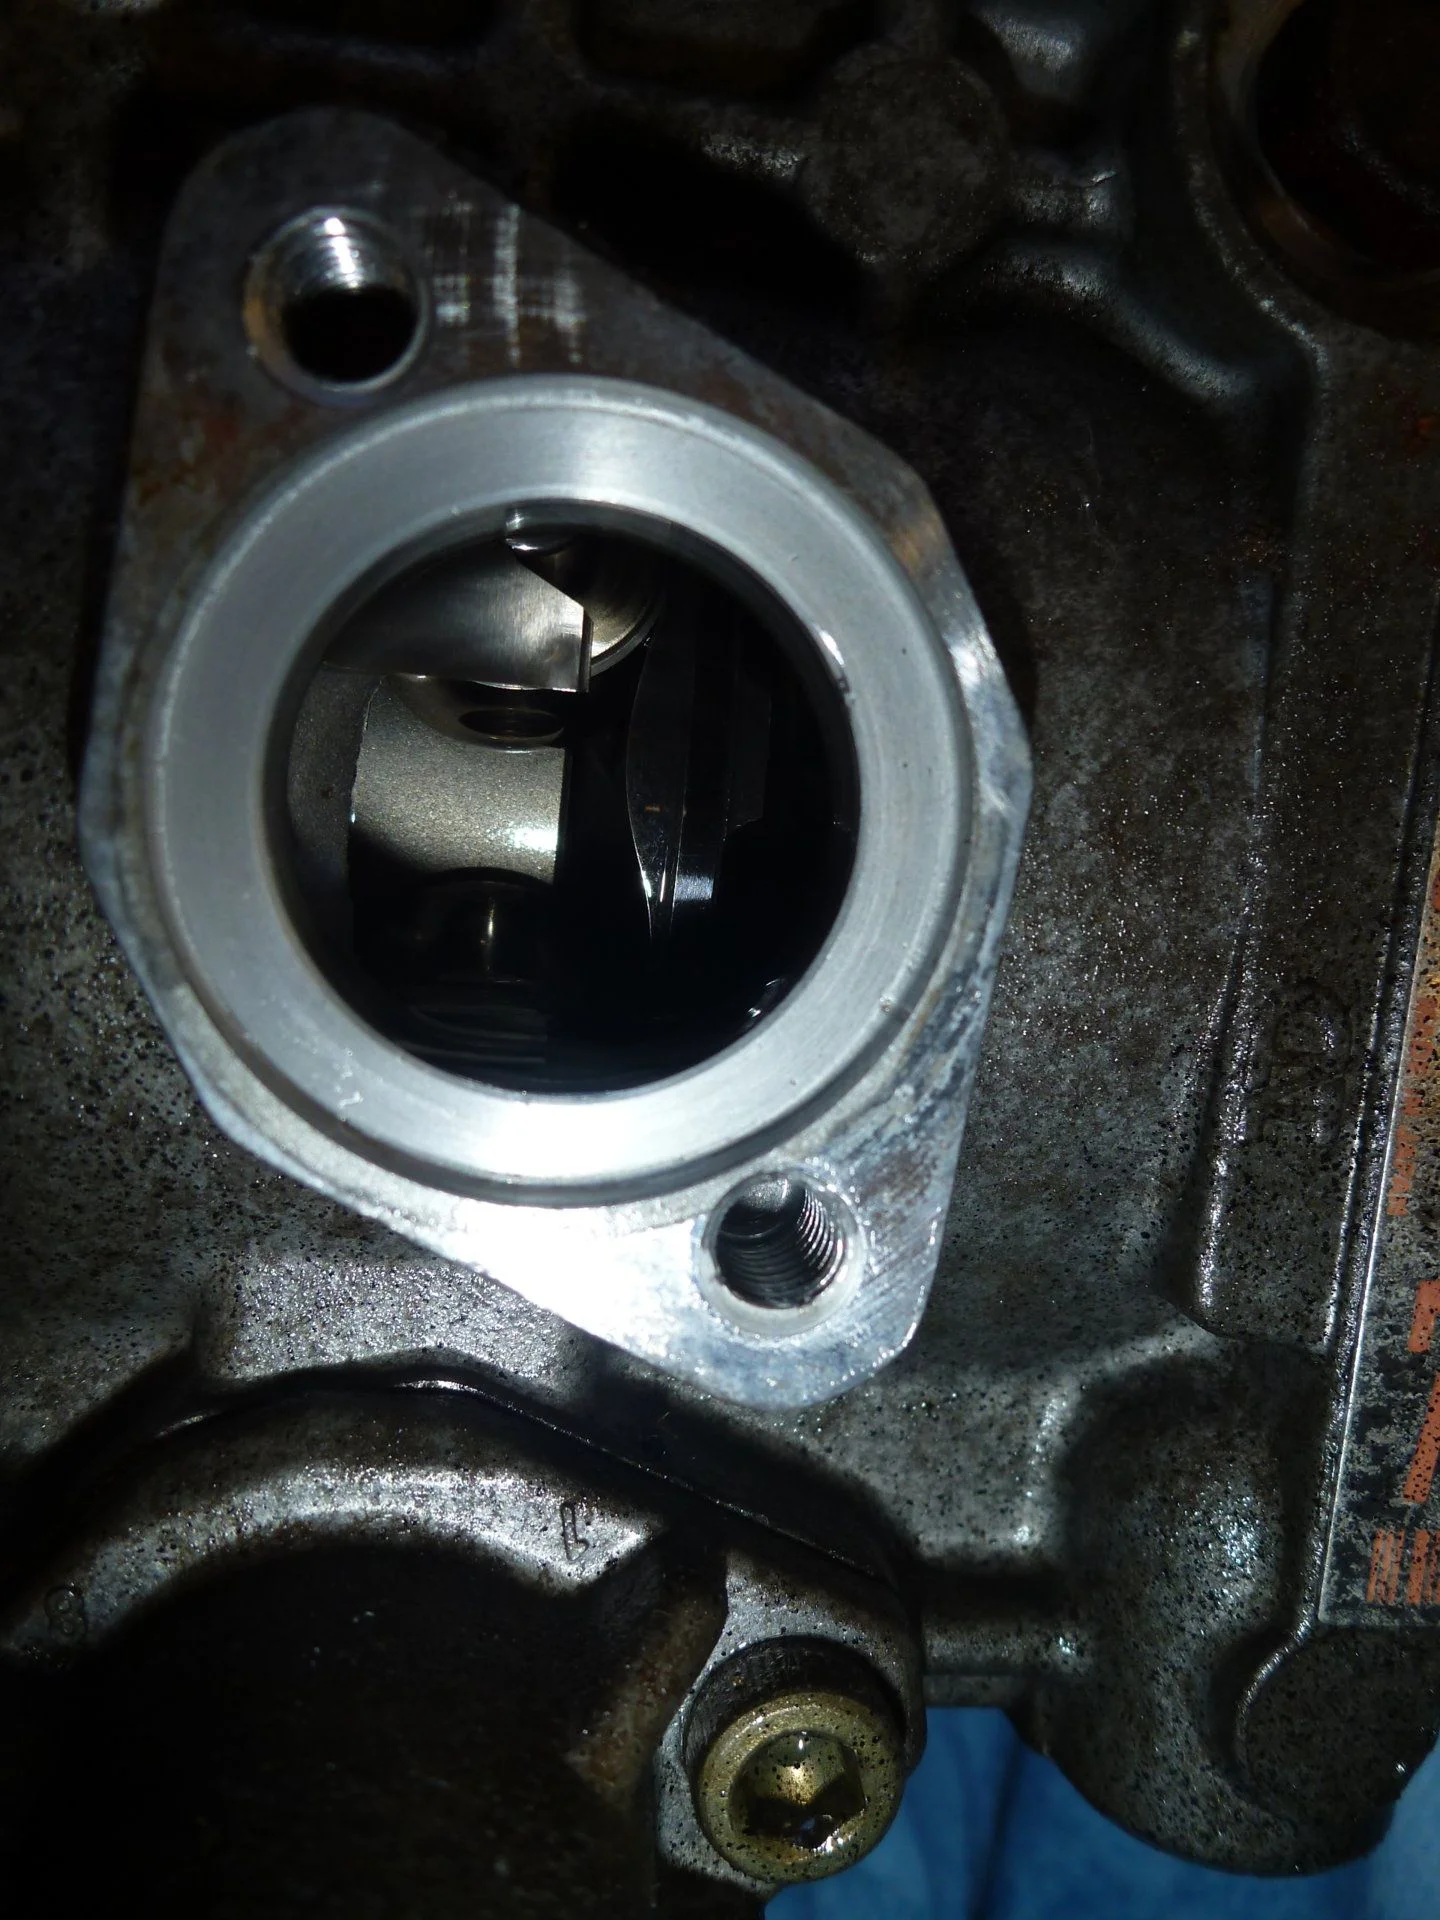
* I was able to remove the ACSD without having to remove the ACSD spring (FYI). I had to use a 6 inch long handle 5mm hex key to do the tricky parts. Some of the photos show a red handled 5mm hex key...this is what made it possible for me. You may have to manually engage the ACSD by using a screw driver (the FSM tells you how to do this when setting the timing, FYI), to be able to reach one of the 5mm hex head screws.
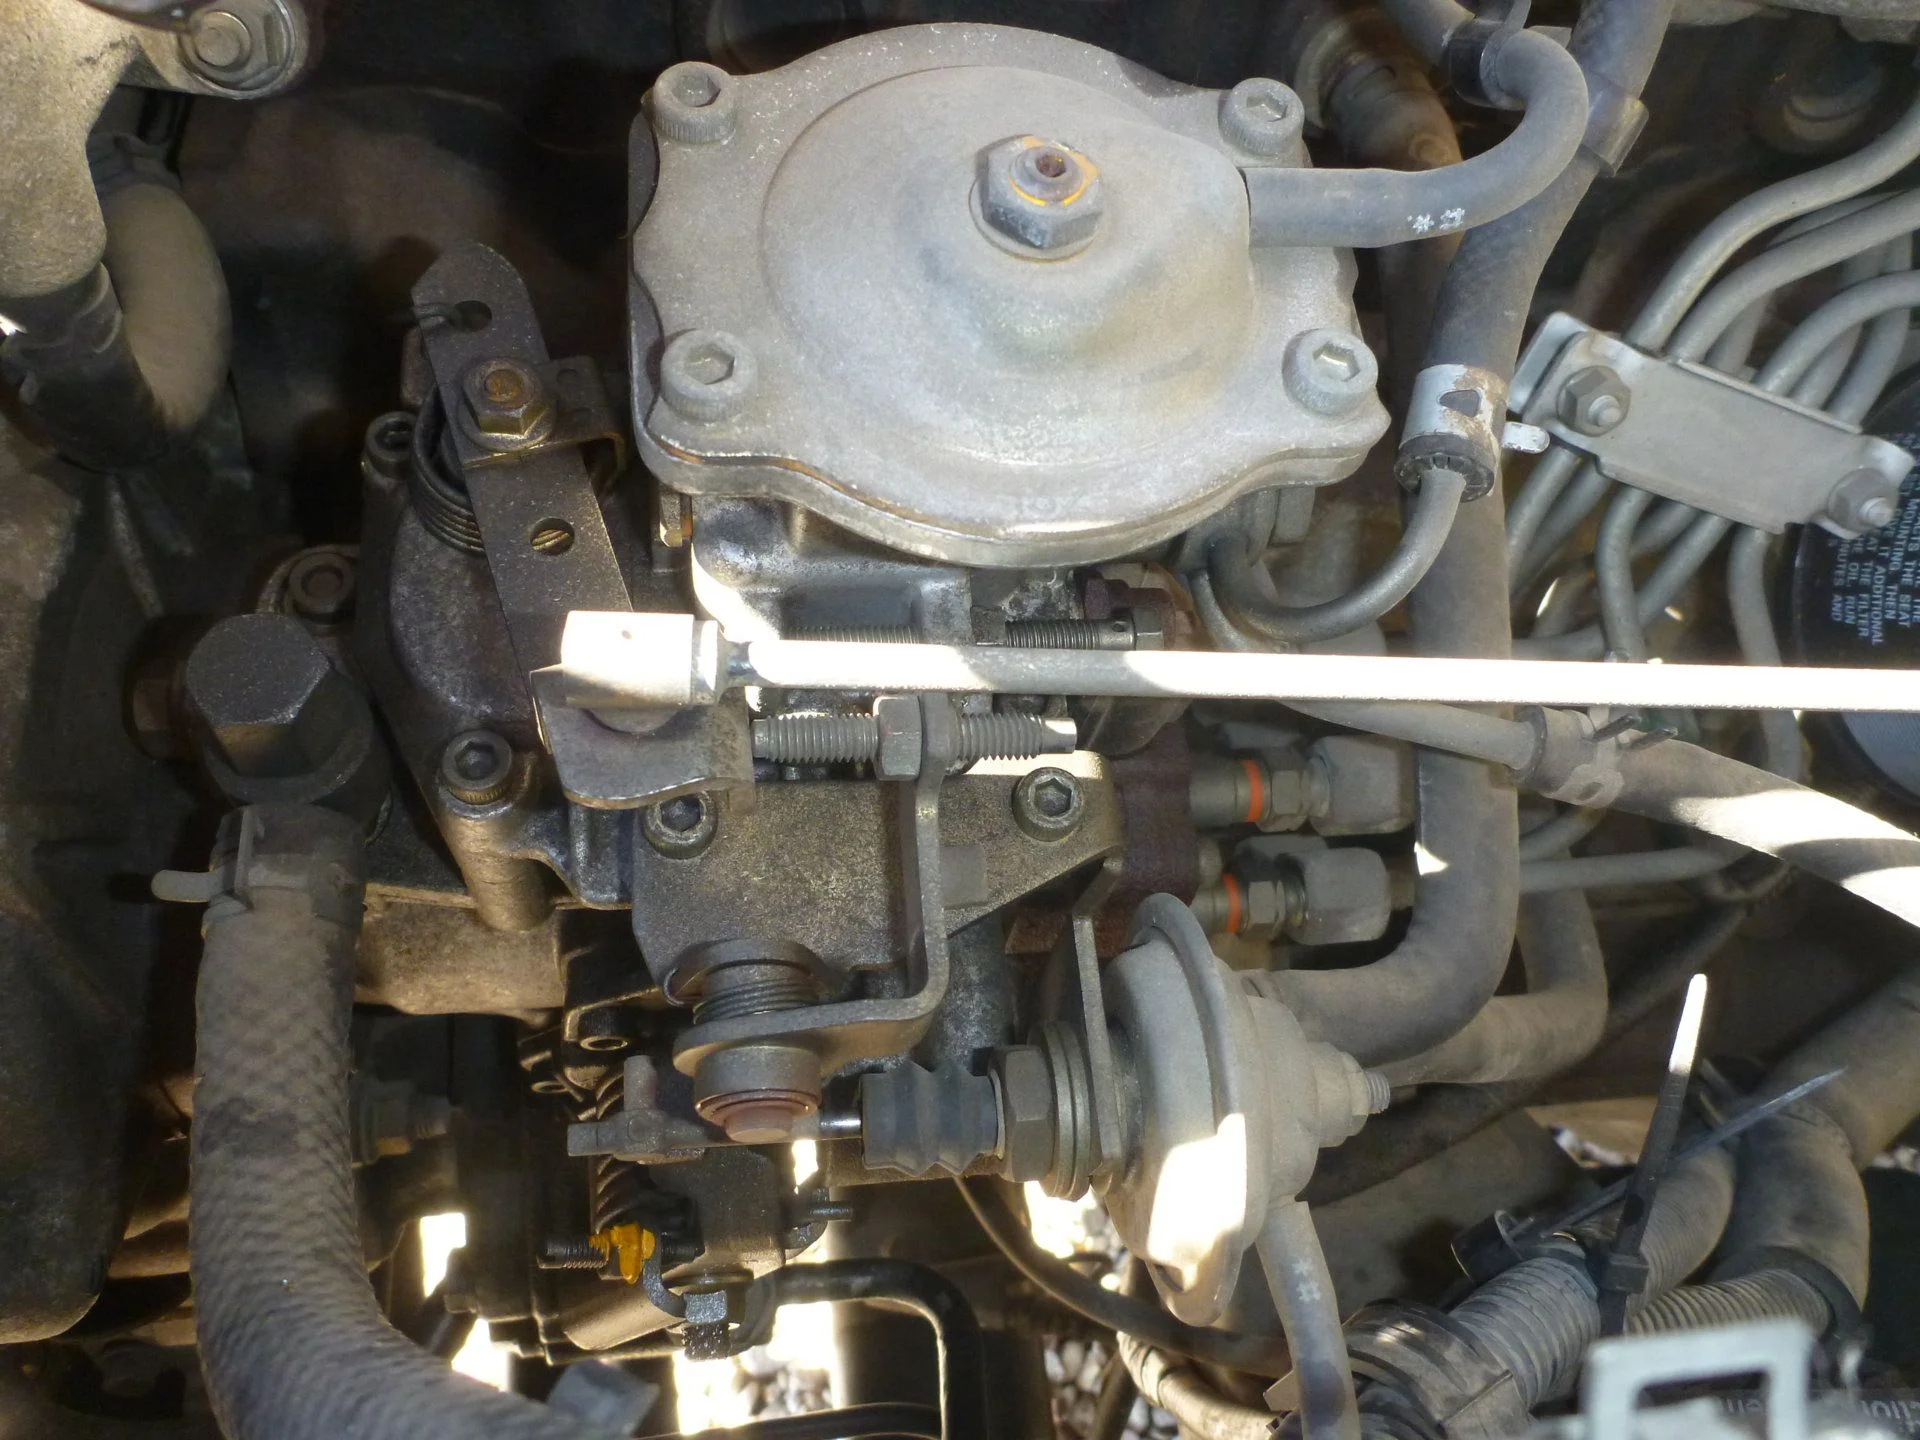
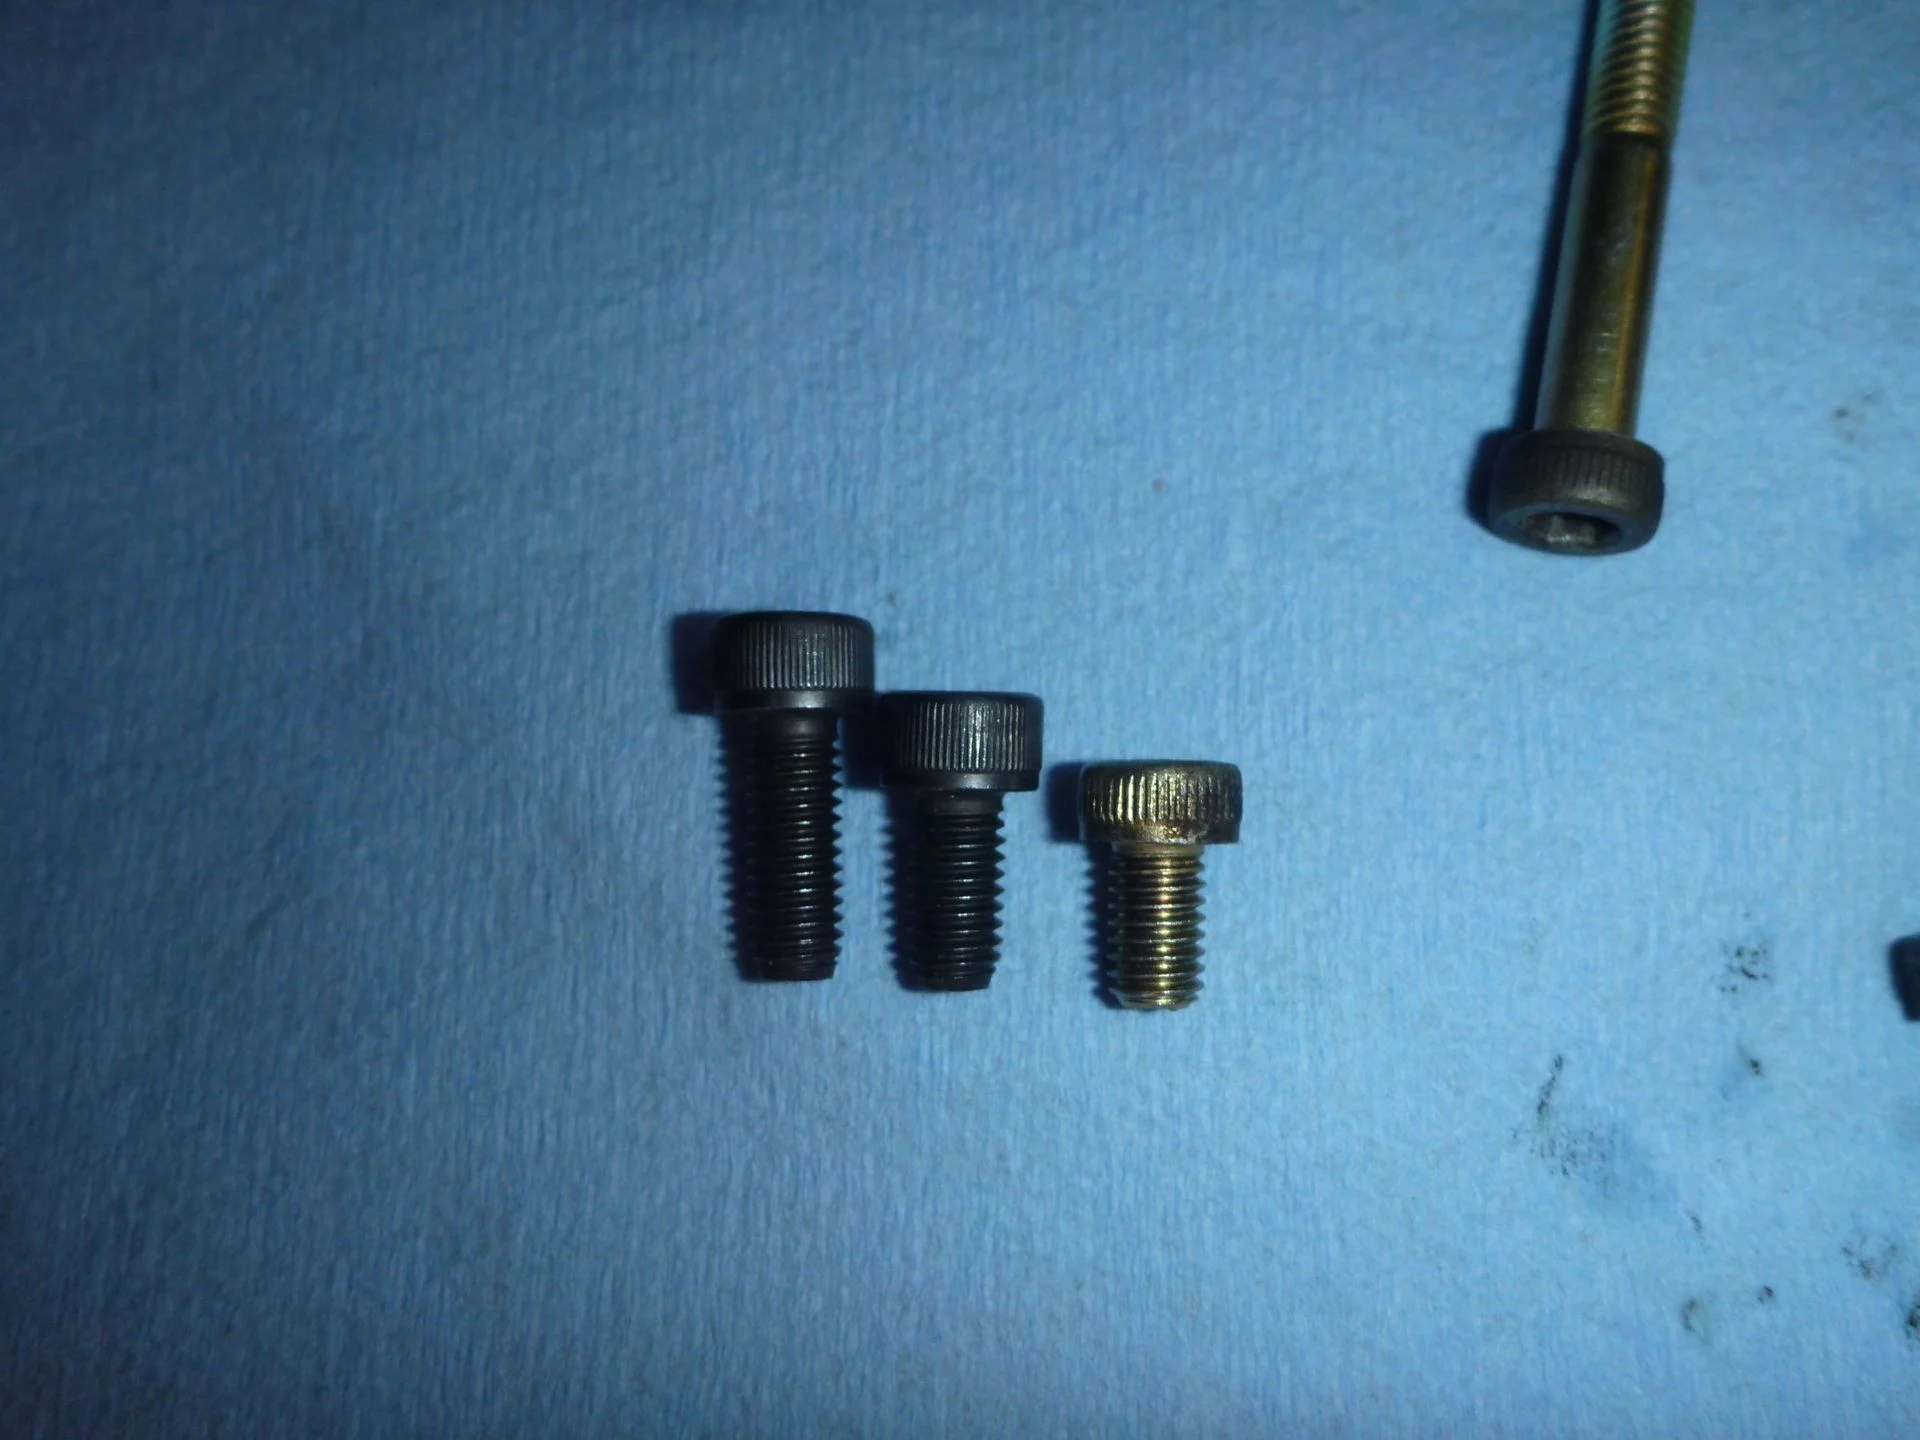
* I sprayed all the 5mm hex head screws (5 of them)...2 for the A/C idle up, and 3 for the ACSD itself...with liquid wrench. Luckily I did not have to grind anything off; everything came off without too much trouble.
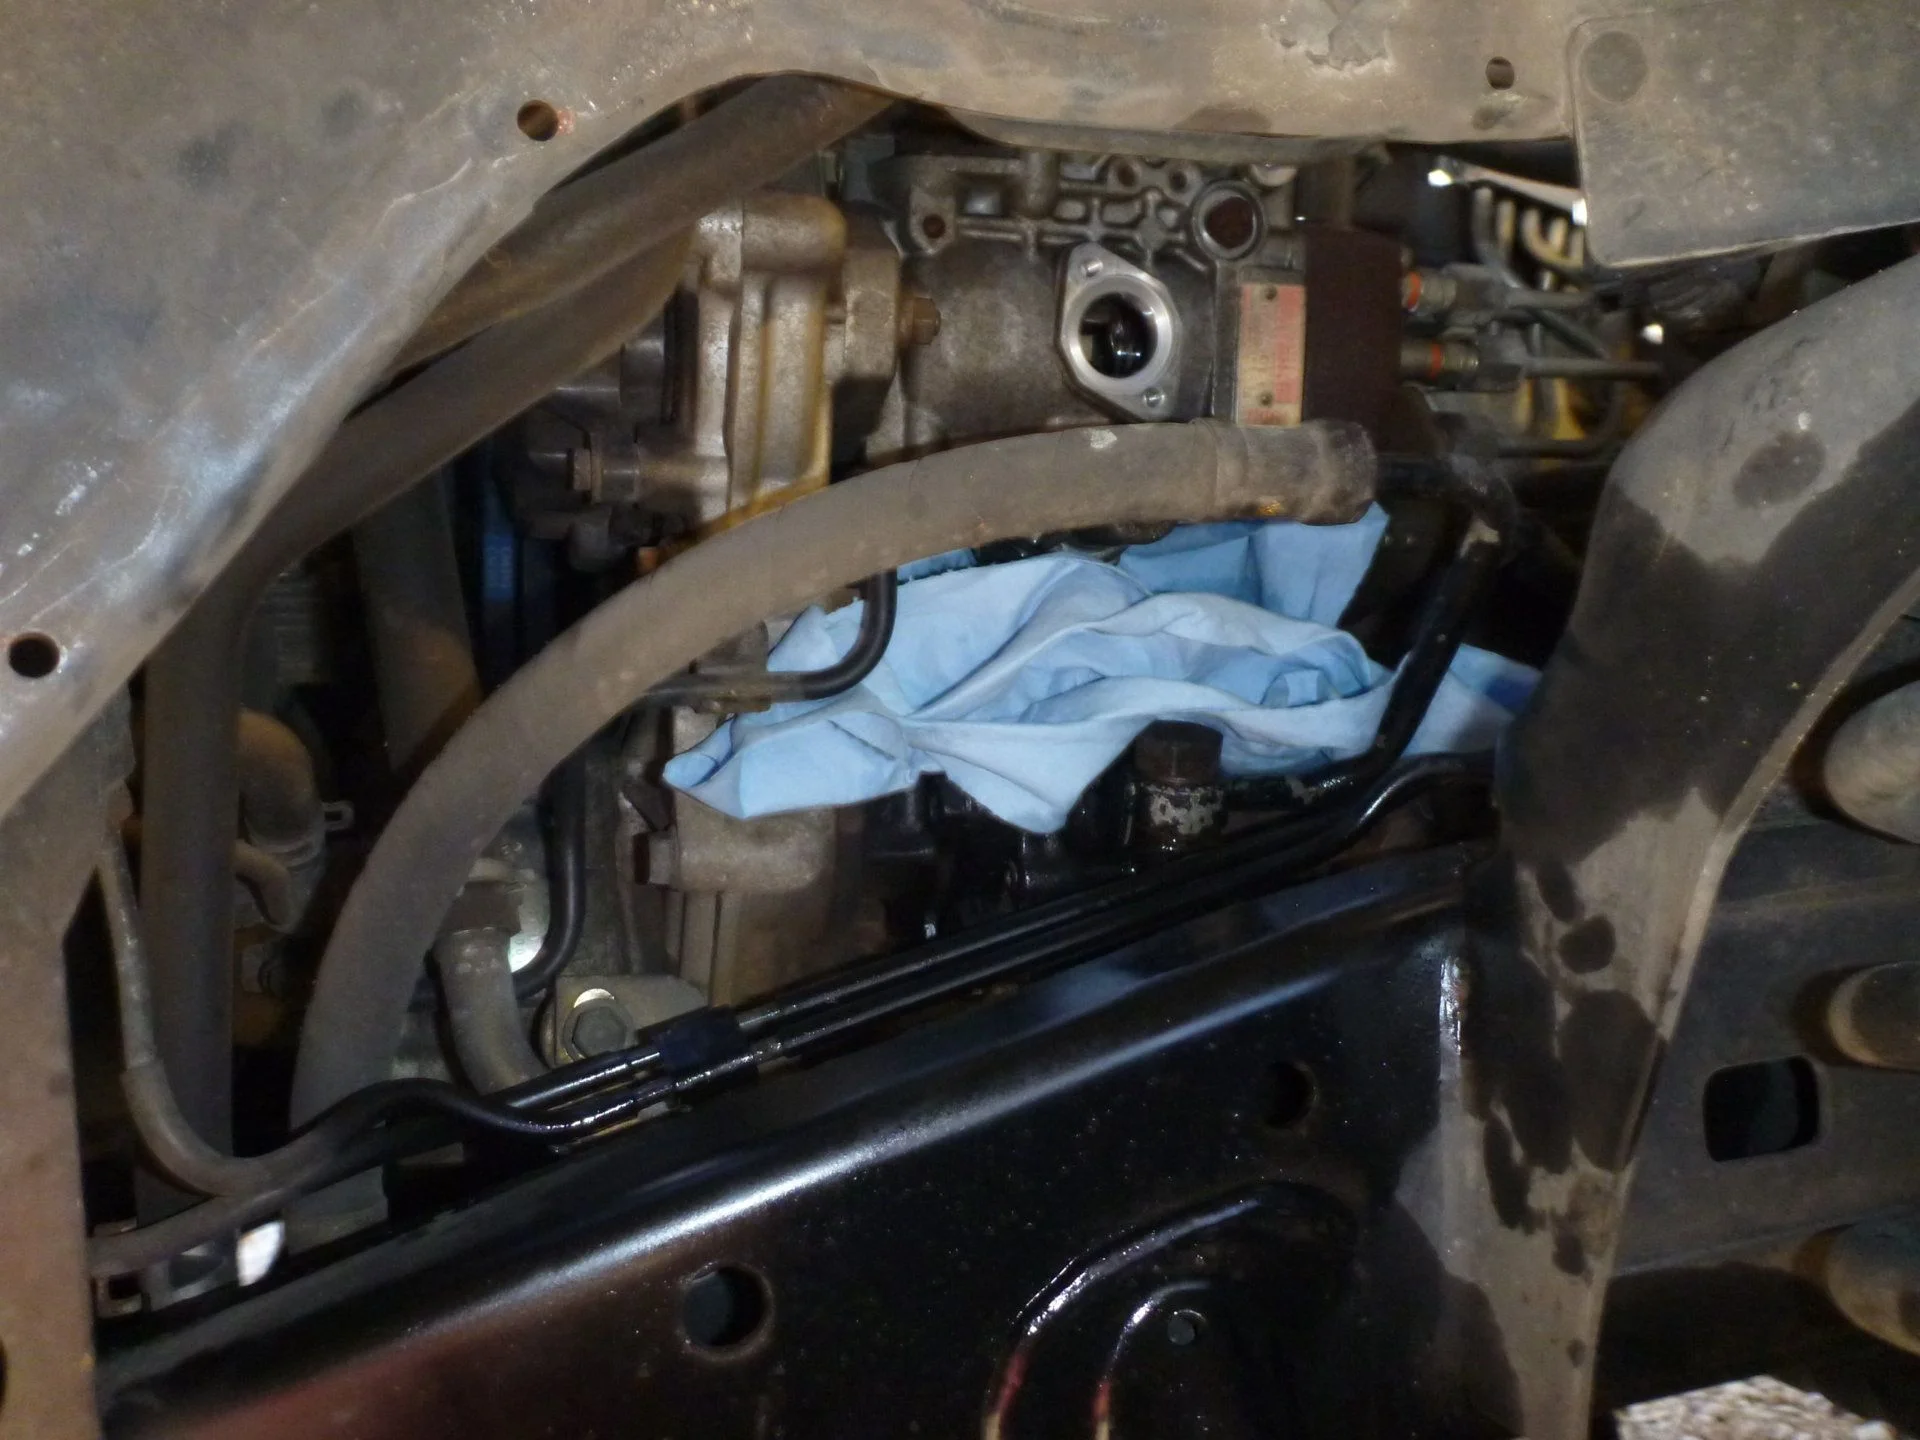
* I lost about 2 cups of diesel or so...I used a catch basin located below the area, on the ground. You will get diesel all over stuff, it's inevitable.
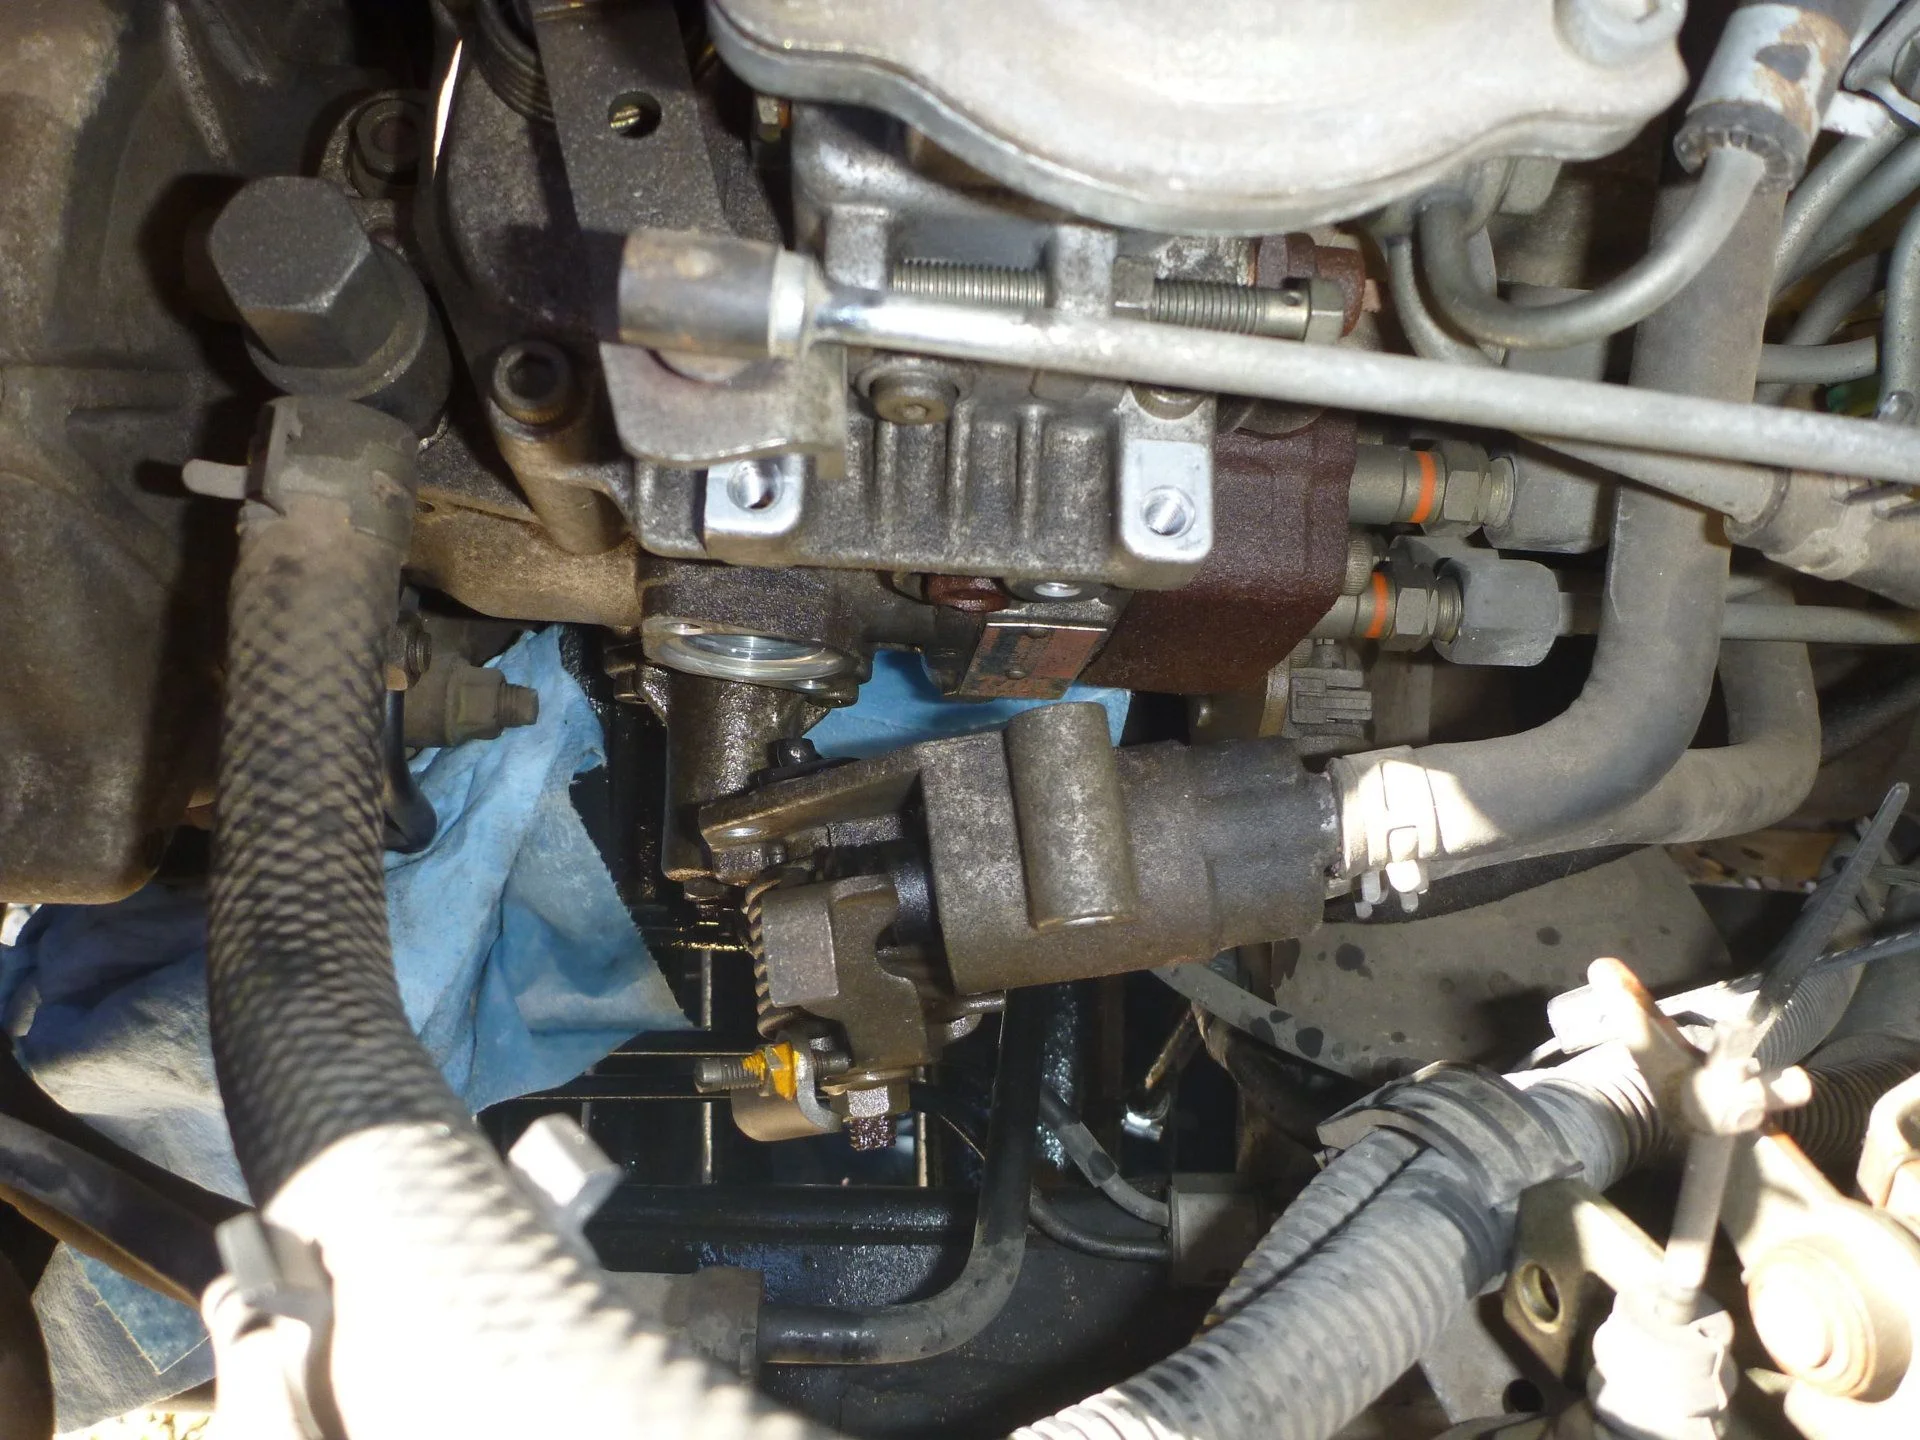
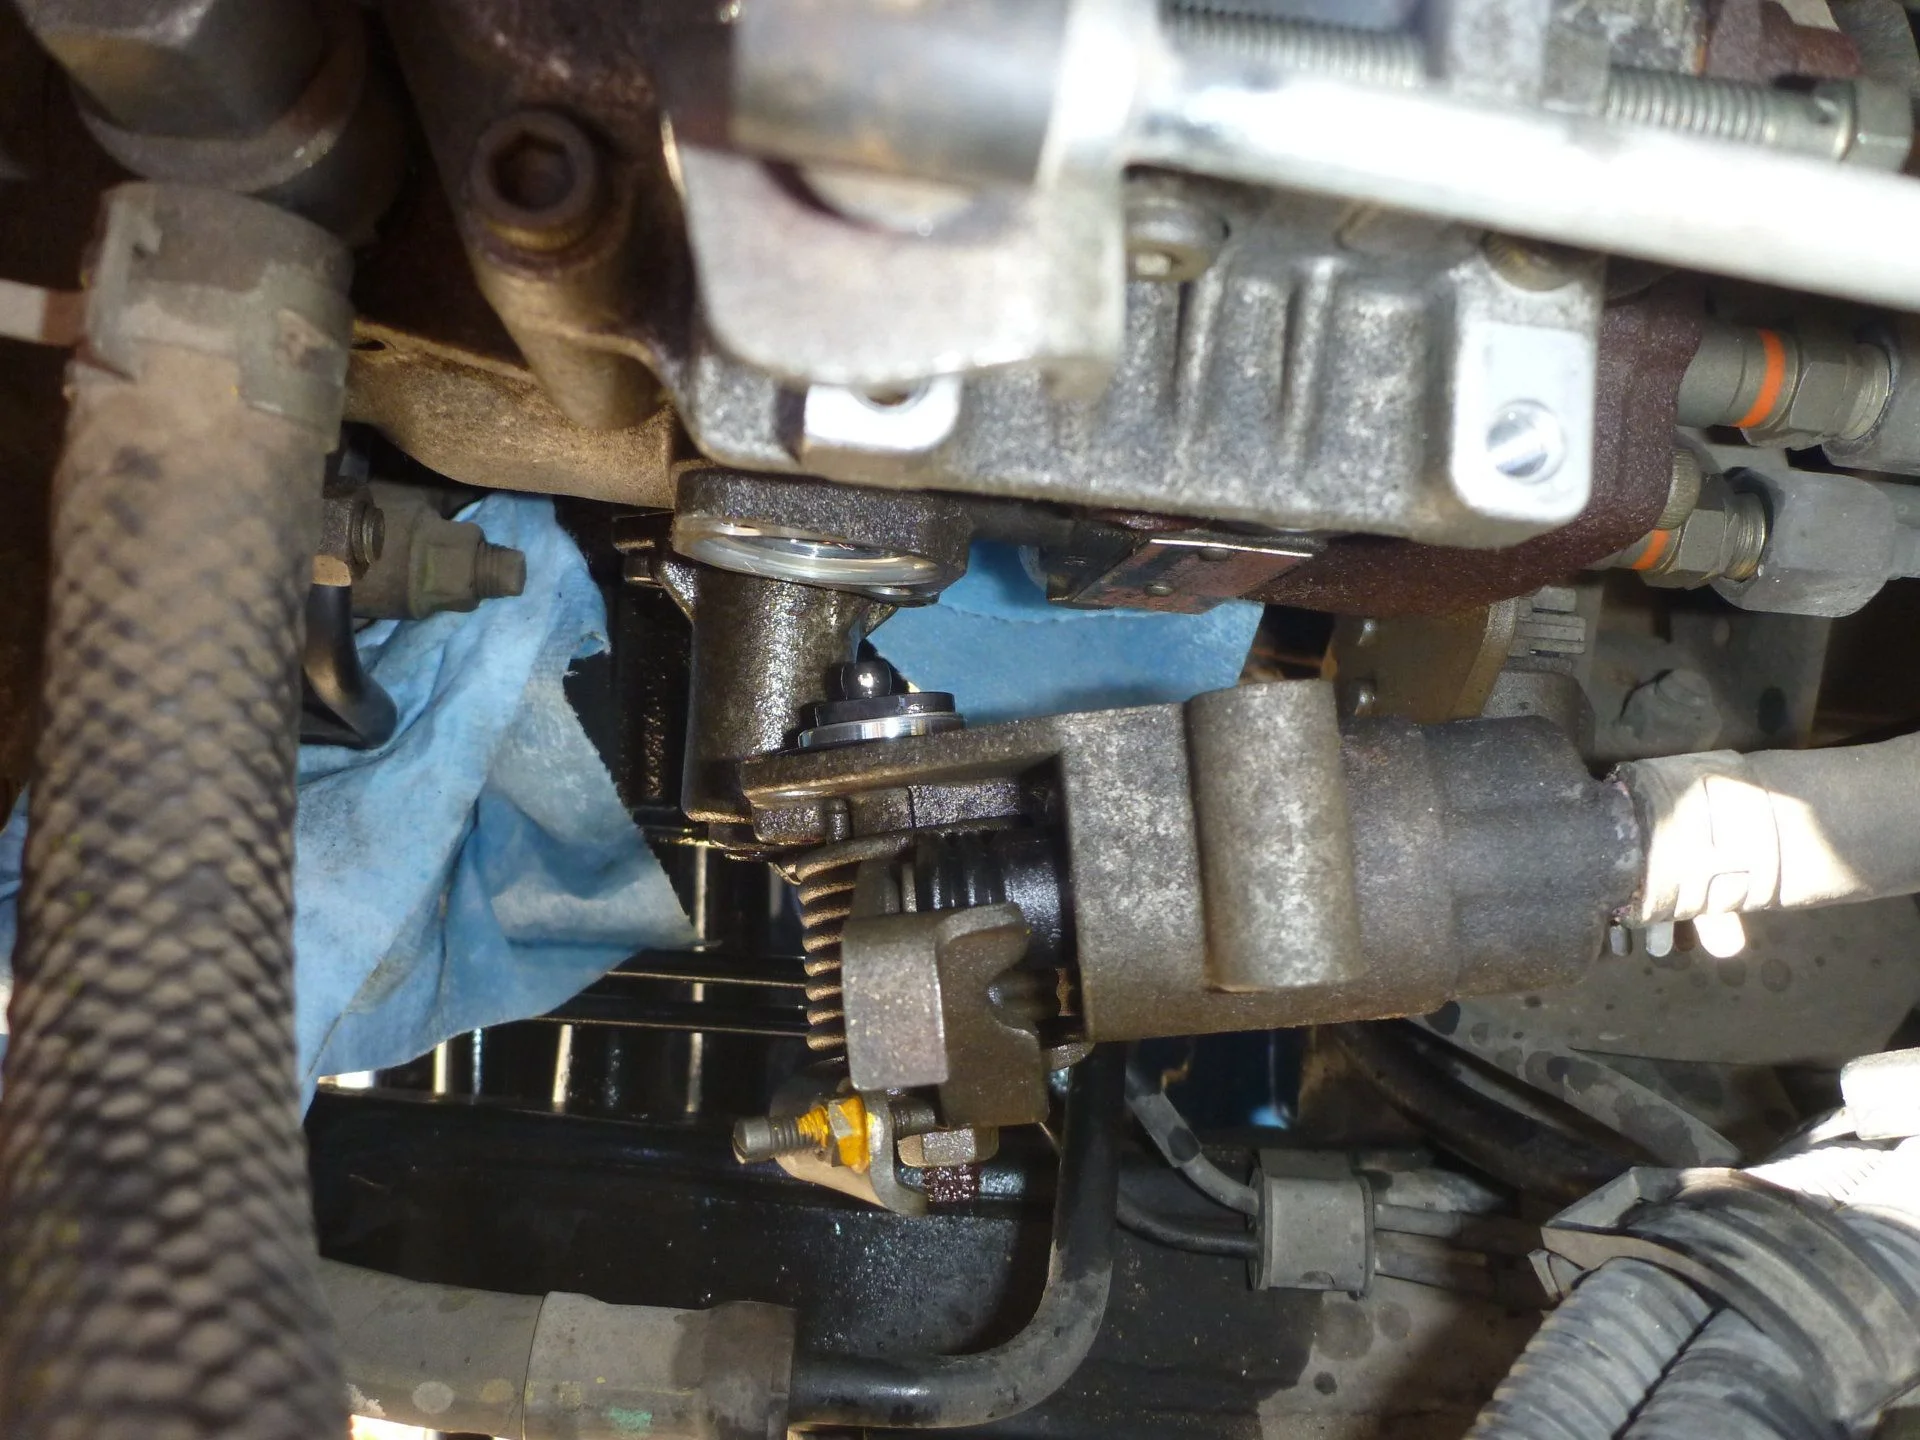
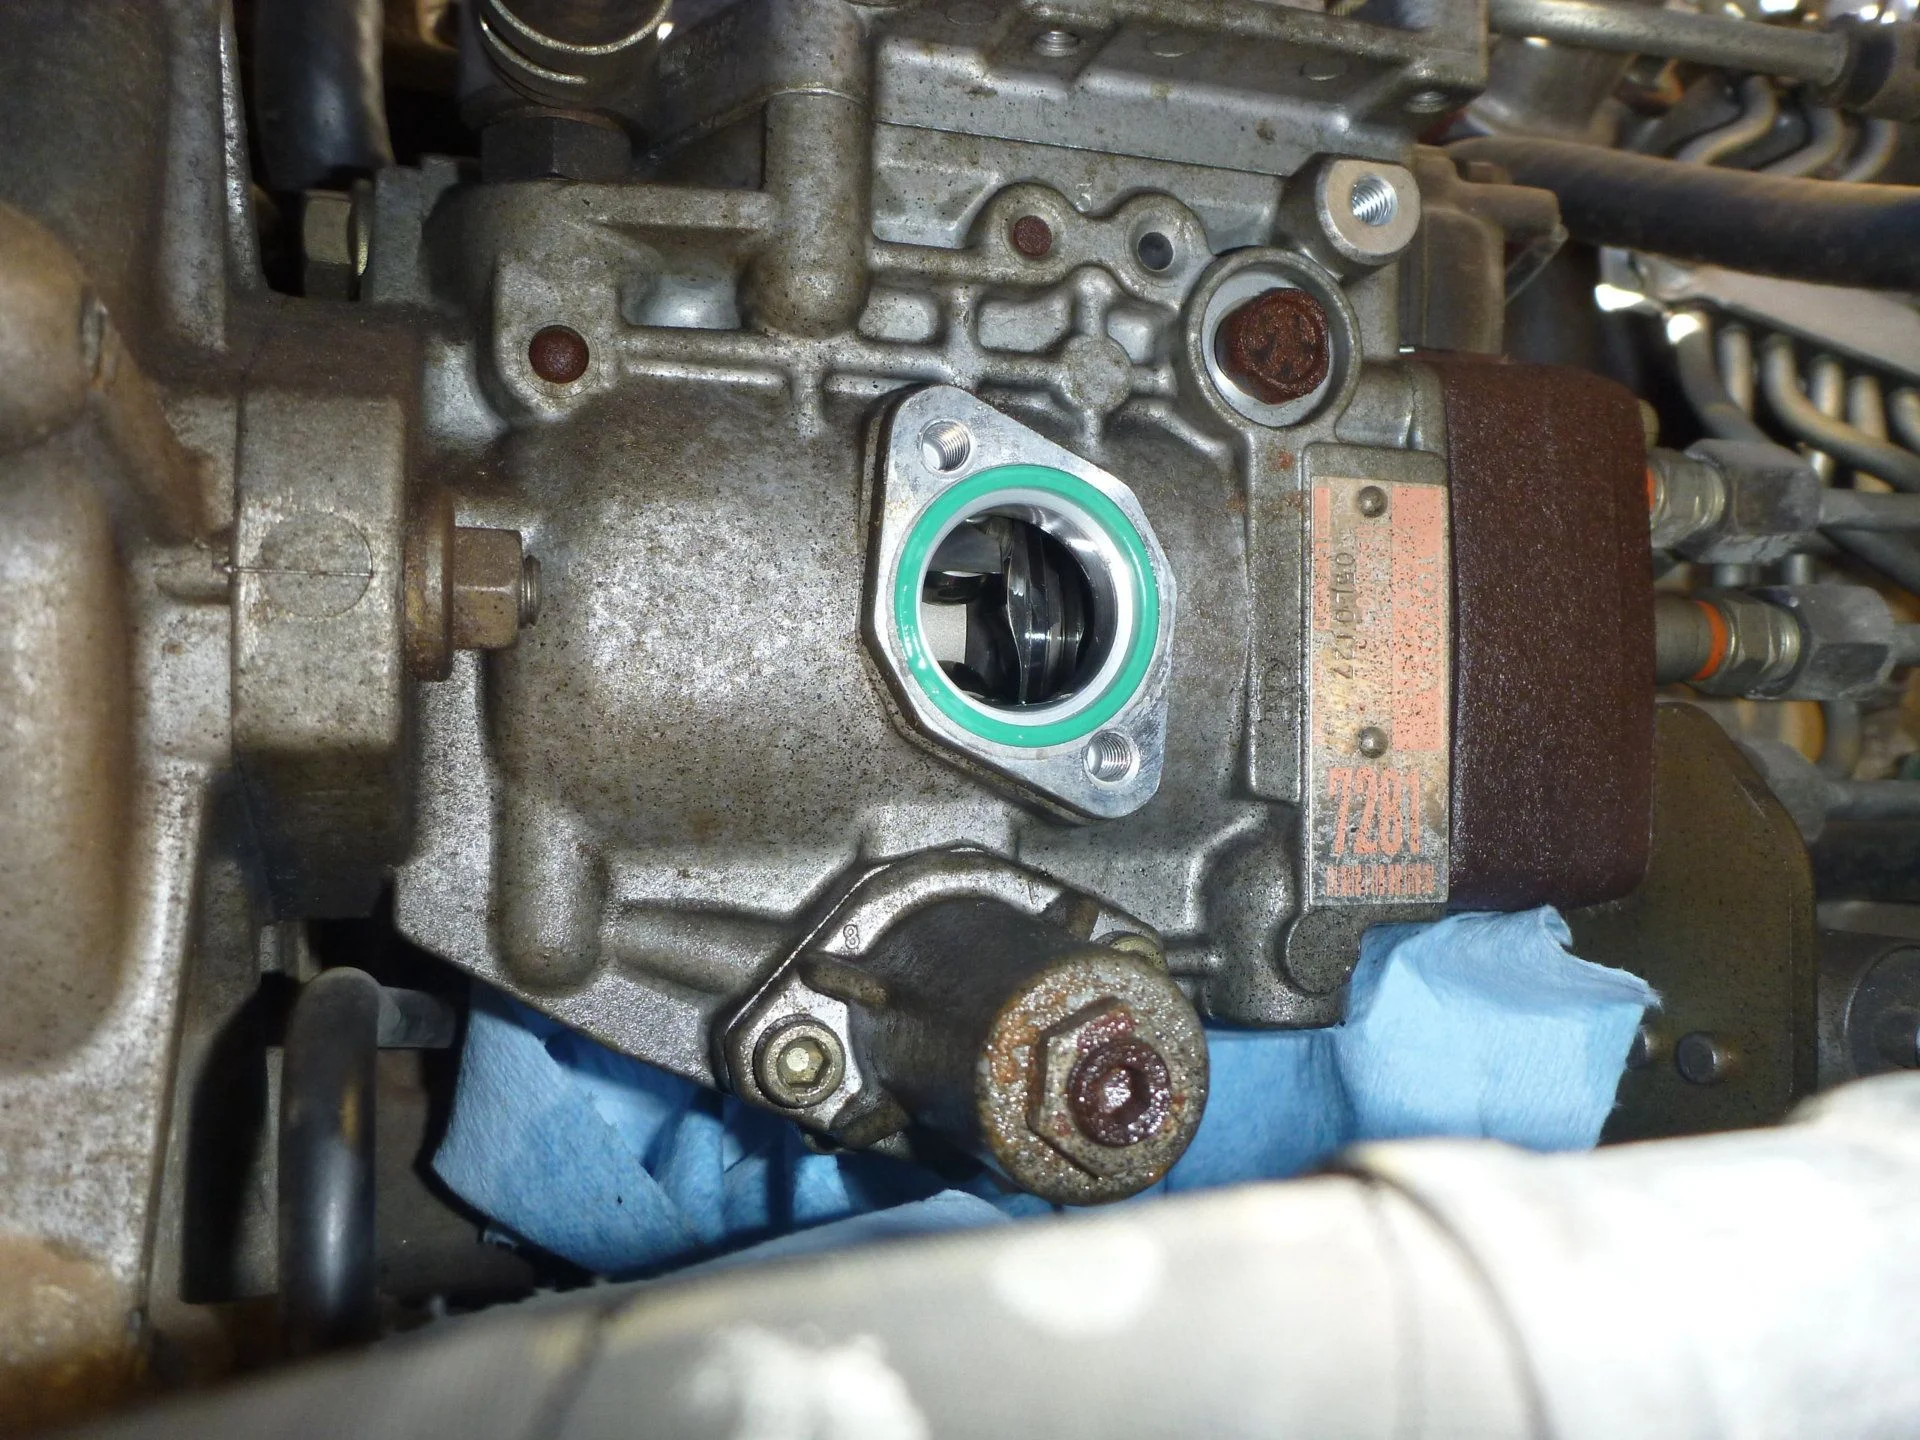
* I lost very little coolant when replacing the coolant line. I found this method worked the best: The ACSD uses coolant to engage/disengage. The ACSD's coolant lines connect to the engine block in only two places, one upper and one lower (you can trace where they go by following the hose). First, pull the coolant line that attaches to the upper part of the engine block and plug it with your finger (I had someone help me do this!!). As a warning, the old coolant lines were VERY difficult to remove from the engine block...getting a suitable grip on them without ripping/tearing them up is challenging. Second, have your replacement coolant line (and hose clamps already on!!) ready to go. Third, disconnect the bottom engine block coolant line and be ready to fit the new replacement line on. Keep that top port plugged, as this keeps coolant from gushing out. Now that the bottom port is connected to the replacement coolant line, plug in the other end to the upper engine block port and engage the hose clamps.
* I did NOT need to adjust the timing...it runs great (besides the fact that our injection pump is leaking!) and is quieter for sure
* I only pumped the fuel primer pump a few times after I had removed the ACSD and installed the backing plate...it started right up with no issues whatsoever.

Hope this helps!

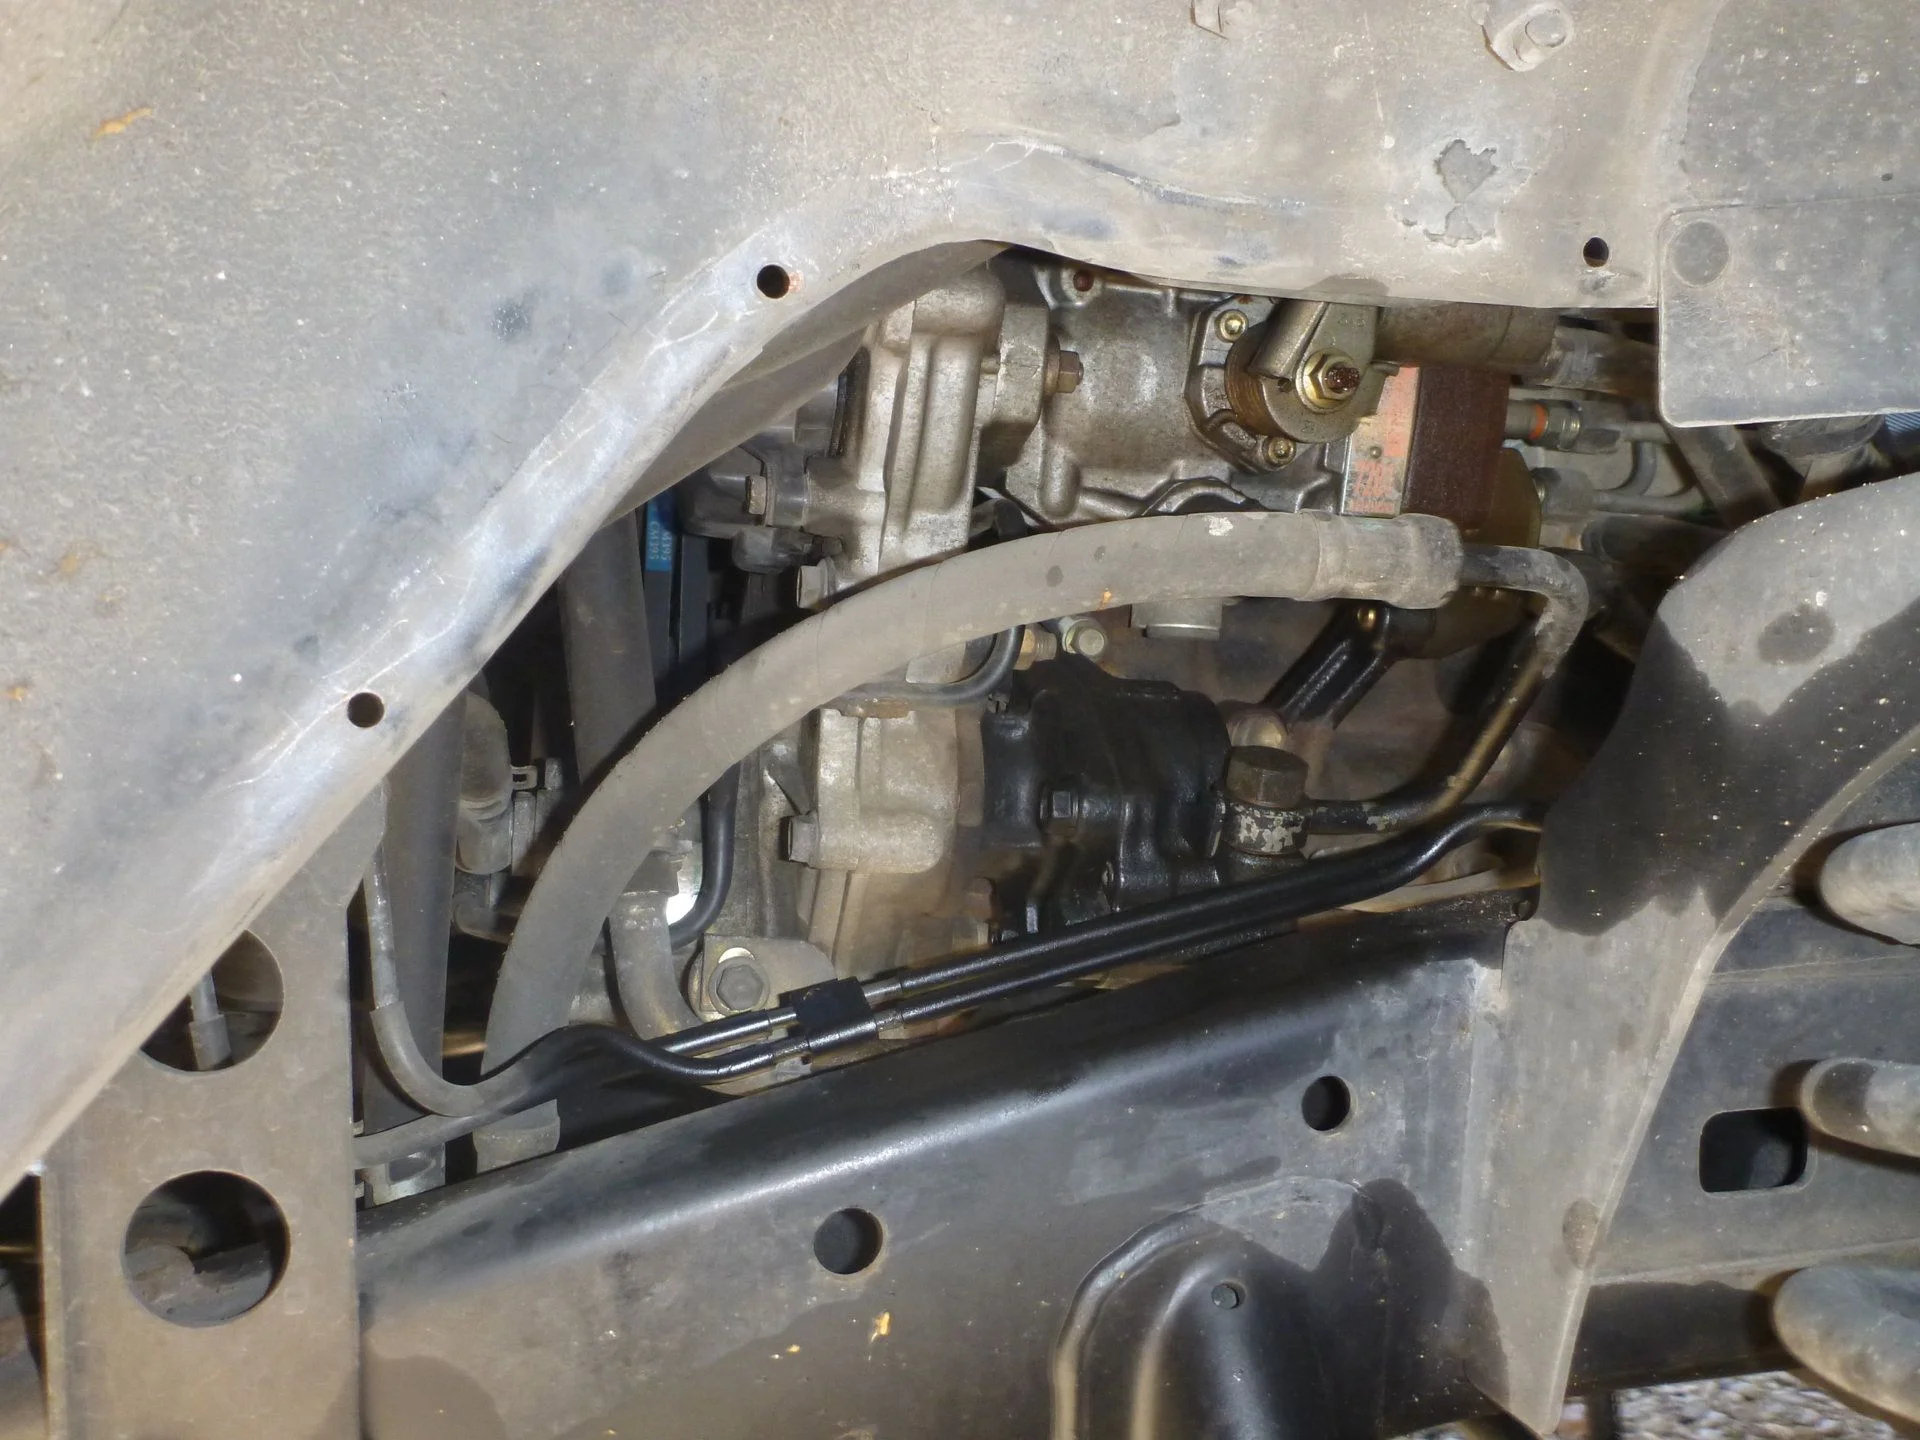
Below are photos of the process in chronological order...hopefully they help others. Remember, I have a 5-speed manual, so I don't have the automatic kick-down cable or any of that stuff near the injection pump :)


Thanks y'all!
Is the blan
1990 HDJ80 LHD MT 1HD-T
ACSD delete executed 13 Nov 21

Delete kit purchased from Back 40. Plate, o-ring, 2 x hose clamps, brass hose junction.
View attachment 2838381

Plate, o-ring, and short screws (1 & 2) taken from "A/C RevUp" device. View attachment 2838383
I first removed short bolts 1 & 2 on "A/C RevUp" apparatus. Then the long bolt #3.

View attachment 2838387

Bolts 4 & 5 attach ACSD to Injector Pump.
View attachment 2838389

This is the "A/C RevUp" device mentioned in other forums/posts. I put it in quotes, because it seems to only be affected by the ACSD, and has nothing to do with A/C or any vacuum apparatus. ??? Obviously l'm not much of a diesel mechanic...
View attachment 2838395
I put this contraption back on, but seems unnecesarry. May pull back off again.


...continued in next post...
How thick the blanking
1990 HDJ80 LHD MT 1HD-T
ACSD delete executed 13 Nov 21

Delete kit purchased from Back 40. Plate, o-ring, 2 x hose clamps, brass hose junction.
View attachment 2838381

Plate, o-ring, and short screws (1 & 2) taken from "A/C RevUp" device. View attachment 2838383
I first removed short bolts 1 & 2 on "A/C RevUp" apparatus. Then the long bolt #3.

View attachment 2838387

Bolts 4 & 5 attach ACSD to Injector Pump.
View attachment 2838389

This is the "A/C RevUp" device mentioned in other forums/posts. I put it in quotes, because it seems to only be affected by the ACSD, and has nothing to do with A/C or any vacuum apparatus. ??? Obviously l'm not much of a diesel mechanic...
View attachment 2838395
I put this contraption back on, but seems unnecesarry. May pull back off again.


...continued in next post...
How thick the blanking plate?
 
Is the blan

How thick the blanking

How thick the blanking plate?
Howdy, Edmund,
I can only speculate the plate thickness at about 4.5mm thick. Check out back40imports.com and ask Dave. Superb knowledge and service.

There are a couple pics of the plate on my post above, with relation to the long screws and short screws removed from the ACSD.
 
Last edited:
Swapping in the short bolts on plate: the torque required to strip the threads is minimal. Tighten short bolts down upon delete plate very gingerly. Or add a couple washers to long bolts? Or get the correct length bolts.
 
Great writeup!
Here is mine.


All in all, the project was pretty easy.

1. I sourced the o-ring ($5) and blanking plate ($22) from a local diesel shop. The blanking plate is about 4-5 mm thick. They did not have new bolts in stock, so I reused existing ones that attached the ACSD to the pump.
2. Detached the assembly with the throttle cable, kick down cable, and AC idle-up actuator - that required undoing 2 hex key bolts on top of the bracket, and one long hex key bolt that goes through the ACSD assembly. To get to access to the long bolt you need to move the kick down level until it's clear. I soaked the bolts in liquid wrench and they all came off pretty easily - one big effort to break the thread, and then came out by hand.
3. Unscrewed the top hex key bolt holding the ACSD to the pump - fairly easy to get to, I ended up using a 5 mm short hex bit on a ratchet wrench.
4. To get to the bottom bolt, I had to disassemble the ACSD lever mechanism, taking off both brackets and the spring, and then reaching the bolt from the wheel well. I used a ratchet wrench with a long hex bit on a long extension.
5. Once the ACSD came off, diesel leaked out of the pump as expected. I then replaced the o-ring and installed the blanking plate reusing the same bolts. The ACSD mounting flange is a little thinner than the blanking plate, so i was worried the bolts may be too short, but they seemed to have worked fine. There was about 4 mm of thread showing.
6. At this point, the ACSD was dangling by the coolant lines. I found it impossible to move the constant tension clamps and remove the coolant lines from the ACSD, so I just cut both off at the ACSD barbs using a hose cutter, connected them together using a 3/8 barb, used the stock constant force clamp on one side and a regular hose clamp on the other, and zip-tied to the nearby fuel line. Lost a s***load of coolant in the process, but I was tired, next time I should have had a plan for capping them.
7. To reinstall the throttle / kick down assembly, I had to make a sleeve for the long bolt since the bracket no longer sits on the ACSD body. I used a bushing from a shock and just cut it down to match the width of the ACSD body (31 mm).
8. Once everything was installed, the engine wouldn't start until I primed the pump (duh!), and then ran at higher than usual idle, which I adjusted down to the 680-700 range with the idle screw on the pump.

1AD44E0D-82FE-4FFA-8FDC-720A7D3B82FE.JPG


ACSD port.jpg


all together.jpg


blank plate 1.jpg


blank plate 2.jpg
 
Last edited:

Users who are viewing this thread

Back
Top Bottom