
Some have asked about my AC setup after I've posted on threads. I want to make this easier to find in a search and also I don't want to hijack their thread.
Here's a great thread:
Adding Air Conditioning to a 3B Diesel
Details on my setup:
1983 BJ60 frame, 3B Diesel engine, H55 transmission (frame, drivetrain and dash are stock BJ60)
1983 FJ60 body with a BJ60 dash.
PO did the bodyswap after bring it down from Canada, then swapped the diesel dash back into it. He also added a turbo.
I called a Landcruiser vendor and bought, used, the entire underdash Heater / AC box from him including heater core in it's box, evaporator core in it's box, blower motor, AC amplifier, everything and I got the little blue factory AC button for the dash. I also bought a AC amplifier from a FJ62, as I thought I'd need it.
There are other threads you can find to see why a FJ60 AC amplifier will not work on a 3B AC conversion, but basically it needs a specific ignition signal a diesel doesn't have. The FJ62 looks for a different signal which is why it should work. I didn't end up using the amplifier, read below to see why.
Underhood, I bought all aftermarket universal AC parts from a vendor that sells hot rod AC parts:
1. a universal hose kit with o-rings
2. parallel flow condenser (biggest I could get, 14 inch by 22 inch)
3. drier
4. Sanden 709 compressor with dual groove v-belt pulley
5. tar-soaked cork to seal at the firewall (this may be called "press-tight")
Note: I was told AC hoses must be "bubble crimped" at the fittings, and only one hydraulic shop in the whole city did that. Find a shop that can make those crimps before you go the custom hoses route.
Other underhood parts needed:
6. 15mm fitting with 45 degreee angle, hose barb on one side, 15mm connector on the other, it goes on the small hose to the firewall. I bought this locally, but CoolStream knows what is needed here.
7. A/C bracket as mentioned here:
1981 BJ60 Project
I had mine cut at a local waterjet place.
Edit: Now the CAD files for the bracket are added to the end of this post.
8. crank pulley
toyotapartszone.com
9. belt
Gates AX-39 fits but is only barely long enough, I'll likely switch to a longer one when it wears out.
I've got an AX-38 sitting on the shelf but I'm almost certain it's too short.
Dayco 17415 will also work, I tried a Dayco 15400, but the 15 series (3/8") width belts are too narrow and it broke within days.
Gates 4L405 or 2405 may work but the sleeve says it's for low horsepower applications (3-17HP)
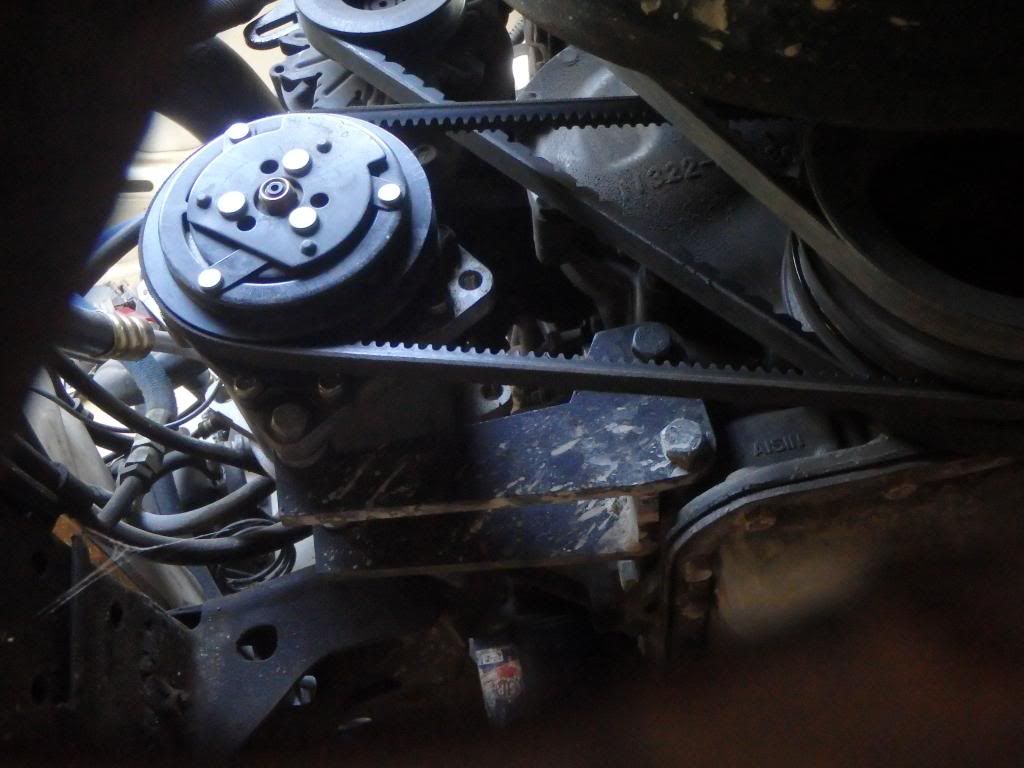
You need a 1/2" wide belt about 40-42" long. Pics below show a belt around 40" long, any shorter won't work.
10. belt tensioner
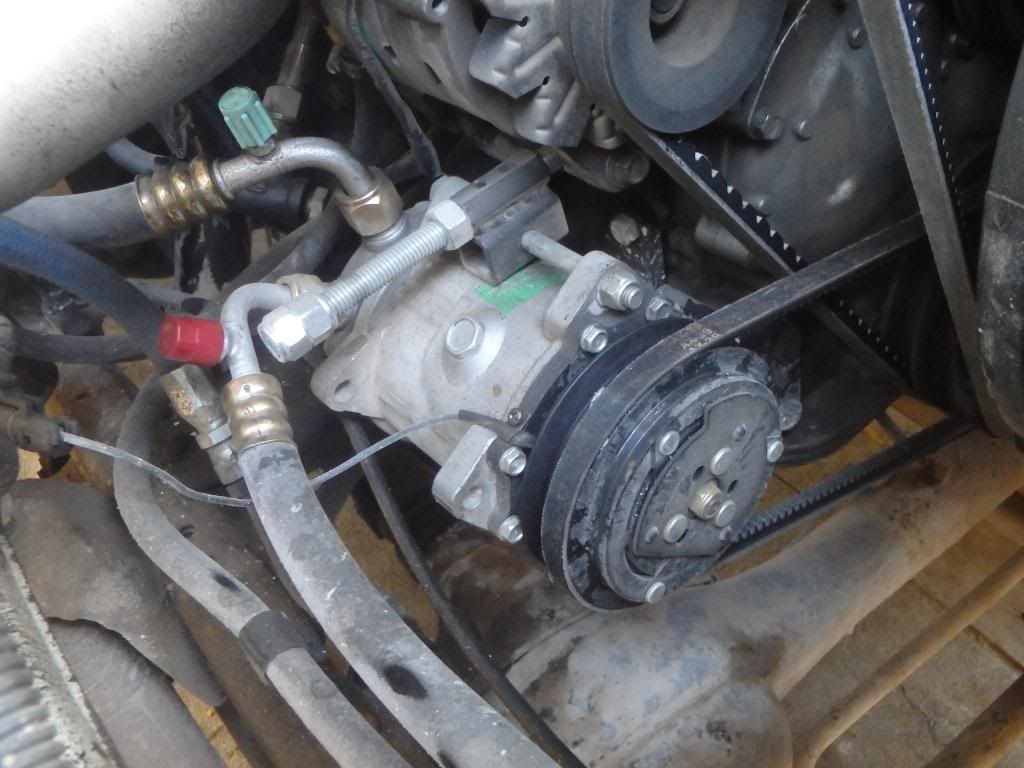
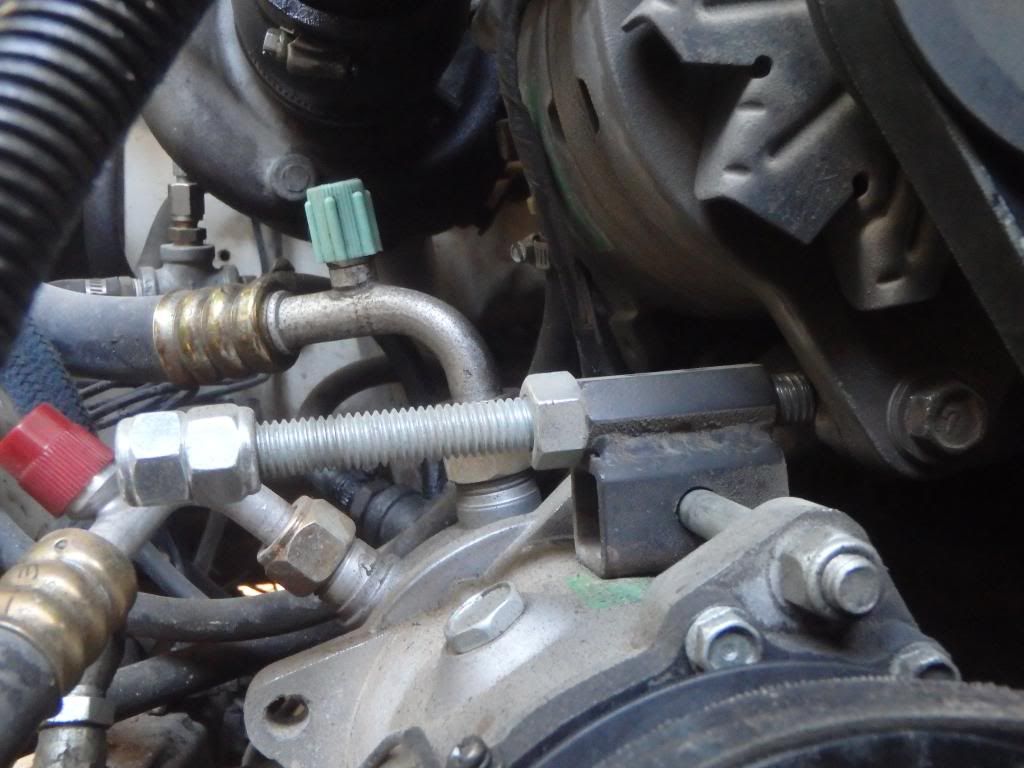
I made one, I'd like to someday make a better one with heim joints or something similar, but this is simple and it works. It pushes against the lower mount of the alternator to create tension. I used all-thread to make it way too long so I could use a variety of belt lengths (more able to use whatever length I can get here). I hope it can use the same length as the alternator or PS pump belt so I have one less spare part to carry, but I haven't tried it yet. If I stick with this design, I plan to remove one lock nut and weld the end one to the all-thread so it can't spin at all. Here's pics of the tensioner and the compressor bracket:
Compressor mounted
http://i947.photobucket.com/albums/ad316/rollinns/Landcruiser-repairs/Landcruiser Air Conditioning/PB040777_zpsc8dd2374.jpg
belt tensioner
http://i947.photobucket.com/albums/ad316/rollinns/Landcruiser-repairs/Landcruiser Air Conditioning/PB040779_zpsaae00ffe.jpg
from below
http://i947.photobucket.com/albums/ad316/rollinns/Landcruiser-repairs/Landcruiser Air Conditioning/PB040781_zpsb1d300b1.jpg
under the dash:
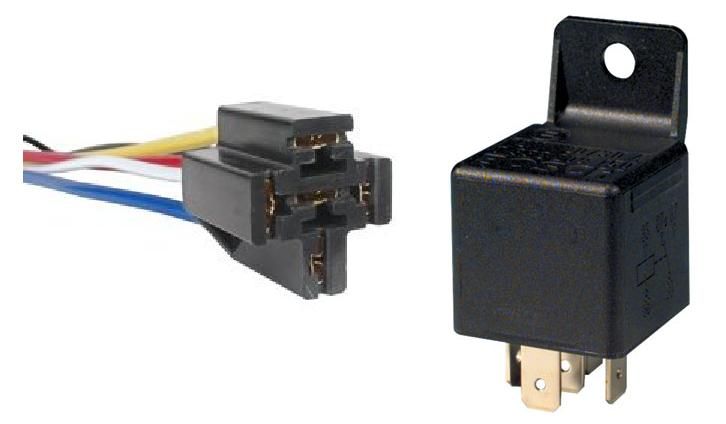
Not all the wiring plugs were present under the dash to wire it all up like it came from the factory, so I bypassed the AC amplifier completely and I wired the factory AC dash switch as follows using a 12v Bosch style relay:
http://i947.photobucket.com/albums/ad316/rollinns/Landcruiser-repairs/Landcruiser Air Conditioning/5terminalrelayandconnector_zpsb1890c3d.jpeg
old compressor clutch wiring ( keep reading for the new diagram):
http://i947.photobucket.com/albums/ad316/rollinns/Landcruiser-repairs/Landcruiser Air Conditioning/relayforACcutoutdiagram3_zpsd4d81fd0.gif
From ground to the AC dash button, to the low pressure switch inside the AC evaporator box to terminal 86. Terminal 30 and terminal 85 go to the AC fuse in the fusebox, and terminal 87 goes to the compressor clutch.
I removed the accordion style tube between the blower and the heater core box and mocked up the evaporator core box to figure out where to drill the holes for the AC fitting to poke through the firewall. Toyota conveniently put 3 little dimples in the fire wall to line up with the tubes for the evaporator core and are a perfect guide for a hole saw.
upper hole size is 1 inch
lower hole size is 1.375 inch
I got all aftermarket parts under the hood, but I don't regret it because everything there is new, and I think I saved some money. It did take more time though since I had to install everything that carries freon before I could start making the hoses. For those that have not made their own hoses, it's tedious but not difficult. I installed the fittings on everything, figured out where I could secure the longer hoses, then cut the hoses an inch or two long and kept trimming the length slightly until every hose fit and would not rub anywhere. I was told AC hoses must be "bubble crimped" at the fittings, and only one hydraulic shop in the whole city did that. I said this eariler but it's worth repeating: find a shop that can make bubble crimps before you go the custom hoses route.
When all the hoses are the right length after pushing the hoses completely on the fittings, you're almost ready to take them to the crimper.
This guy said it better than me:
What does everyone do for Custom AC hoses - Hot Rod Forum : Hotrodders Bulletin Board
"I install the fittings into the hoses, ready to be crimped, and MARK the orientation of the fitting to the hose end. A few degrees off makes installation difficult or impossible, and they cannot be reoriented after crimping.
Have a pro shop crimp the fittings. Some places that make hydraulic hoses for tractors, etc. also have AC tools that came with their crimper because tractors and combines also have AC in the cabs. "
Once the hoses are installed. Wire up the AC button under the dash, the low pressure switch and the compressor clutch. Test that the compressor clutch works with the engine off, then have it filled with freon at a local shop.
It all worked great for a few weeks, until...
Changes / regrets:
now my expansion valve (TXV) is stuck open (high side has low pressure and low side has high pressure). The only used parts I started with were the in the evaporator box under the dash. When it arrived, the evaporator had decades of crud in it which was blocking most of the airflow, while it looked a lot better after 4-5 cleanings with this:
Amazon product ASIN B00ALWZYOYIt still wasn't super clean like I wanted, and after the 3rd cleaning it really didn't get much better, but air flow was decent, I knew the blower motor was strong enough to blow through it and I needed AC going so I installed it anyway. Since I now have to evacuate the system and pull apart the dash to fix it, I'm going to replace all the used stuff. I called Coolstream AC (www.coolstreamac.com) and talked to Rex. I'm getting a new evaporator core, new expansion valve and low side switch, I'm also replacing the generic aftermarket drier with another generic one with a high-low pressure switch (binary switch) on the top since the system doesn't currently have a safety cut off for high pressures. Also when I originally installed the evaporator core I installed a "thermostat switch" from a 68 Ford Galaxy:
http://i947.photobucket.com/albums/ad316/rollinns/Landcruiser-repairs/Landcruiser Air Conditioning/thermostatswitchfrom68FordGalaxie2.jpg
On advice from the shop that evacuated and charged the system, and from Rex at Coolstream, they said I need to wire the thermostat switch inline with the AC button and low pressure switch because I lack the AC amplifier, the thermostat switch will now control the compressor clutch to turn it off when the system gets closer to freezing up and turn it back on when the evaporator temp gets too high. The one I got is adjustable. I'll move this switch to the new evaporator and wire it in at the same time, and wire the new drier mounted switch in the same circuit.
This is how I'll wire it up when I get the new parts:
http://i947.photobucket.com/albums/ad316/rollinns/Landcruiser-repairs/Landcruiser Air Conditioning/relayforACcutoutdiagram-moreswitches_zpsc145990b.gif
After that's all done, every part will be new. I wish I'd gone the "all new" route the first time, but I'm still glad I went with aftermarket "hot rod" AC parts instead of factory pieces since Rex @ CoolStream AC said that the drier swap is a lot easier since it's generic. I also learned my leasson and I end up with a new AC vacuum pump, as a result of replacing the use parts.
disclaimer: I am not affiliated with, compensated by, and I did not receive any discounts or free parts from CoolStream AC. I did receive great customer service to the point of Rex making some phone calls to suppliers regarding questions I had, and to check availability, and he called me back hours later (the same day) with definitive answers, even before he knew if I was going to buy (I had to make sure I could get a vacuum pump.) He's very competent, knowledgeable regarding Landcruisers, and courteous.
Here's a great thread:
Adding Air Conditioning to a 3B Diesel
Details on my setup:
1983 BJ60 frame, 3B Diesel engine, H55 transmission (frame, drivetrain and dash are stock BJ60)
1983 FJ60 body with a BJ60 dash.
PO did the bodyswap after bring it down from Canada, then swapped the diesel dash back into it. He also added a turbo.
I called a Landcruiser vendor and bought, used, the entire underdash Heater / AC box from him including heater core in it's box, evaporator core in it's box, blower motor, AC amplifier, everything and I got the little blue factory AC button for the dash. I also bought a AC amplifier from a FJ62, as I thought I'd need it.
There are other threads you can find to see why a FJ60 AC amplifier will not work on a 3B AC conversion, but basically it needs a specific ignition signal a diesel doesn't have. The FJ62 looks for a different signal which is why it should work. I didn't end up using the amplifier, read below to see why.
Underhood, I bought all aftermarket universal AC parts from a vendor that sells hot rod AC parts:
1. a universal hose kit with o-rings
2. parallel flow condenser (biggest I could get, 14 inch by 22 inch)
3. drier
4. Sanden 709 compressor with dual groove v-belt pulley
5. tar-soaked cork to seal at the firewall (this may be called "press-tight")
Note: I was told AC hoses must be "bubble crimped" at the fittings, and only one hydraulic shop in the whole city did that. Find a shop that can make those crimps before you go the custom hoses route.
Other underhood parts needed:
6. 15mm fitting with 45 degreee angle, hose barb on one side, 15mm connector on the other, it goes on the small hose to the firewall. I bought this locally, but CoolStream knows what is needed here.
7. A/C bracket as mentioned here:
1981 BJ60 Project
I had mine cut at a local waterjet place.
Edit: Now the CAD files for the bracket are added to the end of this post.
8. crank pulley
toyotapartszone.com
9. belt
Gates AX-39 fits but is only barely long enough, I'll likely switch to a longer one when it wears out.
I've got an AX-38 sitting on the shelf but I'm almost certain it's too short.
Dayco 17415 will also work, I tried a Dayco 15400, but the 15 series (3/8") width belts are too narrow and it broke within days.
Gates 4L405 or 2405 may work but the sleeve says it's for low horsepower applications (3-17HP)
You need a 1/2" wide belt about 40-42" long. Pics below show a belt around 40" long, any shorter won't work.
10. belt tensioner
I made one, I'd like to someday make a better one with heim joints or something similar, but this is simple and it works. It pushes against the lower mount of the alternator to create tension. I used all-thread to make it way too long so I could use a variety of belt lengths (more able to use whatever length I can get here). I hope it can use the same length as the alternator or PS pump belt so I have one less spare part to carry, but I haven't tried it yet. If I stick with this design, I plan to remove one lock nut and weld the end one to the all-thread so it can't spin at all. Here's pics of the tensioner and the compressor bracket:
Compressor mounted
http://i947.photobucket.com/albums/ad316/rollinns/Landcruiser-repairs/Landcruiser Air Conditioning/PB040777_zpsc8dd2374.jpg
belt tensioner
http://i947.photobucket.com/albums/ad316/rollinns/Landcruiser-repairs/Landcruiser Air Conditioning/PB040779_zpsaae00ffe.jpg
from below
http://i947.photobucket.com/albums/ad316/rollinns/Landcruiser-repairs/Landcruiser Air Conditioning/PB040781_zpsb1d300b1.jpg
under the dash:
Not all the wiring plugs were present under the dash to wire it all up like it came from the factory, so I bypassed the AC amplifier completely and I wired the factory AC dash switch as follows using a 12v Bosch style relay:
http://i947.photobucket.com/albums/ad316/rollinns/Landcruiser-repairs/Landcruiser Air Conditioning/5terminalrelayandconnector_zpsb1890c3d.jpeg
old compressor clutch wiring ( keep reading for the new diagram):
http://i947.photobucket.com/albums/ad316/rollinns/Landcruiser-repairs/Landcruiser Air Conditioning/relayforACcutoutdiagram3_zpsd4d81fd0.gif
From ground to the AC dash button, to the low pressure switch inside the AC evaporator box to terminal 86. Terminal 30 and terminal 85 go to the AC fuse in the fusebox, and terminal 87 goes to the compressor clutch.
I removed the accordion style tube between the blower and the heater core box and mocked up the evaporator core box to figure out where to drill the holes for the AC fitting to poke through the firewall. Toyota conveniently put 3 little dimples in the fire wall to line up with the tubes for the evaporator core and are a perfect guide for a hole saw.
upper hole size is 1 inch
lower hole size is 1.375 inch
I got all aftermarket parts under the hood, but I don't regret it because everything there is new, and I think I saved some money. It did take more time though since I had to install everything that carries freon before I could start making the hoses. For those that have not made their own hoses, it's tedious but not difficult. I installed the fittings on everything, figured out where I could secure the longer hoses, then cut the hoses an inch or two long and kept trimming the length slightly until every hose fit and would not rub anywhere. I was told AC hoses must be "bubble crimped" at the fittings, and only one hydraulic shop in the whole city did that. I said this eariler but it's worth repeating: find a shop that can make bubble crimps before you go the custom hoses route.
When all the hoses are the right length after pushing the hoses completely on the fittings, you're almost ready to take them to the crimper.
This guy said it better than me:
What does everyone do for Custom AC hoses - Hot Rod Forum : Hotrodders Bulletin Board
"I install the fittings into the hoses, ready to be crimped, and MARK the orientation of the fitting to the hose end. A few degrees off makes installation difficult or impossible, and they cannot be reoriented after crimping.
Have a pro shop crimp the fittings. Some places that make hydraulic hoses for tractors, etc. also have AC tools that came with their crimper because tractors and combines also have AC in the cabs. "
Once the hoses are installed. Wire up the AC button under the dash, the low pressure switch and the compressor clutch. Test that the compressor clutch works with the engine off, then have it filled with freon at a local shop.
It all worked great for a few weeks, until...
Changes / regrets:
now my expansion valve (TXV) is stuck open (high side has low pressure and low side has high pressure). The only used parts I started with were the in the evaporator box under the dash. When it arrived, the evaporator had decades of crud in it which was blocking most of the airflow, while it looked a lot better after 4-5 cleanings with this:
Amazon product ASIN B00ALWZYOYIt still wasn't super clean like I wanted, and after the 3rd cleaning it really didn't get much better, but air flow was decent, I knew the blower motor was strong enough to blow through it and I needed AC going so I installed it anyway. Since I now have to evacuate the system and pull apart the dash to fix it, I'm going to replace all the used stuff. I called Coolstream AC (www.coolstreamac.com) and talked to Rex. I'm getting a new evaporator core, new expansion valve and low side switch, I'm also replacing the generic aftermarket drier with another generic one with a high-low pressure switch (binary switch) on the top since the system doesn't currently have a safety cut off for high pressures. Also when I originally installed the evaporator core I installed a "thermostat switch" from a 68 Ford Galaxy:
http://i947.photobucket.com/albums/ad316/rollinns/Landcruiser-repairs/Landcruiser Air Conditioning/thermostatswitchfrom68FordGalaxie2.jpg
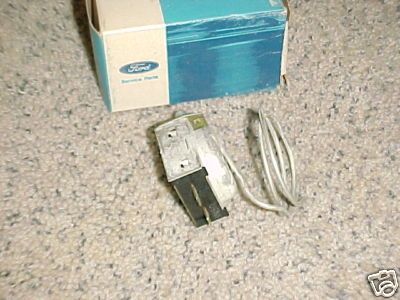
On advice from the shop that evacuated and charged the system, and from Rex at Coolstream, they said I need to wire the thermostat switch inline with the AC button and low pressure switch because I lack the AC amplifier, the thermostat switch will now control the compressor clutch to turn it off when the system gets closer to freezing up and turn it back on when the evaporator temp gets too high. The one I got is adjustable. I'll move this switch to the new evaporator and wire it in at the same time, and wire the new drier mounted switch in the same circuit.
This is how I'll wire it up when I get the new parts:
http://i947.photobucket.com/albums/ad316/rollinns/Landcruiser-repairs/Landcruiser Air Conditioning/relayforACcutoutdiagram-moreswitches_zpsc145990b.gif
After that's all done, every part will be new. I wish I'd gone the "all new" route the first time, but I'm still glad I went with aftermarket "hot rod" AC parts instead of factory pieces since Rex @ CoolStream AC said that the drier swap is a lot easier since it's generic. I also learned my leasson and I end up with a new AC vacuum pump, as a result of replacing the use parts.
disclaimer: I am not affiliated with, compensated by, and I did not receive any discounts or free parts from CoolStream AC. I did receive great customer service to the point of Rex making some phone calls to suppliers regarding questions I had, and to check availability, and he called me back hours later (the same day) with definitive answers, even before he knew if I was going to buy (I had to make sure I could get a vacuum pump.) He's very competent, knowledgeable regarding Landcruisers, and courteous.
Attachments
Last edited:
