Builds A Troopy Finds Its Owner (1 Viewer)

This site may earn a commission from merchant affiliate
links, including eBay, Amazon, Skimlinks, and others.

Looks like you may need a pan off a hzj105 with the shallower middle section. There's a bit of info in outbackstevos thread. May need a different pickup also.

images-1.webp


It would be good if someone could measure one to confirm it would work
 
Hello AlbertoSD,
I read through your thread a long time ago; i'm not anywhere near as keen on short-wheelbase 4x4's as i am about troopies, but your number is the sort that has changed my mind: a bloody car you have there, sir.

@61Mk+ ,

Thank you for your kind words. I am glad the BJ70 has changed your mind a little about SWB vehicles.

I really can't wait to see the Troopie finally done and out there on the trails.

Keep us posted!

-Alberto
 
Locked79,
Yes, thank you, sir, i will update when the time comes; the oil pick-up point will have to be figured out, which may very well mean a new oil pan anyway. I love the input.
It'll be a couple of weeks or so before i am able to next fiddle with the car: overseas visitor, dontcha know. And this one quite likes the troopie. Unfortunately, once again, i am unable to get a picture in just now.
 
Last edited:
I was just now able to load in the other oil pan picture i wanted here. As well, there's that furriner (from another country) i mentioned. Getting in the way of a picture of a nice car.

trpoilpan 005.webp


IvnkaBrooks'15 011.webp
 
Wow, what a troubling story, really sorry that happened to you. Honestly didnt see that coming, especially the way he openly blasted some other members on this forum, calling them crooks and warned us to stay away. Isnt that the pot calling the kettle black!!!

I followed your trucks build, jealous of what was taking place and inspired to copy some of those ideas for my own truck. (which I am still going to do) i often wondered what happened. Why was there no end to that thread with pictures of the truck being passed onto the happy owner? Did he run out of funds? Now we know.......

I hope you get all the bugs worked out to the point where you can enjoy it trouble free, and your nightmare becomes a distant memory, seldom thought of again. My next truck will be one like you have now, only untouched by crushers. Wishing you the best.
 
Hello Phil in BC and Mudders,
I was expecting a lot of flak from Mudders with my thread, as Crushers is not at all lacking in knowledge and experience on LandCruisers and thus i assumed he was a popular one here; so your comments are far from unappreciated. Do keep in mind a lot of his work on my car is magic, as well i likely would not have my car at all without his work (he sourced and imported it too).
Do you have a troopie yourself? I really like some of your comments, for example the jealousy bit: i am jealous of my own troopie, it is that good. No logic there, but just to make a point. In terms of crooks, Crushers has dissed my mechanics' shop (Pro-Active Automotive in Calgary) on Mud, but in eleven years of dealing with them they have not once set a foot wrong. Crushers says they are overpriced. I am unable to agree: if their shop rates are higher than one likes, fine, however if they do the job right the first time, that is money saved, since the job doesn't need to be done again; to do so is painfully expensive. When dealing with one's daily driver, it is even more expensive when work already paid for needs to be done again, especially so when one's job depends on that daily driver. I speak from experience here, with my troopie as well as my old 61.
I just found out that the fuel lines were not all connected properly. Two weeks ago, as i said in previous posts, we switched the lines to the two fuel filters (one from each tank), such that now the gauge, fuel tank switch, and the tank from which the fuel is drawn all match. But that highlighted other issues: i drained the rear tank since then (by driving until it was empty), and filled only the front tank. The rear of the car was covered in diesel mist, a less-than-ideal situation, so i did not want to fill the rear tank. And at the same time i found that the fuel consumption was even more horrendous than usual. As in disgustingly and unacceptably poor. After two or three fuelings of the front tank (about 35 litres at a time, for a 90 litre reservoir), the rear tank's cap was leaking fuel (!!!!): it was full to brimming. Which told me that the fuel lines were crossed up, such that when on one tank, the return fuel went to the other tank. In other words, the front tank got drained real fast, like, and the rear was getting filled. To the top of the filler neck. Jesus H. Christ on a bicycle.
That's sorted now, or so i hope. I took my Dutch friend on some visits (show them furriners the sights!), and had to borrow my mechanic's car, as the brakes faded to near oblivion. I had the flexible brake lines switched (months and months ago, when i initially got the car, so this is not Crushers' work) to the braided stainless type, since i figured they'd be much more able to take a beating from rocks and sticks and what-not when wheeling, plus they do not expand as much, thus providing better brake feel (i am not a mechanic, but that made sense to me). The rear axle's flexible line sprang a serious leak, as it is a very short line; the axle flex was more than it could take, causing a break in the line and a leak of brake fluid. I must say i was a little tense driving 300km (to my mechanic's shop) with VERY soft brakes. No tailgating, i can assure you. A little lesson for me there.
Next week, we attack the fuel tanks (as well as an engine oil leak). As it is my daily driver i am doing the shakedown drives every day; it has been years since i am working towards extended drives and travels, and the shakedowns are going to take me a while yet: i do not want to go far without proper preparation, and the troopie must be right. What crap i must sort out and deal with yet is part of the deal: find the issues now, instead of when i will be in the middle of nowhere.
 
Last edited:
Hello Mudders,
I spent the last three days fiddling with my car, with professional help. A few things were done: the oil pan was modified to prevent the electric-diff-lock mechanism's protector plate from bashing into it. I could have had a new pan (correct for my pre-1990 axles) installed, but didn't as i had already bought a new one (as mentioned a few posts back) and didn't feel like buying another; as well, there was also an important modification done to the existing one, the addition of an oil return pipe from the turbo, which i remembered to photograph for a change.
When the oil pan was removed, a small, perfectly circular pile of silicone was waiting for us at the bottom of it, giving away the location of the oil pick-up screen; a lot more silicone was used than was needed. Nice to know the engine will no longer be in danger of oil starvation. I forget the exact number of bolts there are to hold the oil pan on (16? 18?), but there are also three nuts that fit on studs to go with the bolts; the paired nuts, at the rear of the pan, were not even hand tight.
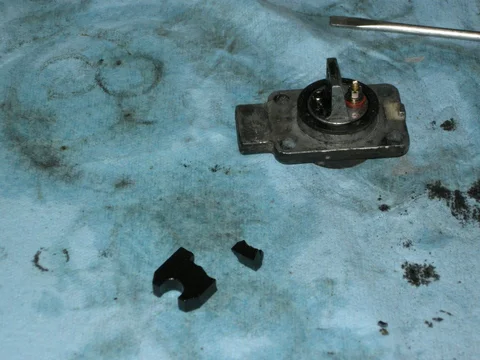
The 1HZ in my troopie came from an '05 or '06 HZJ77, according to Crushers, which is a model that had an oil-level sensor in the pan; that's the purpose of the hole in the side that can be seen in the first picture. That item was incomplete on my pan, and in the fourth picture are two pieces of that sensor that were found broken off, and having an easy life of doing didley; the larger bit in the same picture is the inside of the sensor's mount, with the sensor bits removed (it wasn't wired in and so had no real purpose any longer). The front bump stops were replaced by items that are two inches longer, providing me with a little more piece of mind.
I found it interesting to discover that the oil pan is made of two steel stampings, with one fitting into the other (two welding passes were made for each of the interior and exterior of the pan, plus some type of sealant was applied, again both inside and outside). A good pal of mine, who is a seriously accomplished bike mechanic (he spent years on Japanese bikes) told me that Japanese bikes had doubled exhausts, in order to prevent blueing of the chrome; so the only reason or guess (thanks to Jake, the bike mechanic) i can think of for the existence of the doubled pan is heat-transfer prevention; if anyone knows any better, i am curious.
Five images are the limit per thread, so i'll go on to the next post.
troopiestuffagain 003.webp troopiestuffagain 006.webp troopiestuffagain 007.webp troopiestuffagain 008.webp troopiestuffagain 004.webp
 
Last edited:
Every time I think I'm having a bad day I just need to read this thread. :)
 
View attachment 1175338 View attachment 1175339 View attachment 1175340
UOTE="1978HJ45, post: 10083918, member: 49353"]Every time I think I'm having a bad day I just need to read this thread. :)[/QUOTE]

HAHA! Thanks for a good giggle, 1978HJ45! I do hope, now, that this thread isn't too depressing...
It is, i must say, enormously satisfying to get one's car sorted out right proper.
 
Although I seldom offer anything of technical value I'm always good for a giggle. :)
 
And thank heavens for that.
 
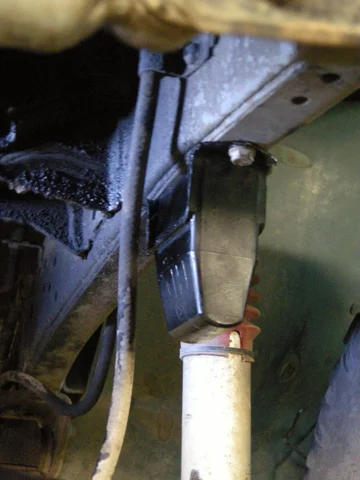
Here are shots of the finished oil pan back in its home, as well as the bent Slee protector plate. That plate was bent back to level after that shot was taken.
About five weeks ago, a significant oil leak developed. It turned out to be from the power steering pump housing (it is lubed by engine oil), as its bolts weren't tightened enough; a gap between it and the mating surface could be seen, too.
The air compressor on board was low on oil, too, so that was topped up (using 10W-30 engine oil, as per the manufacturer). It no longer bleeds air out so quickly once up to pressure.
The reason for the fuel leak at the rear tank's cap is that the surface on which the cap's rubber seal sits has small dents in it; i got a filler neck at a junkyard, from a Ford F350 pick-up (a diesel one). troopiestuffagain 009.webp troopiestuffagain 010.webp troopiestuffagain 005.webp
Sooner or later, hopefully sooner, that'll get changed, and then i'll be able to replace both fuel caps, such that i'll only need one key for both. Too bad i hadn't thought to request a troopie with the factory fuel tanks, just so i could have had fuel cap doors on both. Ah well.
 
Although I seldom offer anything of technical value I'm always good for a giggle. :)

And thank heavens for that.

I could not agree more with both comments.

Charles - You are an enduring source of support, humor and goodwill for 7X forum members/viewers - and usually good for a ho-yuck, giggle, snicker and/or outright gut-busting laugh. Your gracious goodwill and camaraderie are most appreciated.

Nick - Although a more recent arrival, your tales of woe and vehicular redemption are inspiring - especially given the time, effort and expense of your build and related mechanical challenges. The grace and equanimity of your response to the PO's errors and omissions are an excellent example for my emulation.

As a fellow member of the North American Seventy-Five Series Self-Abuse and Self-Flaggelation Society ("NASSSSS") and chairperson of the Cab/Chassis Chapter, I can relate to some of the issues you have faced. I seem to have dodged some of your bullets, but have provided some of my own.

Thanks for showing up, gentlemen :)

:cheers:
 
Mr. Wardharris,
No more of those types of messages, please, or i'll cry!
Seriously, we aim for whatever goals please us, goof up finding the right way there, fall flat on our faces to learn the hard way that mistakes were made, then get up and keep going. You're not wrong about the expenses, they hurt. But i love my car, so what am i losing, a better investment vehicle (intentional pun) that is guaranteed to keep me safe as well as bored?
I got the book, maybe three years ago, from Thomas Sheppard, called, 'Vehicle-Dependent Expedition Travel' (a reprint, by the way). Here's a guy with some serious, and i do mean serious, experience in remote-location travel, in areas beyond any help apart from self-sufficiency, saying, in two locations in that book, that the Troopy is the best vehicle for the purpose. He has reservations about that call of course, and they are fair. However the competition is not only limited, but significantly behind (i am biased). A bit of a confirmation of my vehicle aspirations (yes, i know i'm blowing my own horn here).
So i am passionate about Cruisers. If it means it costs me an arm and a leg, ah well, i made my choice. And i do not regret it, everyday i crank up the 1HZ, listen to its lovely racket, drive it, just look at it, etc etc blablabla, i am a happy owner. In any case, whatever the passion might be, if i decide to jump in the whole hog, it's going to cost me the same arm and the same leg anyway.
A significant bonus to the fun is ih8mud; this Mud gang makes things easier, and as i say, i can only hope my contributions are found to be useful to others. To use your term, Wardharris, if one of us can prevent others from the bullets we've bitten, these forums represent time well-spent.
With some of the stuff i've done, it sometimes feels i am more a member of 'ASSSSS' than 'NASSSSS'.
 
I got a replacement mat for the area under and in front of the seats recently. Today i removed the interior; unfortunately i am once again unable to get pictures in here at the moment. The goal is to detail clean the interior, check all nuts and bolts that aren't tight enough (found some already), hoping to get rid of rattling and knocking sounds at various engine regimes. The old mat was perforated, torn, worn out, so it had to go: there was a lot of gak underneath due to that. As well, i want to get a handle on all threaded holes, find bolts for them, and make note of them all for when i get around to putting together a console for between the seats. And i am removing existing bolts just to apply anti-seize and re-install; there's a of of stainless hardware, as i requested, and it can be amazing how quickly SS threads will stick together.
I do have pictures, however for the second day in a row i am unable to download pictures here, sorry. I am in a rural area for the time being, and the net can be painfully slow.
I have pictures of all the bits i've ordered and received (thank you Akella); while none of them are serious stuff (door seals, screws, bolts, the floor mats, grommets, and the like), i am wondering if anyone is interested in those pictures for the parts numbers.
 
Last edited:
When in doubt, always post pictures of item numbers. It helps other 70 series owners even if not now perhaps two years from now when doing a search for a part number that superseded the one they already have.

Besides, ih8mud loves pictures
 
When in doubt, always post pictures of item numbers. It helps other 70 series owners even if not now perhaps two years from now when doing a search for a part number that superseded the one they already have.

Besides, ih8mud loves pictures

What he said
 
Okay, okay, gentlemen! Let me get the opportunity to be able to get pictures in here on my painfully slow net access, and consider it done.
And thanks for the feedback.
Tried again just now, and it ain't working. I am stubborn, so i'll get them pictures through sooner or later.
 
I am still unable to get pictures in, DAMN! And i try everyday.
Today i got the flooring back in, the new factory mat looks much better than the tired old one (well of course). I still don't know where to install the bracket for the trailer brake controller (i don't want to screw into the plastic bits at the bottom of the dash). I may wait until i put a console together and find a spot there. So far i have found eight empty bolt holes, which i am filling with new bolts. Six of those are around the floor ahead of and between the seats, damn good to know for a future console.
I replaced the two lock cylinders for the access panels at the back of the floor (just ahead of the rear doors), with the same type i used to replace the ones in the rear bumper extensions' storage bin access doors; they're all metal (one of the plastic lock cylinders the car came with cracked), plus i'll have three fewer keys on the ring.
Bolting the transfer case lever's boot back on was hilarious until i figured move the lever into a position that moves the boot over to the side of the bolt(s) you want to start threading. I got replacement screws for the headlight bezels, had to drill one of the old ones out, and the new ones will be anti-seized before installation tomorrow. In fact every single bolt and nut i install gets anti-seized.
 
Finally i'm able to put in pictures, i don't know why; Brian Swearingen (thank you sir!) tells me to disable Flash in my preferences, however i haven't yet figured out how to do that (i'm not terribly skilled in the computer department).
First off, pictures of the interior with its population removed.

troopiebits 007.webp


troopiebits 008.webp


troopiebits 009.webp
 

Users who are viewing this thread

Back
Top Bottom