71 FJ40 A work in progress... (1 Viewer)

This site may earn a commission from merchant affiliate
links, including eBay, Amazon, Skimlinks, and others.

It's been a while, but this evening got back a did a couple of very minor jobs just to feel good about making some progress. I had to put the 40 in storage for six months while moving. The upside was that after six months of sitting in a storage unit it started up on the third turn of the key which I was pretty pleased with.

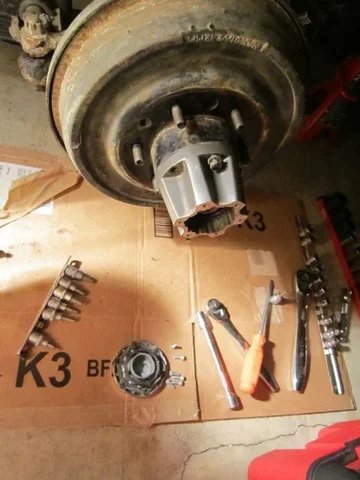
When taking the 40 off the transport I noticed the parking brake wasn't up to holding the vehicles weight on a 15-20% grade, so that was fixed pretty quickly tonight. I had already cleaned up the drum and installed new pads when I had the engine out, but only roughly set up the new cable and tension.

The other quick job was installing the bench seat hook pardion found for me - thank you again!

IMG_7202.jpg

Now the drivers seat can be locked in the upright position with something other than bailing wire the PO used.

Drawn up a new punch list and hope to start getting some things done...
IMG_7201.jpg
IMG_7202.jpg
 
Finally got around to switching out the metal four blade fan with a plastic one and a new shroud. Thanks to 65swb45 for putting the entire package together: spacer, fan, bolts, shroud.

While I was in there I decided to address the cold running temps. It was strange, even in the middle of a Sacramento summer I didn't see the thermostat go over 150. Well when opening up the thermostat housing, and yes shearing off a bolt in the lower housing, I found there was no top gasket at all.

So fixed the thermostat gaskets and housing I managed to break, replaced all the hoses and installed a heater valve at the back of the block so if the temperature ever gets close to hot I can turn off the flow to the inside heaters. That should pretty much cover all the cooling system changes I needed to get done...

IMG_7233.jpg

IMG_7234.jpg

IMG_0584.jpg

Tonight I finished the last couple of hose connections and putting the bib back on. Now the shroud is on it's harder to get around the front without dropping the bib, but I suppose that's part of the point - to keep fingers out :D

Next up is to put the fixed cluster back in and fill it up with coolant and take it for a test drive before the next job... knuckle rebuild and front brake overhaul...
IMG_7233.jpg
IMG_7234.jpg
IMG_0584.jpg
 
Last edited:
Still chipping away at the work, so a quick update. After getting the coolant system back together and finally seeing a running temperature close to 180F I decided to retime/tune it up a bit. The first step was to replace the starter, it worked but sounded very labored with two turning speeds/sounds. Swapping it out with a gear reduction starter:

https://forum.ih8mud.com/40-55-series-tech/96018-gear-reduction-starter.html

made it turn and catch a lot quicker.

After rebuilding the carb last year I never really got a chance to run it apart from move it to and from storage. When I did run it I it started leaking fuel and the sight glass was full. So taking it apart and checking it out, found the problem was a badly installed float valve. My fault - I put it in the wrong way :bang: At least that was an easy problem to fix. Reassembling and running and tuning it with these notes:
https://forum.ih8mud.com/40-55-series-tech/26635-carb-works-great.html

now results in 19" at idle (11deg adv) and an engine that starts without having to crank it for 10-20seconds.

Next up is a knuckle rebuild and TRE swap. Following Coolerman's excellent write up here:

http://www.globalsoftware-inc.com/coolerman/fj40/14.htm

made things a lot more predictable. A few pictures to remind me of the order of things

IMG_2634.jpg

IMG_2635.jpg

IMG_2639.jpg

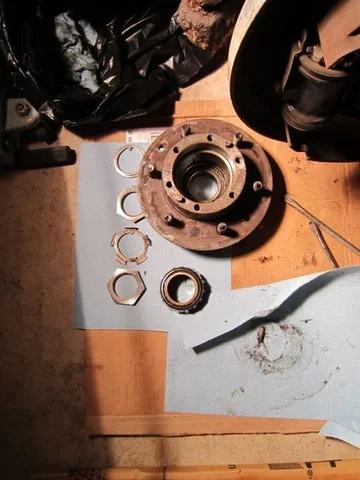
Looking at the side of the lock nut it showed the last person in didn't use a socket. I was a bit concerned my Stanley Proto 50mm deep socket wasn't going to fit, but it did...
IMG_2634.jpg
IMG_2635.jpg
IMG_2639.jpg
 
Last edited:
IMG_2640.jpg

The safety wire preventing the bolts from backing out was discussed here:

Safety Wire discussion

Looks like I need to order some 0.041" safety wire...

IMG_2642.jpg

IMG_2643.jpg

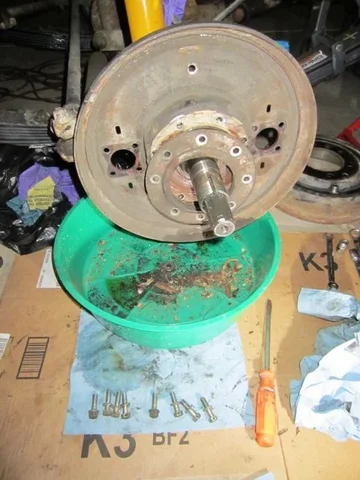
There was a lot of scraping to get the old mud off around the knuckle and some hammer action to get the wheel cylinders out. While I'm in here I'm replacing all the brake lines/components. The rubber lines are perished and after several bleed/adjust cycles it still pulls slightly to the right. I'll be using the 9/71-9/75 parts as the parts for 8/71 are discontinued. I see sor are doing a kit with the new brake lines to work with the 7/70-9/71 year:

http://www.sor.com/cat081.sor

But more on that when I get to it...
IMG_2640.jpg
IMG_2642.jpg
IMG_2643.jpg
 
Last edited:
IMG_2645.jpg

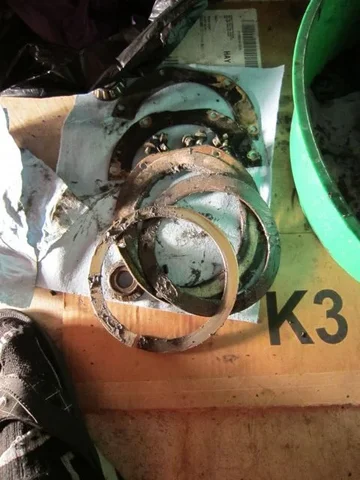
I was surprised the metal split ring and backing retainer (half moon pieces) are not part of the rebuild kits...

IMG_2646.jpg

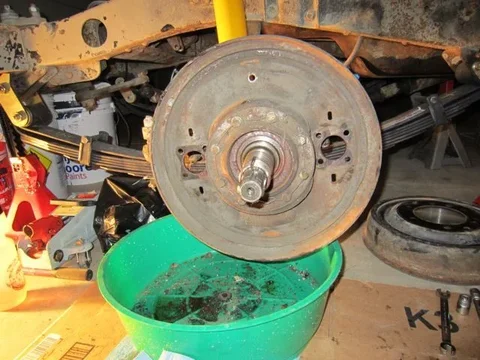
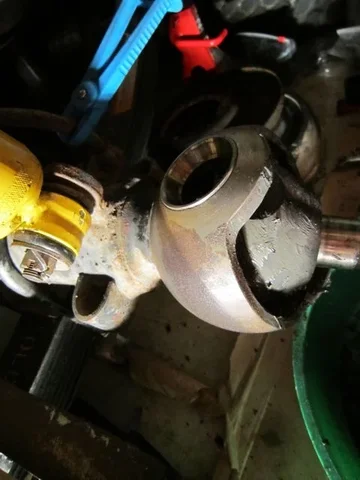
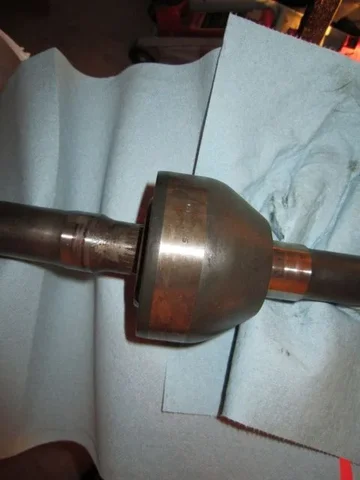
The ball is a little pitted and rusted, hope that's ok. There wasn't a lot of grease in there and some felt more like grit/mud. All the bearings are being replaced too, hopefully I won't have to go back in here for a while...

IMG_2652.jpg

Some slight rust and pitting on the axle seal surface too :/ Well I suppose this is 40+ years for you and not the best upkeep...

The TRE removal from the steering arm was straight forward with one of these:

http://www.amazon.com/gp/product/B0002SRDRI/ref=oh_details_o00_s00_i00?ie=UTF8&psc=1

Onto the next side, before soaking everything in parts cleaner...
IMG_2645.jpg
IMG_2646.jpg
IMG_2652.jpg
 
Thanks for the comments, hope it provides some entertainment :)

One side is not like the other side. Sometimes working on this project is like an archeological dig.

IMG_2660.jpg

The passenger side outer axle looks mint compared to the drivers side. This side wasn't installed in the same way as the drivers side: red FIPG around the spindle gasket/fasteners. Also found the short inner axle was much harder to remove from the birfield.

Still a bit more disassembly to do: knuckle races, the last couple of sections of front brake lines; breaking down the steering/relay rods; freeing up the axle housing from the suspension/driveshaft for a clean up, before the reassembly can start...
IMG_2660.jpg
 
This could be the slowest knuckle/front end rebuild - I'm just hoping I can get it in under 2 months ;)

I can see how jobs grow, it starts as a rebuild, then you look at the parts being taken off and it's tough working with rust and grime, mud, grease. I guess back in the day they didn't believe in giving a quick once over with a hose after a trail run. So first it's a bit of degreasing, cleaning. This reveals the rust scale, so maybe some electrolysis you read about here or there:

http://www.globalsoftware-inc.com/coolerman/fj40/rustremoval.htm

which resulted in a trip to home depot and this:

electrolysis.jpg

which is good for the big pieces, but what about the small pieces, hmm, maybe some time in the carb dip and tumbler:

https://forum.ih8mud.com/metric-tlc/393374-ceramic-media-nut-bolt-restoration.html

https://forum.ih8mud.com/showpost.php?p=2203688&postcount=10

That would make it a lot better, well it takes it from these carb dipped pieces:

degreasedNutsBolts.jpg

to something like this:

CleanNutsBolts.jpg

which is about 8hrs in ceramic media and about 2days in walnut.

I'm trying desperately to hold off on the cad plating this time around. Mainly through lack of room and this task must be done by mid july as I need to roll to a new garage.

I'm pretty much done with the medium size pieces in the electrolysis tank, only the drivers side hub to go. Next is to set up a tank large enough to derust the drum backing plate and drum, before hitting it with some high temp rustoleum...
electrolysis.jpg
CleanNutsBolts.jpg
degreasedNutsBolts.jpg
 
Then there is the painting, moving back to the city has meant things have to be scaled back. So axle prep and paint is a flap disc on a grinder and a paint brush. Following the grinder is some "Prep&Etch", followed by a water rinse/acetone wipe. Then Eastwood rust encapsulator/chassis black extreme out of a quart.

For a brush job, it's meets my standards ;)

axlepaint.jpg

Probably better on the smaller pieces:

knucklePaint.jpg

The test will be over time how it holds up to chipping and abuse...

You can probably see the plastic, temporary, degreasing tub just above the painted axle. Again to save space I went with a air tight container and odorless Mineral Spirits (5g). Then when the degreasing was done, I let it settle out and poured it all back into the gallon containers for next time. Probably not as efficient as a full on parts cleaner, but it gets the parts clean and can be done in small spaces.

Another few days to go for the paint to cure, then it's time to start the re-assembly...
axlepaint.jpg
knucklePaint.jpg
 
Last edited:
You sure you're not some kind of mad scientist? I read your posts and pick up words like "electrolysis" and "acetone"... :hmm:

Nice work...
 
Well the collection of chemicals is certainly growing. I also don't know what I was thinking when I bought a gallon of Phosphoric acid - aka Prep & Etch. I suppose I'm set if I need to clean a tank out :idea:
 
Getting back to working on the project again. I think I'm over my temporary insanity trying to sell the cruiser after a family loss. Working on it, however slowly, is better than not at all.

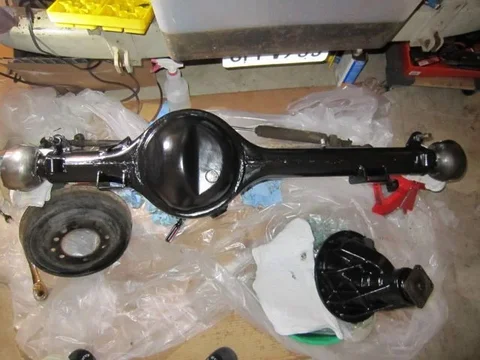
Started on the rear axle last summer and just getting back to it. So here's the starting point. Not too bad, but I'm putting on all new brake hardware and replacing the wheel bearings.

IMG_2712.jpg


Stripped it down completely, driving out the wheel bearings with a piece of wooden closet rail I had lying around. If I ever have to do this again, I'll remember to take the diff out before removing the axle from springs. Had to re-install the axle and use a jack to free the diff. A good tip read here, but one I wished I'd used before taking it off.


IMG_2723.jpg


All the hardware and some of the larger pieces went into the temporary parts cleaner tub with an air-tight sealable top. These u-bolt plates are better, but they're headed to the electrolysis bucket shortly. The nuts, bolts and studs were soaked then cleaned off and are now tumbling in ceramic media ready for reuse. A couple of the diff studs needed their threads cleaning up with a 10mmx1.25 die.


IMG_2719.jpg


So a couple of weeks on rust removal in the electrolysis bucket, some more prep on the housing before painting and should be ready for starting the re-assembly. Well that's the plan anyway. A couple of hours each sunday morning a good way to relax and chip away at the job.

Looking back at the front axle work was a helpful reminder on how I did the job last time, but a few details were missing, such as the die size. So hopefully make better notes this time...
 
It's been a while and just started to have more time to work on the project. The rear axle did get finished with all new brakes and lines. The only old line I have left is the rear line from the master to the rear flex hose. I'll do that at some point.

RearAxle.jpg


The battery completely died due to my son playing around and leaving the lights on. Anyway an excuse to get rid of the PO's dual battery setup. It was pretty corroded under the homemade dual mount that the old tray was toast. I stripped it down, de-rusted the battery mount and engine splash gaurd. For a new tray I went with a stainless tray from stainlesstrays.

BatteryMount.jpg


The old positive cable is too tight so a new one is on order and the fuel filter is now secured.

While I was there stripped down that part of the frame to see what it really looks like underneath the scale. It cleaned up pretty well before being coated with rust encapsulor/chassis black.

bareframe.jpg


I'd really like to complete the entire frame at some point.

Next on the list is to clean up the rear removing the PO welded hitch and return it back to stock. Hoping to get it done before summer and not have another three year break :)
 

Users who are viewing this thread

Back
Top Bottom