71 FJ40 A work in progress... (1 Viewer)

This site may earn a commission from merchant affiliate
links, including eBay, Amazon, Skimlinks, and others.

So this gave me a chance to look a little further into how bad the crank freeze was:

Yep, pretty rusty in there.

IMG_7028.jpg

Looking through the plug holes, the first (front) looks like what I'd expect, polished sides with some cross hatching. As I looked at the remainder of the holes going back they got to look more like the bottom of a ship: rusted and uneven.

I'm wondering now whether it's worth pulling the head, or just taking it straight to get rebuilt? Curiosity may get to me later in the week just to take pictures. :/
IMG_7028.jpg
 
There is an aftermarket carb base heater
View attachment 521252

If you want to sell the carb base heater let me know, I need one.

Also, I would pull the head and see what is going on. Not that big of a deal and the felpro head gasket is not that much. If it needs machining Motor Machine Super Shop in Carmichael (7620 Fair Oaks Blvd, 944-0649) does good work. Pighead had machining work done there on his 2f and they went though my 2F head and trued the mating surfaces of the head, header, and intake. Prices are decent and they are fairly quick.
 
Last edited:
If you want to sell the carb base heater let me know, I need one.

Also, I would pull the head and see what is going on. Not that big of a deal and the felpro head gasket is not that much. If it needs machining Motor Machine Super Shop in Carmichael (7620 Fair Oaks Blvd, 944-0649) does good work. Pighead had machining work done there on his 2f and they went though my 2F head and trued the mating surfaces of the head, header, and intake. Prices are decent and they are fairly quick.

Thanks for the machine shop info, I may have to give them a call once I work out what's going on. It's good to know about the local shops.

Once I get it stripped down I'll be posting a classified with all the take offs, hopefully that will subsidize a minor part ;)
 
It took a while due to struggling with the crank nut. A couple of weeks of PB and pulling on a long breaker bar and it broke free last night:

IMG_7053.jpg

After that freed up it was time to drop the engine mount bolts and to start pulling. It took me a while as this was my first extraction. It didn't take long before I realized it would be easier to take the bellhousing mounts off as they're just perfect for hanging up on things.

IMG_7050.jpg

IMG_7052.jpg

I'm still searching for how to separate the parking cable from the ebrake drum though. For the moment I just took it off the t/c. I'm glad it wasn't on too tight as the 27mm socket I had really wasn't the right on, the nut is a 29mm on my 71F.

There is some clean up to be done before I split up the pieces and clean them up a bit. Definitely going to replace all the gaskets and hopefully that will cut down on the leaks. I'm looking forward to seeing the clutch/flywheel as that must be bathing in oil right now...
IMG_7050.jpg
IMG_7052.jpg
IMG_7053.jpg
 
After some struggles, finally got it all split up.

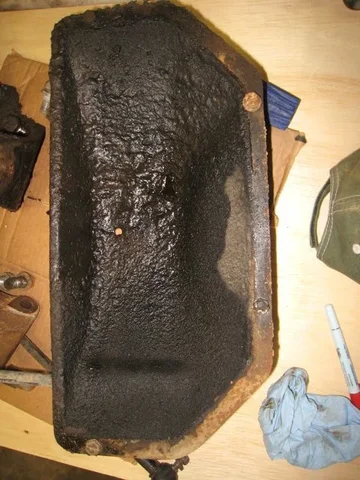
The lower flywheel cover was catching a lot of oil:

IMG_7054.jpg

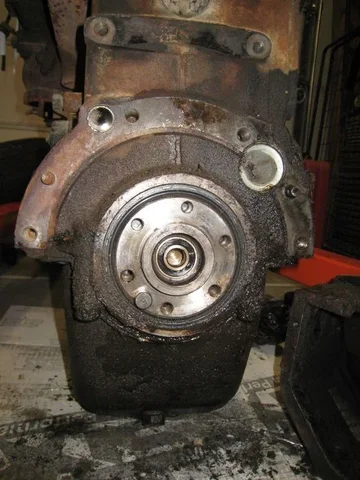
The flywheel looks pretty beat up. I'm going to drop it off at the local NAPA to get it resurfaced. If it's still in spec I'm going to stay with the older flywheel setup.

IMG_7057.jpg

Finally get to see all the mess behind the flywheel. Not sure if it's the rear main and the cam plug, or just the flywheel distributing oil all over the back end.

IMG_7058.jpg

Lots of clean up to do.
IMG_7054.jpg
IMG_7058.jpg
IMG_7057.jpg
 
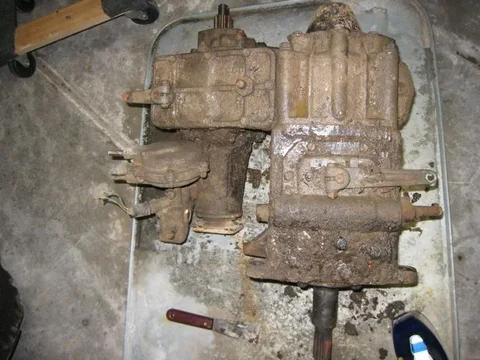
So while the flywheel is getting resurfaced I've got some time to work on the trans/xfer to clean them up.

IMG_7055.jpg


I'd like to get them cleaned up and overhauled. While everything is out I'll get the pressure washer out and clean up the underside of the tub and engine bay. Hopefully it'll make it a bit easier working on things.
IMG_7055.jpg
 
I can't believe it's taken me 6 months to pull the engine, do a couple of things and then get it back in. But just to prove it went back in and runs again here is the warm up movie:


I did manage to get a few things done while it was out. I couldn't face looking at all that crud on the transmission and transfer case so I decided to scrape them down and clean them up as much as I could. Then after reading about how to re-seal and re-gasket both units I knew I had to dive in and get it done. Of course it was much easier with coolerman's write up:

Coolerman's 3 spd rebuild info

I was also determined to get rid of all the leaks, so some FAQ help got me there by replacing the side cover and oil pan gaskets:

oil pan side cover FAQ

It's had a couple of months sitting around with fluids in it without leaking, hopefully it'll stay that way once I start driving it again.

It is running, but the column shifting needs to be re-installed and the clutch master/slave replaced and setup.

So a couple of more things done, but the list is still long. The next goal is to get the takeout work finished and drivable for the spring...

Complete engine takeout work:
* Reconnect shifting mechanism and test
* Install clutch slave and master and setup
* re grease rear driveshaft slip joint (emptied to re-install shaft)
* install flywheel cover, radiator cover, bumper, bellhousing inspection cover on starter side.
* Brake (e-brake and master warning) and reverse lights
* Re check all lights (passenger side freezing)
* Speedometers redo - install cable and swap in replacement speedo, try and by-pass/cap speedmarker lines
* washer bottle - check motor/install
* Check air filter gaskets (inner and outer in cleaner)
* add horns

Get running:
* Valve clearance
* Points and timing
* re- route Carb fuel line around not over valve cover
* PCV valve replacement
* verify all dash lights work, hand brake light etc.
* Check gauges
* re-run brake master check wires (snapped off)

Refresh:
* Front end hub/bird/wheel bearing/lockers
* Carb refresh
* Suspension/TREs
* Rear end wheel bearings
* Tire condition
* Driveshaft overhaul
* PS flush
* Front heater
* Rear heater
* Door handles/locks
 
Last edited:
An old trick to save $

Instead of spending a bunch of $ on Kroil oil or some other penetrating oil you can just get a spray bottle and mix 50/50 automatic trans oil and kerosene, or if you prefer you can use Marvel Mystery oil instead of auto trans oil...Nice truck and build...Lee
 
Good read and cool truck. The good thing about doing all that stuff is at least it is done! Keep on keepin on bro!

Randy
 
Good read and cool truck. The good thing about doing all that stuff is at least it is done! Keep on keepin on bro!

Randy

It's done and I hope to remember how it was done :) I liked your post on the heater valve:

https://forum.ih8mud.com/sale-parts/547432-fj40-heater.html#post7287506

that's one thing I'm going to have to do in the summer.

After re-installing the column shift linkages and actually greasing the zerks it's shifting reasonably well and the new clutch is night and day difference over the original juddering nightmare.

I didn't have much time after getting that done, but I did get the timing light out to see how things were. Well it's idling at 1k rpm due to a weak return spring. Pushing it to rest drops it to 660, but timing at that reveals no BB or BTDC mark, so not sure how far off it is....a job for another day.

I posted this in paint and body:

https://forum.ih8mud.com/paint-body...int-aka-how-do-you-remove-lot-rattle-can.html

There is reasonable paint under the 2-3 layers of spray paint. I've just got to come up with an efficient way to remove those layers as the original beige is much nicer than orange peel brown :D I'm not trying to get showroom quality, just make it a little more presentable without spending an arm and a leg on a complete paint job.
 
Noticed you are located in loomis and emryville. Im also in loomis, where abouts do you live? Just curious, Nice 40 BTW, lookin sweet!
 
This weekend was fairly productive, occasionally manage to get a chunk of time to get some things done.

Saturday was spent running through the points and timing. The current set up was 16deg advanced, so after checking the point gap and adjusting the timing got it running in spec. The FSM explains it pretty clearly and has a nice picture showing which way to turn the distributor. After that went over the valve adjustments using:

https://forum.ih8mud.com/40-55-series-tech/232126-first-valve-adjustment-my-78-fj40.html

which made a somewhat daunting task straight forward.

Today was a few hours wrestling with a OME install. After letting the existing fasteners soak in penetrating oil for an hour the tear down went pretty smoothly considering no power tools were used :D The biggest struggle was getting the new leaf with bushings into the leading spring hanger. If anyone has some tips to get this done I'd appreciate it. So far I only have one rear side done...
 
hiya,

When I put new bushing into my springs, I used a jack to help push the rear into the hangers. I shaved a thin layer off one of them as it was too fat to fit into the old hanger. Nice build & good luck, ty :beer:
 
hiya,

When I put new bushing into my springs, I used a jack to help push the rear into the hangers. I shaved a thin layer off one of them as it was too fat to fit into the old hanger. Nice build & good luck, ty :beer:

Thanks, it's good to hear that it's just not me struggling to get the big bushing in there. I also found I had to use a putty knife to make sure the bushing didn't push out of the hanger pin hole and get caught up.
 
OME install complete

Finally got the OME kit install finished this weekend. It took far too long, but I think I could do an entire install in a day now as opposed to the 2.5 days this took me :/ The removal wasn't the issue, it was installing the new parts with tight fitting bushings. I also tried to follow the FSM installation instructions which didn't work well for me.

The easiest way I found, rears for example, was to install the rear shackle first, then jack the spring up to meet the axle. Attach the U bolts, then jack the spring even further to align the front spring into the hanger. A couple of greased putty knives, one on each side, helped the bushing slide into place. This also prevented the bushing from catching on the outside pin hole.

It's definitely a great improvement over the tired old springs I had. Previously it felt like a jaring ride, now it's got a bit of spring to it and less roll.

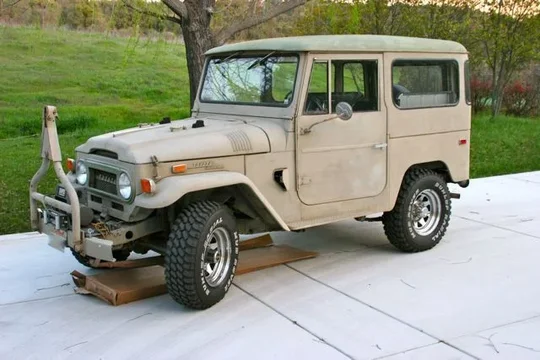
Before:
Day1.jpg

After:
OMEDay.jpg

The wheels do protrude about an inch outside of the body, but I have some stock steel rims to replace the chrome ones. Aesthetics are lower on the priority list :eek:

After the test drive I decided to go back and check the timing again as it seems to be dropping every once in while. With the timing light it's definitely retarding to between TDC and BB for a second every 10-20s; rather than sitting on the BB. Running a vacuum gauge on it shows about 15". I'm going to try and time it using the vacuum gauge when I get a chance. Perhaps there was a reason the PO had it set to 16deg advanced. Hopefully won't need to go that far up.

Just out of curiosity also went and re-ran a compression check after adjusting the valves. The numbers are better, but still below spec.

1 112
2 130
3 110
4 110
5 125
6 122

5 out of 6 plugs were sooty, but plug #5 looked almost clean. This is suspicious along with the brakes being not so assisted as I previously remembered.

So with the suspension done, the list keeps growing. I took the carb off and will attempt a rebuild using PinHead's youtube links this week:

Rebuilding an Aisan Carburator Part 1 by Pin Head.mp4

It really is filthy at the moment, so hopefully once done I can go back and get the timing/running smoother and then it's back to the brakes.

Just reading back this post and looking at the picture - the front side marker is out. Another item back on the list...
Day1.jpg
OMEDay.jpg
 
Last edited:
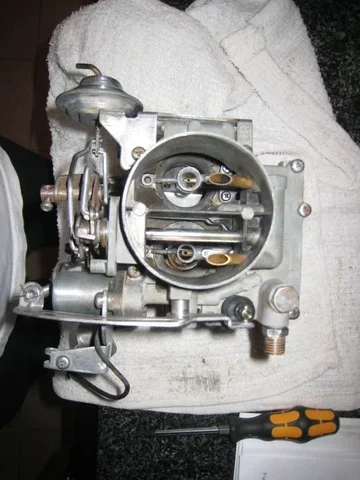
Carb rebuild - before pics

Just looking at the carb in this state makes me think it needs a little work and it has to work better with some new jets/gaskets/etc. The gunk in the bottom of the fuel bowl is mildly alarming - is the fuel filter doing anything? ;)

carb_from1.jpg

carb_from2.jpg
carb_from1.jpg
carb_from2.jpg
 
Carb - after pics

Have to thank Pin Head for his great movies (links above). It definitely makes it easy to understand the end to end process and gave me confidence that I could jump in and do it.

carb_to1.jpg

carb_to2.jpg

carb_to3.jpg

Apart from cleaning things up there wasn't anything too alarming. Gaskets were mostly intact, all the pieces were there. Having the FSM helped re-assure me when my stuff wasn't looking like the later carb in the videos.

Running through the alignment process in the FSM was the hardest. The biggest anomaly was the amount of travel made by the choke breaker vacuum diaphram. It wasn't breaking it as much as it should. Spec showed 38deg, actual was closer to 20.

When I bolt it back on I'm also going to eliminate the VSV gear as per:

https://forum.ih8mud.com/40-55-series-tech/232222-1971-carb-vacuum-port-connections.html

since I'm ditching the speedmarker as it's highly likely that it trashed the current speedo. Something jammed up and broke the main speedo cable.
carb_to1.jpg
carb_to2.jpg
carb_to3.jpg
 
The slow progress continues. Before putting the carb back in I decided to get the brake booster rebuilt and replace the brake master. On the last brake bleed fluid was seeping out between the master and the booster so thought it best to overhaul that area.

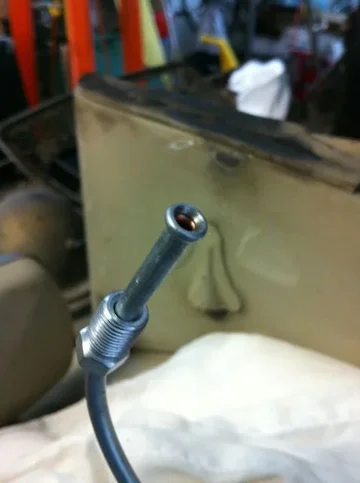
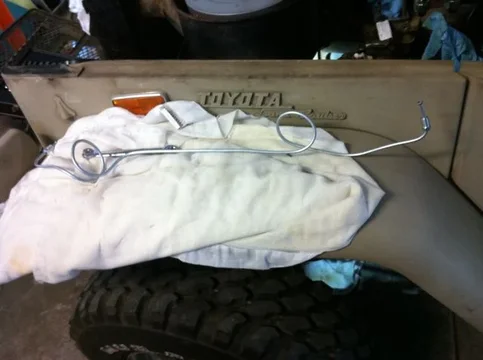
While I was there I replaced the first hard line coming from the brake master. This seemed to have fluid on it. Also it was not stock as it had, what looked like, a T piece in it and no loops. Since this project is for learning as well as fun I decided to make the hard line myself.

The first flare worked out pretty well:

IMG_0448.jpg

Of course he next one was harder as it was based on the end I cut. This is where I learnt that cleaning up the end of the cut is the key to a good flare. I'm not sure if the cheap cutter I have is squishing the tube too much, or they all do. In the end I used a bit of advise I read here about dremelling the end flat, burr free and not squished.

IMG_0447.jpg

It looks a lot better than the old line and has a 10mm nut as opposed to the 9mm one on previously. Again a mix up of PO repairs - the rear MC fitting was 10mm the front was 9mm.

After bleeding the master, and all the lines, everything seems ok and ready for the carb to be re-installed so I can take it for a test drive. On the last drive the booster didn't appear to be helping much at all. I hope the rebuild will have addressed that.
IMG_0448.jpg
IMG_0447.jpg
 

Users who are viewing this thread

Back
Top Bottom