Hi all, long time lurker here. I just thought I would make a post about my experiences with the 4X4Labs front bumper "kit".
I wish I had taken more pictures in the beginning. Here is the kit in the box.
![IMG_20150609_141202 [15566].jpg IMG_20150609_141202 [15566].jpg](data:image/svg+xml;charset=utf-8,%3Csvg xmlns%3D'http%3A%2F%2Fwww.w3.org%2F2000%2Fsvg' width='640' height='480' viewBox%3D'0 0 640 480'%2F%3E)
Here is a shot showing the starting point. Basically just bolting the mounting plates to the bumper and test fitting the winch plate.
![IMG_20150724_181637 [10800].jpg IMG_20150724_181637 [10800].jpg](data:image/svg+xml;charset=utf-8,%3Csvg xmlns%3D'http%3A%2F%2Fwww.w3.org%2F2000%2Fsvg' width='480' height='640' viewBox%3D'0 0 480 640'%2F%3E)
Here is the center section half welded with a couple parts tacked on.
![IMG_20150725_210000 [10774].jpg IMG_20150725_210000 [10774].jpg](data:image/svg+xml;charset=utf-8,%3Csvg xmlns%3D'http%3A%2F%2Fwww.w3.org%2F2000%2Fsvg' width='640' height='480' viewBox%3D'0 0 640 480'%2F%3E)
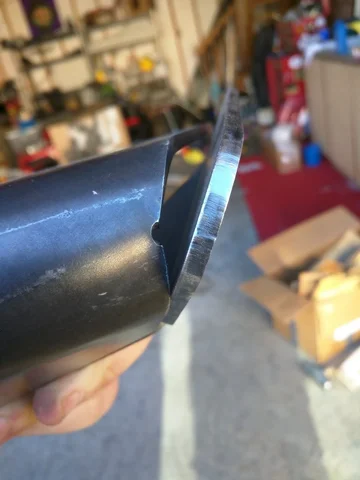
Here is where I ran into a problem. The first set of wing inners and outers would not match up no matter how I oriented them. I tried everything, it was driving me crazy. Finally after feeling really dumb I contacted 4X4Labs for assistance and found out that there was a manufacturing problem and the pieces simply were made wrong. WHAT A RELIEF! They sent me the new parts right away and everything made a lot more sense.
![IMG_20150610_105135 [15553].jpg IMG_20150610_105135 [15553].jpg](data:image/svg+xml;charset=utf-8,%3Csvg xmlns%3D'http%3A%2F%2Fwww.w3.org%2F2000%2Fsvg' width='640' height='480' viewBox%3D'0 0 640 480'%2F%3E)
The correct pieces tacked in place.
![IMG_20150726_201240 [10787].jpg IMG_20150726_201240 [10787].jpg](data:image/svg+xml;charset=utf-8,%3Csvg xmlns%3D'http%3A%2F%2Fwww.w3.org%2F2000%2Fsvg' width='640' height='480' viewBox%3D'0 0 640 480'%2F%3E)
......
I wish I had taken more pictures in the beginning. Here is the kit in the box.
![IMG_20150609_141202 [15566].jpg IMG_20150609_141202 [15566].jpg](https://forum.ih8mud.com/data/attachments/951/951007-fa2389406e88a33aa1c99dacab5e53ca.jpg)
Here is a shot showing the starting point. Basically just bolting the mounting plates to the bumper and test fitting the winch plate.
![IMG_20150724_181637 [10800].jpg IMG_20150724_181637 [10800].jpg](https://forum.ih8mud.com/data/attachments/951/951000-9608021e68e87458f4e27578de7a9c0c.jpg)
Here is the center section half welded with a couple parts tacked on.
![IMG_20150725_210000 [10774].jpg IMG_20150725_210000 [10774].jpg](https://forum.ih8mud.com/data/attachments/951/951002-cc2165292fd8bf934959d7393276bfe5.jpg)
Here is where I ran into a problem. The first set of wing inners and outers would not match up no matter how I oriented them. I tried everything, it was driving me crazy. Finally after feeling really dumb I contacted 4X4Labs for assistance and found out that there was a manufacturing problem and the pieces simply were made wrong. WHAT A RELIEF! They sent me the new parts right away and everything made a lot more sense.
![IMG_20150610_105135 [15553].jpg IMG_20150610_105135 [15553].jpg](https://forum.ih8mud.com/data/attachments/951/951006-2fa997fbf0f20d261e2f654ce2a1326b.jpg)
The correct pieces tacked in place.
![IMG_20150726_201240 [10787].jpg IMG_20150726_201240 [10787].jpg](https://forum.ih8mud.com/data/attachments/951/951003-f70b83af0863593075fb54bf3b5dfac2.jpg)
......

![IMG_20150726_201234 [10761].jpg IMG_20150726_201234 [10761].jpg](https://forum.ih8mud.com/data/attachments/951/951008-79afb7d2ef601efbb0913965bf9b767a.jpg)

![IMG_20150824_195829 [10748].jpg IMG_20150824_195829 [10748].jpg](https://forum.ih8mud.com/data/attachments/951/951010-973c221ad956e52b53f6eac1082133eb.jpg)
![IMG_20150904_145933~3 [10735].jpg IMG_20150904_145933~3 [10735].jpg](https://forum.ih8mud.com/data/attachments/951/951011-7a7adbe66bfbdc2ecdd02d030d3e6729.jpg)
![IMG_20151004_185439~3 [10709].jpg IMG_20151004_185439~3 [10709].jpg](https://forum.ih8mud.com/data/attachments/951/951012-614fa17f6764cd87eaa2725ac1394808.jpg)
