Yet another BJ42 frame off-Dbradford04 (1 Viewer)

This site may earn a commission from merchant affiliate
links, including eBay, Amazon, Skimlinks, and others.

A u-joint would work fine. But, you're adding money needlessly IMO. Have you welded in the steering box mount yet? If not, just put it at the correct angle and tack it in. No need to shim the box itself.

Everything else is looking great! Nice to see some progress! I take it you made it home for a couple of days?

:cheers:

Yah..the box mount has to be bolted in like the motor mounts because the frame is powdercoated. There's more to it as well..if I change the angle of the box or the box mount, I start to touch things like the motor and the over inject stop...as I told Wayne, I don't have a ton of fabricating tools or talent. I have to do bolt on stuff..I'm pretty good at figuring stuff out if I think about it long enough...the double u-joint is the simplest and easiest fix for me.

I'll have to shorten the drag link as well...my local machine shop can cut and sleeve it for me easy enough.

This is y third week at home, but only 3 good days working on the rig..a couple more days this weekend, but then I travel most of May...

I'll post some more pics this weekend.
 
A u-joint would work fine. But, you're adding money needlessly IMO. Have you welded in the steering box mount yet? If not, just put it at the correct angle and tack it in. No need to shim the box itself.

Everything else is looking great! Nice to see some progress! I take it you made it home for a couple of days?

:cheers:

edit: And yes, it looks like your drag link is way too long. Odd. Not sure why that would be. But, Budbuilt can make you a nice beefy one. That's where I got my drag link for my 60 series swap. Mine is set up for an 80 series rod end at the pitman arm and a 40 series at the other end. Beefy! They can set it up any way you like.

Hmmm..so someone here makes them?? I'll measure it this weekend and try to get a price.
 
D'oh, I knew that. :rolleyes: I can't remember what I did last week! Yeah, a u-joint would work great in that situation. And yes, BudBuilt makes some good stuff. But, I'm sure the local machine shop would work just fine to shorten your stock drag link. Your choice.

:cheers:
 
as long as the rod is mounted securely with no slop at all then the double Ujoint should work but make sure you have the bearing installed ...
otherwise your steering control will be questionable.

2 things i never fawk with, steering and brakes.
 
I actually built the steering for an experimental aircraft, and think I understand the mechanics of it. Rest assured no expense will be spared to make it work and work well. The folks at Bergenson that sell the joints will consult. I'm going to go slow.

I'm at the point where I will mount the box where it suits me with the most clearance...rotate my pitman arm where I get optimal swing...shorten the drag link as necessary, then either make the steering shaft line up, whatever it takes. A couple of u-joints or a double joint, and a bearing wont kill me or crush my budget.

Thanks for the pointers you guys!
 
Body panels

So today I started mounting body panels to start setting nutserts and making the final alignment on the frame.

The steering column is at the machinists getting cut and welded.

20130510_145049.jpg


20130510_145059.jpg


20130510_145106.jpg
 
It's going to get interesting from here on out..lining up all this stuff and getting the nutserts in the right spot wont be easy.

20130510_145114.jpg


20130510_145127.jpg


20130510_145134.jpg
 
More body panels.

The next thing is to get the top back to the shop..line it all up then attack the fenders and aprons..

20130510_145134.jpg


20130510_151904.jpg


20130510_151916.jpg
 
more body panels and the miracle of rivet nuts

So previously, I just hung all the body panels in place. I soon discovered that I didn't have all the parts and pieces I needed...so hello parts suppliers. Ordered weatherstripping..inner and outre door bows..rivet nuts with a wider grip range since I have a fiberglass body..it all comes in.

Today I used the magical rivet nut tool and start to really mount body panels. Fairly easy to use..not sure I fully understand what I'm doing. Got one nut off by a 16th...which is all it takes to make your day miserable, but easy fix.

20130608_132534.jpg


20130608_132538.jpg


20130608_132545.jpg
 
some more pictures and the rivet nut tool I bought...there will be tons of use for this baby for sure. I even used it to replace a busted off bolt in one of the pieces..drilled out the bolt and the factory retainer nut and just put in a rivet nut..worked like a champ!

20130608_150922.jpg


20130608_150927.jpg


20130608_150932.jpg
 
It's been so long since I had the top Line-X'd that I had forgotten the wingnut didn't put plugs in the holes..I should have tapped the holes prior to lifting it on. So tomorrow, I will take it off and do that then re-install with the gasket. I just want to make sure that everything lines up 90%, and that when I take it all back apart and have it coated, all the drilling tugging and fitting are done.

Starting to look like a real Landcruiser!

20130608_160350.jpg


20130608_160358.jpg


20130608_160407.jpg
 
The top was in the back of the truck in the sun all day. The one thing I did notice, is that in spite of being line-X'd inside and out, it was still relatively hot on the underside. I will be putting some kind of heat shield material in prior to a head liner.
 
Looking good! :clap:
 
Yah Tom..It's like a big jigsaw puzzle with no directions or picture to go off of...I am going to struggle mightily getting body panels to line up..slow going for sure, but keeps me out of the bars I guess. Wish you could come over for a month and help me out!
 
.... Wish you could come over for a month and help me out!

I wish I could too Dan.

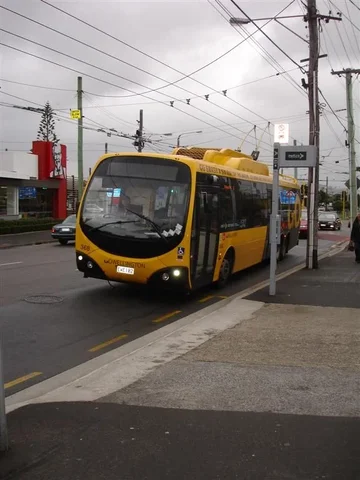
And maybe driving your trolley buses for food money:
DowntownJaxTrolley.PNG

would make a pleasant change from driving ours:

WellingtonTrolley.jpg

And as these photos show, your climate must be much more agreeable than the wintry stuff we have here right now.

:D

DowntownJaxTrolley.PNG


WellingtonTrolley.jpg
 
top

Yesterday I was kind of freaked out about the top lining up..none of the holes looked like they were even close...There was a giant gap at the drivers side B pillar.

First things first..remove the top and tap out all the threads..20 of them I think??

Removed the door bows so that I had some push pull space.

Put a ratchet strap across the 2 B pillars to pull them in a teensy bit.

Jacked up the body a touch right under the Pillar.

Viola'! didn't even have to push or pull..every bolt lined up and went in by hand..WHEW! Now at least I know it will all go back together in the end.

I was somewhat concerned that the door bows would have to be tweaked to fit back on, but they went on super easy..no issues.

20130608_160407.jpg
 
I also got my steering figured out..good news bad news..

Fisrt, all the mini truck power steering conversion threads made it seem like a snap..even a recent 81 conversion made it look simple. I even found the exact same parts he had used..a u-joint out of an fj62...anyway, what made mine different from all the rest?? Murphy's Law..mine had a collapsible steering column..you essentiall had to treat the collapsible side like a u joint in the column..

I had to have the fj62 piece welded solid because I couldn't have 2 collapsible pieces. The other bad part is no rag joint.

It works perfectly..it aint pretty..I could spend 500 bucks (or more) getting all new parts, but its solid and I'm gonna live with it for now.

20130609_112240.jpg


20130609_112246.jpg


20130609_112259.jpg
 

Users who are viewing this thread

Back
Top Bottom