What Did You Do With Your 120 Today? (30 Viewers)

This site may earn a commission from merchant affiliate
links, including eBay, Amazon, Skimlinks, and others.

We took the Clipper out for its maiden voyage Friday and everything worked out well. I felt bad seeing my 5’2 wife struggle to get our 3mo son situated in his car seat so I began searching for t4r steps. I’d have preferred sliders of course but can’t drop that kind of coin right now. Remember when sliders were 480 shipped?
Anyway picked these up for $40 which is hard to beat.
They look a lot better than the factory steps imo and tuck up higher than the lower link skids so I think they’ll be fine for awhile. Will be extra careful when off-road of course.

View attachment 3125255

View attachment 3125256
raw sliders sale emailed a couple days ago ;)


YEEP, free shipping on $1330 aint muchOfAsale. :bang: 😮
 
raw sliders sale emailed a couple days ago ;)


YEEP, free shipping on $1330 aint muchOfAsale. :bang: 😮
lol exactly!
I remember buying sliders for my 2010 FJ from PureFJ for around 400 shipped
The only way to pull that off now is a weld yourself from 4x innovations.
 
@Toyoland66 Did you heat gun the old ones or just rip them Off? How'd you deal with the gummy sealant?
I was hesitant when I started removing mine then stalled out. I've since learned there's no retaining the old when you take them off so I need to go at it again with that attitude.... I'm still curious though about the goop and cleanup prior to installing the blacks. 🤙🏼
View attachment 3125263View attachment 3125264
View attachment 3125277
Thanks.

I just ripped mine off. I don't think it is possible to remove them without destroying them. Once they were off I cleaned up the area underneath with goo gone and installed the new ones. IIRC, there is one screw in each one and they simply clip in place. The cargo windows were the most difficult but you can replace those without removing the windows.
 
@DRANGED like what @midwestgxer said there is a torx screw in each of the door pieces. Remove that screw then pull the trim up forcefully, it’s held on with basically plastic spring clips onto the top seam of the sheetmetal door. I don’t think there’s actually sealant that might be degradation of the old trim. I cleaned up the surface with quick detailer before installing the new trim.

The doors are easy, the rear window trim is a bit trickier, I destroyed the old one getting them off. You have to loosen the bottom bolt on the window to get enough room to unclip the old and clip in the new. It’s held in with push pins.

I also bought them from partsouq.
 
lol exactly!
I remember buying sliders for my 2010 FJ from PureFJ for around 400 shipped
The only way to pull that off now is a weld yourself from 4x

@DRANGED like what @midwestgxer said there is a torx screw in each of the door pieces. Remove that screw then pull the trim up forcefully, it’s held on with basically plastic spring clips onto the top seam of the sheetmetal door. I don’t think there’s actually sealant that might be degradation of the old trim. I cleaned up the surface with quick detailer before installing the new trim.

The doors are easy, the rear window trim is a bit trickier, I destroyed the old one getting them off. You have to loosen the bottom bolt on the window to get enough room to unclip the old and clip in the new. It’s held in with push pins.

I also bought them from partsouq.
Hey @Krackerjacked! Same story here. Remove screw and forcefully yank them up. The quarter window is trickier. I hit the easy button and popped them open, cut the tab that has the screw through it as high as I could with a box cutter, and cut the tab ear off the new one and installed the new. I have had 0 issues with rattles or leaking and it's been a year.

On sliders, if you're still in the ATX, consider ShrockWorks bolt-on sliders. Super tough and nice craftsmanship. They are the only slider game in town in TX and being able to dodge shipping ($350ish) by picking up at their Houston shop really helped me with the sticker shock. I gave around $750 for mine a year ago (powder coated w/dimple plates). They don't market for GX but as with most things, their 4th Gen 4Runner sliders bolt up nicely.
 
Just added RCI sliders to the GX. Got them on sale,no top plate and installed them my own damn self so out of pocket was not as bad as it could have been.

30ADC924-D251-40F8-AAAA-837E4BE061C2.jpeg
 
5th gen T4R sliders also work if you are willing to drill 7-8 holes in each side of the frame and install some rivnuts. The other 7-8 threaded holes per side are identical between the 5th gen T4R and GX470, the 470 is just missing a few holes. When I bought my sliders last year the 5th gen T4R sliders were a few hundred cheaper than 4th gen T4R/GX470 sliders.

Despite only having 32" tires and wheeling fairly often (including on tight/rocky stuff here in MO) I have yet to have my sliders hit anything! On 35's you'd need to be doing some heavy wheeling to really need them :)
 
I wouldn't trust rivnuts at all for sliders. I've pivoted the entire weight of my truck around a rock on my sliders and I'm sure rivnuts wouldn't hold up to that
 
I wouldn't trust rivnuts at all for sliders. I've pivoted the entire weight of my truck around a rock on my sliders and I'm sure rivnuts wouldn't hold up to that
A single M8x1.25 rivnut has a upset load capacity of around 13,000 lbs. I have 7 per side plus the OEM threaded holes. Believe me, they'll hold up to it :)
 
Despite only having 32" tires and wheeling fairly often (including on tight/rocky stuff here in MO) I have yet to have my sliders hit anything! On 35's you'd need to be doing some heavy wheeling to really need them :)


Appreciate the insight y’all!
And this is my logic. I’ve kissed my passenger lower link but that was at hidden falls (rock crawling park)
I’ve since added skids to them and these sit higher so I’ll just be careful from here on out. Perks of the short wheelbase is I’m generally climbing with the rear before I’m close to high centering.
 
Finally got around to repainting my sliders and rear bumper. There were plenty of rock chips and deep scratches that left bare metal exposed and rusty, so I wanted to get it all covered up again before the road salt starts again. Rustoleum Pro Grade bed liner for texture and durability + gloss clear for easy cleaning and some uv protection made it all look brand new.

20220927_195951.jpg
20220927_200110.jpg

My sliders came powder coated, but they didn't match (one side crinkle finish, other side was smooth). So at least they match now for the first time lol.

20220927_195701.jpg

Also mounted a Scangauge to keep an eye on temps, voltage, and fuel trims. I was using a Blue Driver scan tool before, but got tired of having to use my phone to just monitor things.

Next up is coating everything in Woolwax and I should be good to go for the winter.
 
Received my Sherpa Equipment Co roof rack bars today a little earlier than UPS usually delivers, so quickly threw them on. I went with slightly wider bars to accommodate a 4x8 sheet of plywood if I ever need to carry one.


0BBCD438-342C-4BD0-8B75-DEA27A9F47CC.jpeg
34ADED1C-F065-4A83-A107-3E56AAD8161F.jpeg
 
Suppose I didn't technically do it TO the GX yet, but the new build is on it's way:
F2848B2C-54C3-4941-9A5C-F7CE09462682.jpeg

E75B4893-A4DA-4FB4-B123-1A9BD6FAB82B.jpeg
 
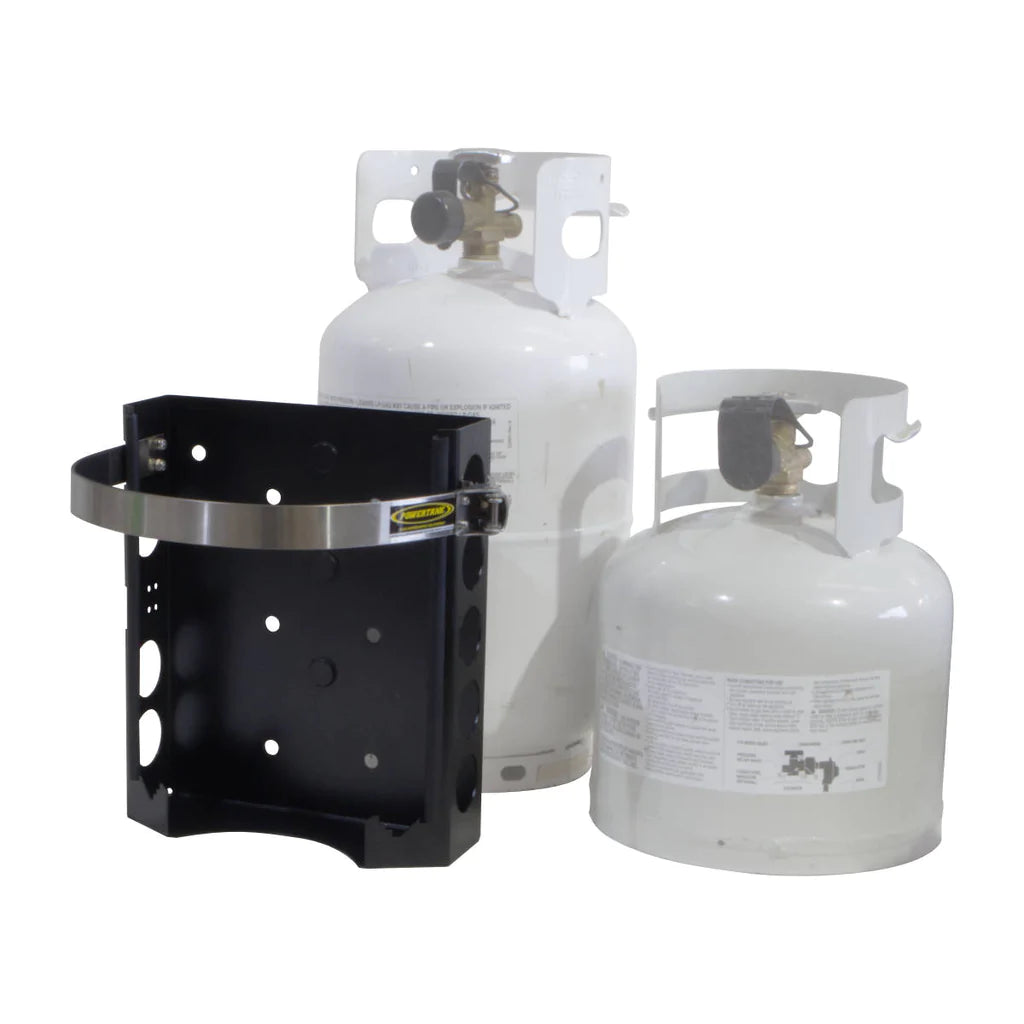
Finally found a propane rack on sale.
PXL_20220920_025351175.jpg
PXL_20220920_025650721.jpg
PXL_20220920_025232764.jpg
PXL_20220920_025255670.jpg


As my DIYing was going nowhere.
And it mounts with my discovered standard unistrut cam nut into the rhino platform slots perfectly..
PXL_20221002_202253627.jpg
 
Last edited:
where did you find it on sale at?
@Svensk120 Blemished... But I don't see anything wrong with it.
Power tank for $100 instead of $160

 
Got the kids some charging ports in the 2nd row and applied some protection for the new wheels.

View attachment 3130260

View attachment 3130261

View attachment 3130262

View attachment 3130263

View attachment 3130264
I need too do this (charging ports).
Are you considering a write-up?
I know it's not new and others have done it too, but you've got a good presentation there. I like to do a port options and the clean look. 🤙🏼

Does your rig have the DVD option, is that why there's the fold-down door there below the ac controls?
 
Last edited:
I need too do this (ports).
Are you considering a write-up?
I know it's not new and others have done it too, but you've got a good presentation there. I like to do a port options and the clean look. 🤙🏼

Does your rig have the DVD option, is that why there's the fold-down door there below the ac controls?
Yeah, you remove the dvd controls and bolt the new faceplate in that holds the charging ports. I forget where I got the 3D printed faceplate. I thought it was Etsy but not finding it. (I bought it over a year ago for this project). It was pretty easy once I located a ground and decided to run power from the fuse box. I was prepared to remove the entire center console but glad I didn’t need to.

DF31A6C7-B07D-4004-9AA7-C4024BD7A761.jpeg
 

Users who are viewing this thread

Back
Top Bottom