
todays project....because i've been all about the electric lately.

-
North American Clubhouses - East RegionCA.ON- SOTEC CA.ON- Upper Canada Land Cruisers CA.QC- Club TORQ CA.QC- Quebec Cruisers AL- DixieLand Cruisers AL- Hot South Cruisers FL- Florida Land Cruiser Association FL- Northwest Florida Toyota 4WD FL- Tampa Bay Land Cruiser Association GA- Pavement Pounders GA- Georgia Cruisers GA/FL/AL- Red Hills Land Cruiser Club GA- YOTA IL- Windy City Land Cruisers IN- Hoosier Cruisers IN- Indiana Land Cruisers KY- Kentucky Landcruiser MA/NH- Yankee Toys MI- Lake Michigan Land Cruisers MS- CottonLand Cruisers NC- Olde North State Cruisers NJ- Garden State Land Cruisers NY/CT/MA- FJNortheasters NY- Gotham City Land Cruisers OH- The Buckeye Birfield Syndicate PA- Keystone Cruisers PA- Steel City Land Cruiser Club SC: Land Cruisers: Charleston SC- Palmetto State Land Cruiser Association SC- Upstate Cruisers SC- Swamp Fox Land Cruisers SC- Low Country Land Cruisers TN- Appalachia Cruisers TN- Bluff City Cruisers TN- STLCA VA- Bay to Blue Ridge Cruisers VA- COVA CRUISERS VA/DC/MD- Capital Land Cruiser Club VA/NC- Mid-Atlantic TLCA VA- Star City Land Cruisers VT/NH/MA/ME Acadian Overlanders WI- Land Cruiser Legends WV- Mountaineer Cruisers
-
North American Clubhouses - Central RegionCA.AB- Oil Country Cruisers CA.AB- Rocky Mountain Land Cruiser Association CA.AB- Toyota Ghost Wheelers AR- Razorback Land Cruisers AR/MO- Ozark Mountain Cruisers CO- BookCliff Cruisers CO- Colorado Land Cruisers CO- Derailed Cruisers CO- Rising Sun 4WD Club CO/WY- Horsetooth 4 Wheelers Cruiser Club IA- Tall Corn Cruisers KS/MO- Tornado Alley Cruisers LA- Bayou State Land Cruisers LA- Louisiana Land Krewesers MO- Gateway Cruisers MT- 406 Cruisers MT- Big Sky Cruisers NE- Flat Land Cruisers NM- High Desert Cruisers OK- Green Country Cruisers SD- Dakota Territory Cruisers TX- Alamo City Land Cruisers TX- Bayou City Land Cruisers TX- Lone Star Land Cruisers TX- Lone Star Land Cruisers - Austin Chapter TX- The White Trash of the Elwood Chapter TX- Toyota Trail Riders
-
North American Clubhouses - West RegionCA.BC- Coastal Cruisers CA.BC- Okanagan-Similkameen Land Cruisers CA.BC- Peace Canyon Toyota Swamp Donkeys CA.BC- Calgary Chapter: Swamp Donkeys
CA.BC- Vancouver Island Cruisers AZ- Copper State Cruisers CA- Beach-n-Toys CA- Central Coast Land Cruisers CA- Central Valley Crawlers CA- Gold Country Cruisers CA- Inland Empire Cruisers CA- L.A. County Trailcrew CA- Mountain Transit Authority CA- Pacific Mountain Cruisers CA- San Diego Cruisers CA - Santa Cruz Land Cruisers CA- SoCal 80's CA- Southern California Land Cruisers CA- Toyotally Awesome Cruisers HI- Hawaiian Island Land Cruisers ID- Treasure Valley Land Cruisers NV- Battle Born Cruisers of Northern Nevada NV- Southern Nevada Land Cruisers OR/CA- Jefferson State Cruisers OR- Cascade Cruisers OR- Central Oregon Cruisers OR- Portland Metro Cruisers UT- Red Rock Cruiser Club UT- Wasatch Cruisers WA- Central Washington Cruisers WA- North Sound Cruisers WA- South Sound Cruisers WA- Spokane Land Cruisers
Navigation
Install the app
How to install the app on iOS
Follow along with the video below to see how to install our site as a web app on your home screen.
Note: This feature may not be available in some browsers.
More options
Style variation
You are using an out of date browser. It may not display this or other websites correctly.
You should upgrade or use an alternative browser.
You should upgrade or use an alternative browser.
What are you working on?
- Thread starter crawlin40
- Start date
This site may earn a commission from merchant affiliate
links, including eBay, Amazon, Skimlinks, and others.
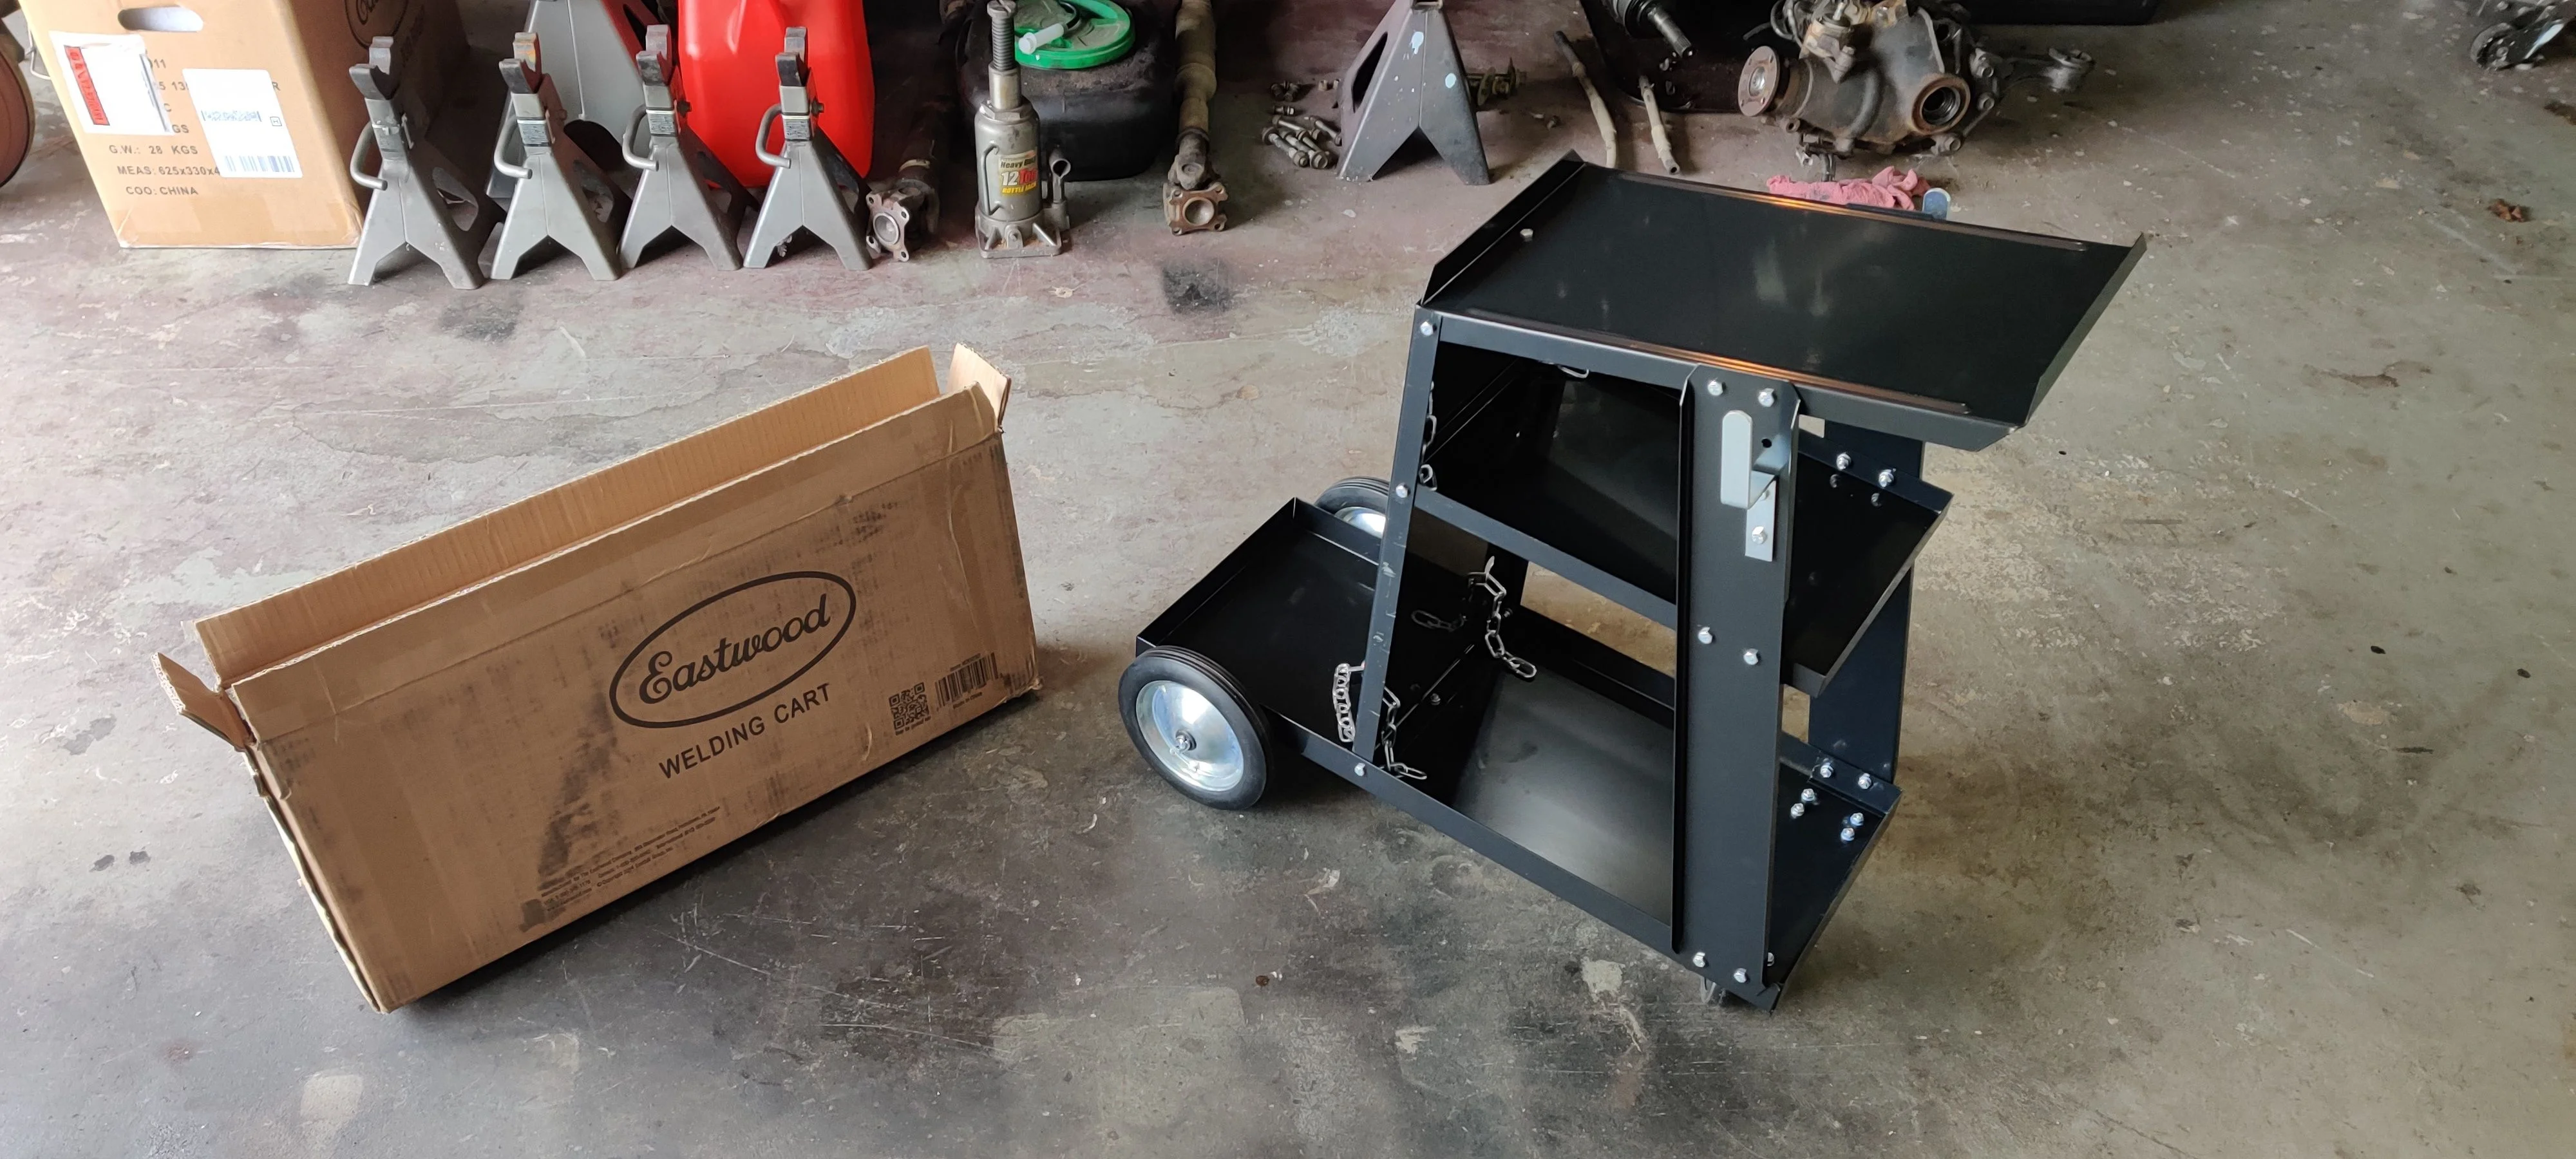
Started to get thing together today, without electricity though, but nuts and bolts
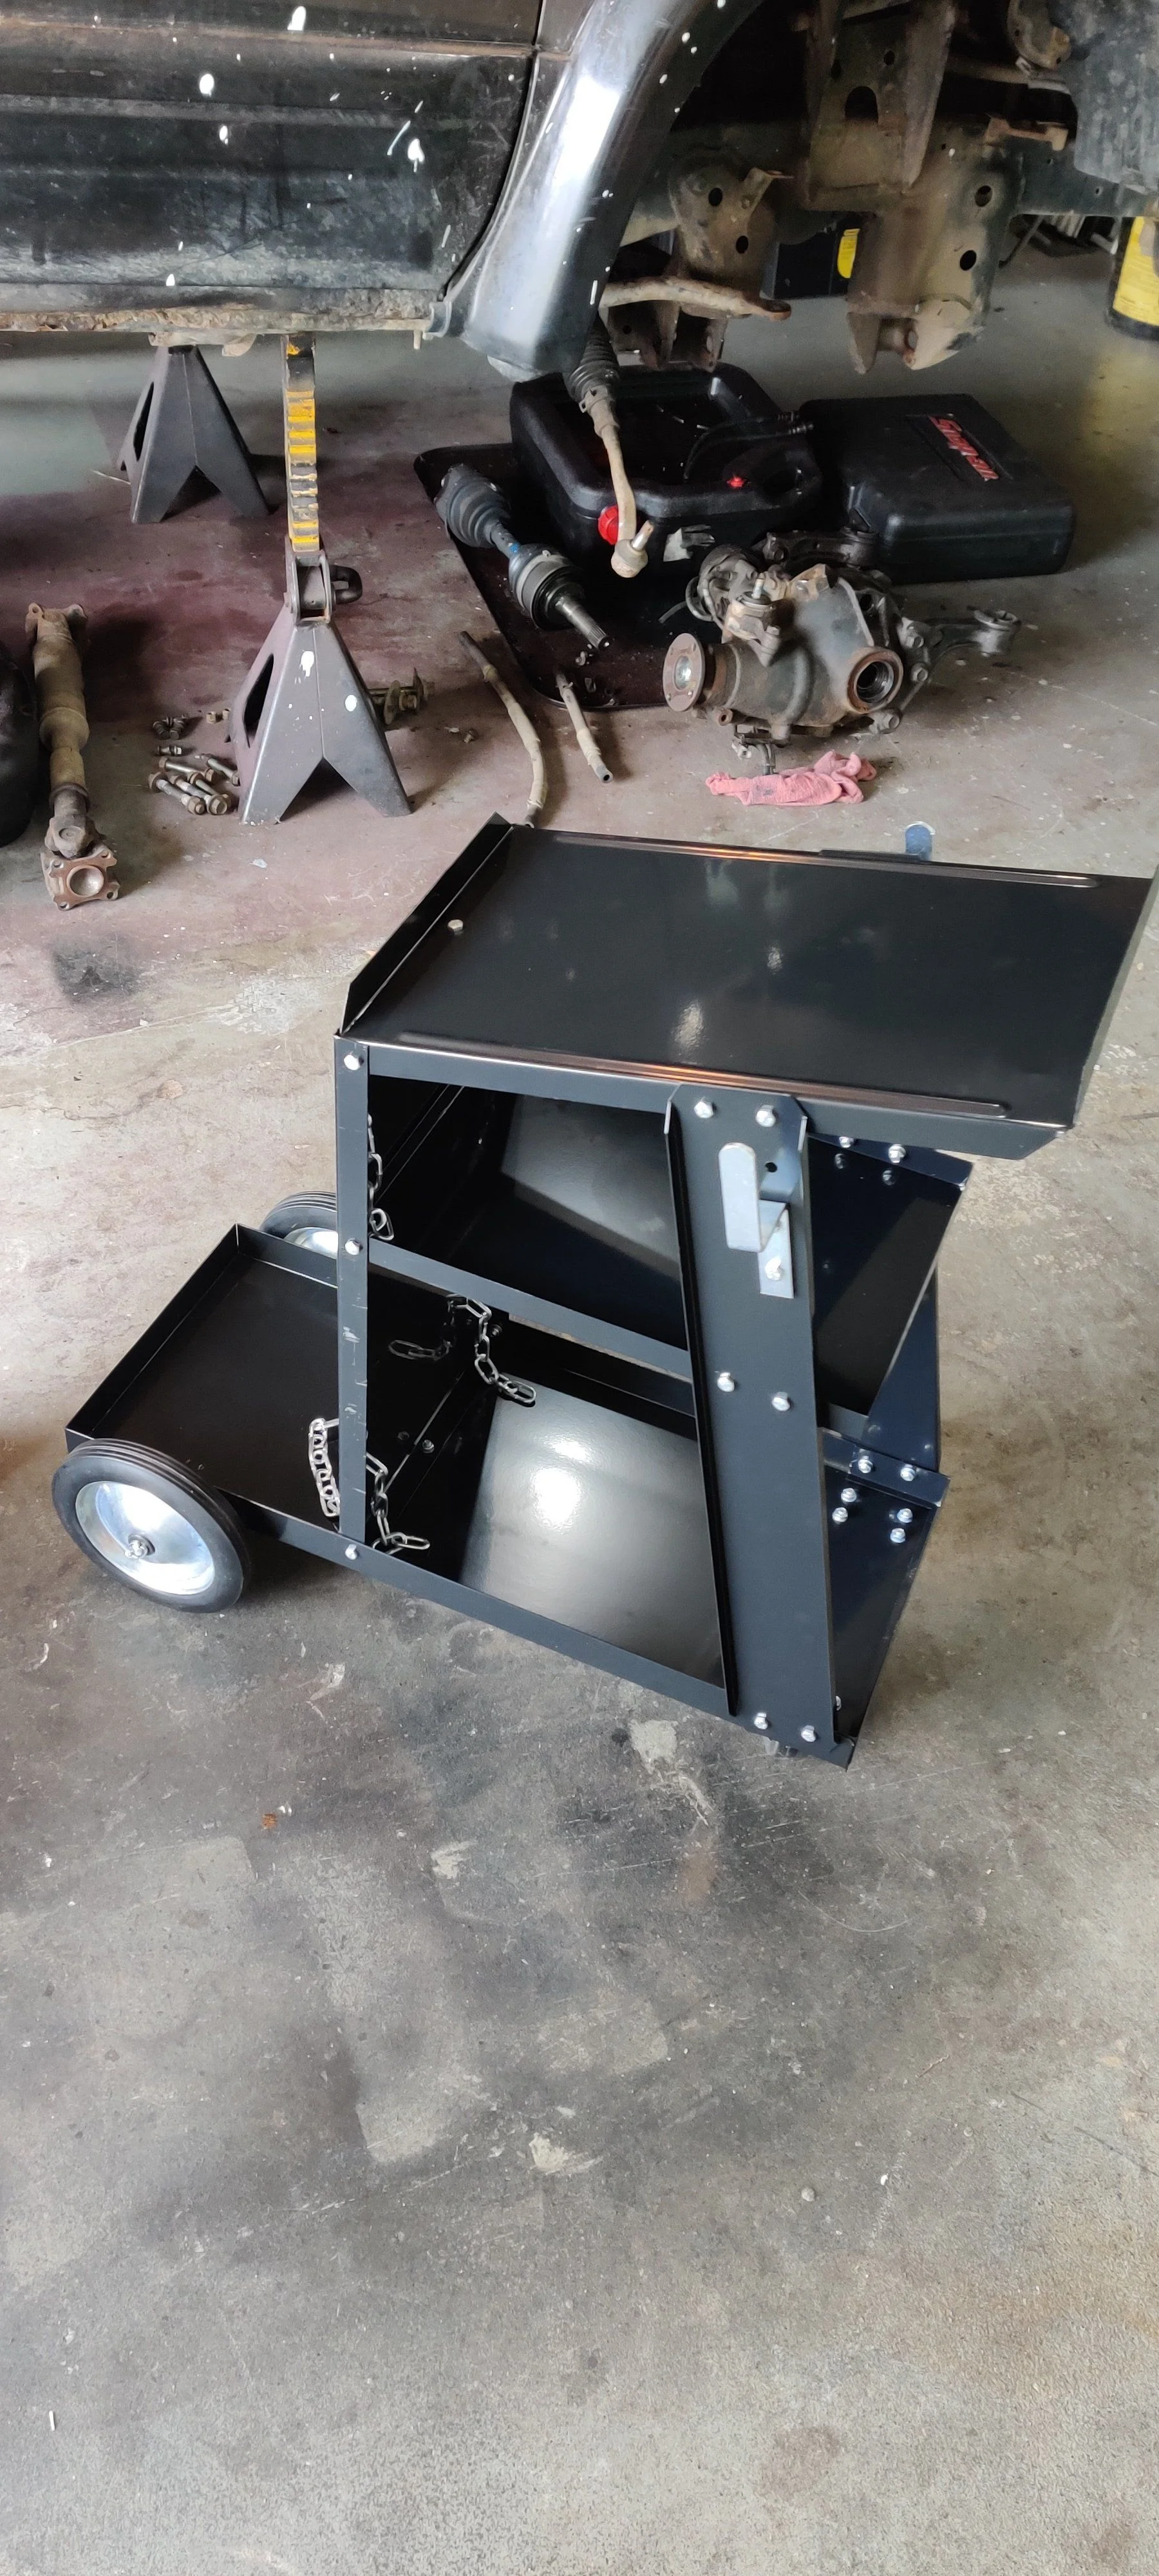
The cart took about 45 minutes to put together because i decided to put blue loctite on each bolt since no lock washers were included in the kit and i hate the sound of loose nus against ting metal (its like nails on a chalk board to me...)
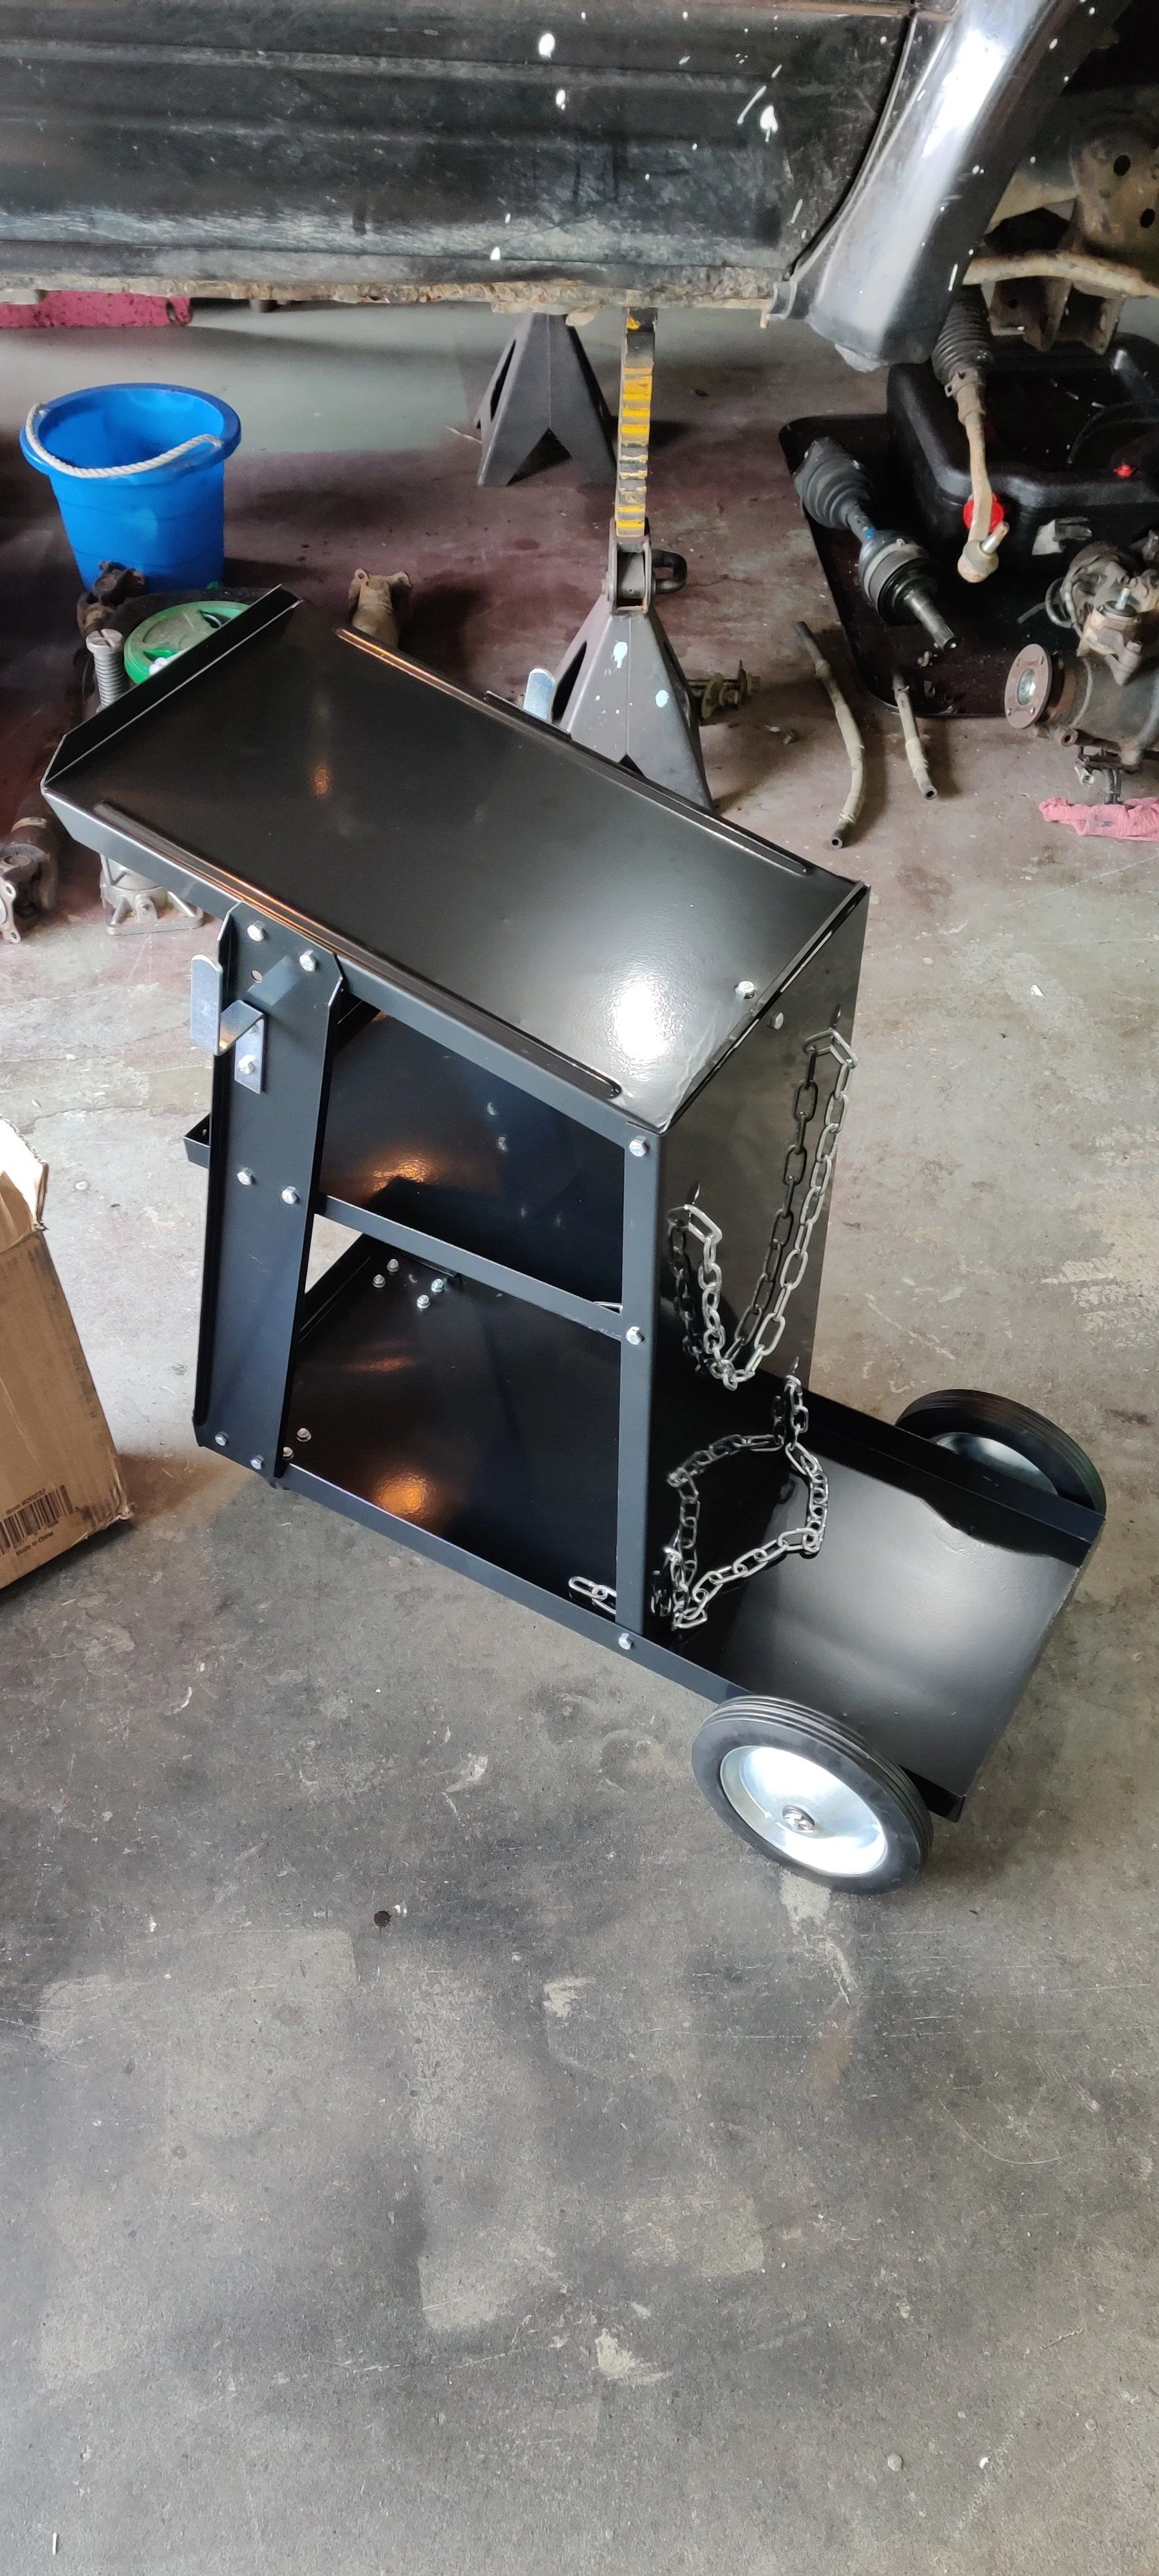
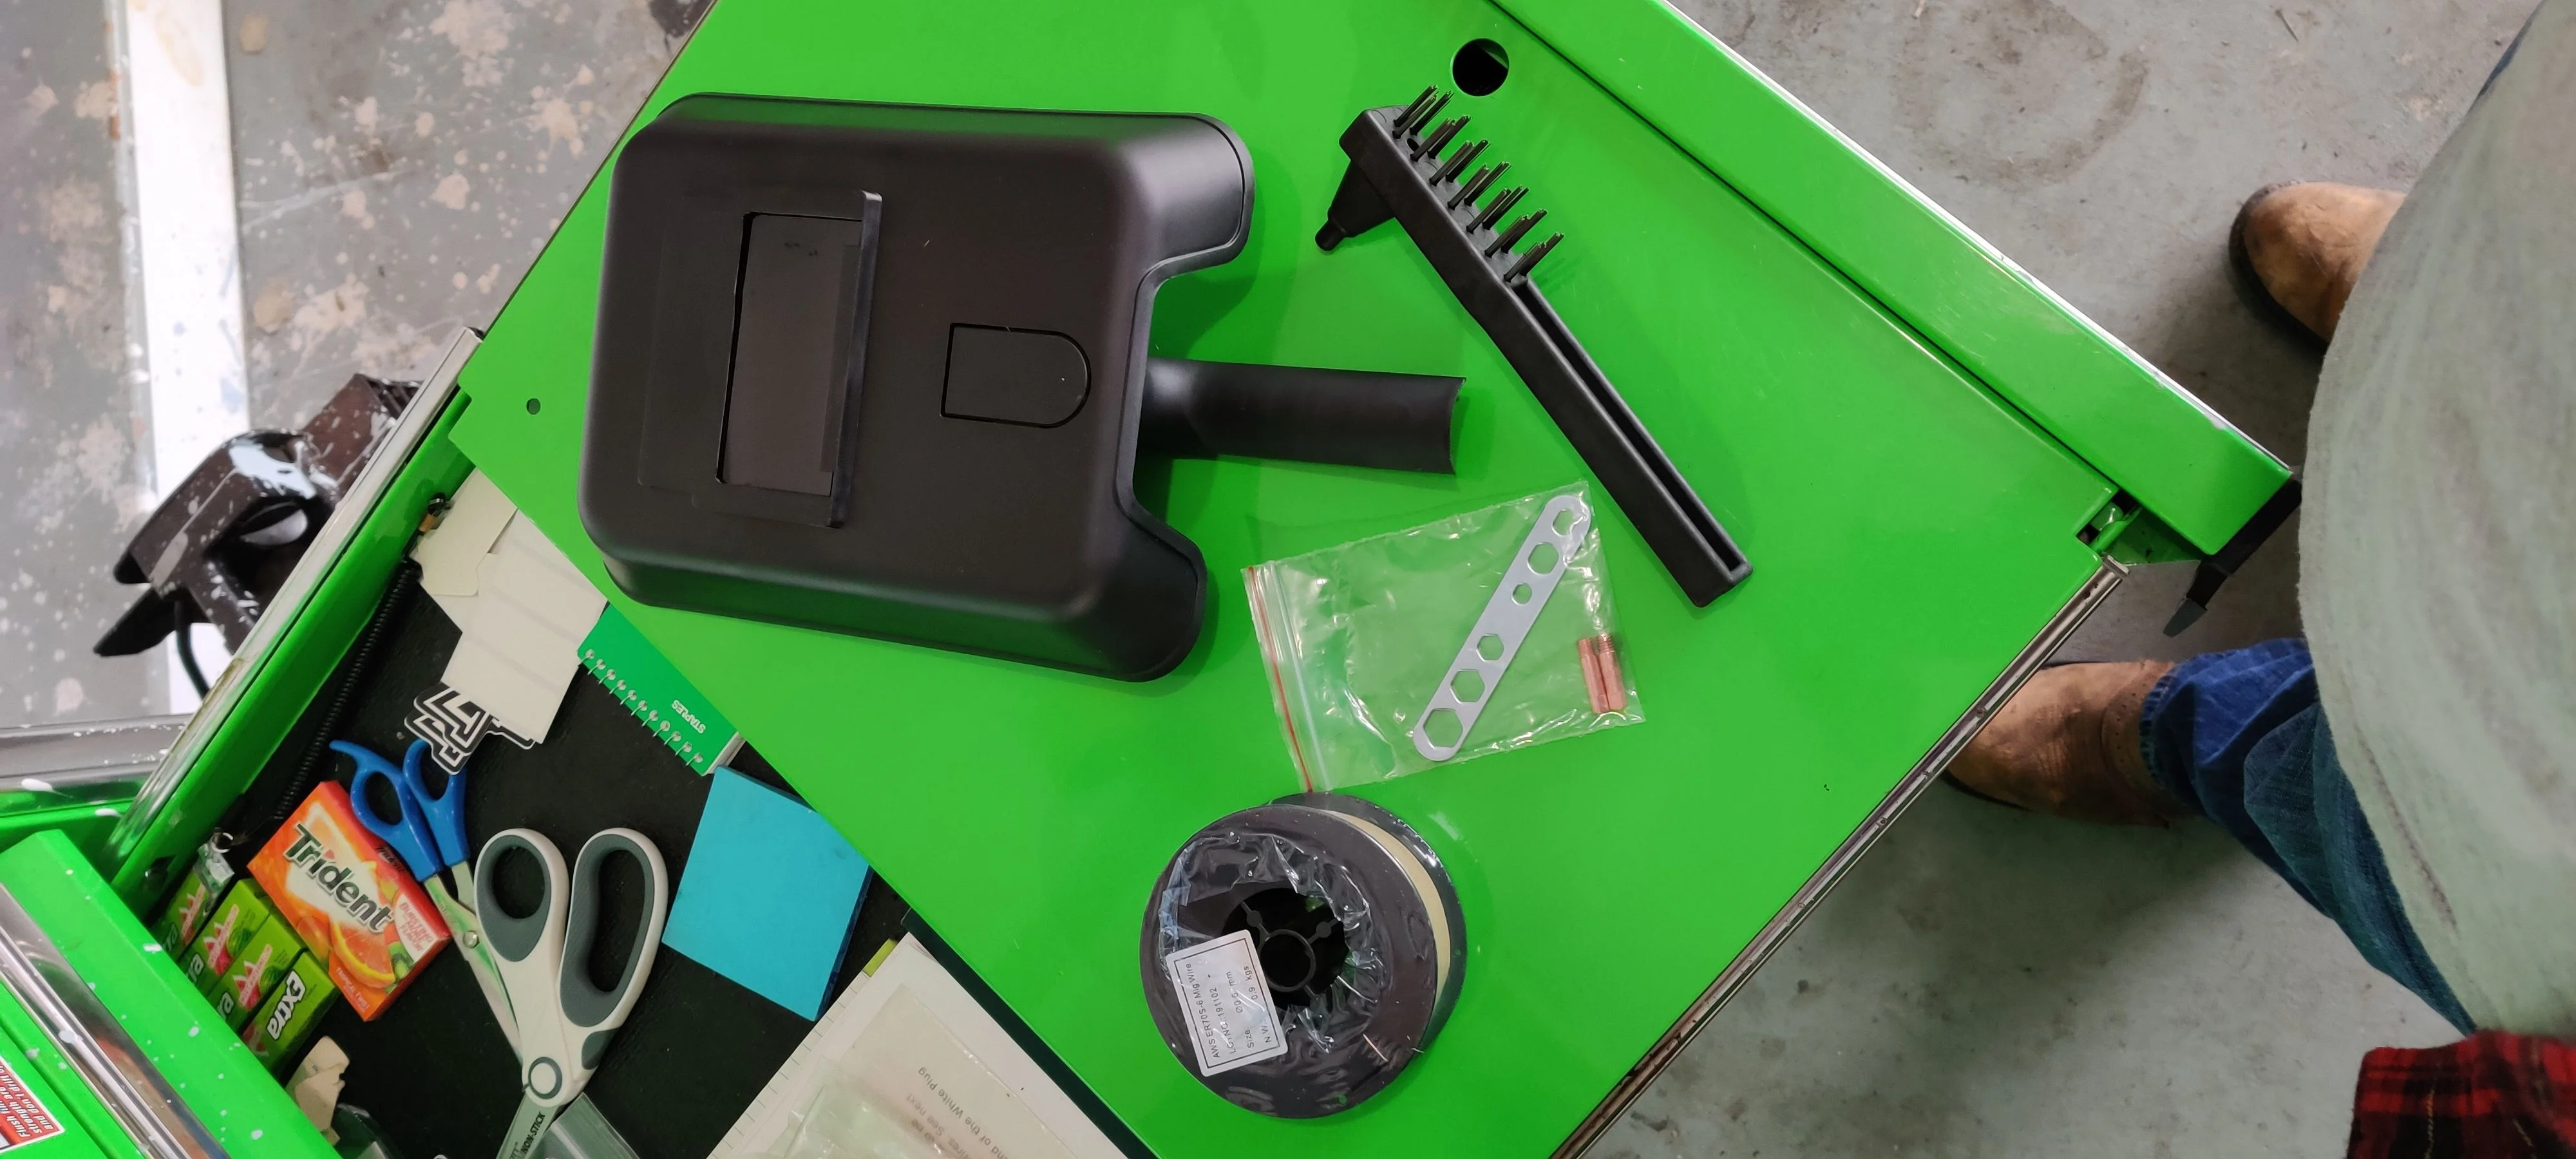
Then I put the topper on:
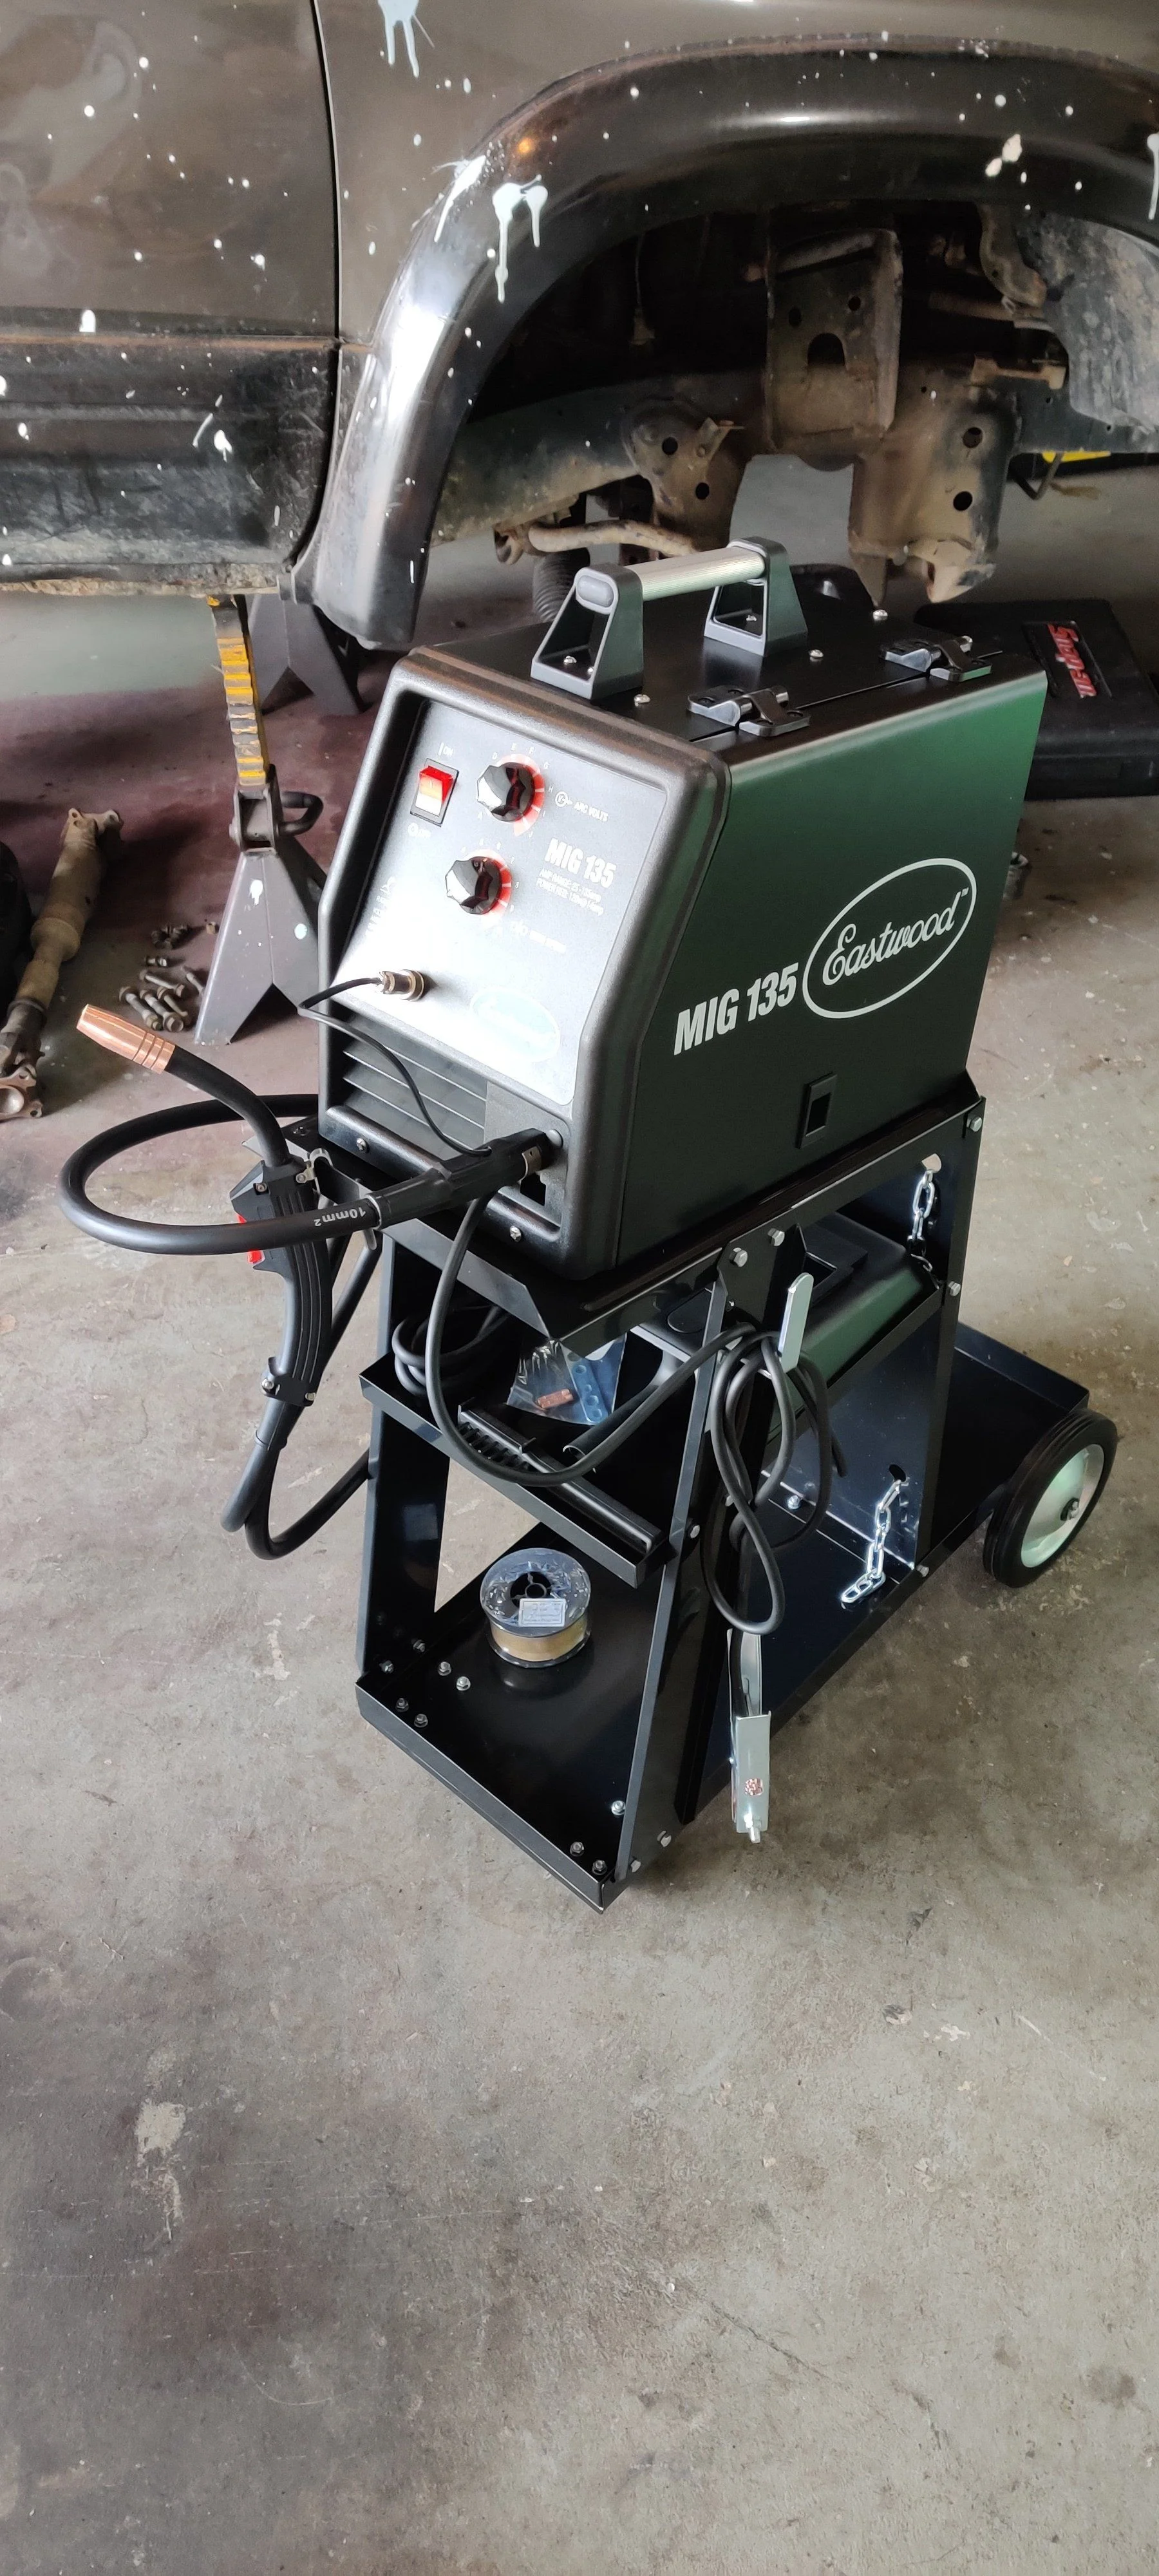
Also included in with the welder were these items:
I don't plan on using that shield or the wire (.025) but its pretty cool of them to do that!
Its home in the garage for now will be here:
I still need to take a trip to harbor freight to get some items so I am not firing it up just yet but hopefully tomorrow.
Till then I think I will pour a drink of whiskey and get my reading on thanks to Andy @jamarquardt22 for the reading material:
The cart took about 45 minutes to put together because i decided to put blue loctite on each bolt since no lock washers were included in the kit and i hate the sound of loose nus against ting metal (its like nails on a chalk board to me...)
Then I put the topper on:

Also included in with the welder were these items:
I don't plan on using that shield or the wire (.025) but its pretty cool of them to do that!
Its home in the garage for now will be here:

I still need to take a trip to harbor freight to get some items so I am not firing it up just yet but hopefully tomorrow.
Till then I think I will pour a drink of whiskey and get my reading on thanks to Andy @jamarquardt22 for the reading material:

I cleared close to 500lbs of scrap metal out of my 2 car garage/shop in hopes of clearing some space to actually work, including an old grill, about 2/3 of a 283 Small Block Chevy, a couple dead batteries and electric motors, so many brake rotors I'm not actually sure where they all came from. And yet, the garage somehow looks exactly the same, like I didn't get rid of anything at all...Got $26 bucks at the scrap yard though. Beer money!
First run in hand....some how got twisted on the mounting hole locations....but close enough to give it a field trial to verify if the material thickness is going to work or not....its twice as thick as the oe stuff.
And for clarity....its the insulator material behind a 40series fuse block.


And for clarity....its the insulator material behind a 40series fuse block.
My buddy picked this truck up for dirt cheap (running driver) and in between projects at my house I helped him mount up new wheels and tires. Yesterday drove it over to another friends house that has a collection of old German metal.


That’s a cool collection! My beetles were 72 and 73 and that Rabbit looks close to the 79 I had but it was the cats!t orange variety.My buddy picked this truck up for dirt cheap (running driver) and in between projects at my house I helped him mount up new wheels and tires. Yesterday drove it over to another friends house that has a collection of old German metal.
View attachment 2284335
View attachment 2284336
View attachment 2284337
Picked up STEDI, LED ARB Bullbar foglight upgrade kit. Now just have to figure out how to wire them in. Bought the Bullbar w/ out lights ‘cause the halogens on my last one were a pain and constantly needed changing. Point being, should have thought this one through a little more as I need to rig up a harness now. Appear to be a great alternative if you already have the lights!


My buddy picked this truck up for dirt cheap (running driver) and in between projects at my house I helped him mount up new wheels and tires. Yesterday drove it over to another friends house that has a collection of old German metal.
View attachment 2284335
View attachment 2284336
View attachment 2284337
Your friends have good taste! Those are some nice wheels all around.
Another round of code work.
This da tank was manufactured in 2012...in 2016 we replaced the nozzle and a section of plate....here again in 2020 the same section needs replaced again.
The first rd we did as an R1 repair...doing a flush patch with carbon steel as per the original code of construction.
4 years later and the exact same issue surfaced in nearly the same places. So this rd we are doing an R2 alteration. The old patch ans nozzle was replaced with a stainless flush patch and nozzle....thusly altering the construction of the vessel..so a design and calculation package was required and the repair proceeds as an alteration to the original construction code but retaining the same mawp rating.


.jpg")
.webp")
This da tank was manufactured in 2012...in 2016 we replaced the nozzle and a section of plate....here again in 2020 the same section needs replaced again.
The first rd we did as an R1 repair...doing a flush patch with carbon steel as per the original code of construction.
4 years later and the exact same issue surfaced in nearly the same places. So this rd we are doing an R2 alteration. The old patch ans nozzle was replaced with a stainless flush patch and nozzle....thusly altering the construction of the vessel..so a design and calculation package was required and the repair proceeds as an alteration to the original construction code but retaining the same mawp rating.
Last edited:
You guys are all doing cool stuff. Me? I’ve detailed the interior of my 450 twice in the past 4 weeks.. BTW, how long can I count on my alternator going? It’s charging 14.1v consistently, but it does have 110,000 miles and 7 years on it.
BTW, how long can I count on my alternator going? It’s charging 14.1v consistently, but it does have 110,000 miles and 7 years on it.
Lots of variables. How hard is it pushed, how well is it protected from the elements. I've seen alternators last over 300k. I've also seen them fail after every wheeling trip for some rigs.
I remember in a conversation with one of my instructors who use to work for Volvo had mentioned in the past alternator replacement was a actual service interval! I never really researched it to verify his claim, but got a good kick out of it.
120 series start to go around 125-150K, at least that has been my experience for 3 of them now. But most of the time you can just buy a rebuild kit and you are back in business for another 100K. All it took for the FJC was replacing the brushes at a local shop.
Like you mentioned, all depends on the load, accessories and usage.
Last edited:
Well, that can’t be much more difficult that putting new brushes on a starter motor, which I’ve done. Thanks, I’ll just start carrying a spare set of brushes.
Playing in the mud on wheeling trip, I ended up with an alternator light coming on. Got home on the battery. The truck shut off as I turned in the driveway.
Figuring the alternator was shot, I pulled it out and took it apart. On the 80 alternator at least, the brushes were in a self contained assembly, very easy to deal with. In my case the problem was the muddy water had gotten in and filled the brush holder with grit, keeping them from moving. Washed them out and put it all back together. Worked ever since.
Point is, I would not be scared of taking an alternator apart, they are pretty simple when it comes down to it.
Playing in the mud on wheeling trip, I ended up with an alternator light coming on. Got home on the battery. The truck shut off as I turned in the driveway.
Figuring the alternator was shot, I pulled it out and took it apart. On the 80 alternator at least, the brushes were in a self contained assembly, very easy to deal with. In my case the problem was the muddy water had gotten in and filled the brush holder with grit, keeping them from moving. Washed them out and put it all back together. Worked ever since.
Point is, I would not be scared of taking an alternator apart, they are pretty simple when it comes down to it.
These trucks are pretty amazing when it comes to alternator failure, I've been really.i.preased. If you have a healthy battery (I run a 27F like my tundra) it can go a good distance.
I have a 2000 limited edition 4Runner thays is pretty much as plus as a fully loaded 80 series with auto and electric everything.
The first time out with the I decided to christen it by blazing through a mud hole, and that was the end of it.
The truck has auto lights and daytime running lights through the headlights you can't turn off (not an option back then). I made it out to thensyaging area and all the way to Andy's in Lancaster and the truck didn't skip a beat! I was shocked!
Considering all the electronics needed just run and move it I thought for sure we would have killed it. But we made it!
Also something to note, at once point half way home I noticed the daytime running lights had turned off! I don't know if Toyota built in a fail safe for that kind of situation but I'm sure that helped us get home as well!
Gave project Fluffy some love yesterday.
Back in either November or December (shows how often I drive this car...) on my way home from work one night I noticed my steering go a little wonky. Every time I made a turn or shifted the weight of the vehicle, the steering wheel would go off center when coming back to heading straight. Each time it would always be a different direction.
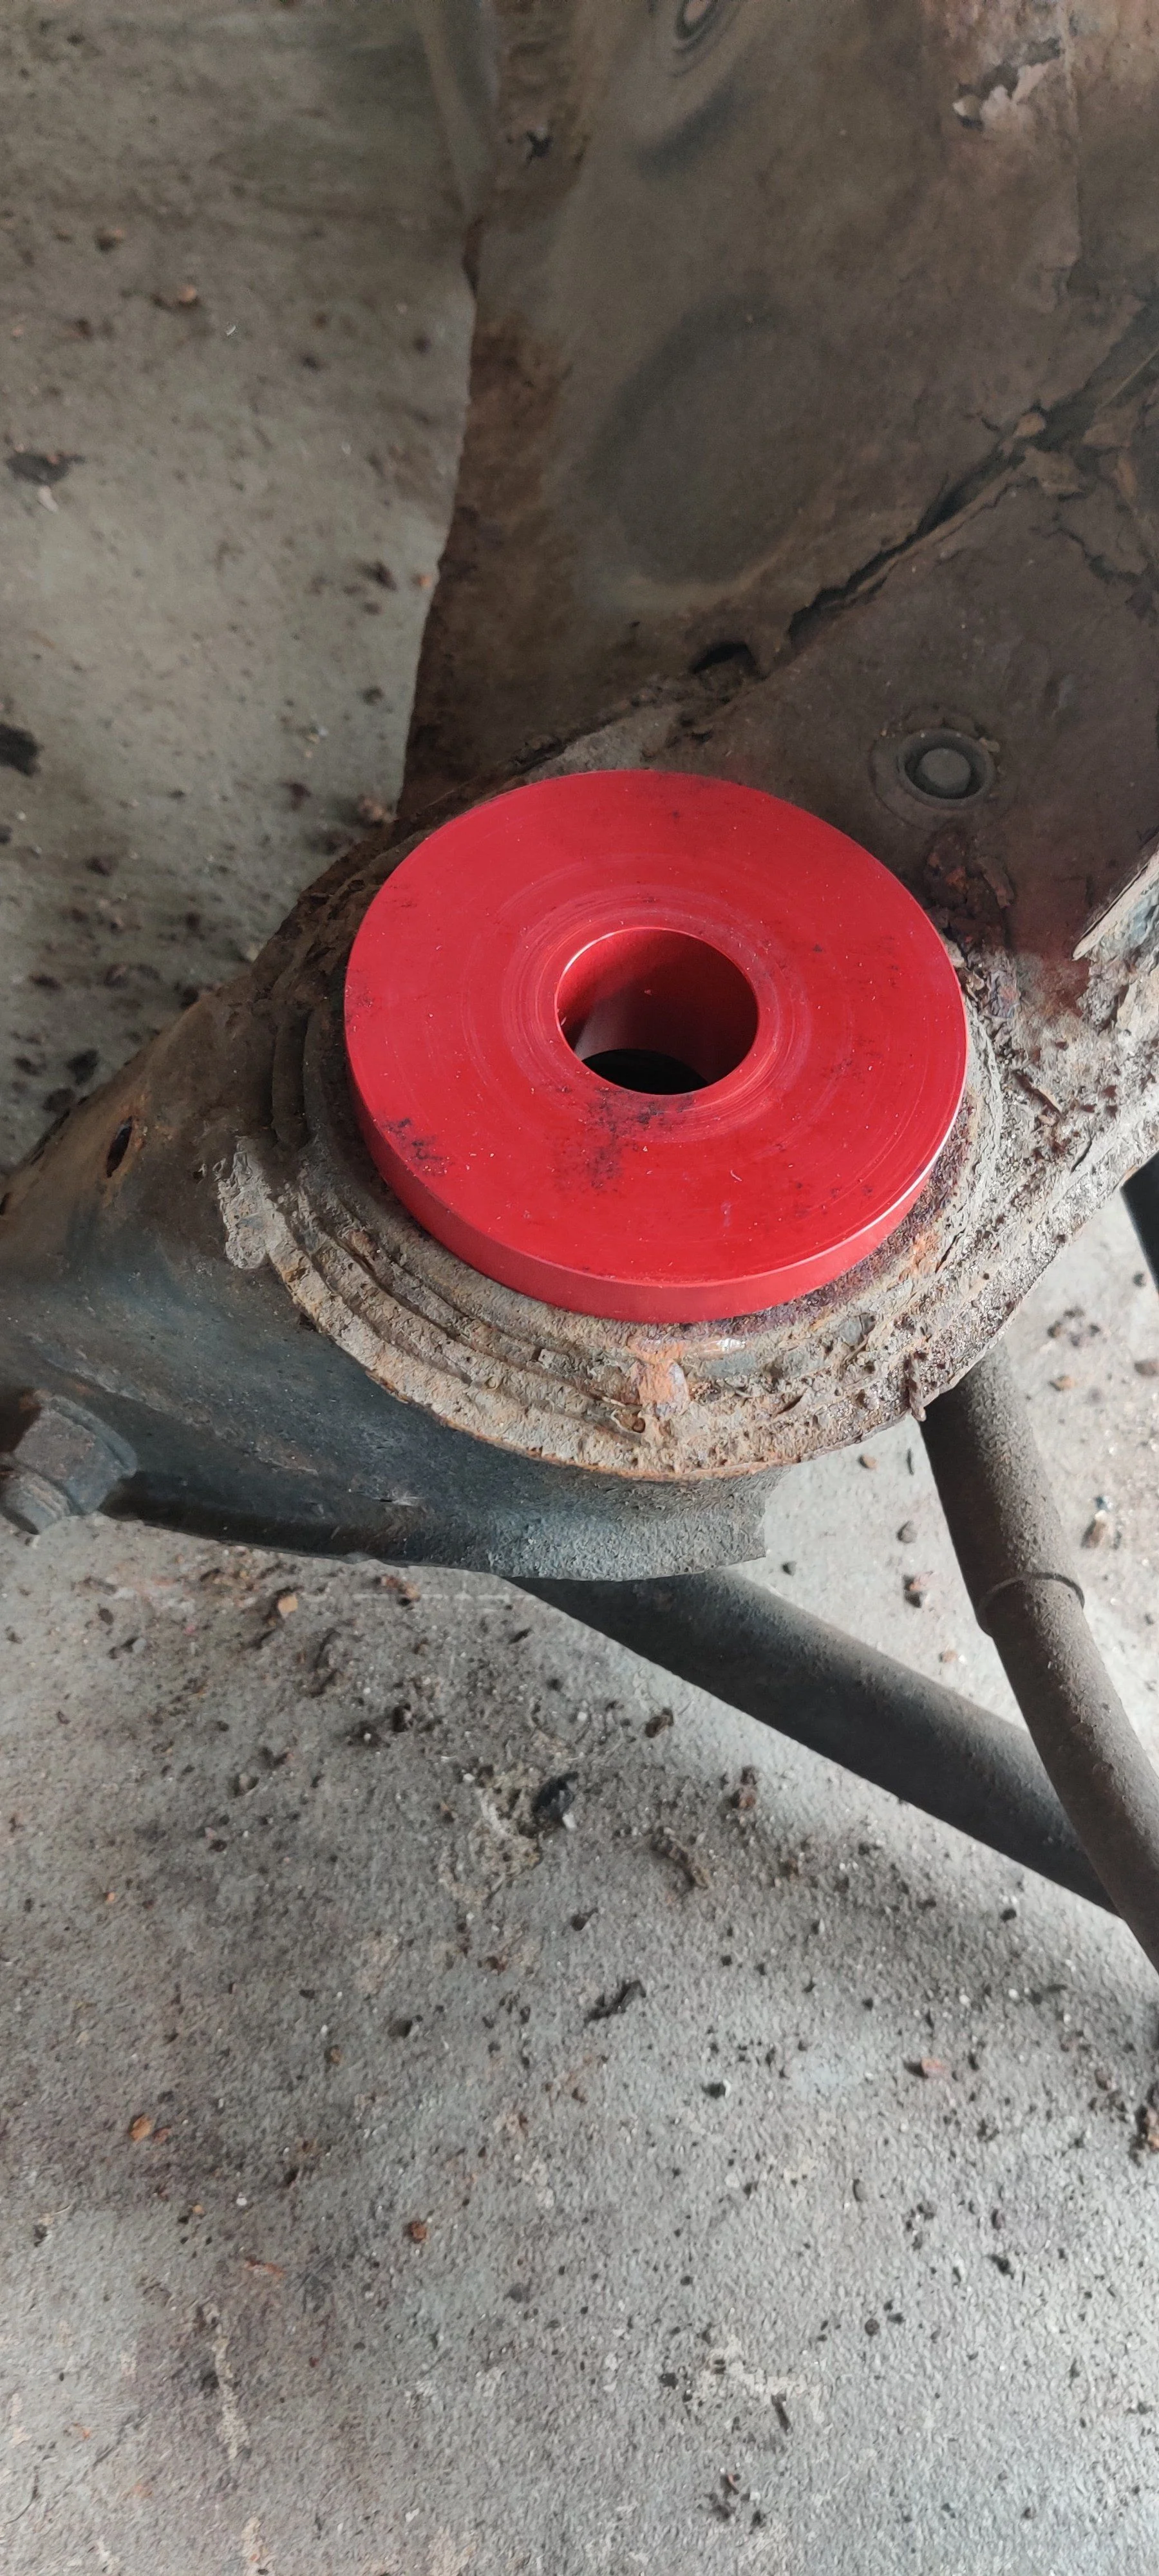
I have changed a lot of the bushings in the front end, so I suspected it may be the rear sub-frame bushings finally letting go (considering I semi drifted it and then the wheels caught hard and then this all started....) so I ordered up some racecar parts! lol I decided to go with some Battle Version solid rear subframe bushings. This job in total took me 4 hours! How! I've never worked on this platform before, its 27 years old and rusted, but it went without a hitch!
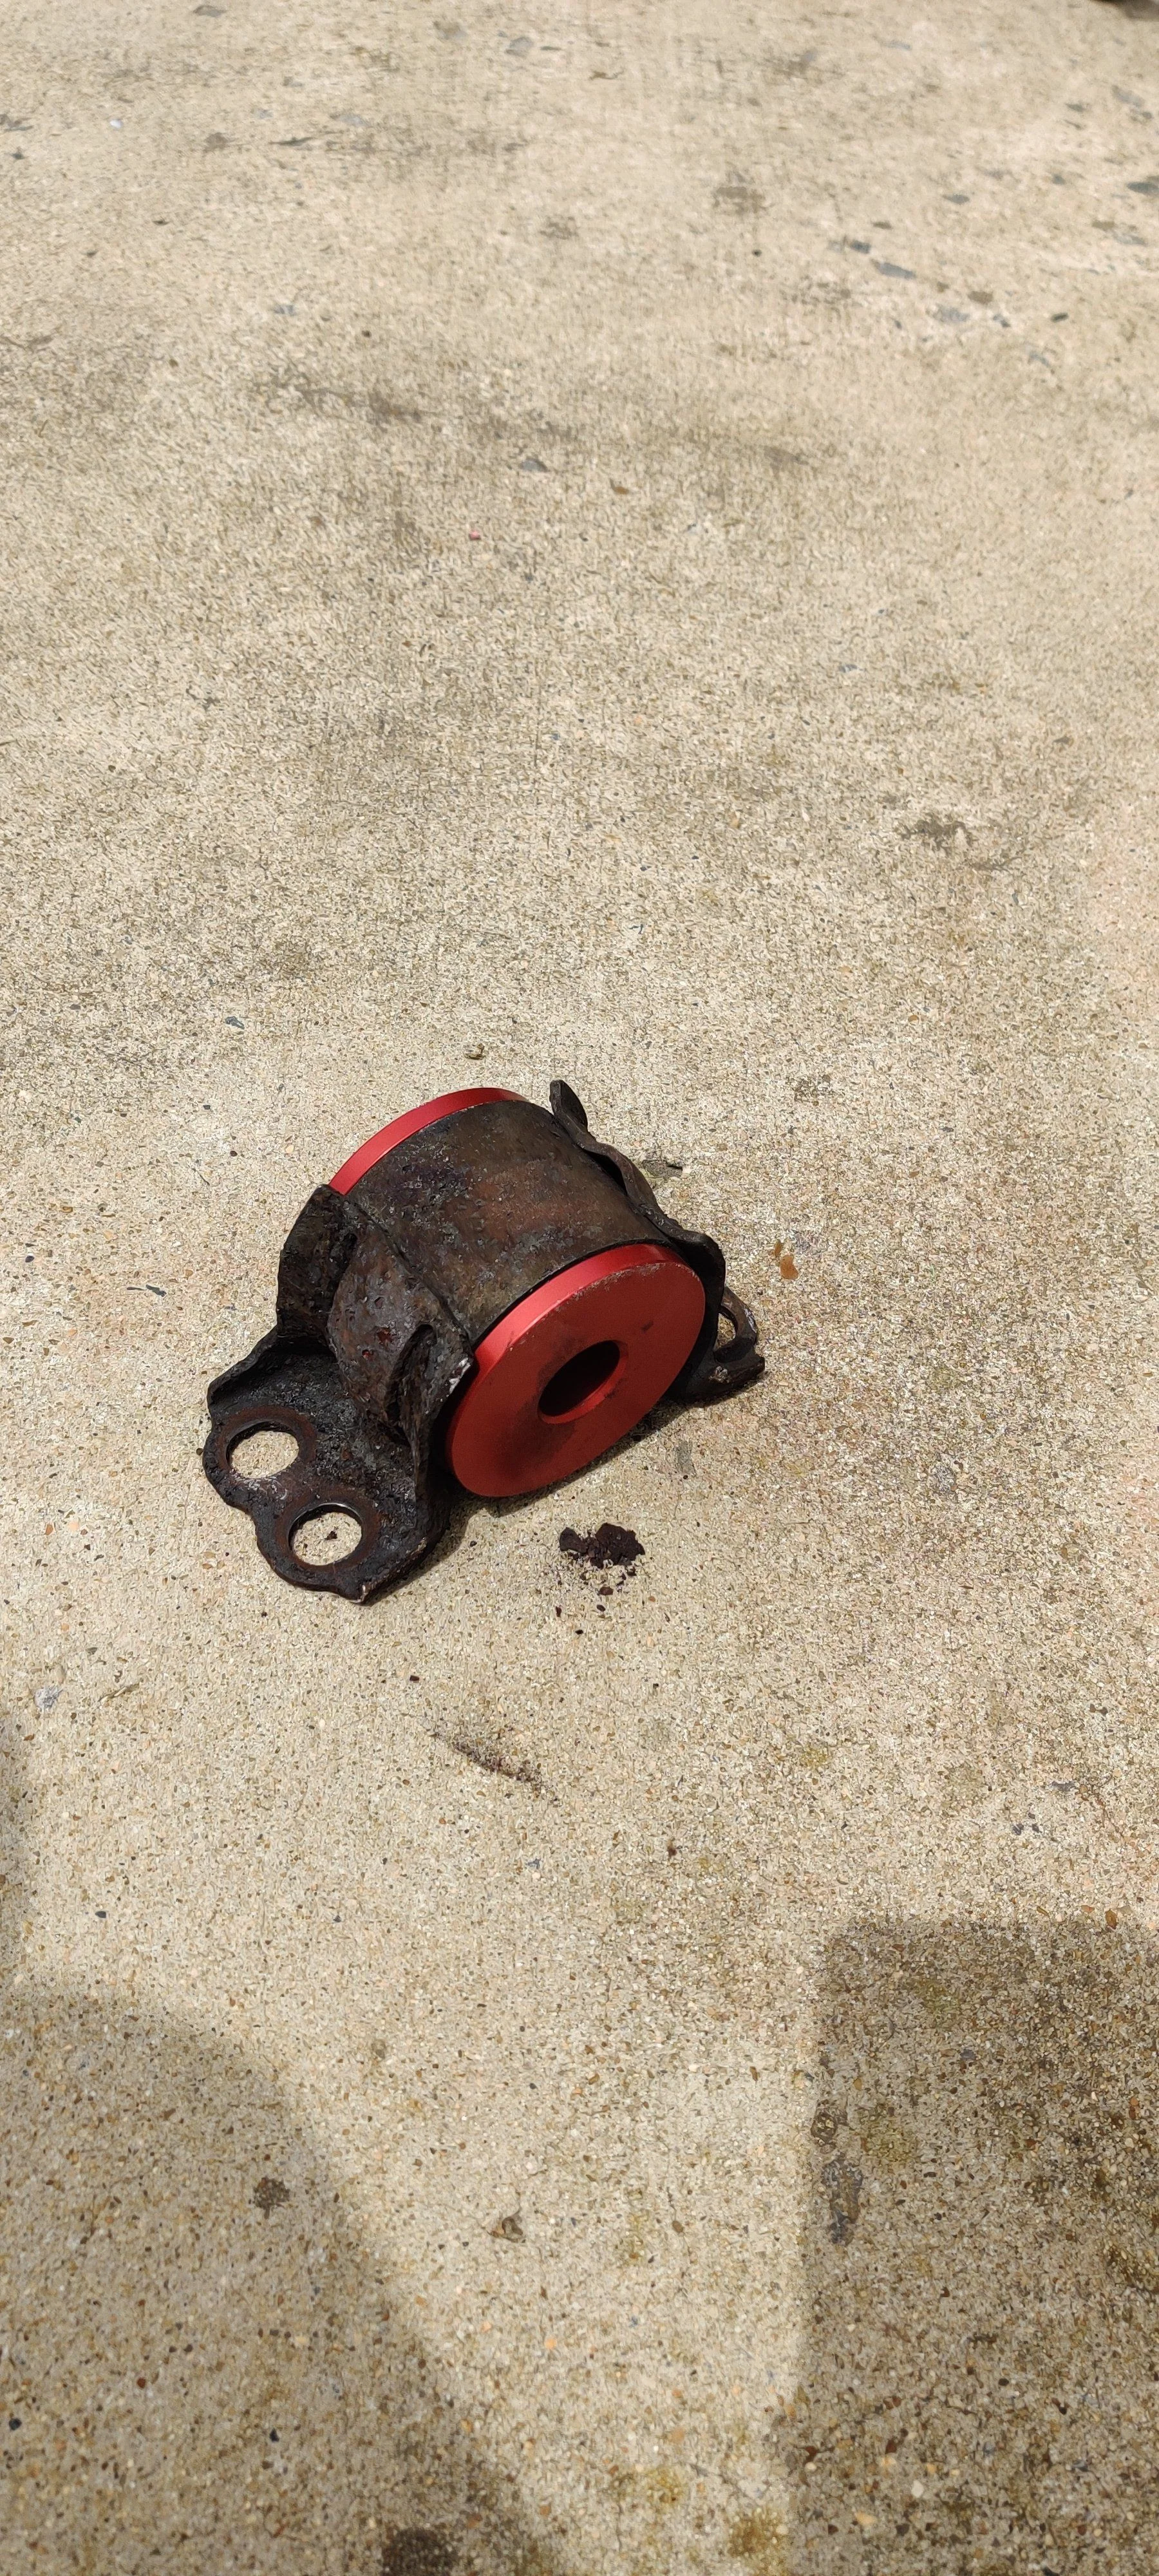
I really could not believe how easy it was to get the bushings out of the subframe itself. Literally a hit with a brass chisel and hammer and each side came out without a sweat. I counted, 30 seconds a side! The rear mounts took a few minutes longer since I had to heat them up with a torch, but once I did, one swing of my mallet and the old bushing came right out!
Unfortunately, this did not fix my issue. Today I took video (will upload later for my own recollection) and found that the steering rack bushings I replaced about a year ago gave out to the oil leaks, I can't remember what kind I used, I think it was just normal rubber instead of Poly. So I will have to order a new set here soon and also rear swaybar endlinks (the only thing no to survive this project but they started to show signs of play anyway).
Back in either November or December (shows how often I drive this car...) on my way home from work one night I noticed my steering go a little wonky. Every time I made a turn or shifted the weight of the vehicle, the steering wheel would go off center when coming back to heading straight. Each time it would always be a different direction.
I have changed a lot of the bushings in the front end, so I suspected it may be the rear sub-frame bushings finally letting go (considering I semi drifted it and then the wheels caught hard and then this all started....) so I ordered up some racecar parts! lol I decided to go with some Battle Version solid rear subframe bushings. This job in total took me 4 hours! How! I've never worked on this platform before, its 27 years old and rusted, but it went without a hitch!


I really could not believe how easy it was to get the bushings out of the subframe itself. Literally a hit with a brass chisel and hammer and each side came out without a sweat. I counted, 30 seconds a side! The rear mounts took a few minutes longer since I had to heat them up with a torch, but once I did, one swing of my mallet and the old bushing came right out!
Unfortunately, this did not fix my issue. Today I took video (will upload later for my own recollection) and found that the steering rack bushings I replaced about a year ago gave out to the oil leaks, I can't remember what kind I used, I think it was just normal rubber instead of Poly. So I will have to order a new set here soon and also rear swaybar endlinks (the only thing no to survive this project but they started to show signs of play anyway).
my artistic streak is about as deep as a pc of paper...so this is this years art for a day thing

Finally managed to get the shed to 95% complete. Enough to feel good about stuffing a car in it and moving on to the next project.
![20200502_122523[1].webp](https://forum.ih8mud.com/attachments/20200502_122523-1-webp.2297393/ "20200502_122523[1].webp")
![20200502_122544[1].webp](https://forum.ih8mud.com/attachments/20200502_122544-1-webp.2297394/ "20200502_122544[1].webp")
![20200426_142511[1].webp](https://forum.ih8mud.com/attachments/20200426_142511-1-webp.2297397/ "20200426_142511[1].webp")
Next thing up is dealing with the garage. Not happy with myself letting it get like this. I like keeping things orderly and just got lazy.
![20200503_123152[1].webp](https://forum.ih8mud.com/attachments/20200503_123152-1-webp.2297402/ "20200503_123152[1].webp")
![20200503_123221[1].webp](https://forum.ih8mud.com/attachments/20200503_123221-1-webp.2297403/ "20200503_123221[1].webp")
Moved all the cars out for a while so I can work on things with more space.
Next thing up is dealing with the garage. Not happy with myself letting it get like this. I like keeping things orderly and just got lazy.
Moved all the cars out for a while so I can work on things with more space.
more LED lights...i may be addicted to this...these are city racers offerings. they are pretty hefty not much plastic to them, mostly alum.
there is an interesting side effect to the shop radio whilst playing with the lights....not sure how headlights can white noise a radio.
night pictures when....well when it nights out.


there is an interesting side effect to the shop radio whilst playing with the lights....not sure how headlights can white noise a radio.
night pictures when....well when it nights out.
Last edited:
Yeah I'm liking these.

